Generic SQL Connector step-by-step
This topic is a step-by-step guide. It creates a simple sample HR database and use it for importing some users and their group membership.
Note
Microsoft Entra ID now provides a lightweight agent based solution for provisioning users into a SQL database, without needing a MIM sync deployment. We recommend using it for outbound user provisioning. Learn more.
Prepare the sample database
On a server running SQL Server, run the SQL script found in Appendix A. This script creates a sample database with the name GSQLDEMO. The object model for the created database looks like this picture:

Also create a user you want to use to connect to the database. In this walkthrough, the user is called FABRIKAM\SQLUser and located in the domain.
Create the ODBC connection file
The Generic SQL Connector is using ODBC to connect to the remote server. First we need to create a file with the ODBC connection information.
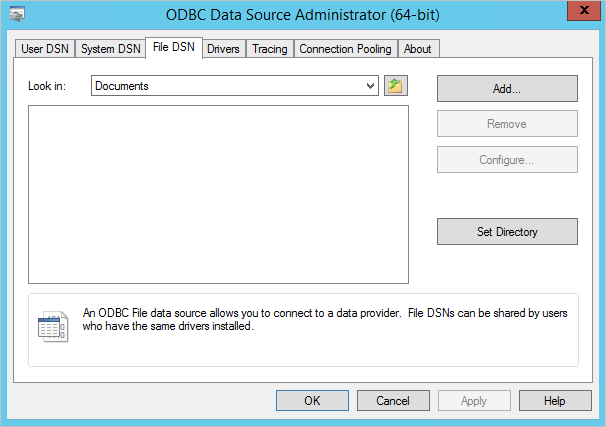
- Start the ODBC management utility on your server:

- Select the tab File DSN. Click Add....
- The out-of-box driver works fine, so select it and click Next>.

- Give the file a name, such as GenericSQL.
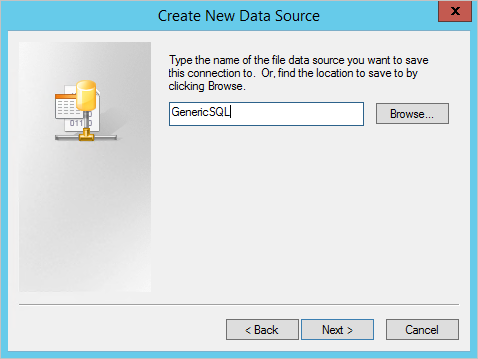
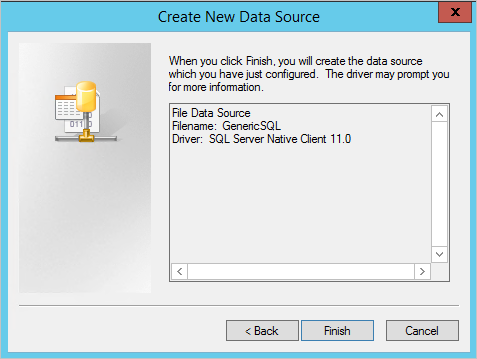
- Click Finish.
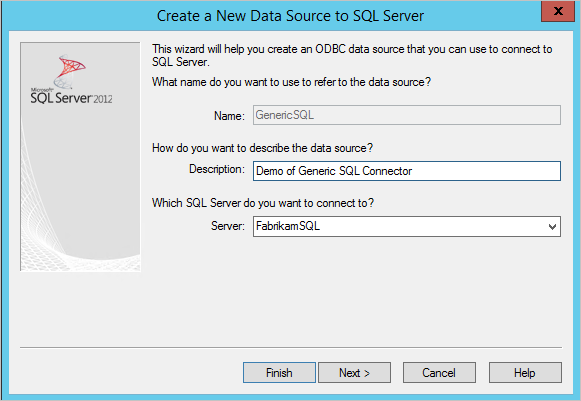
- Time to configure the connection. Give the data source a good description and provide the name of the server running SQL Server.
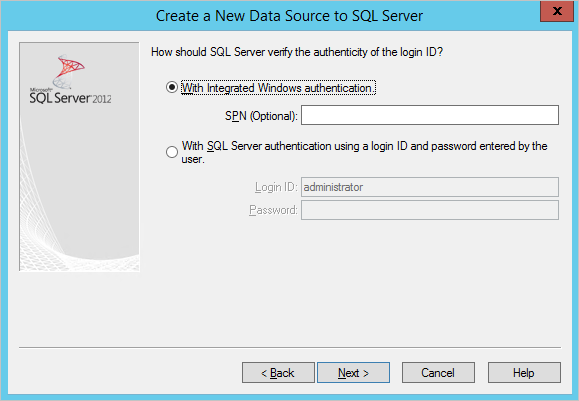
- Select how to authenticate with SQL. In this case, we use Windows Authentication.
- Provide the name of the sample database, GSQLDEMO.
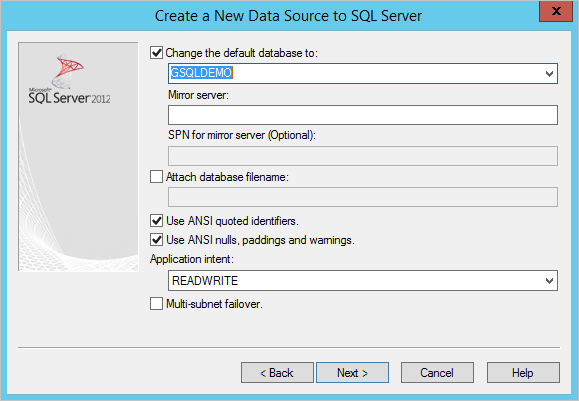
- Keep everything default on this screen. Click Finish.

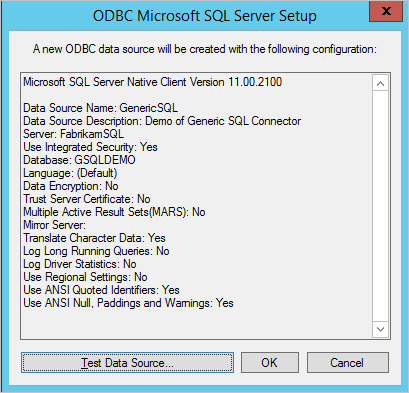
- To verify everything is working as expected, click Test Data Source.
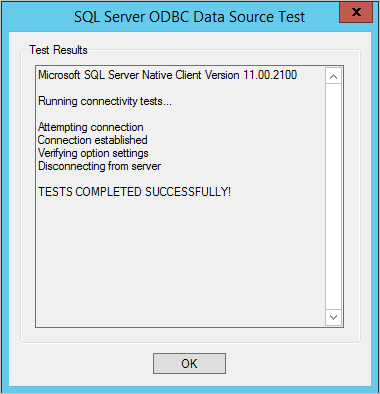
- Make sure the test is successful.
- The ODBC configuration file should now be visible in File DSN.
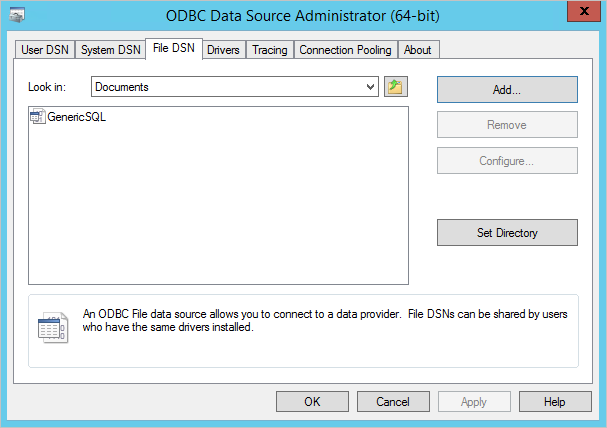
We now have the file we need and can start creating the Connector.
Create the Generic SQL Connector
- In the Synchronization Service Manager UI, select Connectors and Create. Select Generic SQL (Microsoft) and give it a descriptive name.

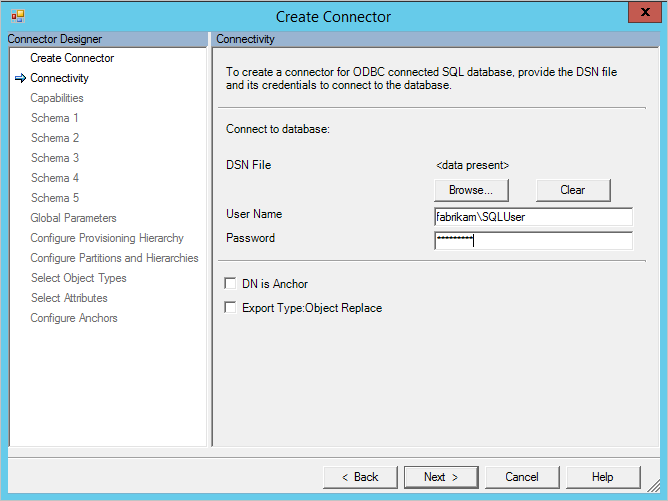
- Find the DSN file you created in the previous section and upload it to the server. Provide the credentials to connect to the database.
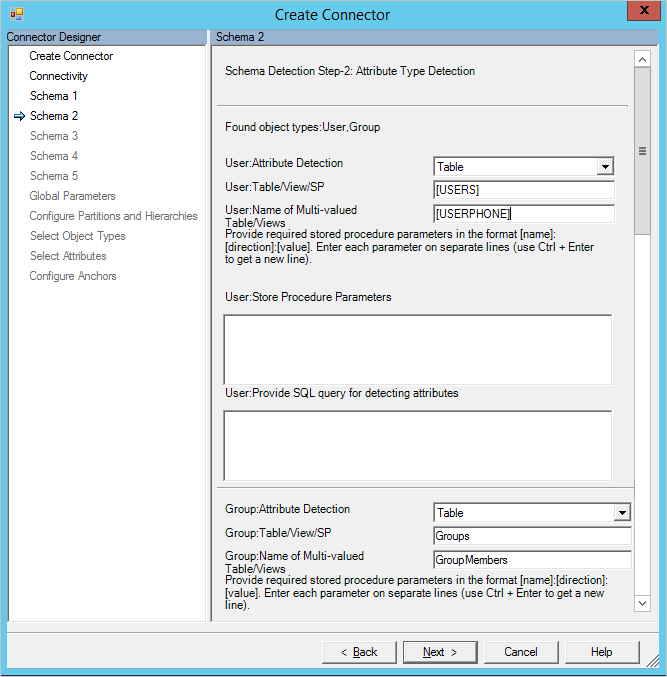
- In this walkthrough, we are making it easy for us and say that there are two object types, User and Group.

- To find the attributes, we want the Connector to detect those attributes by looking at the table itself. Since Users is a reserved word in SQL, we need to provide it in square brackets [ ].
- Time to define the anchor attribute and the DN attribute. For Users, we use the combination of the two attributes username and EmployeeID. For group, we use GroupName (not realistic in real-life, but for this walkthrough it works).

- Not all attribute types can be detected in a SQL database. The reference attribute type in particular cannot. For the group object type, we need to change the OwnerID and MemberID to reference.
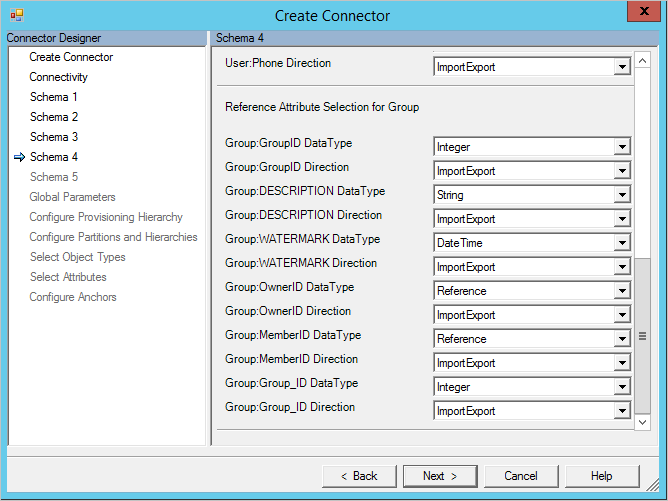
- The attributes we selected as reference attributes in the previous step require the object type these values are a reference to. In our case, the User object type.

- On the Global Parameters page, select Watermark as the delta strategy. Also type in the date/time format yyyy-MM-dd HH:mm:ss.

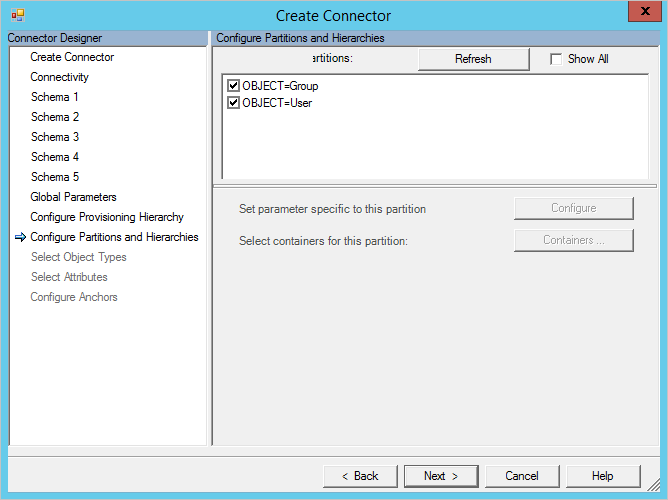
- On the Configure Partitions and Hierarchies page, select both object types.
- On the Select Object Types and Select Attributes, select both object types and all attributes. On the Configure Anchors page, click Finish.
Create Run Profiles
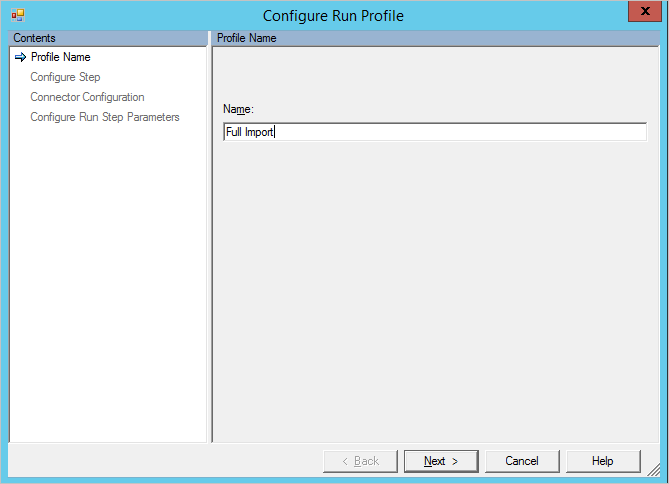
- In the Synchronization Service Manager UI, select Connectors, and Configure Run Profiles. Click New Profile. We start with Full Import.
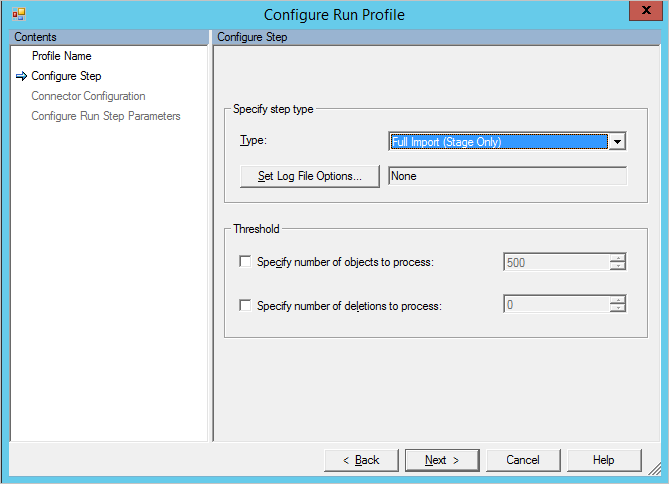
- Select the type Full Import (Stage Only).
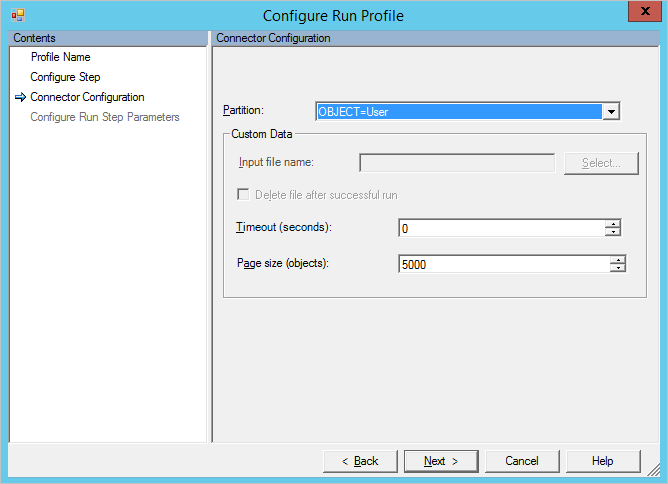
- Select the partition OBJECT=User.
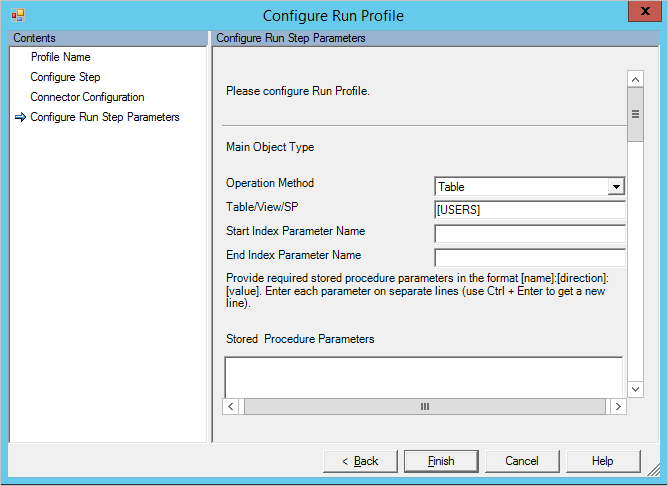
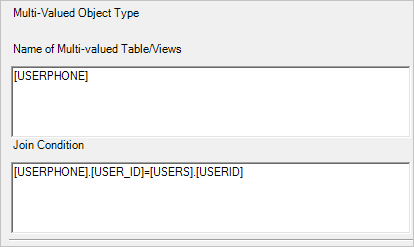
- Select Table and type [USERS]. Scroll down to the multi-valued object type section and enter the data as in the following picture. Select Finish to save the step.
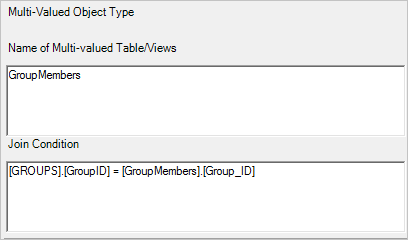
- Select New Step. This time, select OBJECT=Group. On the last page, use the configuration as in the following picture. Click Finish.

- Optional: If you want to, you can configure additional run profiles. For this walkthrough, only the Full Import is used.
- Click OK to finish changing run profiles.
Add some test data and test the import
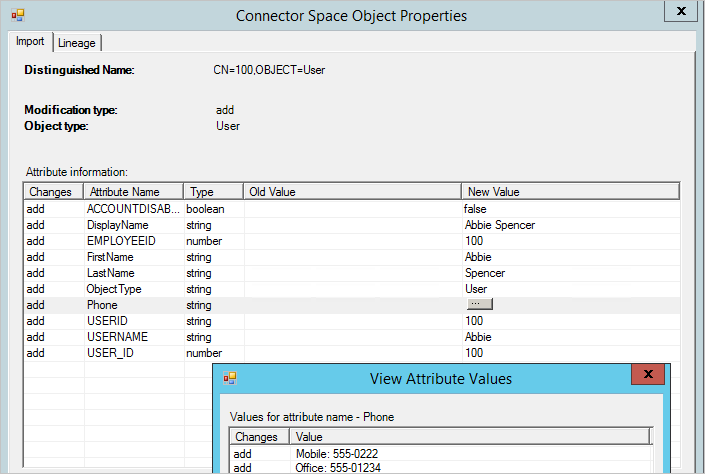
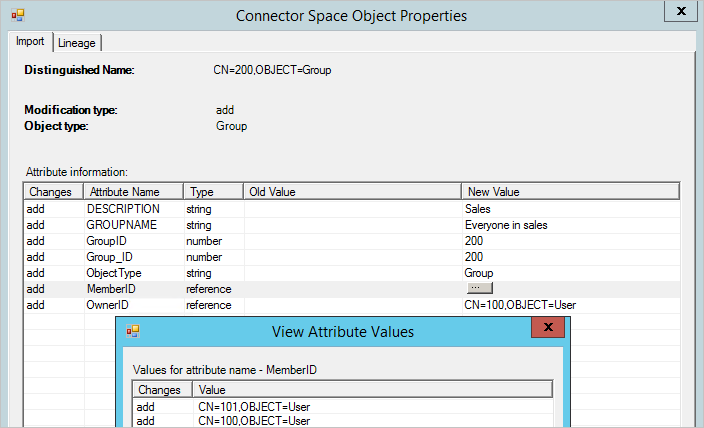
Fill out some test data in your sample database. When you are ready, select Run and Full import.
Here is a user with two phone numbers and a group with some members.
Appendix A
SQL script to create the sample database
---Creating the Database---------
Create Database GSQLDEMO
Go
-------Using the Database-----------
Use [GSQLDEMO]
Go
-------------------------------------
USE [GSQLDEMO]
GO
/****** Object:  Table [dbo].[GroupMembers]   ******/
SET ANSI_NULLS ON
GO
SET QUOTED_IDENTIFIER ON
GO
CREATE TABLE [dbo].[GroupMembers](
    [MemberID] [int] NOT NULL,
    [Group_ID] [int] NOT NULL
) ON [PRIMARY]

GO
/****** Object:  Table [dbo].[GROUPS]   ******/
SET ANSI_NULLS ON
GO
SET QUOTED_IDENTIFIER ON
GO
CREATE TABLE [dbo].[GROUPS](
    [GroupID] [int] NOT NULL,
    [GROUPNAME] [nvarchar](200) NOT NULL,
    [DESCRIPTION] [nvarchar](200) NULL,
    [WATERMARK] [datetime] NULL,
    [OwnerID] [int] NULL,
PRIMARY KEY CLUSTERED
(
    [GroupID] ASC
)WITH (PAD_INDEX = OFF, STATISTICS_NORECOMPUTE = OFF, IGNORE_DUP_KEY = OFF, ALLOW_ROW_LOCKS = ON, ALLOW_PAGE_LOCKS = ON) ON [PRIMARY]
) ON [PRIMARY]

GO
/****** Object:  Table [dbo].[USERPHONE]   ******/
SET ANSI_NULLS ON
GO
SET QUOTED_IDENTIFIER ON
GO
SET ANSI_PADDING ON
GO
CREATE TABLE [dbo].[USERPHONE](
    [USER_ID] [int] NULL,
    [Phone] [varchar](20) NULL
) ON [PRIMARY]

GO
SET ANSI_PADDING OFF
GO
/****** Object:  Table [dbo].[USERS]   ******/
SET ANSI_NULLS ON
GO
SET QUOTED_IDENTIFIER ON
GO
CREATE TABLE [dbo].[USERS](
    [USERID] [int] NOT NULL,
    [USERNAME] [nvarchar](200) NOT NULL,
    [FirstName] [nvarchar](100) NULL,
    [LastName] [nvarchar](100) NULL,
    [DisplayName] [nvarchar](100) NULL,
    [ACCOUNTDISABLED] [bit] NULL,
    [EMPLOYEEID] [int] NOT NULL,
    [WATERMARK] [datetime] NULL,
PRIMARY KEY CLUSTERED
(
    [USERID] ASC
)WITH (PAD_INDEX = OFF, STATISTICS_NORECOMPUTE = OFF, IGNORE_DUP_KEY = OFF, ALLOW_ROW_LOCKS = ON, ALLOW_PAGE_LOCKS = ON) ON [PRIMARY]
) ON [PRIMARY]

GO
ALTER TABLE [dbo].[GroupMembers]  WITH CHECK ADD  CONSTRAINT [FK_GroupMembers_GROUPS] FOREIGN KEY([Group_ID])
REFERENCES [dbo].[GROUPS] ([GroupID])
GO
ALTER TABLE [dbo].[GroupMembers] CHECK CONSTRAINT [FK_GroupMembers_GROUPS]
GO
ALTER TABLE [dbo].[GroupMembers]  WITH CHECK ADD  CONSTRAINT [FK_GroupMembers_USERS] FOREIGN KEY([MemberID])
REFERENCES [dbo].[USERS] ([USERID])
GO
ALTER TABLE [dbo].[GroupMembers] CHECK CONSTRAINT [FK_GroupMembers_USERS]
GO
ALTER TABLE [dbo].[GROUPS]  WITH CHECK ADD  CONSTRAINT [FK_GROUPS_USERS] FOREIGN KEY([OwnerID])
REFERENCES [dbo].[USERS] ([USERID])
GO
ALTER TABLE [dbo].[GROUPS] CHECK CONSTRAINT [FK_GROUPS_USERS]
GO
ALTER TABLE [dbo].[USERPHONE]  WITH CHECK ADD  CONSTRAINT [FK_USERPHONE_USER] FOREIGN KEY([USER_ID])
REFERENCES [dbo].[USERS] ([USERID])
GO
ALTER TABLE [dbo].[USERPHONE] CHECK CONSTRAINT [FK_USERPHONE_USER]
GO
Feedback
Coming soon: Throughout 2024 we will be phasing out GitHub Issues as the feedback mechanism for content and replacing it with a new feedback system. For more information see: https://aka.ms/ContentUserFeedback.
Submit and view feedback for