Quickstart: Create and deploy a Copilot Studio copilot
Important
Power Virtual Agents capabilities and features are now part of Microsoft Copilot Studio following significant investments in generative AI and enhanced integrations across Microsoft Copilot.
Some articles and screenshots may refer to Power Virtual Agents while we update documentation and training content.
Copilot Studio empowers teams to quickly and easily create powerful copilots using a guided, no-code graphical experience without needing data scientists or developers.
This quickstart article helps you create a copilot for the first time. You learn how to add topics to your copilot, test content changes in real-time, and deploy your copilot to a test page. Once deployed, you can analyze the performance of your copilot.
Explore the home page
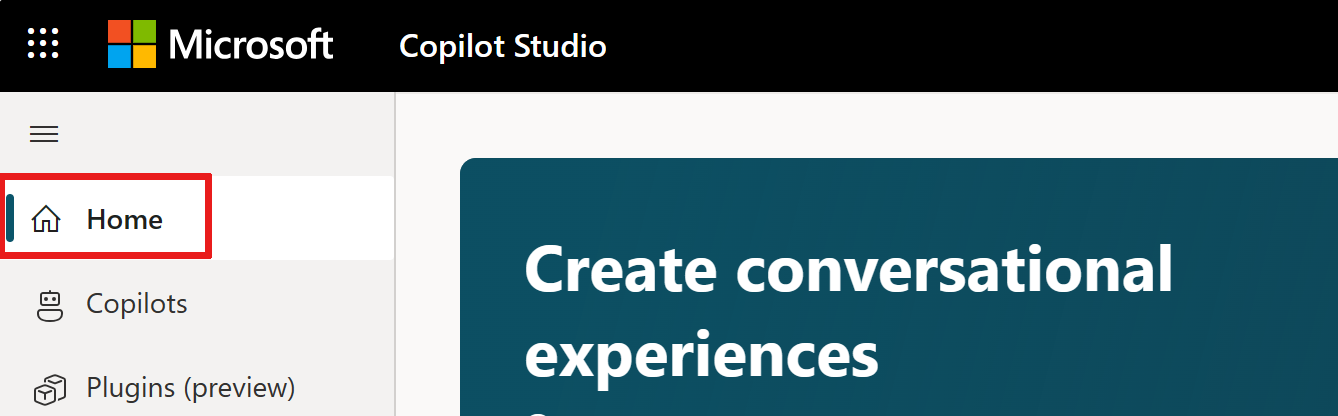
Copilot Studio has an app-level home page, listing your recently accessed copilots. On this page you can create a new copilot, view recent copilots, and access learning resources like documentation and learning paths.

In the navigation menu, select Copilots to open the Copilots page. All copilots you create in a given environment appear here. In your list of copilots, you can see metadata such as owner, when it was last published, and who last modified the copilot.
Create a copilot
Go to the Copilot Studio introduction website. Supported browsers include Microsoft Edge, Chrome, and Firefox.
On the website, select Try free and sign in with your work email address.
Note
Personal Microsoft accounts are currently not supported.
After you sign up, a default Power Platform environment is made for you. For most users, this default is sufficient. However, to specify a custom Power Platform environment, select another one, using the environment picker.

Note
Copilot Studio is only supported in these data locations. Outside of these locations, create a custom environment with Region set to a supported data location before you create your copilot.
For more information on creating a custom Power Platform environment, see Working with environments.
Once signed up, you land on the Home page. Select Create in the left navigation.

On the Create page, choose to create a new copilot using a conversational creation experience or using the Configuration page. Alternatively, create a copilot based on an existing template.

Create a new copilot
Note
While creating a copilot, use of the Configure page is generally available. However, creating a copilot with the conversational builder is presently in preview mode.
On the Create page, select New copilot.
On the left side of the pane, engage with the conversational builder in plain language by answering the questions it asks.

Note
Avoid single-word responses.
Use conversational style language. For example:
- "Provide employees with help on troubleshooting issues with their company issued devices"
- "Help employees submit expense reimbursement requests"
- "Create a copilot for topics related to Human Resources and employee benefits"
As you respond to the questions, observe the summary in the right pane to know what the LLM (Large Language Model) is interpreting from your inputs. To scope your copilot, continue to refine and give instructions.

You can provide one or more knowledge sources to the copilot to use as resources to provide answers from.
When you're ready, select I'm done. Let's try it out..
The preview pane appears. You can test the copilot's responses and continue to refine in the Configuration page based on your testing in the preview pane. The copilot hasn't been created yet.

After testing the copilot, select Create.
Note
You can select Create at any time during the conversation.
Copilot Studio opens the Configuration page for your new copilot.
Create a copilot from a template
Note
Copilot operations like publish and authentication configurations might take a few more minutes to be ready for use.
On the Create page, under Start with a template, select a template.
On the template configuration page, enter a name, description, and instructions for your new copilot.
To change the icon representing your copilot, select Change icon.
To confirm the template's preset data connection, select the three dots next to the data connection, and then select Edit.

On the Connection setup page, if you're satisfied with the listed connection, select Confirm.
On the template configuration page, select a primary language.
To add extra knowledge sources, select Add knowledge.
When you're finished configuring your new copilot on the template configuration page, select Create at the top of the page.

To test your new copilot, select Test at the top of the page, and then test the responses. Continue to refine your copilot as desired in the Configuration page. The copilot hasn't been published yet.

Familiarize yourself with Copilot Studio
While waiting for processing, you might want to:
- Explore the overall user interface for Copilot Studio.
- Explore topics and start creating and editing topics.
- Experiment with the preloaded user topics and system topics.
- Interact with your copilot using the Test copilot chat pane.
- Review Key concepts - Authoring Copilot Studio copilots to better understand authoring.
Tip
Select Home, in the navigation menu, to go back to the app-level home page from your copilot.
Create a topic
With a new copilot, you can start creating topics. A topic is a dialog tree that describes how your copilot responds to a user's question.
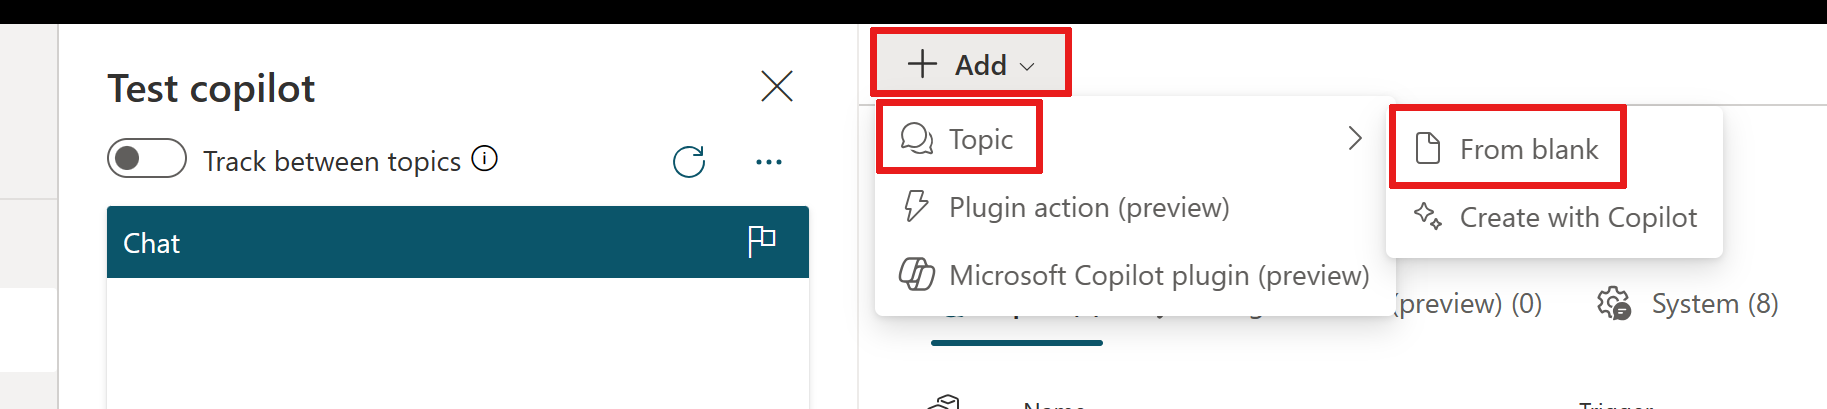
Open your copilot in Copilot Studio, select Topics at the top of the page, and then select Add a topic > From blank.
Here you build a topic by giving it a name and configuring a trigger. Trigger phrases are examples of user questions or utterances that teach the copilot to respond when the questions or utterances are detected.
- Name your topic 'Personal Hello World' at the top.
- In the Trigger box under Phrases, select Edit. The On Recognized Intent pane appears.
- Add 'hello world' text, also called an utterance, under Add phrases.
- Select the + icon next to the phrase box to add it to your trigger.
- Select the Save icon at the top to save your trigger.

Select the (+) icon below your trigger node and select Send a message.
Enter 'Hello! I'll create a personalized greeting for you.' into the newly added Message node.
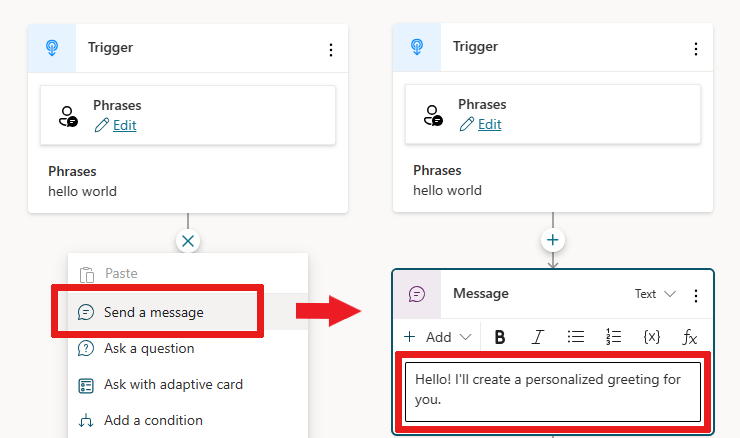
Select the Save icon at the top to save your trigger.
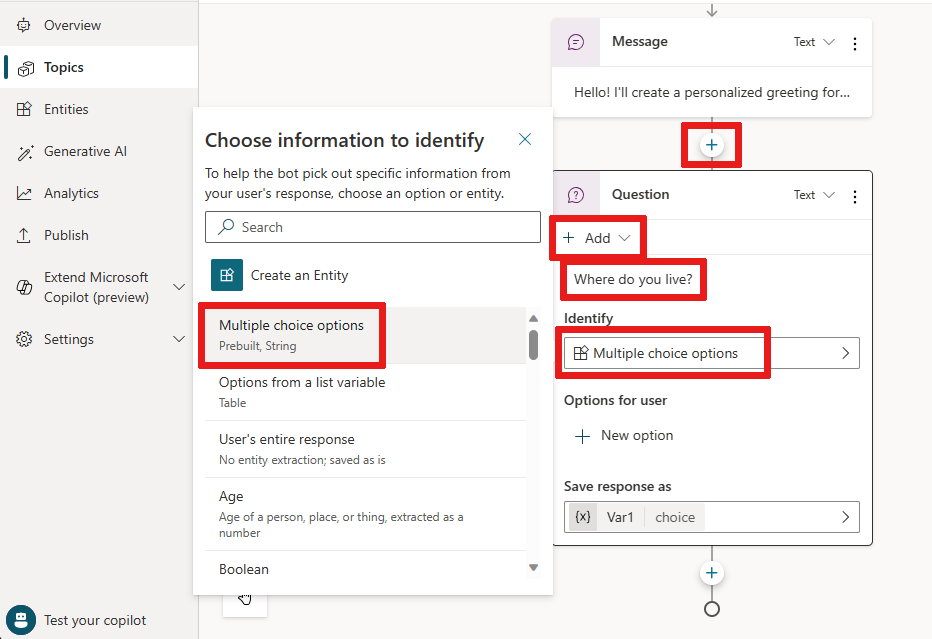
Select the (+) icon below your new message node and add an Ask a question node.
Enter the question text, 'Where do you live?', in the Ask a message box. Select Multiple choice options under Identify to give the customer a choice in responses.
With Multiple choice options selected, you need to add more options.
Add two options for the user, by selecting + New option under Options for user in the Question node, then enter 'Seattle' as the text. Add another option and enter 'Bellevue' as the text.
Each option is presented in the copilot chat as a multiple choice button to the user.
To help understand the conversation flow, view the whole dialog tree in the authoring canvas.
The dialog tree creates separate paths in the conversation, depending on the customer's response. This path leads the customer to the best resolution for each user response.
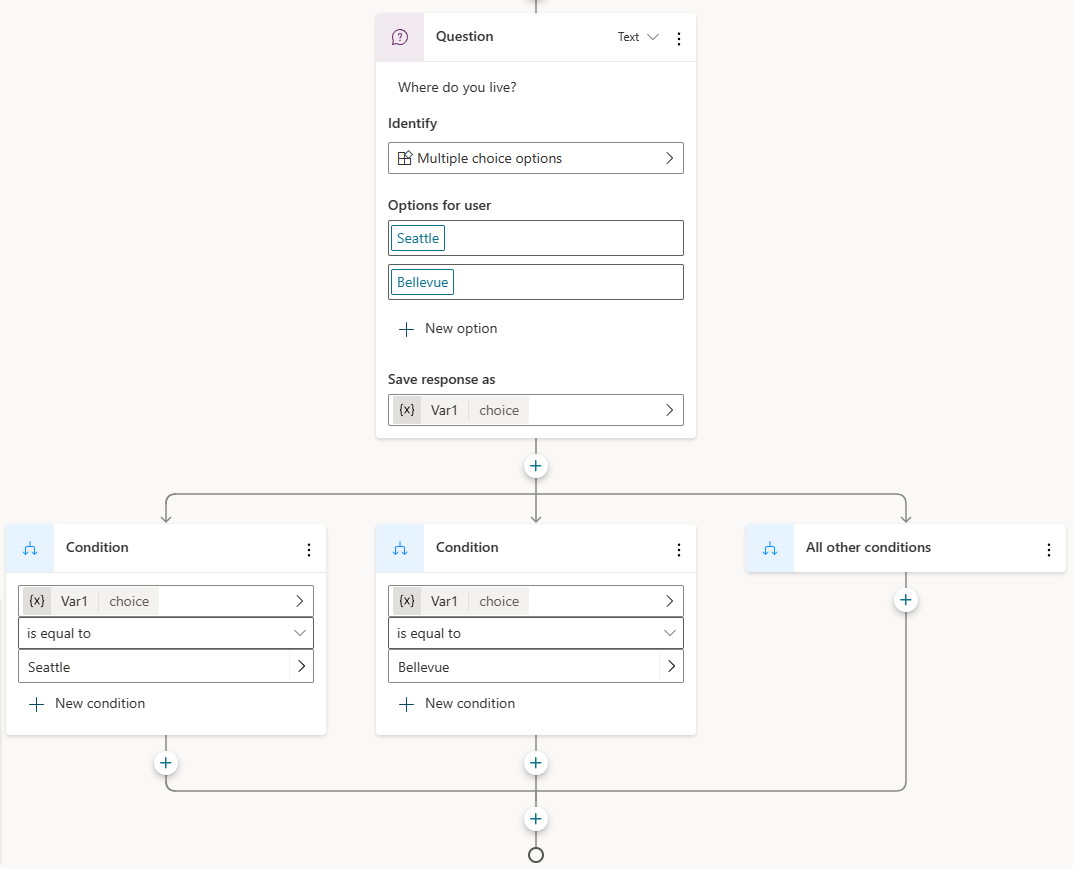
In the forked conversation path, the nodes automatically check for 'Seattle' in one path and 'Bellevue' in the other path to take the best next step.
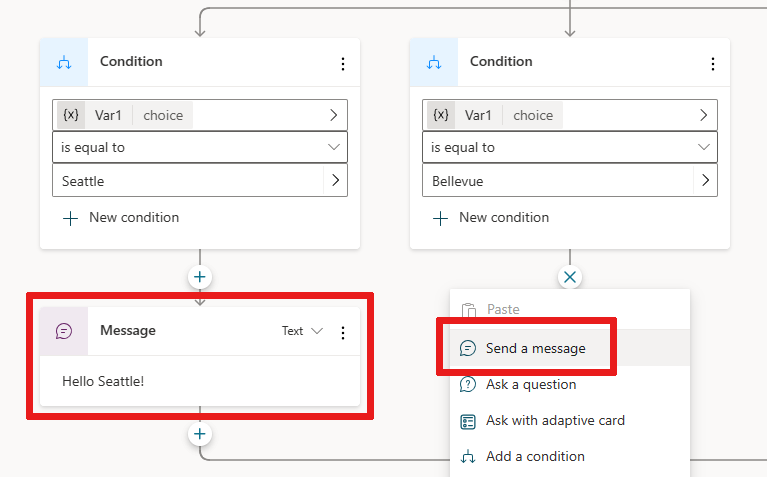
Finally, select the (+) icon below each of the Condition nodes to add a Message node in each branch.
Add a small message like 'Hello Seattle!' in the Seattle branch and 'Hello Bellevue!' in the Bellevue branch.
Select the Save icon at the top to save your trigger.


You now have a basic branching dialog tree, congratulations! You can begin to create more complex versions of this tree by incorporating variables, entities, and Power Automate flows.
Test your content in real time
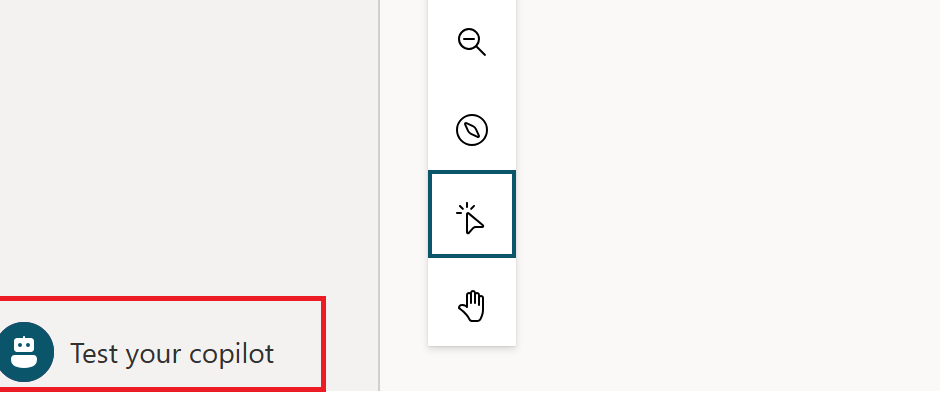
With content authored into a dialog tree, test the conversation in real time to see if it's working as you expected. You can test, using the Test your copilot pane.
If the test copilot pane isn't showing on your screen, select Test at the top of the page.
To follow along on a node-by-node basis as the copilot executes your dialog, select the More icon (
...) in the Test your copilot pane and turn on Track between topics. You see parts of your dialog tree highlighted as the copilot gets to that portion of the dialog.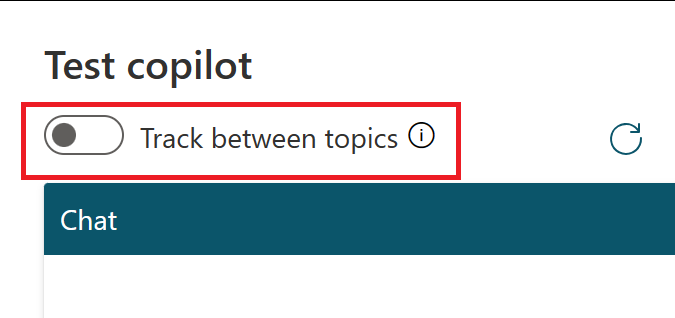
Type "hello world" in the chat window, and send the message to the copilot. You see the top portion of your dialog tree highlighted in green, and Seattle and Bellevue presented as user options in the test copilot pane.
The copilot is now waiting for you to respond, displaying suggestions on how to respond. These suggestion buttons reflect what you authored within your dialog tree in the Ask a question node.
In the test copilot, you can either select these suggestion buttons to continue, or you can enter your response into the chat window.

Continue the dialog by selecting the Seattle branch.
You see the chat stop once you reach the bottom of this branch. If you author more content, the dialog continues, but since we only created a small dialog tree, we reach the end of the content quickly.
This test experience empowers you to quickly create and test a conversation to ensure that the conversation flows as anticipated. If the dialog doesn't reflect your intention, you can change the dialog, and save it. The latest content is pushed into the test copilot, and you can try it out again. The published version of the copilot doesn't change, so feel free to play around with your content until you're happy with it.
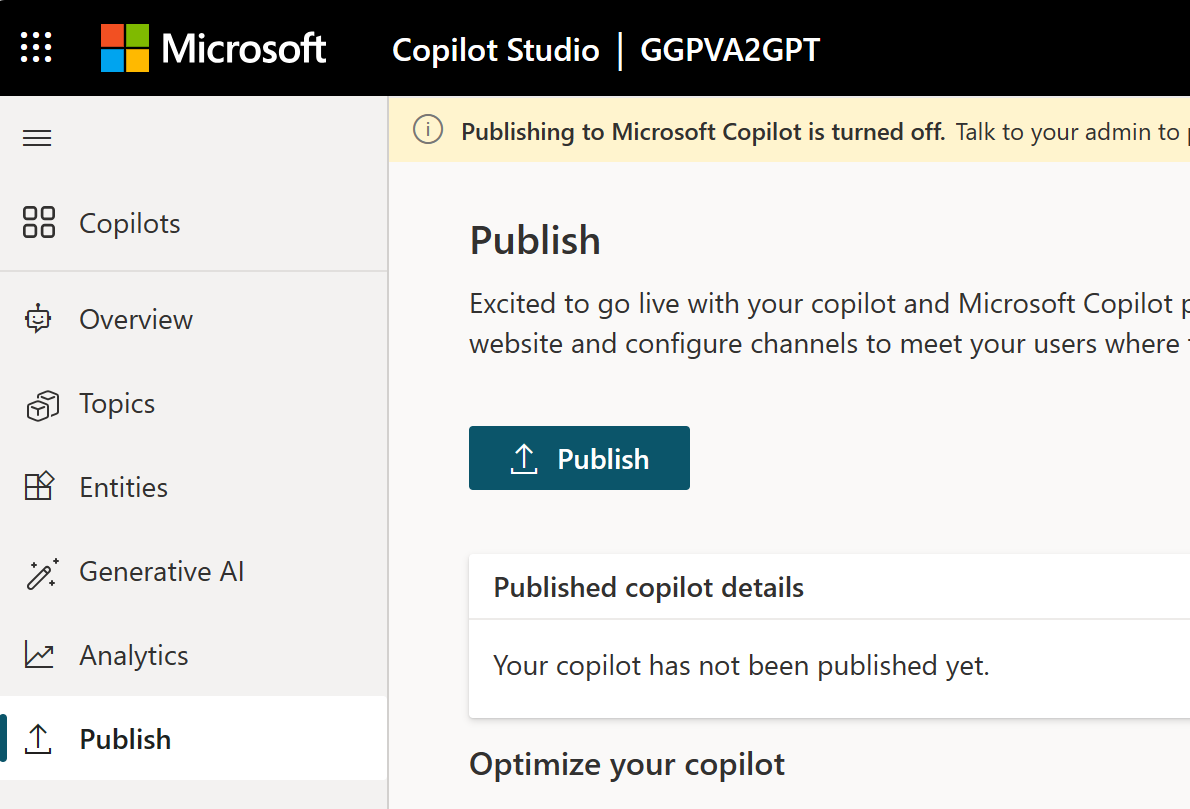
Publish your copilot - web app
Once you're fine with the content authored in your copilot, you can publish your copilot to a website.
If you are on the page for any one topic, select any of the menu items at the top of the page.

At the top of the page, select Publish, and then select Publish again in the Publish this copilot confirmation message. If the publish is successful, you see a green banner on the top of the page.
At the top of the page, select Channels and then Demo website under Channels.

On the Demo Website pane, enter a welcome message and some common trigger phrases.

Copy the website URL and select Save.
Send the URL to others to demonstrate it.
The webpage demonstrates what your copilot looks like to an end-user who comes to your webpage. The copilot canvas is at the bottom. You can interact with it by typing into the window or by selecting a starter phrase from the provided options.
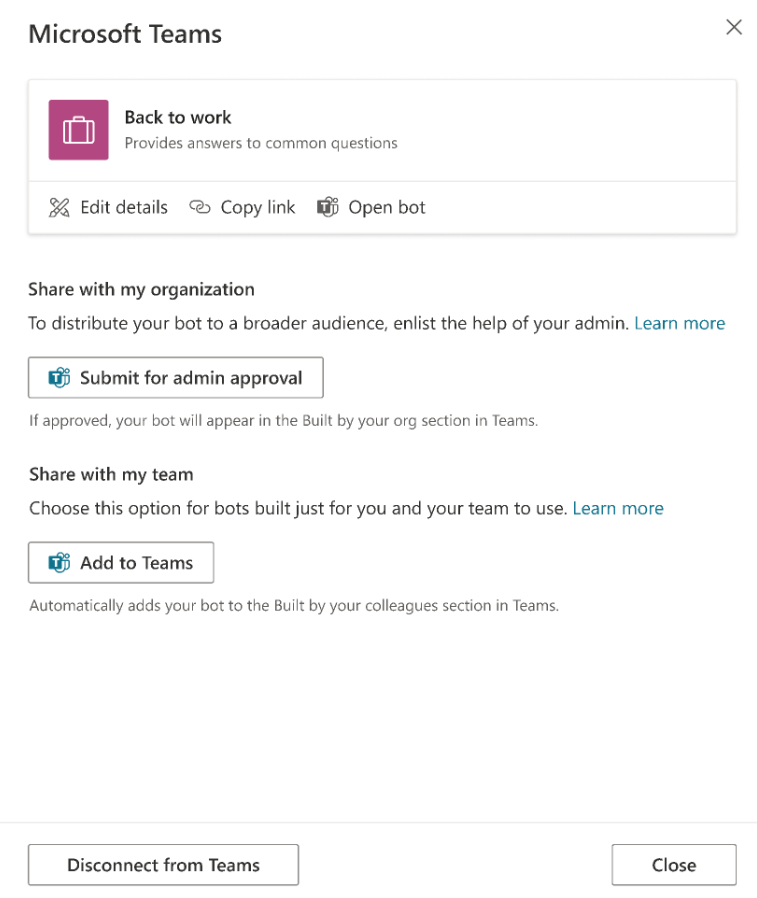
For more information on publishing your copilot to other channels, see the documentation under Publication key concepts.
Analyze the performance of your copilot
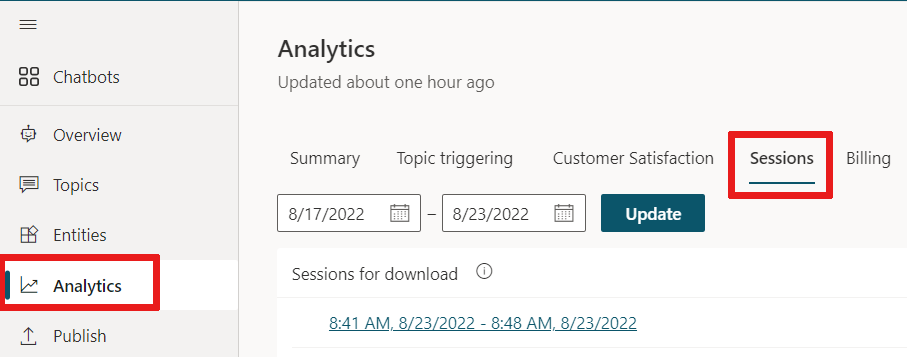
When your copilot completes interactions with users, the statistics are recorded in your copilot's analytics. To view analytics, select Analytics at the top of the page.

Here, you can find key performance indicators (KPIs) showing:
- The volume of sessions your copilot handled.
- How effectively your copilot was able to engage end-users and resolve issues.
- Escalation rates to human agents.
- Abandonment rates during conversations.
You find customer satisfaction information at the KPI level and in the Customer Satisfaction tab.
Note
There is up to a 1-hour delay between when the conversations occur and when the statistics for those conversations appear in the analytics views. Also, all interactions with the copilot are logged in analytics, including interactions from your demo website, custom website, or test copilot.
You can also view detailed session history and transcripts by selecting Analytics > Sessions. Here, you can download a CSV file with the full session transcript. You can tune the performance of your copilot and change the content in your topics to improve your copilot's efficiency.
For more information, see Analytics key concepts.


Conclusion
You created a copilot, created your own topic, tested it out, published it to a demo website, and learned how to analyze your copilot's flow and performance. Congratulations! Your copilot has many more capabilities, so try it out and play with the advanced features.
For questions not covered in the documentation or for feature ideas, visit our community and post questions.
We'd love to hear your ideas on Copilot Studio.Visit our Ideas board and post your ideas.
Feedback
Coming soon: Throughout 2024 we will be phasing out GitHub Issues as the feedback mechanism for content and replacing it with a new feedback system. For more information see: https://aka.ms/ContentUserFeedback.
Submit and view feedback for