Create and configure datasets in the .NET Framework using Visual Studio
Note
Datasets and related classes are legacy .NET Framework technologies from the early 2000s that enable applications to work with data in memory while the applications are disconnected from the database. They are especially useful for applications that enable users to modify data and persist the changes back to the database. Although datasets have proven to be a very successful technology, we recommend that new .NET applications use Entity Framework Core. Entity Framework provides a more natural way to work with tabular data as object models, and it has a simpler programming interface.
A dataset is a set of objects that store data from a database in memory and support change tracking to enable create, read, update, and delete (CRUD) operations on that data without the need to be always connected to the database. Datasets were designed for simple forms over data business applications. For new applications, consider using Entity Framework to store and model data in memory. To work with datasets, you should have a basic knowledge of database concepts.
You can create a typed DataSet class in Visual Studio at design time by using the Data Source Configuration Wizard. For information on creating datasets programmatically, see Creating a dataset (ADO.NET).
Create a new dataset by using the Data Source Configuration Wizard
Open your project in Visual Studio, and then choose Project > Add New Data Source to start the Data Source Configuration Wizard.
Choose the type of data source to which you'll be connecting.
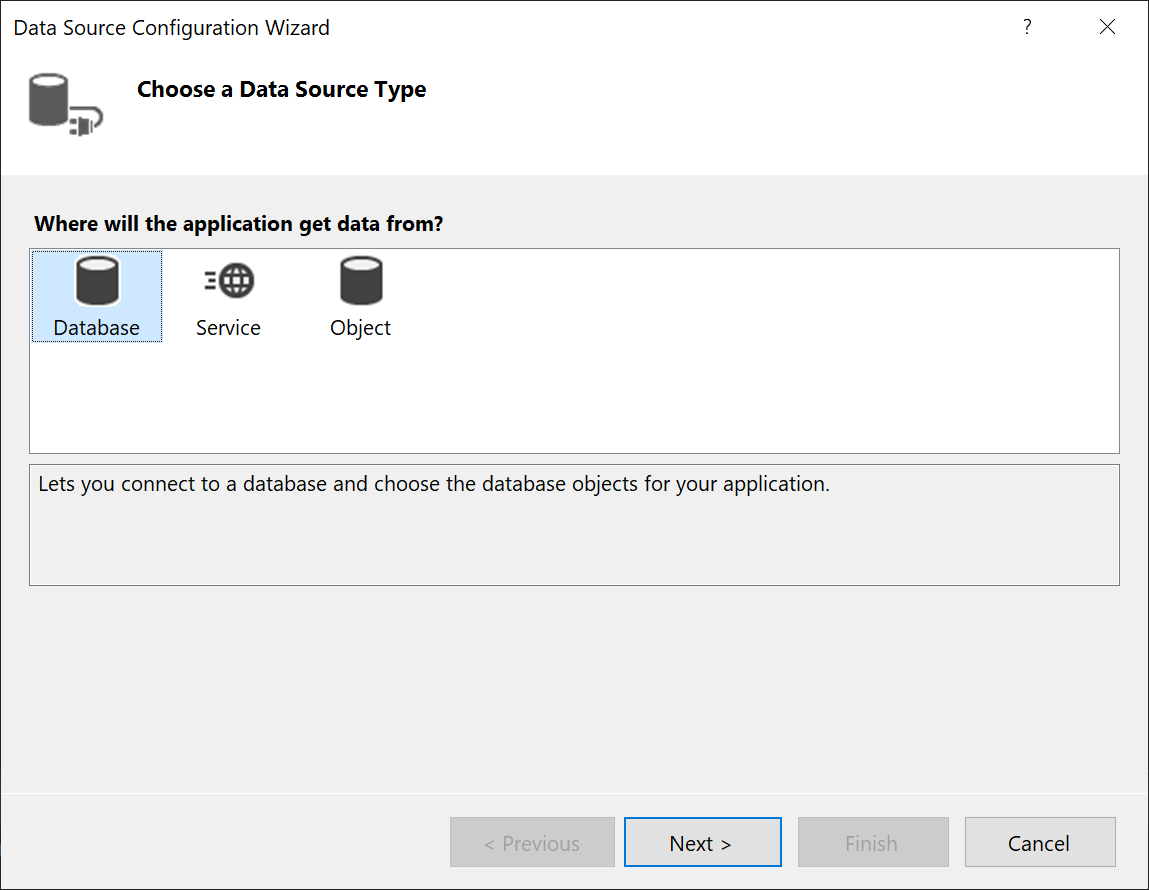
Choose
DataSetfrom the list of options.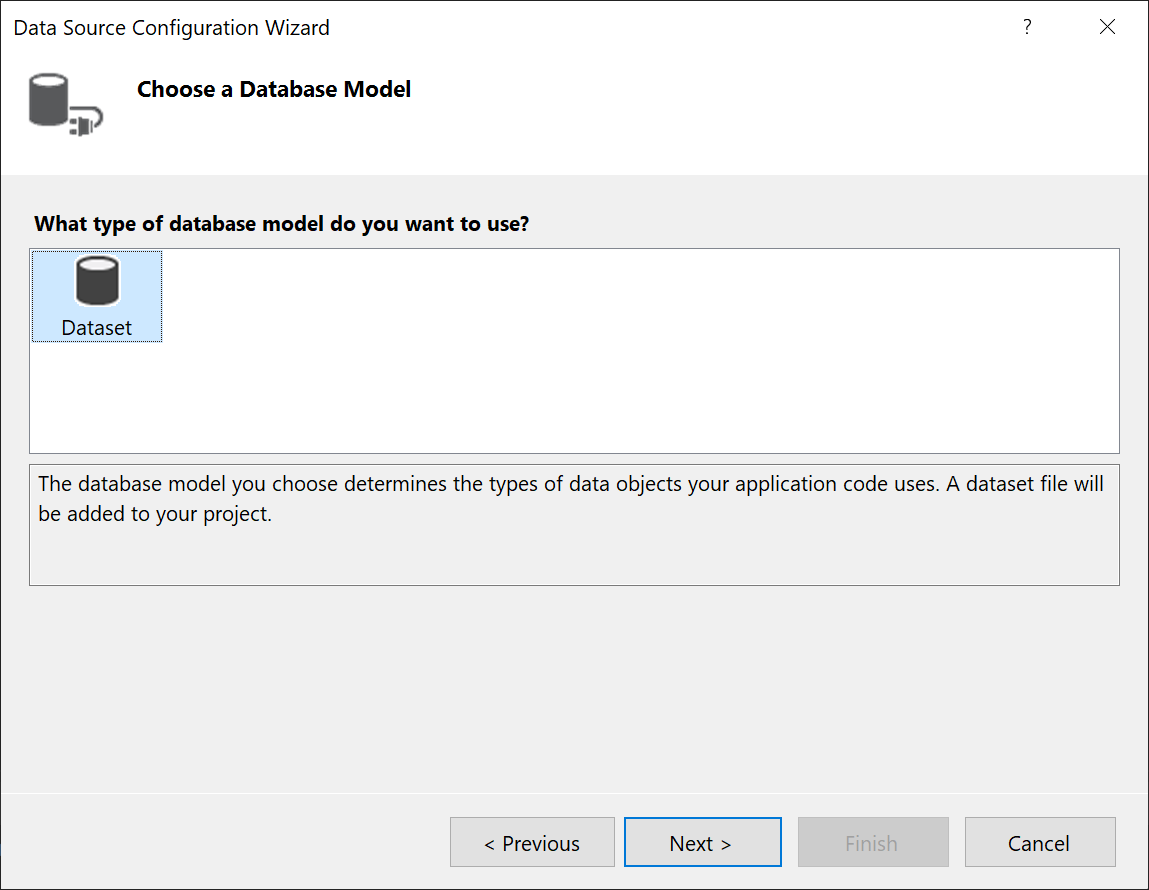
Choose the database or databases that will be the data source for your dataset.

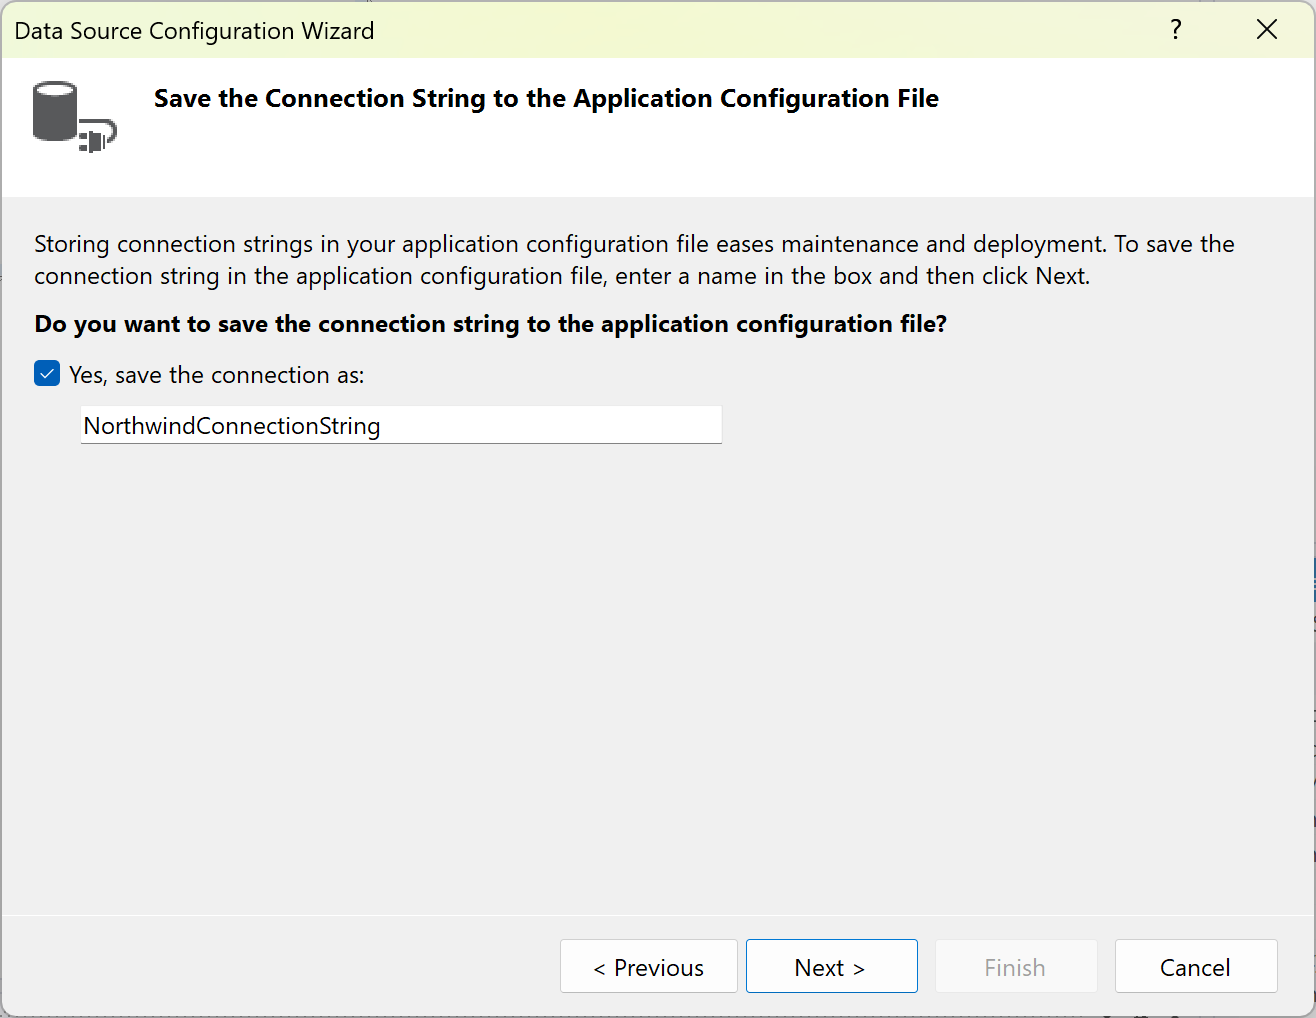
Choose whether to save the connection string in app.config.
Choose the tables (or individual columns), stored procedures, functions, and views from the database that you want to be represented in the dataset.
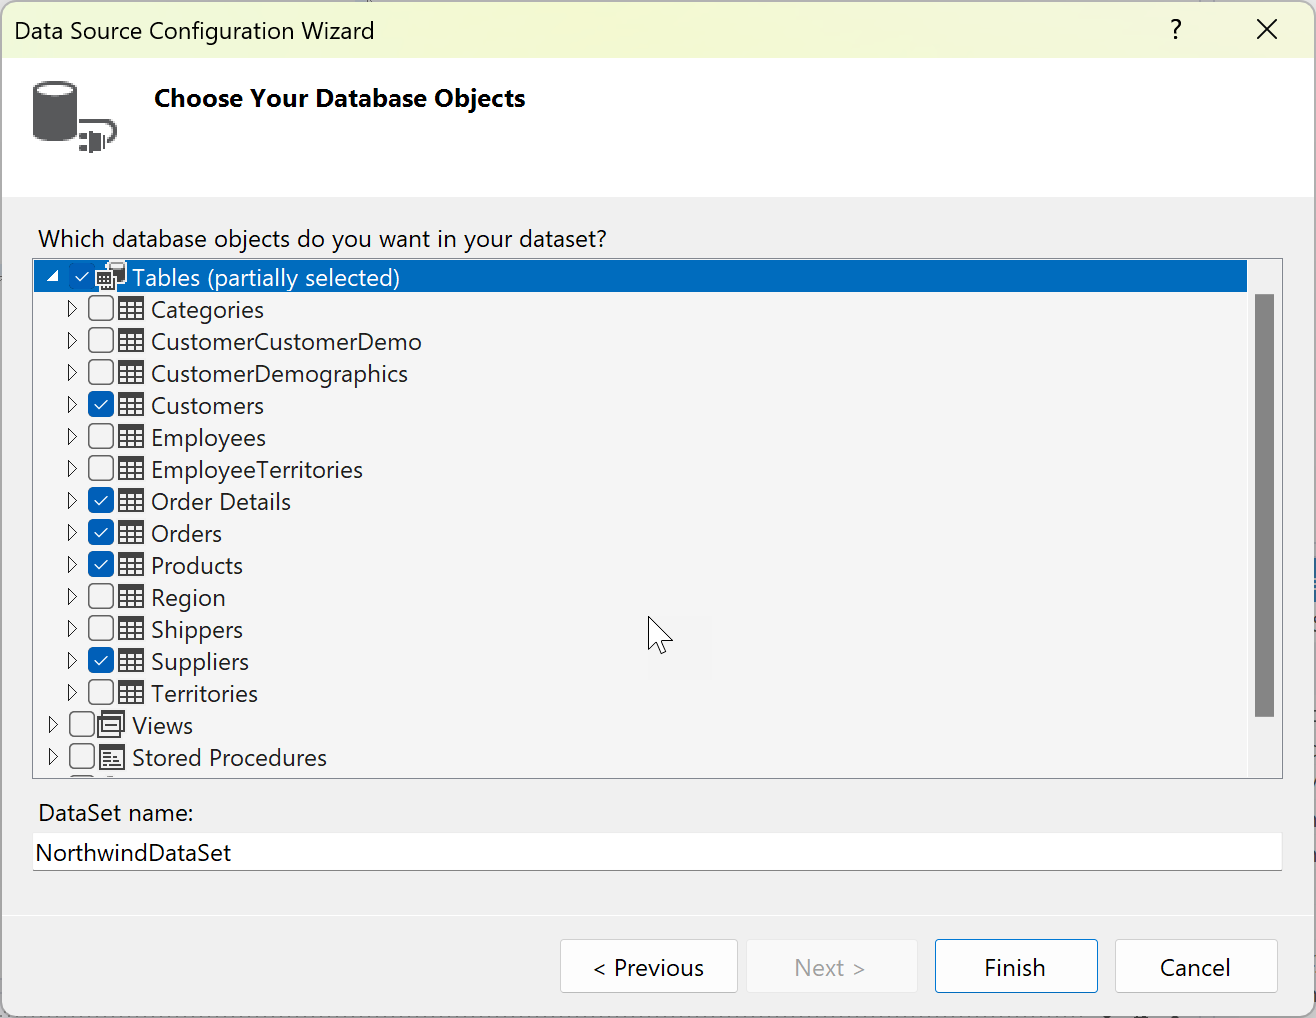
Click Finish.
The dataset appears as a node in Solution Explorer.
Click the dataset node in Solution Explorer to open the dataset in the DataSet Designer. Each table in the dataset has an associated
TableAdapterobject, which is represented at the bottom. The table adapter is used to populate the dataset and optionally to send commands to the database.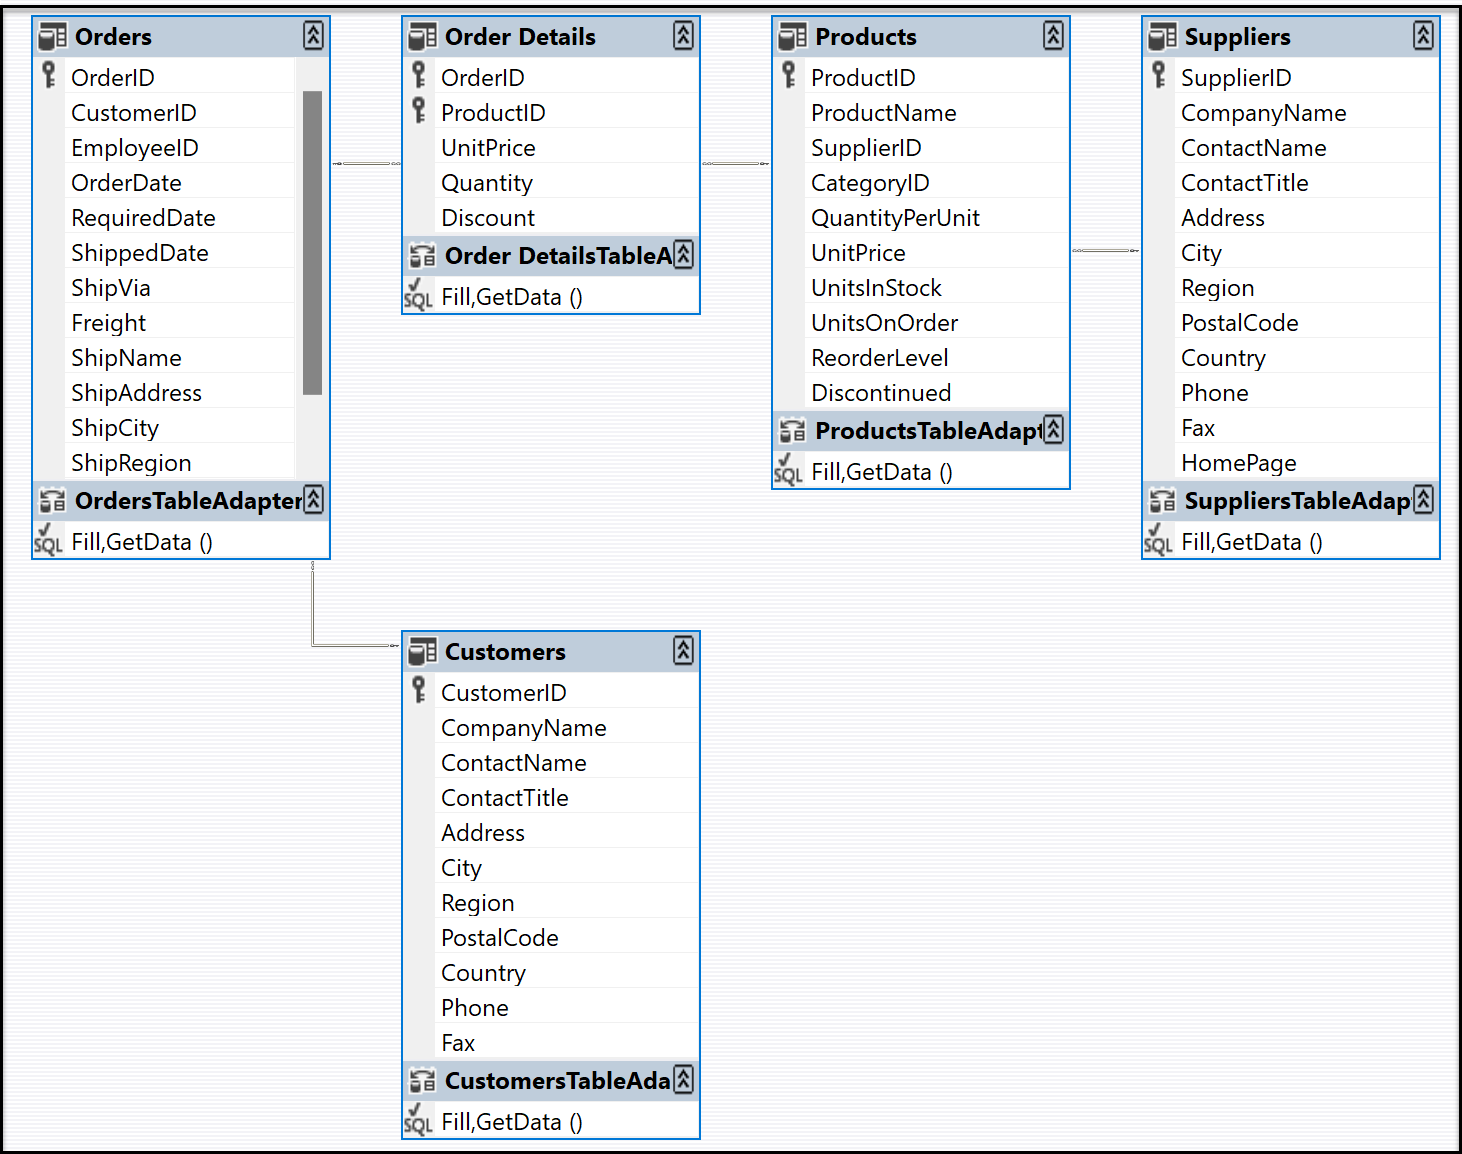
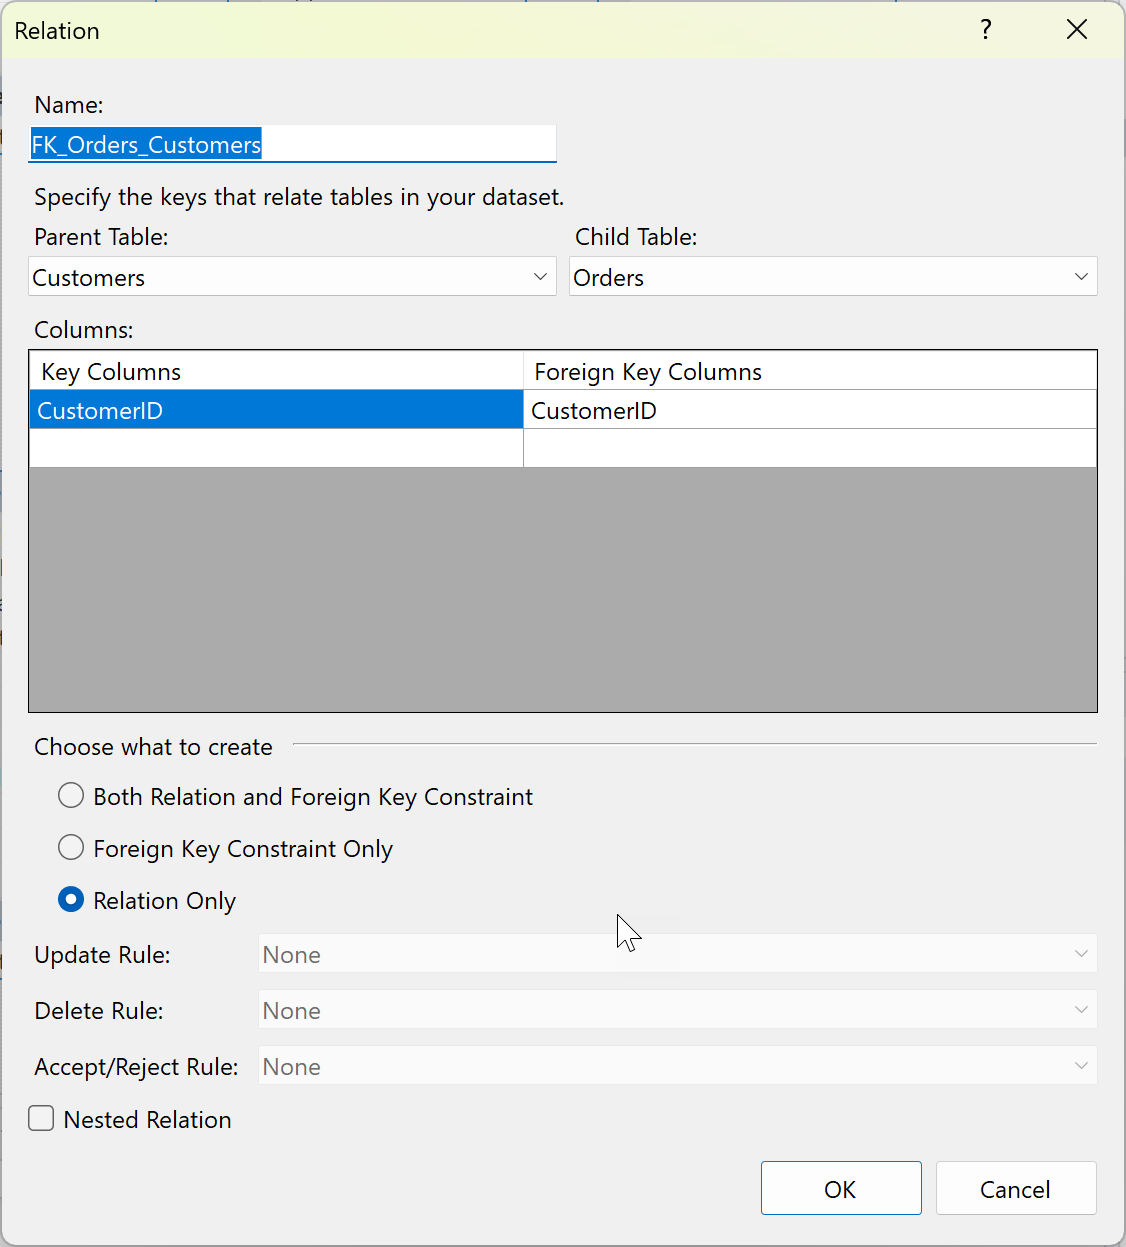
The relation lines that connect the tables represent table relationships, as defined in the database. By default, foreign-key constraints in a database are represented as a relation only, with the update and delete rules set to none. Typically, that is what you want. However, you can click the lines to bring up the Relation dialog, where you can change the behavior of hierarchical updates. For more information, see Relationships in datasets and Hierarchical update.
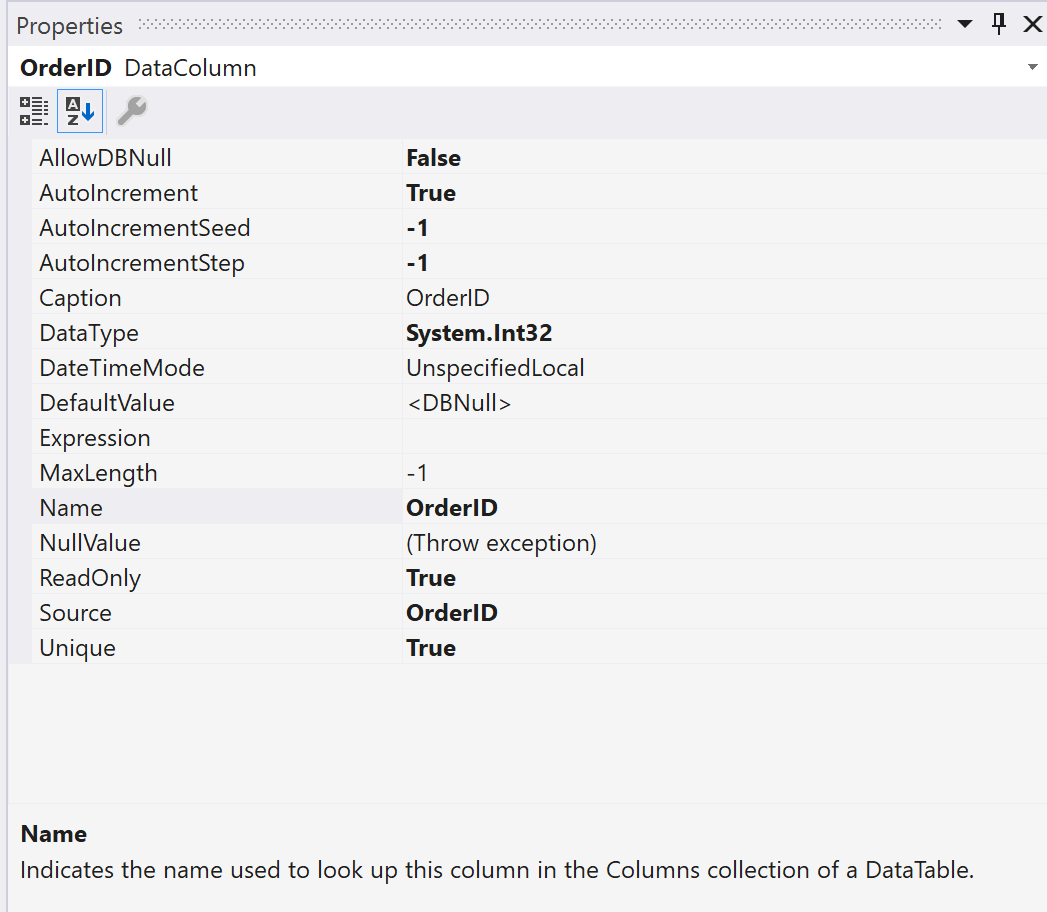
Click a table, table adapter, or column name in a table to see its properties in the Properties window. You can modify some of the values here. Just remember that you are modifying the dataset, not the source database.
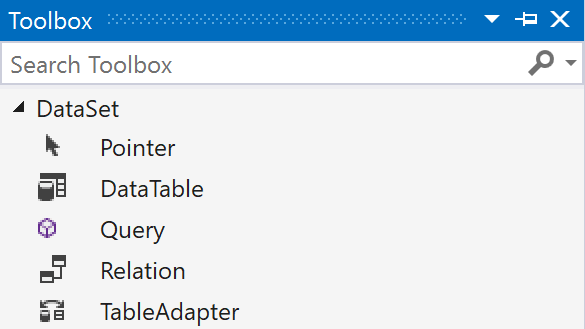
You can add new tables or table adapters to the dataset, or add new queries for existing table adapters, or specify new relations between tables by dragging those items from the Toolbox tab. This tab appears when the DataSet Designer is in focus.
Next, you might want to specify how to populate the dataset with data. For that, you use the TableAdapter Configuration Wizard. For more information, see Fill datasets by using TableAdapters.
Add a database table or other object to an existing dataset
This procedure shows how to add a table from the same database that you used to first create the dataset.
Click the dataset node in Solution Explorer to bring the DataSet Designer into focus.
Click the Data Sources tab in the left margin of Visual Studio, or type data sources in the search box.
Right-click the dataset node and select Configure Data Source with Wizard.
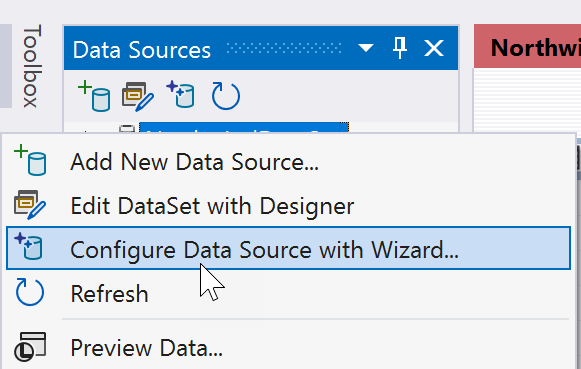
Use the wizard to specify which additional tables, stored procedures, or other database objects to add to the dataset.
Add a stand-alone data table to a dataset
Open your dataset in the Dataset Designer.
Drag a DataTable class from the DataSet tab of the Toolbox onto the Dataset Designer.
Add columns to define your data table. Right-click on the table and choose Add > Column. Use the Properties window to set the data type of the column and a key if necessary.
Stand-alone tables need to implement Fill logic so that you can fill them with data. For information on filling data tables, see Populating a DataSet from a DataAdapter.
Related content
Feedback
Coming soon: Throughout 2024 we will be phasing out GitHub Issues as the feedback mechanism for content and replacing it with a new feedback system. For more information see: https://aka.ms/ContentUserFeedback.
Submit and view feedback for