Step 3: Serve static files, add pages, and use template inheritance with Django app
Applies to: ![]() Visual Studio
Visual Studio ![]() Visual Studio for Mac
Visual Studio for Mac
Note
This article applies to Visual Studio 2017. If you're looking for the latest Visual Studio documentation, see Visual Studio documentation. We recommend upgrading to the latest version of Visual Studio. Download it here
Previous step: Create a Django app with views and page templates
In the previous steps of the tutorial, you've learned how to create a minimal Django app with a single HTML page. Modern web apps, however, contain many pages. Modern web pages use shared resources like CSS and JavaScript files to provide consistent styling and behavior.
In this step, you learn how to:
- Use Visual Studio item templates to quickly add new files of different types with convenient boilerplate code (step 3-1)
- Set up the Django project to serve static files (step 3-2)
- Add additional pages to the app (step 3-3)
- Use template inheritance to create a header and nav bar that's used across pages (step 3-4)
Step 3-1: Become familiar with item templates
As you develop a Django app, you usually add many Python, HTML, CSS, and JavaScript files. For each file type (files like web.config that you might need for deployment), Visual Studio provides convenient item templates to get you started.
To view available templates, go to Solution Explorer, right-click the folder in which you want to create the item, and then select Add > New Item.
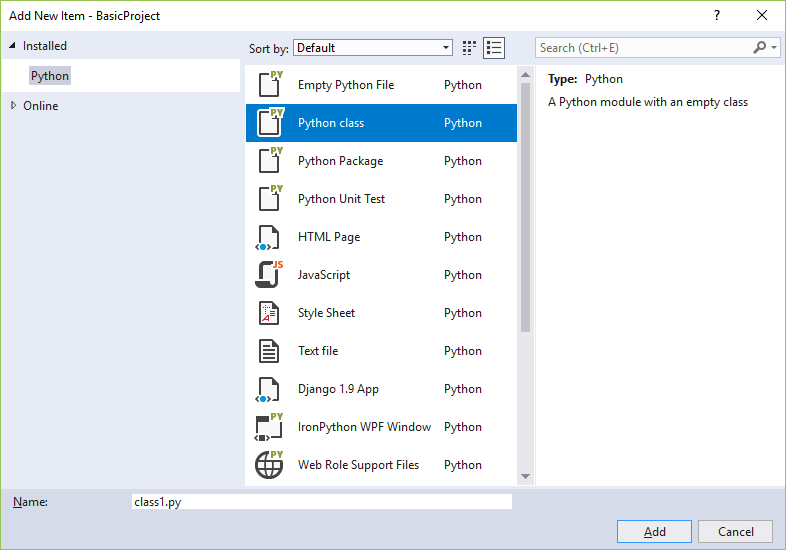
To use a template, select the desired template, specify a name for the file, and then select Add. Adding an item in this manner automatically adds the file to your Visual Studio project and marks the changes for source control.
Question: How does Visual Studio know which item templates to offer?
Answer: The Visual Studio project file (.pyproj) contains a project type identifier that marks it as a Python project. Visual Studio uses the type identifier to show only the item templates that are suitable for the project type. This way, Visual Studio can supply a rich set of item templates for many project types without asking you to sort them every time.
Step 3-2: Serve static files from your app
In a web app built with Python (using any framework), your Python files always run on the web host's server. The Python files are also never transmitted to a user's computer. Other files, however, such as CSS and JavaScript, are used exclusively by the browser. So, the host server simply delivers them as-is whenever they're requested. Such files are referred to as "static" files, and Django can deliver them automatically without you needing to write any code.
A Django project is set up by default to serve static files from the app's static folder, thanks to the lines in the Django project's settings.py file:
# Static files (CSS, JavaScript, Images)
# https://docs.djangoproject.com/en/1.9/howto/static-files/

STATIC_URL = '/static/'

STATIC_ROOT = posixpath.join(*(BASE_DIR.split(os.path.sep) + ['static']))
You can organize the files within static using any folder structure that you like, and then use relative paths within that folder to refer to the files. To demonstrate the process, follow the steps below to add a CSS file to the app, then use that stylesheet in the index.html template:
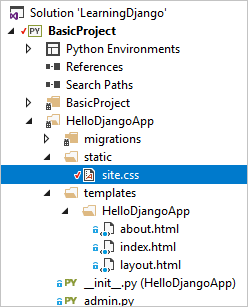
In Solution Explorer, right-click the HelloDjangoApp folder in the Visual Studio project, select Add > New folder, and name the folder
static.Right-click the static folder and select Add > New item. In the dialog that appears, select the Stylesheet template, name the file
site.css, and select Add.
The site.css file appears in the project and is opened in the editor. Your folder structure should appear similar to the below image:
Replace the contents of site.css file with the following code and save the file:
.message {
    font-weight: 600;
    color: blue;
}
Replace the contents of the app's templates/HelloDjangoApp/index.html file with the following code. The code replaces the
<strong>element used in step 2 with a<span>that references themessagestyle class. Using a style class gives you more flexibility in styling the element. (If you haven't moved the index.html file into a subfolder in templates when using VS 2017 15.7 and earlier, refer to template namespacing in step 2-4.)<html> <head> <title>{{ title }}</title> {% load static %} <!-- Instruct Django to load static files --> <link rel="stylesheet" type="text/css" href="{% static 'site.css' %}" /> </head> <body> <span class="message">{{ message }}</span>{{ content }} </body> </html>Run the project to observe the results. When you're done, stop the server and commit your changes to source control if you like (as explained in step 2).
Question: What is the purpose of the {% load static %} tag?
Answer: The {% load static %} line is required before referring to static files in elements like <head> and <body>. In the example shown in this section, "static files" refers to a custom Django template tag set, which allows you to use the {% static %} syntax to refer to static files. Without {% load static %}, you'll see an exception when the app runs.
Question: Are there any conventions for organizing static files?
Answer: You can add other CSS, JavaScript, and HTML files in your static folder the way you want. A typical way to organize static files is to create subfolders named fonts, scripts, and content (for stylesheets and any other files). In each case, remember to include those folders in the relative file path in {% static %} references.
Question: Can I complete the same task without using the {% load static %} tag?
Answer: Yes, you can.
<html>
    <head>
        <title>{{ title }}</title>
        <link rel="stylesheet" type="text/css" href="../../static/site.css" />
    </head>
    <body>
        <span class="message">{{ message }}</span>{{ content }}
    </body>
</html>
Step 3-3: Add a page to the app
Adding another page to the app will:
- Add a Python function that defines the view.
- Add a template for the page's markup.
- Add the necessary routing to the Django project's urls.py file.
The following steps add an "About" page to the "HelloDjangoApp" project, and links to the page from the home page:
In Solution Explorer, right-click the templates/HelloDjangoApp folder. Select Add > New item and select the HTML Page item template. Name the file
about.htmland select Add.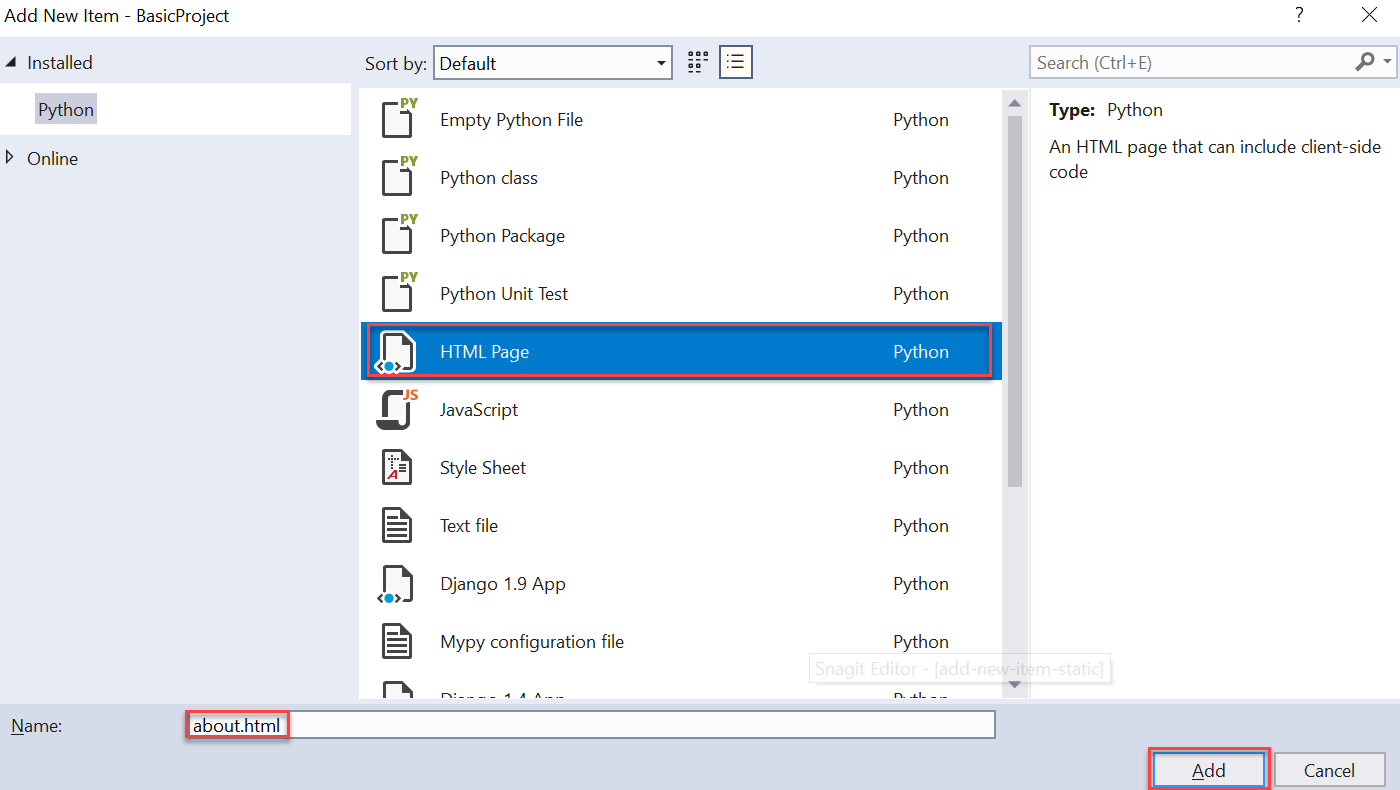
Tip
If the New Item command doesn't appear on the Add menu, ensure that you have stopped the server so that Visual Studio exits debugging mode.
Replace the contents of about.html with the markup below (you replace the explicit link to the home page with a simple navigation bar in step 3-4):
<html>
    <head>
        <title>{{ title }}</title>
        {% load static %}
        <link rel="stylesheet" type="text/css" href="{% static 'site.css' %}" />
    </head>
    <body>
        <div><a href="home">Home</a></div>
        {{ content }}
    </body>
</html>
Open the app's views.py file and add a function named
aboutthat uses the template:def about(request): return render( request, "HelloDjangoApp/about.html", { 'title' : "About HelloDjangoApp", 'content' : "Example app page for Django." } )Open the Django project's urls.py file and add the following line to the
urlPatternsarray:url(r'^about$', HelloDjangoApp.views.about, name='about'),Open the templates/HelloDjangoApp/index.html file and add the following line below the
<body>element to link to the About page (you'll again replace this link with a nav bar in step 3-4):<div><a href="about">About</a></div>Save all the files using the File > Save All menu command, or just press Ctrl+Shift+S. (Technically, this step isn't needed as running the project in Visual Studio saves files automatically. Nevertheless, it's a good command to know about.)
Run the project to observe the results and check the navigation between pages. When you're done, close the server.
Question: I tried using "index" for the link to the home page, but it didn't work. Why?
Answer: Even though the view function in views.py file is named index, the URL routing patterns in the Django project's urls.py file doesn't contain a regular expression that matches the string "index". To match the string, you need to add another entry for the pattern ^index$.
As shown in the next section, it's better to use the {% url '<pattern_name>' %} tag in the page template to refer to the name of a pattern. In that case, Django creates the proper URL for you. For example, replace <div><a href="home">Home</a></div> in about.html with <div><a href="{% url 'index' %}">Home</a></div>. The use of 'index' works here because the first URL pattern in urls.py is, in fact, named 'index' (by virtue of the name='index' argument). You can also use 'home' to refer to the second pattern.
Step 3-4: Use template inheritance to create a header and nav bar
Instead of having explicit navigation links on each page, modern web apps use a branding header and a navigation bar. A navigation bar provides the most important page links, popup menus, and so on. To ensure that the header and nav bar are the same across all pages, don't repeat the same code in every page template. You instead want to define the common parts of all your pages in one place.
Django's template system provides two means for reusing specific elements across multiple templates: includes and inheritance.
Includes are other page templates that you insert at a specific place in the referring template using the syntax
{% include <template_path> %}. If you want to change the path dynamically in code, you can also use a variable. Includes are used in the body of a page to pull in the shared template at a specific location on the page.Inheritance uses the
{% extends <template_path> %}at the beginning of a page template to specify a shared base template that the referring template then builds upon. Inheritance is commonly used to define a shared layout, nav bar, and other structures for an app's pages, such that referring templates can only add or modify specific areas of the base template called blocks.
In both cases, <template_path> is relative to the app's templates folder (../ or ./ are also allowed).
A base template delineates blocks using {% block <block_name> %} and {% endblock %} tags. If a referring template then uses tags with the same block name, its block content overrides that of the base template.
The following steps demonstrate inheritance:
In the app's templates/HelloDjangoApp folder, create a new HTML file. Right-click the templates/HelloDjangoApp folder, select Add > New item and then select the HTML Page item template. Name the file
layout.htmland select Add.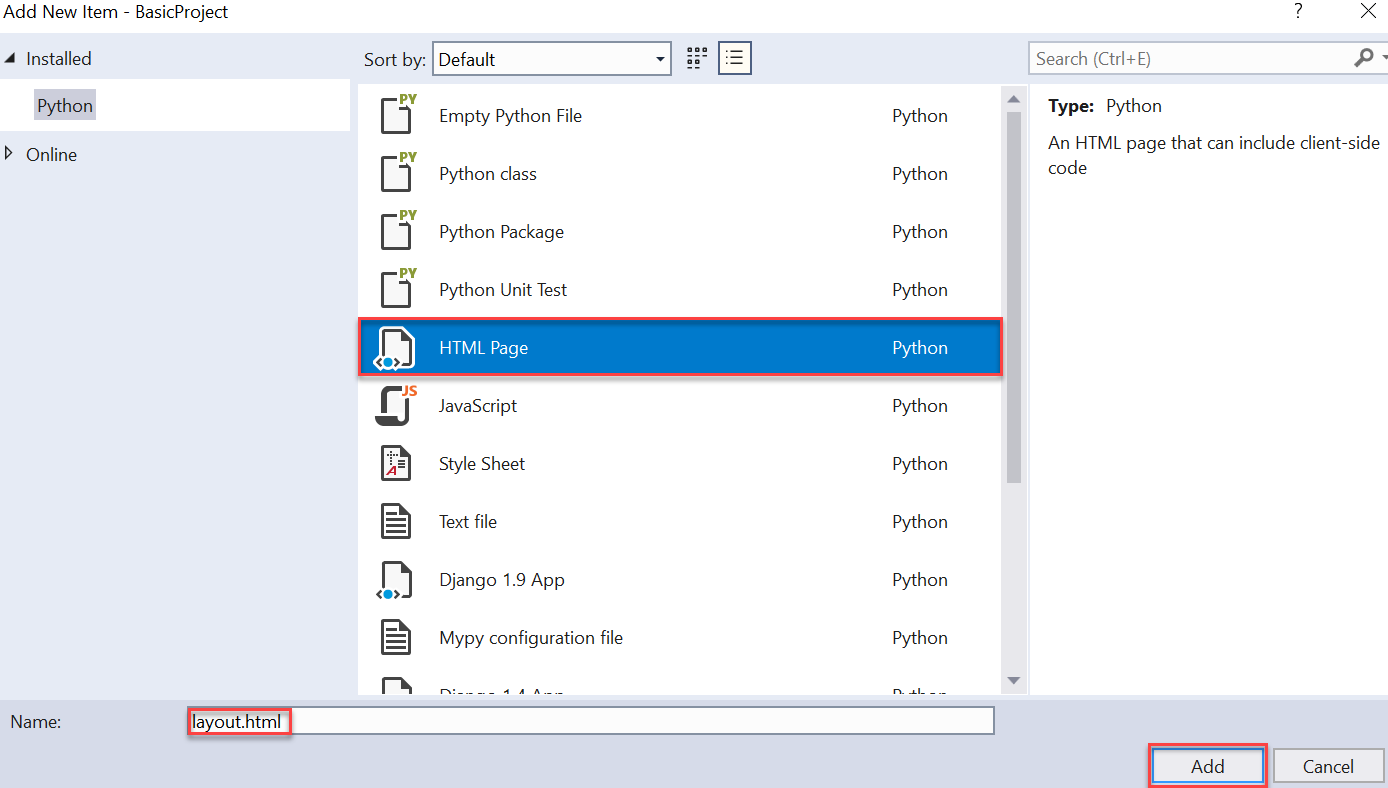
Replace the layout.html file's content with the markup below. You can see that this template contains a block named "content" that is all the referring pages need to replace:
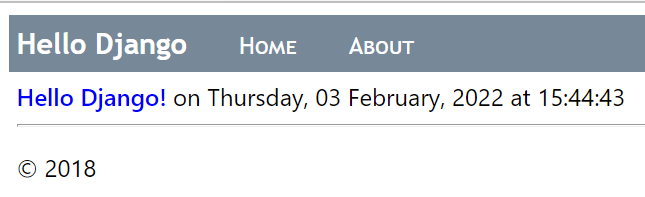
<!DOCTYPE html> <html> <head> <meta charset="utf-8" /> <title>{{ title }}</title> {% load static %} <link rel="stylesheet" type="text/css" href="{% static 'site.css' %}" /> </head> <body> <div class="navbar"> <a href="/" class="navbar-brand">Hello Django</a> <a href="{% url 'home' %}" class="navbar-item">Home</a> <a href="{% url 'about' %}" class="navbar-item">About</a> </div> <div class="body-content"> {% block content %}{% endblock %} <hr/> <footer> <p>© 2018</p> </footer> </div> </body> </html>Add the following styles to the app's static/site.css file (this walkthrough isn't attempting to demonstrate responsive design here; these styles are simply to generate an interesting result):
.navbar {
    background-color: lightslategray;
    font-size: 1em;
    font-family: 'Trebuchet MS', 'Lucida Sans Unicode', 'Lucida Grande', 'Lucida Sans', Arial, sans-serif;
    color: white;
    padding: 8px 5px 8px 5px;
}

.navbar a {
    text-decoration: none;
    color: inherit;
}

.navbar-brand {
    font-size: 1.2em;
    font-weight: 600;
}

.navbar-item {
    font-variant: small-caps;
    margin-left: 30px;
}

.body-content {
    padding: 5px;
    font-family:'Segoe UI', Tahoma, Geneva, Verdana, sans-serif;
}
Modify the templates/HelloDjangoApp/index.html file to refer to the base template and override the content block. You can see that by using inheritance, this template becomes simple:
{% extends "HelloDjangoApp/layout.html" %}
{% block content %}
<span class="message">{{ message }}</span>{{ content }}
{% endblock %}
Modify the templates/HelloDjangoApp/about.html file to refer to the base template and override the content block:
{% extends "HelloDjangoApp/layout.html" %}
{% block content %}
{{ content }}
{% endblock %}
Run the server to observe the results. When you're done, close the server.
Because you'd made substantial changes to the app, it's again a good time to commit your changes to source control.
Next steps
Go deeper
- Writing your first Django app, part 3 (views) (docs.djangoproject.com)
- For more capabilities of Django templates, such as control flow, see The Django template language (docs.djangoproject.com)
- For complete details on using the
{% url %}tag, see url within the Built-in template tags and filters for Django templates reference (docs.djangoproject.com) - Tutorial source code on GitHub: Microsoft/python-sample-vs-learning-django