Nested virtualization in Azure Stack HCI
Applies to: Azure Stack HCI, versions 22H2 and 21H2
Nested virtualization is a feature that lets you run Hyper-V inside a Hyper-V virtual machine (VM). This allows you to maximize your hardware investments and gain flexibility in evaluation and testing scenarios.
Important
Because Azure Stack HCI is intended as a virtualization host where you run all of your workloads in VMs, nested virtualization is not supported in production environments. For production use, Azure Stack HCI should be deployed on validated physical hardware.
Some scenarios in which nested virtualization can be useful are:
- Running applications or emulators in a nested VM
- Testing software releases on VMs
- Reducing deployment times for training environments
Enable nested virtualization on a VM
To enable nested virtualization on a VM using Windows Admin Center:
Connect to your cluster, and then in the Tools pane, select Virtual machines.
Under Inventory, select the VM on which you want to enable nested virtualization.
Select Settings, then Processors, and check the box for Enable nested virtualization.
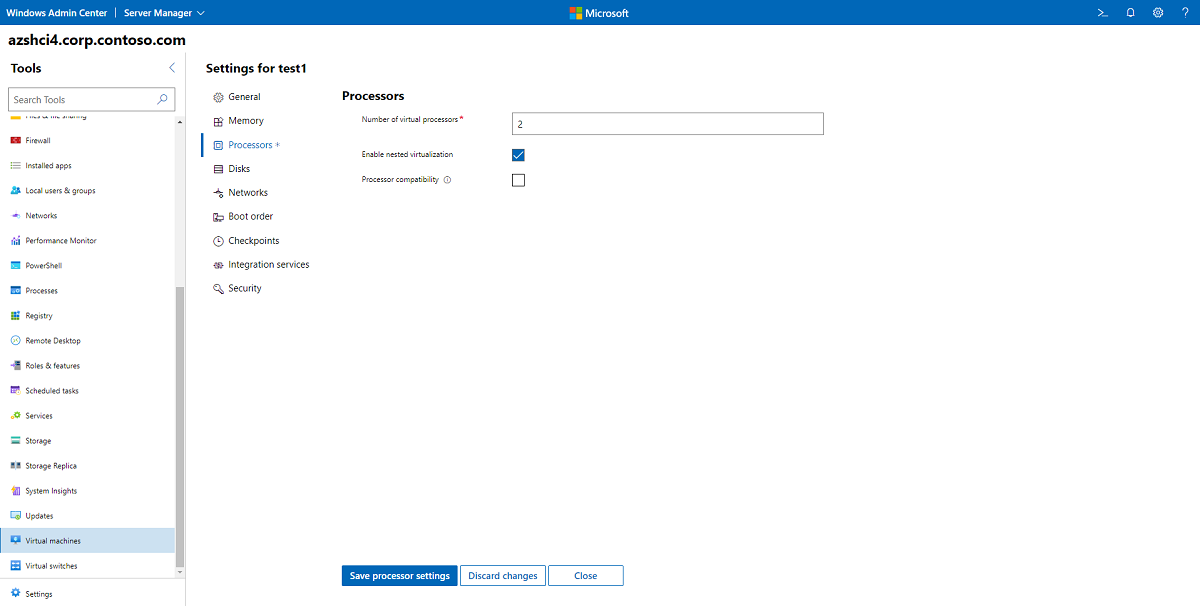
Select Save processor settings.

To configure nested virtualization on a VM using PowerShell, see Run Hyper-V in a Virtual Machine with Nested Virtualization.
Nested virtualization processor support
Azure Stack HCI, version 21H2 adds support for nested virtualization on AMD processors. Now you can run nested virtualization on first generation EPYC processors or newer generations (Naples, Rome, Milan).
Prerequisites:
- Azure Stack HCI, version 21H2
- VM configuration version 10.0 or greater
- An AMD EPYC processor with SVM enabled
Next steps
For more information, see also:
Feedback
Coming soon: Throughout 2024 we will be phasing out GitHub Issues as the feedback mechanism for content and replacing it with a new feedback system. For more information see: https://aka.ms/ContentUserFeedback.
Submit and view feedback for