Azure Virtual Machines
An Azure service that is used to provision Windows and Linux virtual machines.
7,065 questions
This browser is no longer supported.
Upgrade to Microsoft Edge to take advantage of the latest features, security updates, and technical support.
' cx='32' cy='32' r='32' /%3E%3Ctext x='50%25' y='55%25' dominant-baseline='middle' text-anchor='middle' fill='%23FFF' %3EKO%3C/text%3E%3C/svg%3E)
When provisioning VMs, how may I select a custom size for the OS disk? I'd like to use P6 64- GB SSD premium disks to take advantage of the 12 month free tier. Unfortunately, the free tier templates available within the portal does not support my desired OS images.

@Ken Onwere What your looking for is not in the marketplace, so you will need to create a custom disk with the OS image on it in the proper size. This is a surprisingly complicated process.
The easiest way to do this is to spin up a VM with the image you would like, stop and delete the VM, but save the disk. You can do this with a managed or unmanaged disk.
Next, create a new VM and attach the first VM's OS disk as a data disk to this VM, along with a new blank data disk, sized for your desired OS disk size (64gb).
Copy the data from your 1st VM's OS disk (currently attached as a data disk) to the 64GB blank data disk. You can do this using a simple copy + paste and file explorer. Once this is done, detach the data disk, mark it is a SPECIALIZED OS disk, and then create a new VM with this disk.
Once your new VM with the correct sized disk is up and running, generalize that OS and register it as a custom image.
Editing an existing managed disk is not something you can do via the portal. You will need to use PowerShell or CLI to mark a disk as a data disk, OS disk, and image type.
If you would like detailed instructions on any of these steps, please let me know.

@Ken Onwere Apologies for the delay in response and all the inconvenience caused because of the issue.
I tested same in my lab with free Subscription and I was able to create one. Can you check below and let me know if you are able to create one during VM provisioning.
As mentioned here

First I created Azure VM as below.
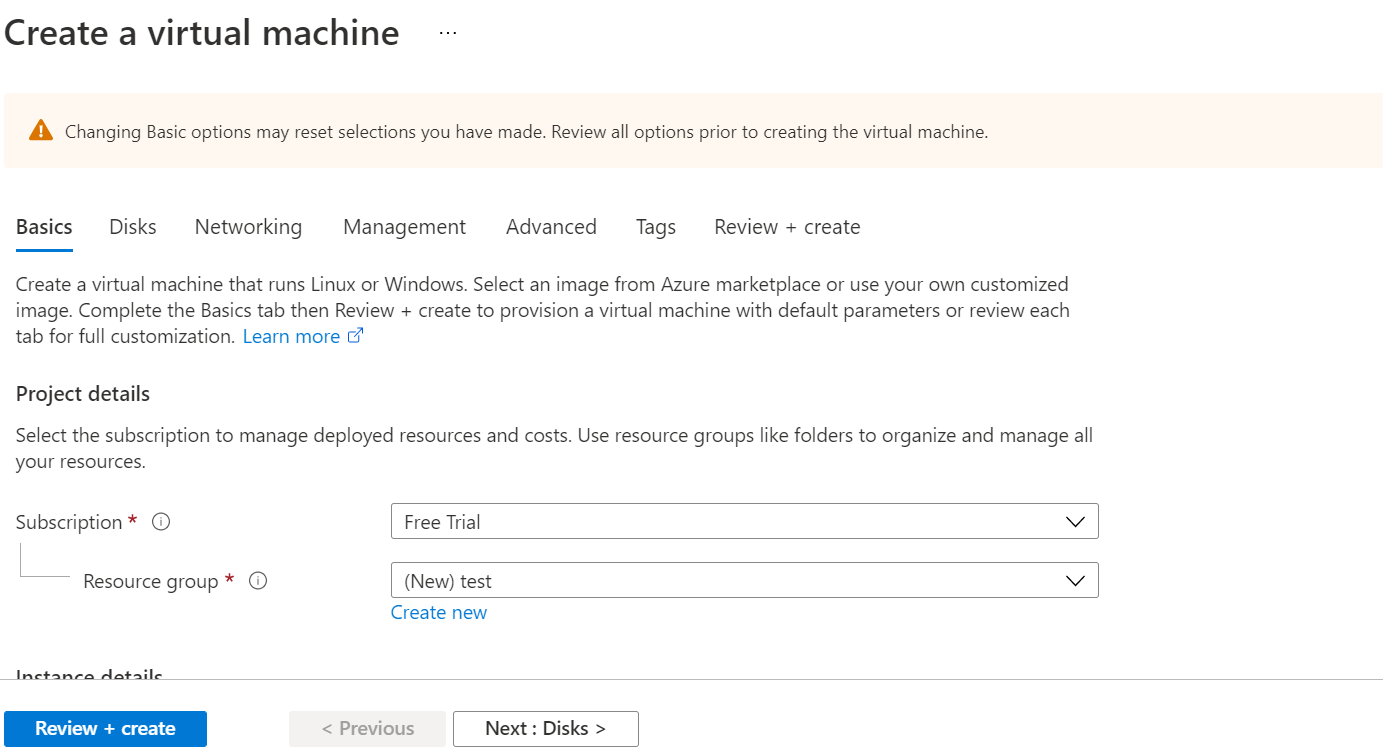
Now clicking on Disk button on bottom you will be redirected to page like below:
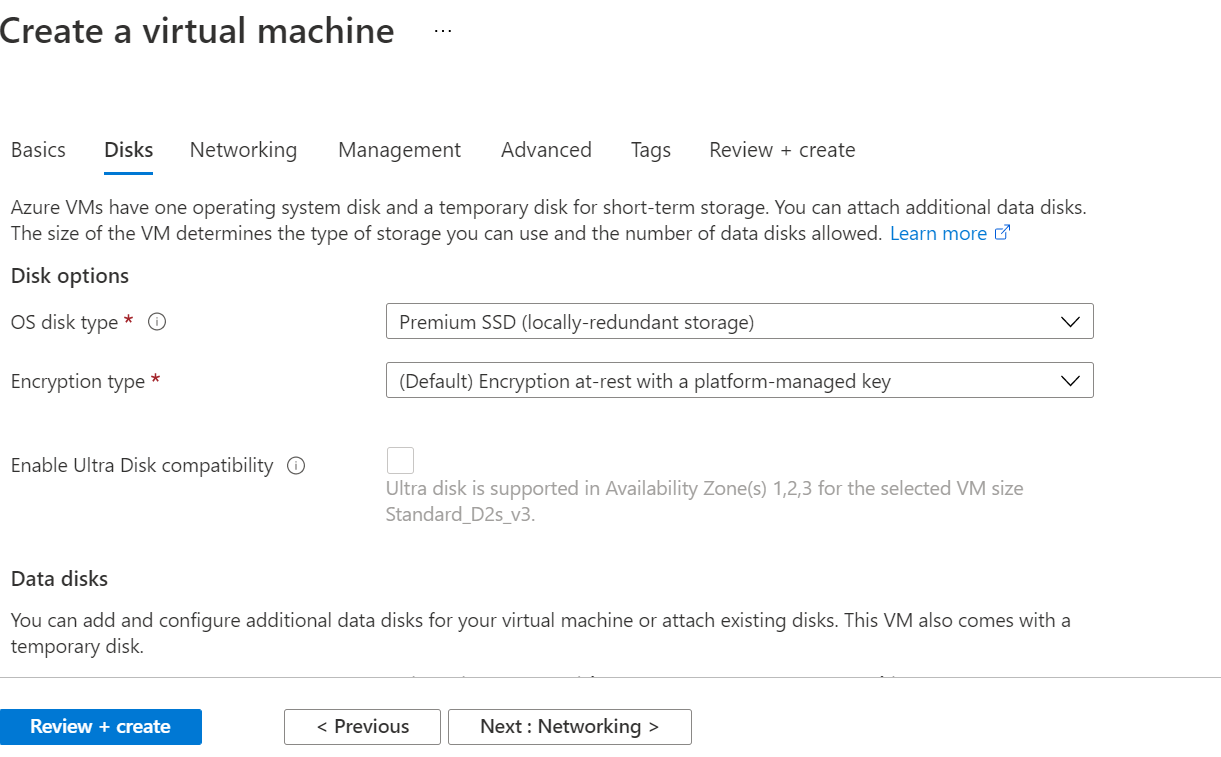
Here when you Scroll down click on option of disk as below:
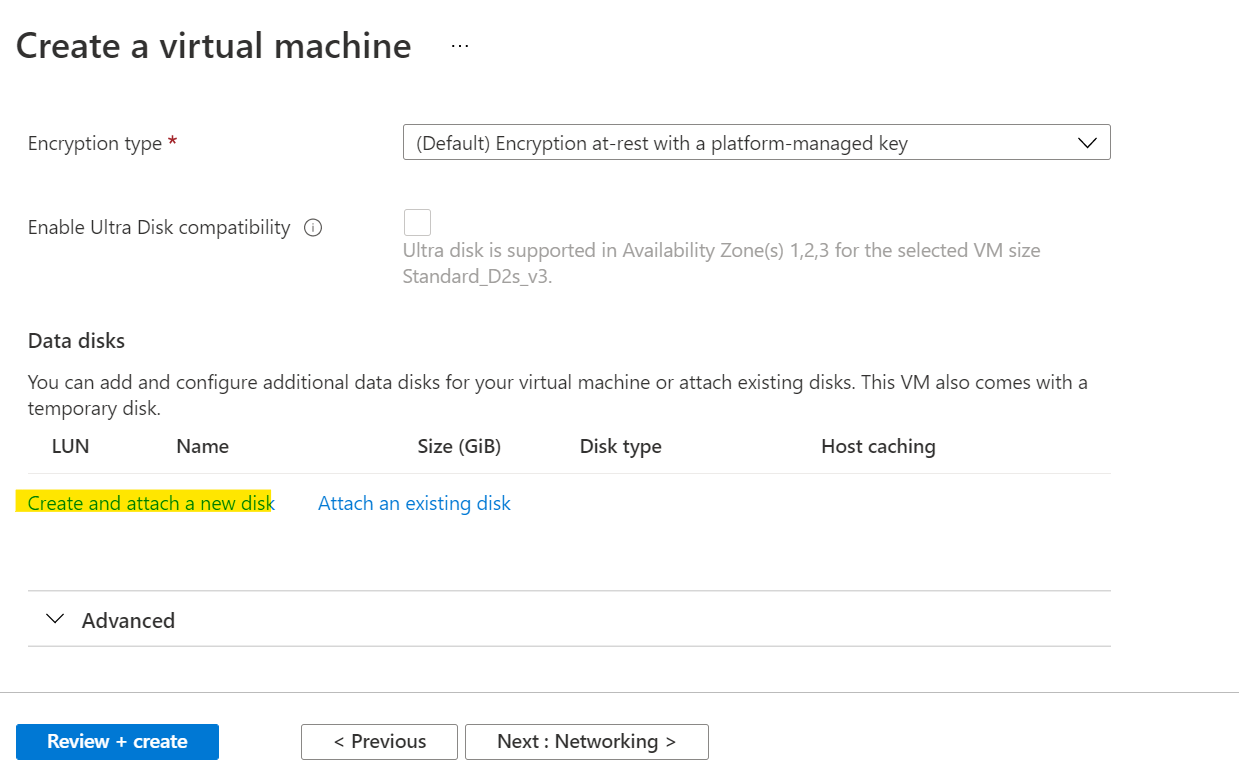
Here you will get default options like this click on the highlighted option where you will get the the list of Premium disks you can attach:
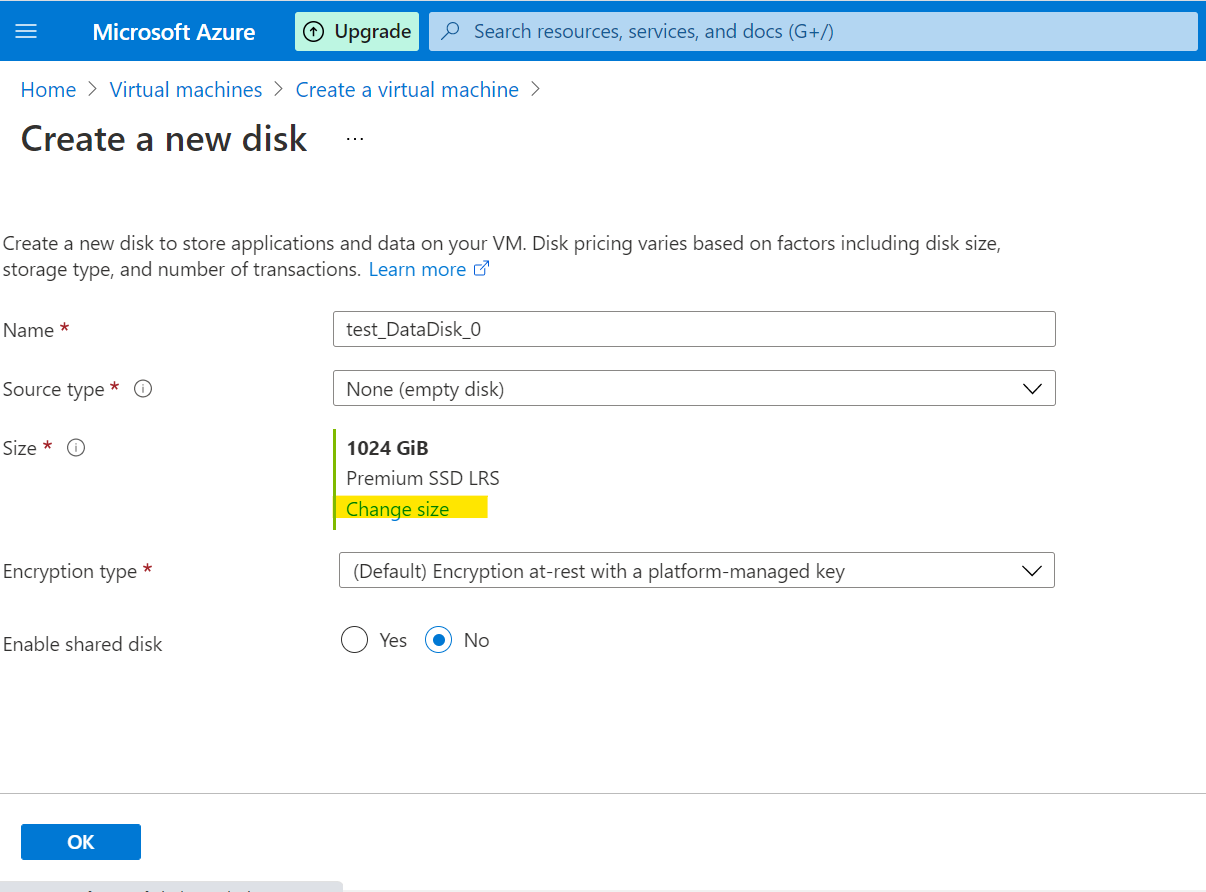
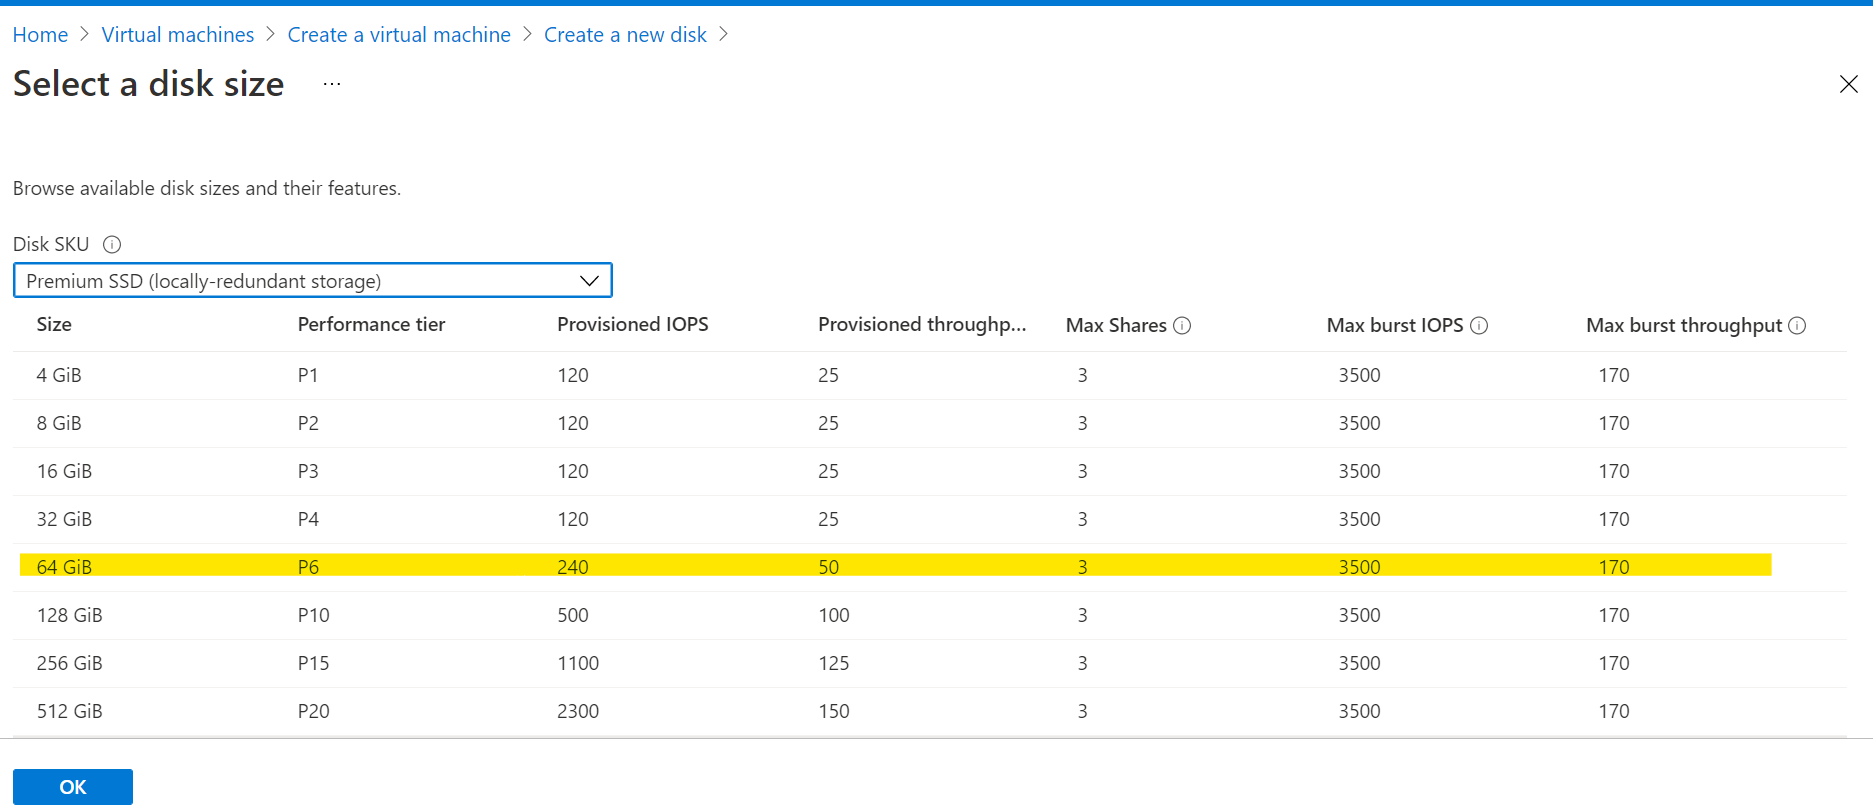
Click on Ok and then move with creation part of VM. It should show you successful deployment on Azure portal with desired OS Disk size as per your mentioned requirement.
Hope it helps!!!
Please "Accept as Answer" if it helped so it can help others in community looking for help on similar topics.
Thanks for the feedback. Unfortunately the steps you described work for Data Disks. However, I wish to adjust the size of the OS Disk at provisioning.
@Ken Onwere I do completely agree that mentioned input are for data disk and apologies for the mistake I do have few inputs regarding same for normal subscription regarding the disk but since this is specific to free trial I am running few tests and collecting information for same so I can come with some concrete answer for your queries.Allow me sometime and I will keep you posted with my findings :)
Thanks
@Ken Onwere Thank you for your patience over the matter!!!
Just to be sure I had discussion with our internal team and below are the inputs I got:
User can use "Small Disk" image present in the marketplace for smaller OS disk but these are limited sets
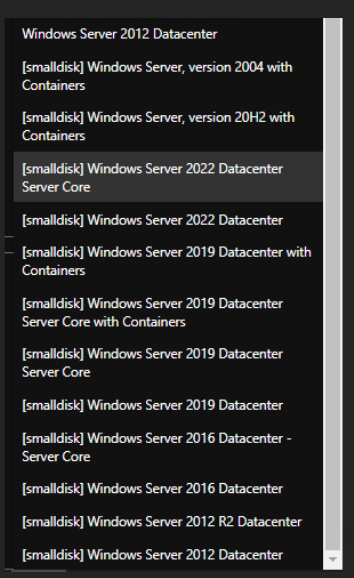
Default image size is 128gb, hence expect these windows images, reset all images will be 128 gb due to which you are not able to provision 64GB disk.
However, if he wants to use any specific image, then you can bring the image vhd file from on-premise and create VM using it with required disk. One such example is here as well.
Hope it helps!!!
If you have any further queries do let me know I would be more than happy to answer those.
Please "Accept as Answer" if it helped so it can help others in community looking for help on similar topics.
Unfortunately, the list of "smalldisk" images only works if I wish to deploy the Windows OSes listed. I'll purse other options. Thanks.
' cx='32' cy='32' r='32' /%3E%3Ctext x='50%25' y='55%25' dominant-baseline='middle' text-anchor='middle' fill='%23FFF' %3ET%3C/text%3E%3C/svg%3E)
Hello @TravisCragg-MSFT
You mentioned in your response, mark the disk as SPECIALIZED OS DISK. Can you kindly help how to mark the disk as SPECIALIZED OS DISK in Azure portal?
Thanks.
@TechGuy_MS1 This is not possible via the portal, you will need to use the CLI or Azure PowerShell.