Just to expand a little on the suggestion from David:
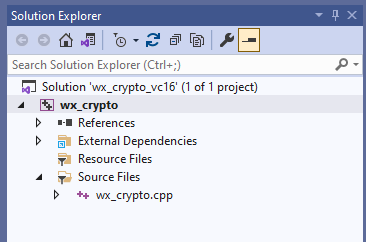
(1) In the solution which is not showing a category for
Header files, right-click on the Project node.
(2) Choose Add->New Filter and name it Header Files
(3) In the Solution Explorer window, click on the
Header Files node to give it focus.
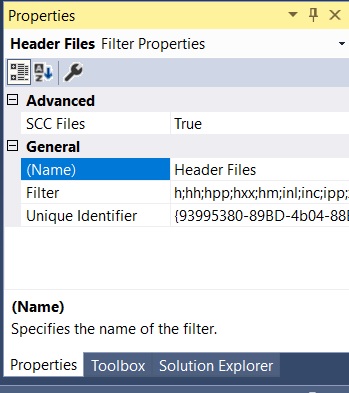
(4) Open or switch to the Properties window to see
the Properties for this filter.
(5) In the field labeled "Filter" put the extensions you want
to have treated as Header Files. David gave one example. Here
is another you can use:
h;hh;hpp;hxx;hm;inl;inc;ipp;xsd
(6) Now add a new header file to the project and see if it
appears under Header Files in the Project tree in the
Solution Explorer window.
' cx='32' cy='32' r='32' /%3E%3Ctext x='50%25' y='55%25' dominant-baseline='middle' text-anchor='middle' fill='%23FFF' %3EBK%3C/text%3E%3C/svg%3E)


' cx='32' cy='32' r='32' /%3E%3Ctext x='50%25' y='55%25' dominant-baseline='middle' text-anchor='middle' fill='%23FFF' %3EDL%3C/text%3E%3C/svg%3E)