Register a client app (Azure Data Catalog REST API)
This article shows you how to register a Data Catalog client app in Azure Active Directory (Azure AD). To allow your application access to the Data Catalog REST API, you need to register your application with Azure Active Directory. This action allows you to establish an identity for your application and specify permissions to Data Catalog REST resources.
Important Before you register a Data Catalog app you need an Azure Active Directory tenant and an organizational user.
Register a client app
Register your client app in Azure Active Directory to establish an identity for your application and specify permissions to Data Catalog REST resources. When you register a client app, such as a console app, you receive an Application (client) ID. The ID is used by the application to identify itself.
Follow this article to Register a new client application in your company Azure Active Directory: Quickstart: Register an application with the Microsoft identity platform
Open the Azure portal.
Select Azure Active Directory from the left-hand side menu.
Under the Manage section, select App registrations.
Select + New registration.
Enter a name for the application (the service principal name), such as Azure Data Catalog account.
Select Accounts in this organizational directory only as the account type.
For the Redirect URI field, enter any URL you want. The website doesn’t have to exist.
Then select Register.
On your new app registration, select API Permissions. Select + Add a permission.
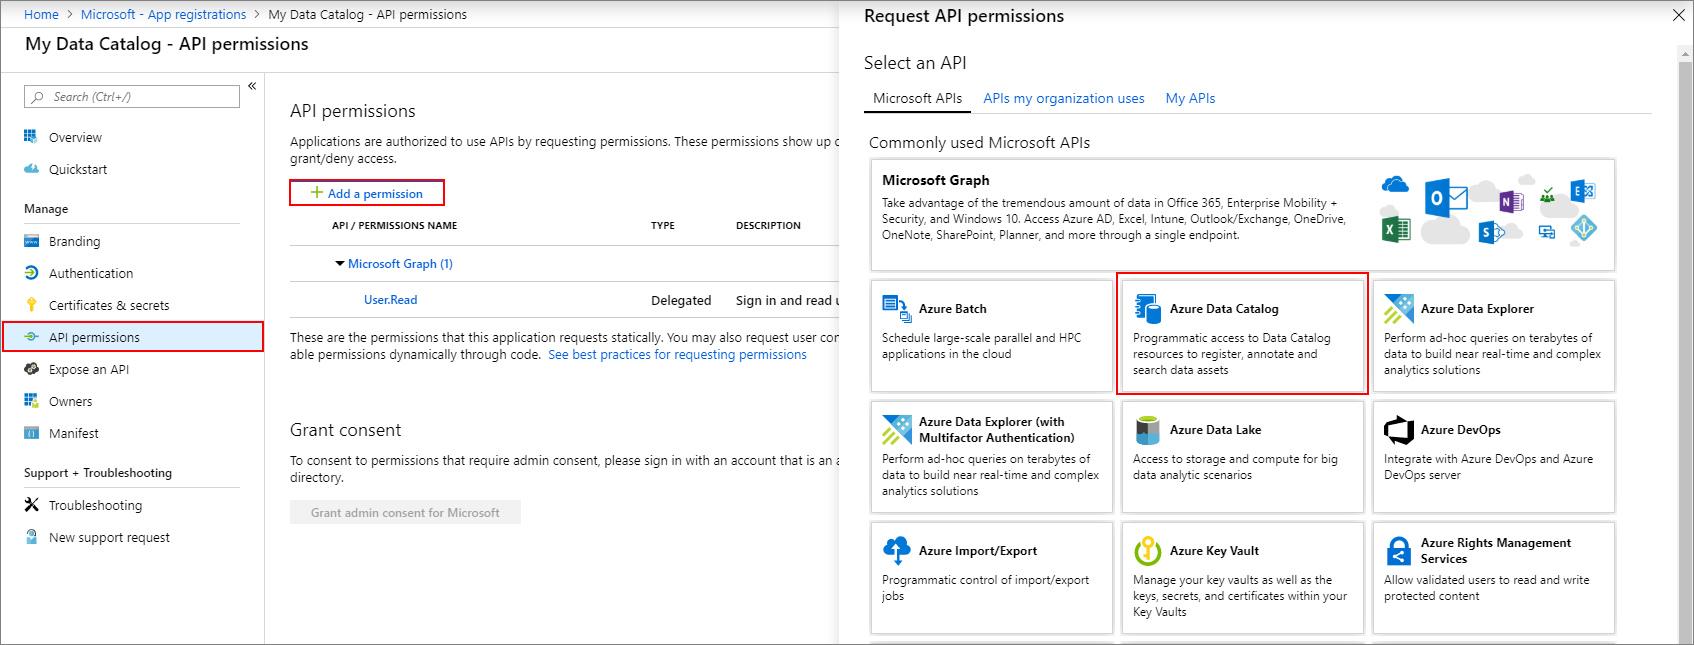
In the list of Permissions, select Azure Data Catalog
For the choice under What type of permissions does your application require, select the option Delegated permissions.
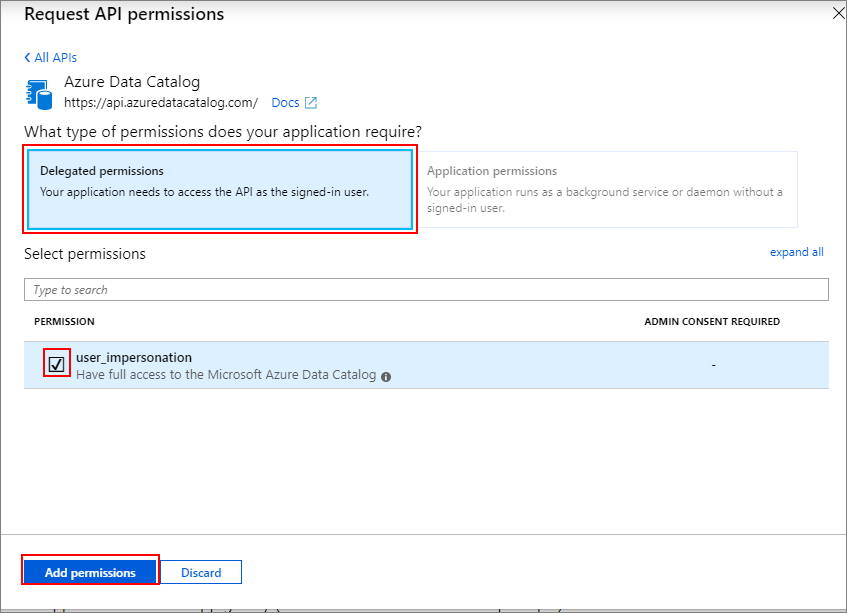
Select the checkbox to grant permission user_impersonation. Then select Add permission.
Get the Application (client) ID
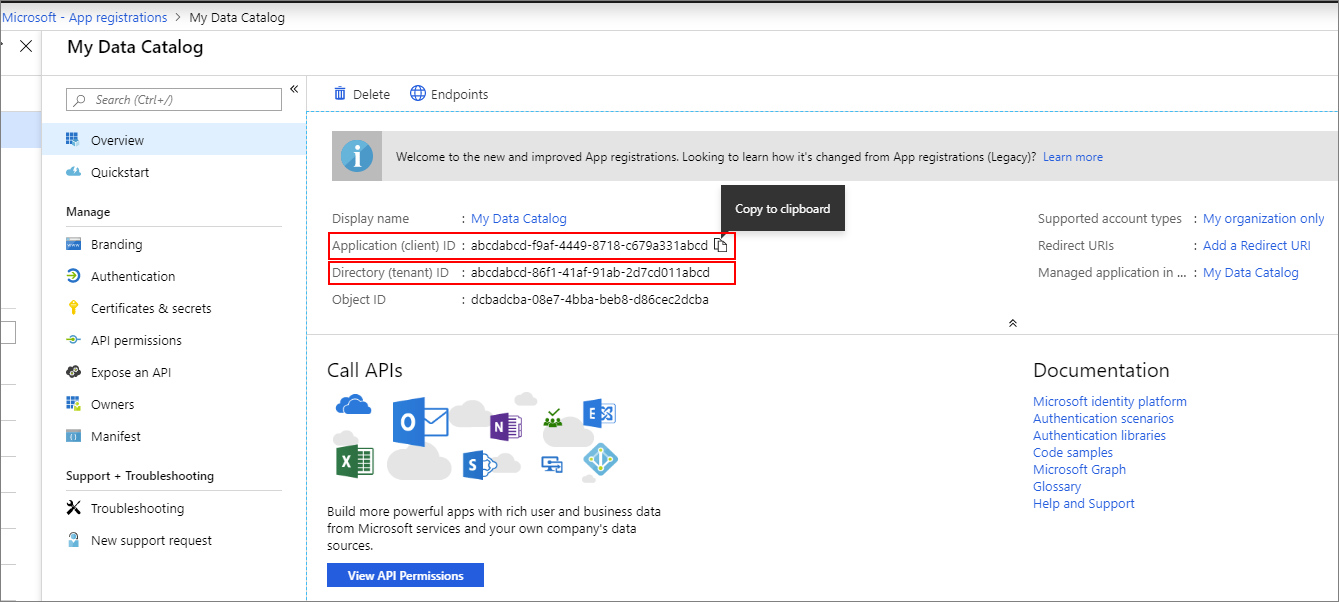
You need to copy the Application (client) ID and Directory (tenant) ID values.
If you've just created the App registration, select the Overview page of the App registration to get ID information.
If you've closed the App registration already, here's how to find it:
Open the Azure portal.
Select Azure Active Directory from the list of resources.
Under the Manage heading, select App Registrations page. A list of All applications. Select the tab Owned applications to see only the applications you've created.
Select the row for the App registration you want to use.
Select the Application (client) ID. Use the copy button to copy the value, and paste into notepad or another temporary place.
Select the Directory (tenant) ID. Use the copy button to copy the value, and paste into notepad or another temporary place.
Configure the Azure Data Catalog service principal
Browse to http://www.azuredatacatalog.com
Select Settings. Then add the service principal to the appropriate Catalog User.
Based on the business need, you can add it to glossary admin or catalog admin.
Note
The service principal format is
<clientid>@<tenantid>. To locate the values to insert for the <placeholders>, use the Azure portal and open the Azure Active Directory.- The Clientid value is listed on the Azure Active Directory App registrations (Legacy) page in the Application ID column.
- The TenantID value is listed on the Azure Active Directory Properties page as the Directory ID property.
Follow the Service Principal Authentication sample REST API code to build your solution.