Troubleshoot issues with in-app marketing
This article helps you troubleshoot and resolve issues related to in-app marketing.
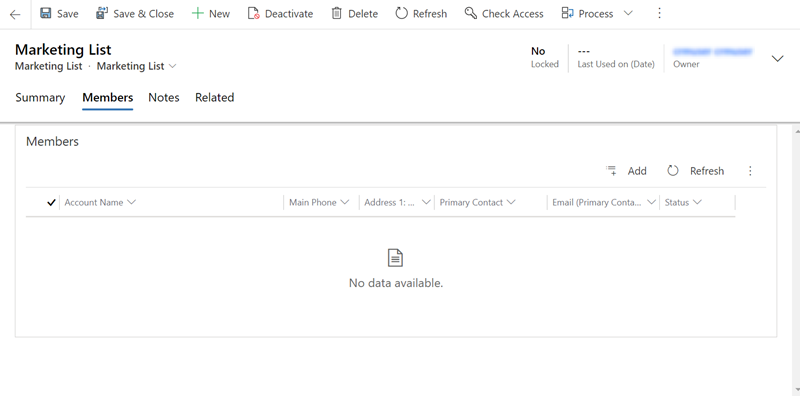
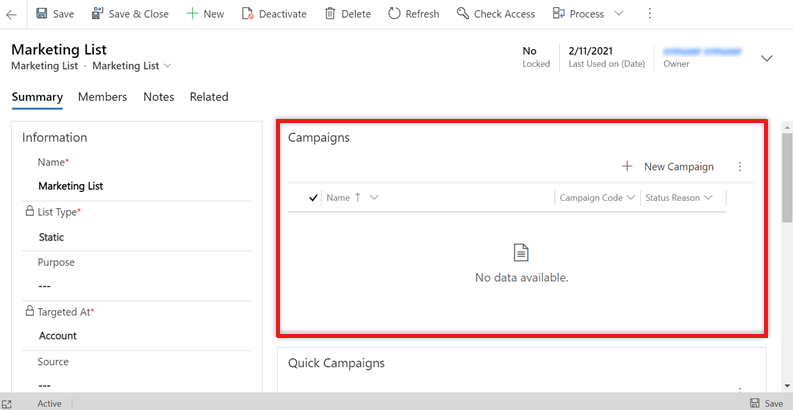
Issue 1 - Members view isn't available when you open the Marketing List form
Cause
The issue is occurring due to the customization of views for each subgrid in the Marketing List form, causing the member list to appear empty.
Resolution
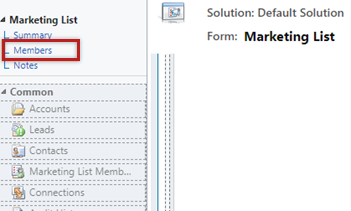
Go to Advanced Settings > Settings > Customizations > Customize the System.
From the site map, open Entities > Marketing List > Forms.
From the list of forms, select the Marketing List form.

On the Marketing List form, from the Marketing List site map, select Members.
Select Contacts, and then select Change Properties. The Set Properties window opens.
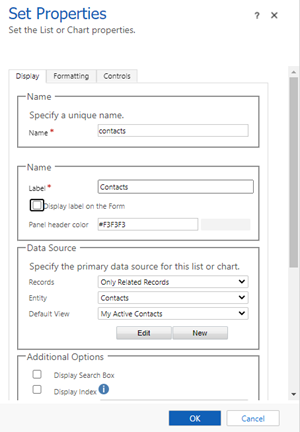
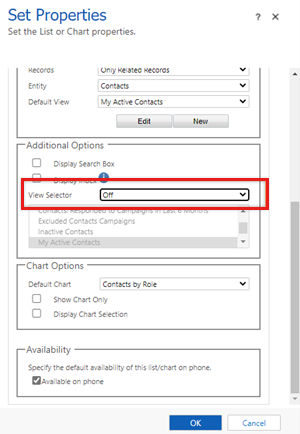
In the Additional Options section, from the View Selector drop-down list, select Show Selected Views.
The list of additional options appears.
Select the My Active Contacts view, and from the View Selector drop-down list, select Off.
In the Name section, clear the Display label on the Form checkbox.
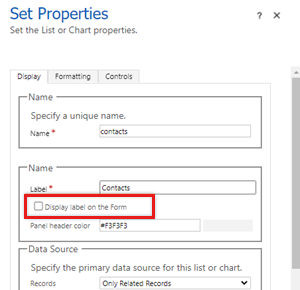
Select OK.
Repeat steps 5 through 9 for Accounts and Leads.
Save and publish the form.
Issue 2 - Can't associate a campaign created from the Marketing List form with a Marketing List record in Unified Interface
Cause
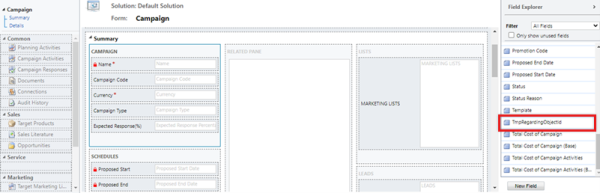
The issue occurs because the attribute TmpRegardingObjectId has been removed from the Campaigns form.
Resolution
Go to Advanced Settings > Settings > Customizations > Customize the System.
From the site map, open Entities > Campaign > Forms.
From the list of forms, select the Campaign form.

From the Field Explorer pane displayed on the right side of the page, add the field TmpRegardingObjectId to the form.
Select the TmpRegardingObjectId field, and then select Change Properties.
The Set Properties window opens.
In the Label section, clear the Display label on the Form checkbox, and in the Visibility section, clear the Visible by default checkbox.

Save and publish the form.
Issue 3 - Can't find a related account field for a member account by using advanced find in Unified Interface
Cause
The issue occurs because the Contact or Account display name has been changed in the application, and the Company Name (RELATED_TYPE) picks the related type from the changed display name.
Resolution
In Unified Interface, the company name entity is available as Company Name (Account). For example, if you rename the Account as Organization, the entity will be renamed as Company Name (Organization).
Issue: Can't send emails by using the email quick campaign distribution list
Cause
The issue occurs because of one of the following reasons:
- The users don't have permissions to send emails on behalf of other users.
- The owner of the record (marketing list members) hasn't allowed other Dynamics 365 users to send emails on the owner's behalf.
Resolution
To resolve the issue, do one of the following:
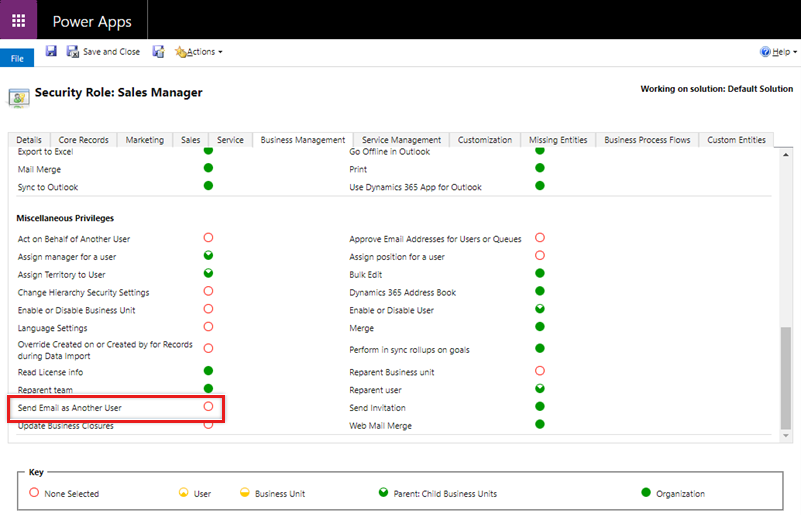
For the user who's creating the quick campaign, the Send Email as Another User privilege must be assigned to at least one role assigned to the user. For more information, see Create a security role with team member's privilege inheritance.
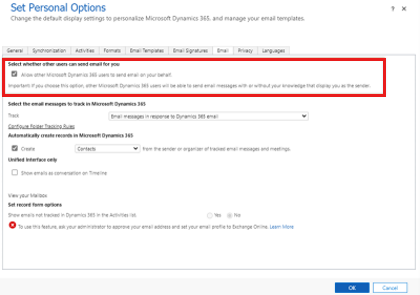
For the owner of the record, the Allow other Microsoft Dynamics 365 users to send email on your behalf checkbox must be selected under Select whether other users can send email for you on the Set Personal Options dialog box.
Issue 4 - Can't change the form field in the email within the quick campaign wizard
Cause
The issue is caused by insufficient permissions for the Send Email as another User option for your role.
Resolution
Provide sufficient permissions for the Send Email as another User option to one of your roles.
Issue 5 - Can't see email templates in the distribute dialog box
Cause
The email template selector in Unified Interface relies on certain access levels for different entities.
Resolution
To resolve the issue, users require access to system user records. Provide the access to system users by assigning them security roles in your Dynamics 365 organization. For more information, see Configure user security to resources in an environment.
Issue 6 - The campaign distribution process is stuck with a status of Pending or Failed
Cause
The campaign distribution process requires a workflow to run in the background. When the workflow is disabled, campaign distribution won't be completed and will be stuck in a Pending or Failed state.
Resolution
To resolve this issue, enable the workflow background process and then activate the ActivityPropagation process.
Enable the workflow background process
Go to Advanced Settings > Settings > System > System Jobs.
Go to ActivityPropagation jobs and under Process Sessions, select the job that matches or approximately matches, the date and time at which the quick campaign was run.
Verify that an error message is displayed under the details section, stating that the async operation was skipped because the org is in Disable Background Processing mode. Update the settings for your environment by doing the following:
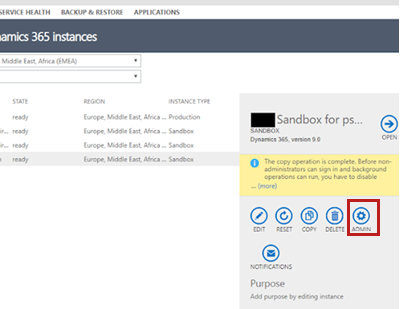
Go to the Dynamics 365 admin center, select your instance, and then select Admin Settings.
Clear the Disable background operations checkbox.
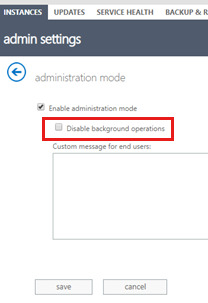
Save your settings, and exit.
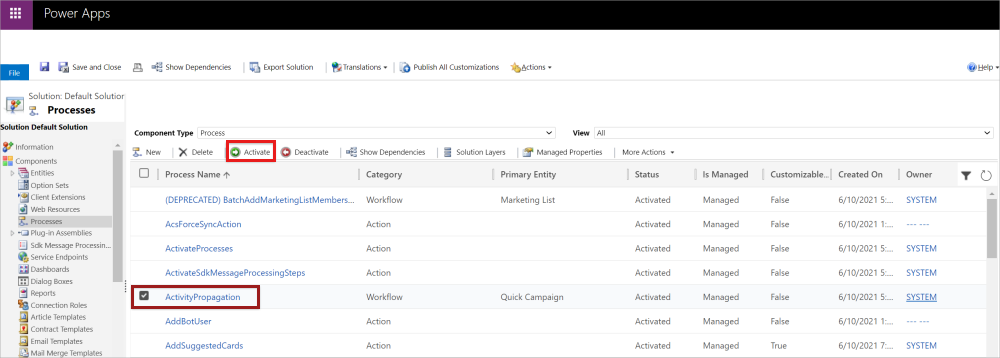
Activate the ActivityPropagation process
Go to Advanced Settings > Settings > Customizations > Customize the System.
From the site map, go to Processes.
In the view selector, select All.
All the available processes are displayed.
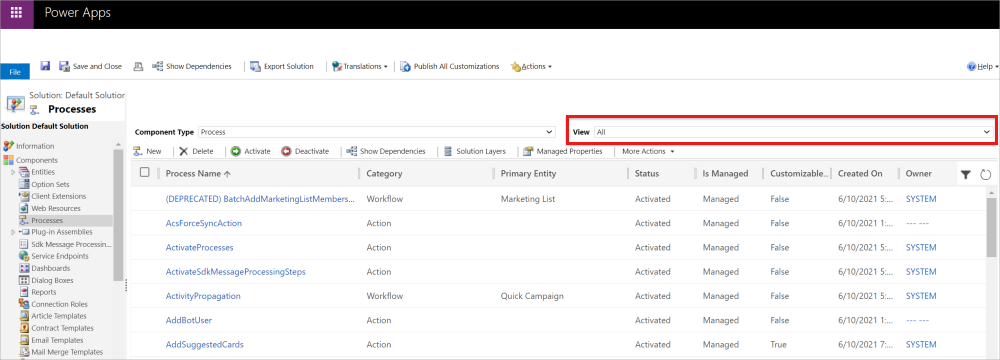
Select the ActivityPropagation process, and then select Activate.
Issue 7 - My quick campaign failed and it's set to Aborted
Cause
The issue is caused by the failure of a stack trace that's related to the custom plug-ins in the workflow process.
Resolution
- Go to Advanced Settings > Settings > System > System Jobs.
- Go to ActivityPropagation jobs and under Process Sessions, select the job that matches or approximately matches, the date and time at which the quick campaign was run.
The system job contains information that includes the stack trace that has the failure. Resolve the failure as mentioned in the stack trace failure documentation.
Issue 8 - The quick campaign is executing an unstoppable loop and generating thousands of failure records
Cause
Due to unknown conditions, when a workflow fails to create campaign activities, it goes into an unstoppable loop and keeps creating campaign activities, which all fail. You'll observe that the number of failures keeps increasing until it exceeds the number of members in the targeted marketing list.
Resolution
Deactivate the ActivityPropagation workflow, and then activate it again.
Go to Advanced Settings > Settings > Customizations > Customize the System.
From the site map, go to Processes.
In the view selector, select All.
All the available processes are displayed.
Select the ActivityPropagation workflow, and then select Deactivate.
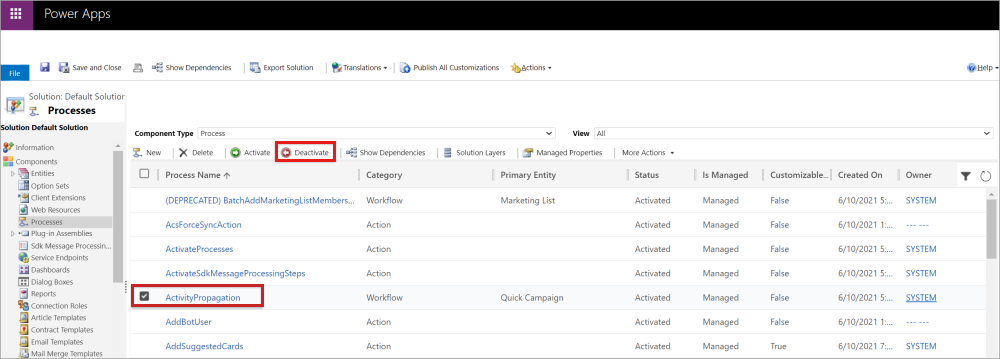
Wait 24 hours, and then reactivate the ActivityPropagation workflow.
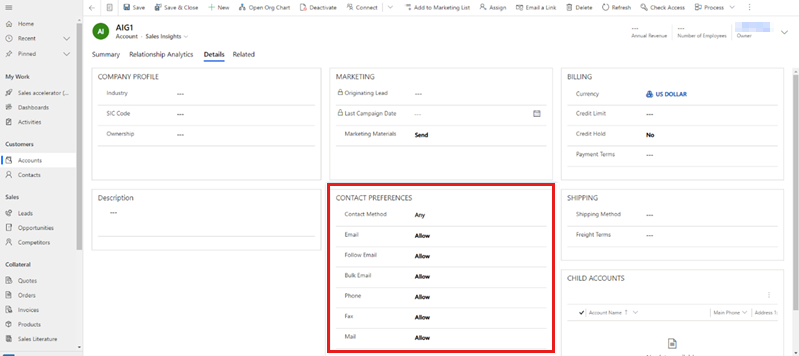
Issue 9 - Campaign distribution doesn't create activities on target entities
Target records (account, contact, and lead) can identify their preferences for receiving marketing materials through campaign distribution: these include emails, phones, fax, and bulk mail.
Campaign activities are created for members of the Marketing List only when their preferences are set to Allow or Send.
Issue 10 - Campaign distribution is failing for some members
Cause
Campaign distribution is based on the members in the marketing list. The member can be an account, contact, or lead. A campaign distribution can fail for members due to one of the following reasons:
- There's no email address associated with the member.
- The email address associated with the member is invalid.
- The member has configured the Send Marketing Material field in the member record as Do not send.
Resolution
Review the detailed reason for the failure in the Excluded members grid, and take any necessary action.
Issue 11 - The Campaign tab isn't available in account, contact, or lead forms in Unified Interface
Cause
Because there's no direct relationship between the campaign table and accounts, contacts, or leads, the Campaign tab isn't available in those forms. The only way to view the campaign list is through a distributed campaign activity, because a distributed campaign activity is the true indication that a target entity is being used in a campaign.
Resolution
To resolve the issue, add the Campaign Activities tab to the form.
Note
In this example, we're using the Account entity.
Go to Advanced Settings > Settings > Customizations > Customize the System.
From Components, select Entities > Account > Forms.
Open the form to which you want to add the subgrid.
On the form page, select the Insert tab, and then select One column.
A new column is added as a tab.
Select the tab, and then select Change Properties. The Tab Properties dialog opens.
Enter the values for Name and Label as Campaign Activities, and then select OK. The tab is then renamed as Campaign Activities.
Select the Campaign Activities tab, go to the Insert tab, and then select Sub-Grid.
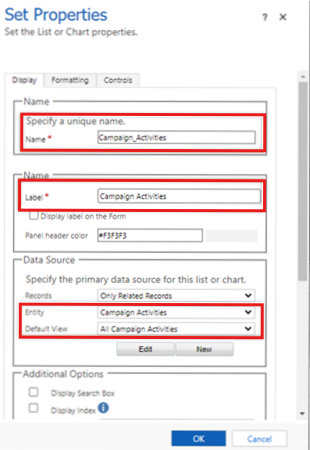
The Set Properties dialog for the subgrid opens.
On the Display tab, enter the following information:
- In the Name section, for the unique name, enter Campaign_Activities.
- In the Name section, for Label, enter Campaign Activities.
- In the Data Source section, do the following:
- For Entity, select Campaign Activities.
- For Default View, select All Campaign Activities.
Save the changes and publish the form.
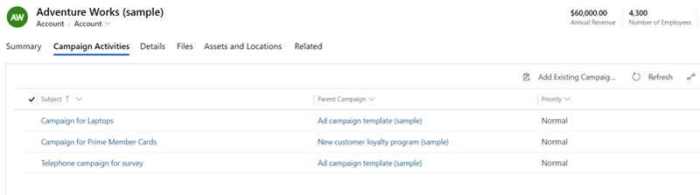
To verify that the issue has been resolved, open the account that has been used in campaigns and has some distributed campaign activities. Select the Campaign Activities tab to verify that the related campaign activities appear.
Issue 12 - User is getting timed out when trying to delete a static marketing list
Cause
Deletion of a static marketing list with a large number of members (more than 50,000) takes much time, and results into a time-out.
Resolution
It's recommended to first remove all members from the marketing list by using Remove using Advanced Find, and then delete the marketing list. For the better performance of application and avoid time outs, remove the members in the marketing list in groups of 10,000 at a time. For example, if there are 20,000 members in a marketing list and you want to remove the members. Remove 10,000 members first and then remove the other 10,000.
الملاحظات
قريبًا: خلال عام 2024، سنتخلص تدريجيًا من GitHub Issues بوصفها آلية إرسال ملاحظات للمحتوى ونستبدلها بنظام ملاحظات جديد. لمزيد من المعلومات، راجع https://aka.ms/ContentUserFeedback.
إرسال الملاحظات وعرضها المتعلقة بـ