How to customize the Azure API Management developer portal using templates
There are three fundamental ways to customize the developer portal in Azure API Management:
- Edit the contents of static pages and page layout elements
- Update the styles used for page elements across the developer portal
- Modify the templates used for pages generated by the portal (explained in this guide)
Templates are used to customize the content of system-generated developer portal pages (for example, API docs, products, user authentication, etc.). Using DotLiquid syntax, and a provided set of localized string resources, icons, and page controls, you have great flexibility to configure the content of the pages as you see fit.
Note
The following documentation content is about the deprecated developer portal. You can continue to use it, as per usual, until its retirement in October 2023, when it will be removed from all API Management services. The deprecated portal will only receive critical security updates. Refer to the following articles for more details:
Availability
Important
This feature is available in the Premium, Standard, Basic, and Developer tiers of API Management.
For feature availability in the v2 tiers (preview), see the v2 tiers overview.
Developer portal templates overview
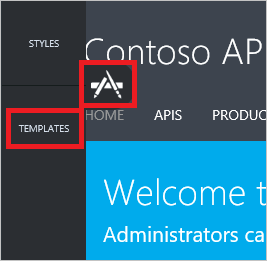
Editing templates is done from the Developer portal while being logged in as an administrator. To get there first open the Azure portal and click Developer portal from the service toolbar of your API Management instance.
To access the developer portal templates, click the customize icon on the left to display the customization menu, and click Templates.
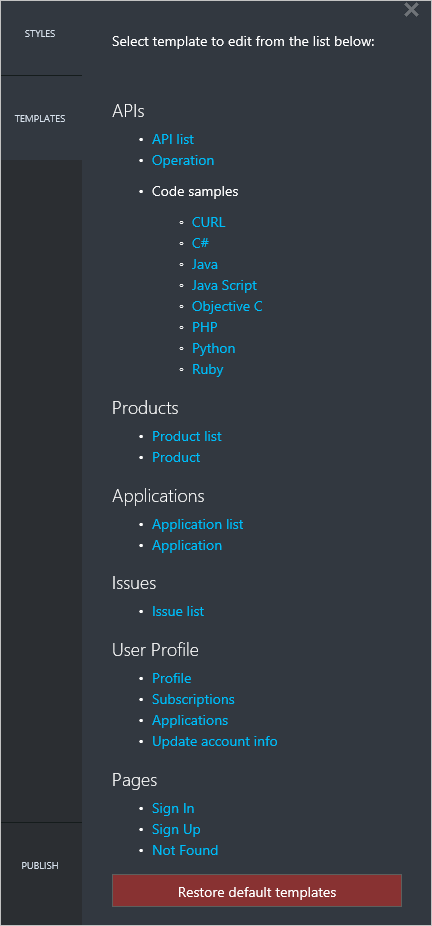
The templates list displays several categories of templates covering the different pages in the developer portal. Each template is different, but the steps to edit them and publish the changes are the same. To edit a template, click the name of the template.
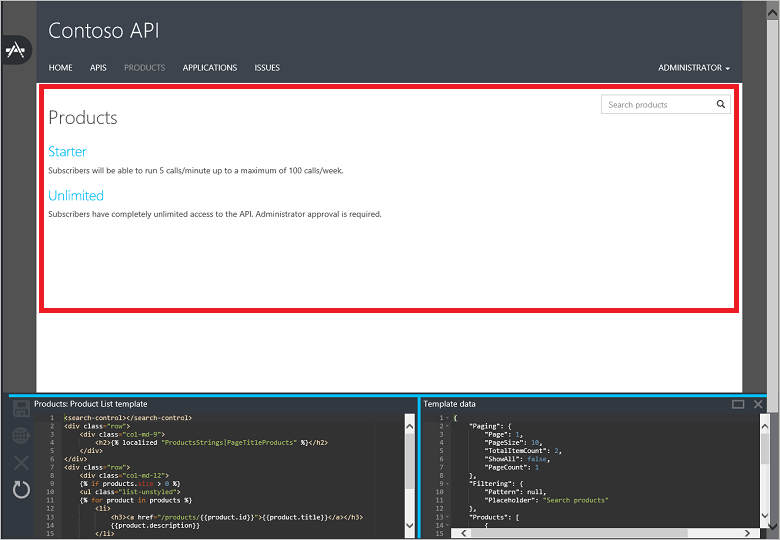
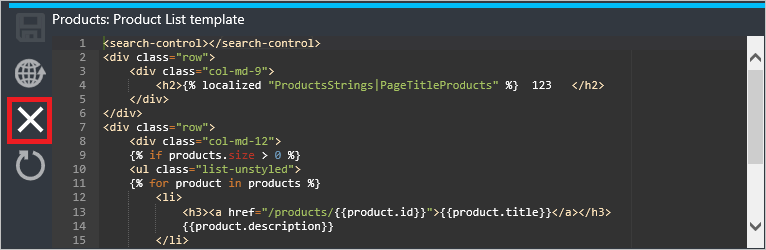
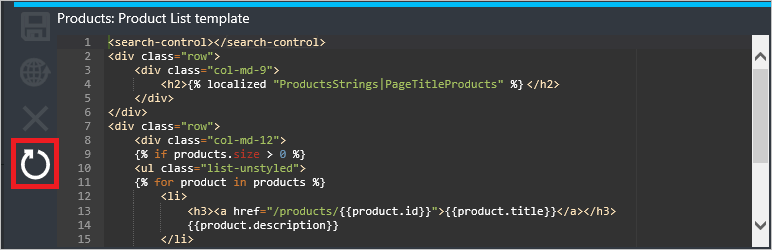
Clicking a template takes you to the developer portal page that is customizable by that template. In this example, the Product list template is displayed. The Product list template controls the area of the screen indicated by the red rectangle.
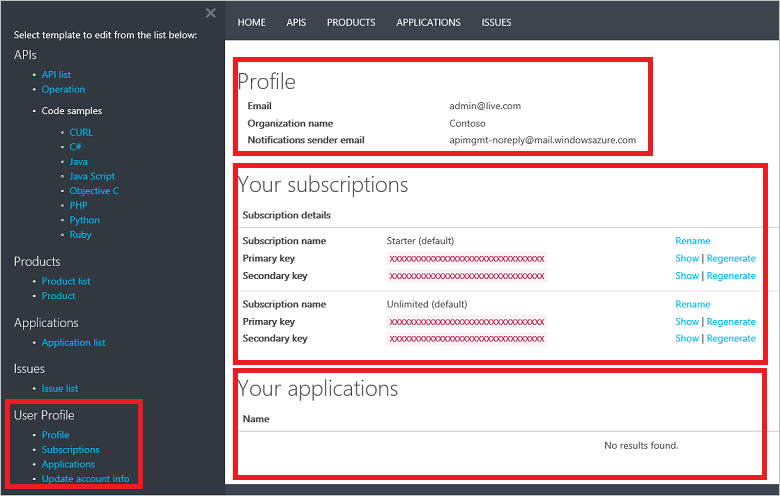
Some templates, like the User Profile templates, customize different parts of the same page.
The editor for each developer portal template has two sections displayed at the bottom of the page. The left-hand side displays the editing pane for the template, and the right-hand side displays the data model for the template.
The template editing pane contains the markup that controls the appearance and behavior of the corresponding page in the developer portal. The markup in the template uses the DotLiquid syntax. One popular editor for DotLiquid is DotLiquid for Designers. Any changes made to the template during editing are displayed in real-time in the browser, but are not visible to your customers until you save and publish the template.

The Template data pane provides a guide to the data model for the entities that are available for use in a particular template. It provides this guide by displaying the live data that are currently displayed in the developer portal. You can expand the template panes by clicking the rectangle in the upper-right corner of the Template data pane.
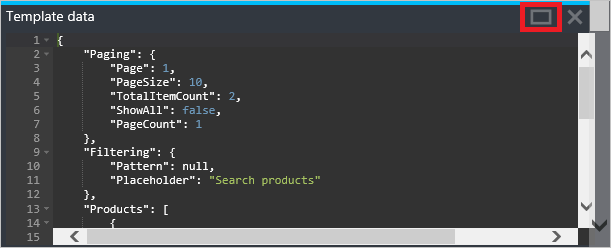
In the previous example, there are two products displayed in the developer portal that were retrieved from the data displayed in the Template data pane, as shown in the following example:
{
    "Paging": {
        "Page": 1,
        "PageSize": 10,
        "TotalItemCount": 2,
        "ShowAll": false,
        "PageCount": 1
    },
    "Filtering": {
        "Pattern": null,
        "Placeholder": "Search products"
    },
    "Products": [
        {
            "Id": "56ec64c380ed850042060001",
            "Title": "Starter",
            "Description": "Subscribers will be able to run 5 calls/minute up to a maximum of 100 calls/week.",
            "Terms": "",
            "ProductState": 1,
            "AllowMultipleSubscriptions": false,
            "MultipleSubscriptionsCount": 1
        },
        {
            "Id": "56ec64c380ed850042060002",
            "Title": "Unlimited",
            "Description": "Subscribers have completely unlimited access to the API. Administrator approval is required.",
            "Terms": null,
            "ProductState": 1,
            "AllowMultipleSubscriptions": false,
            "MultipleSubscriptionsCount": 1
        }
    ]
}
The markup in the Product list template processes the data to provide the desired output by iterating through the collection of products to display information and a link to each individual product. Note the <search-control> and <page-control> elements in the markup. These control the display of the searching and paging controls on the page. ProductsStrings|PageTitleProducts is a localized string reference that contains the h2 header text for the page. For a list of string resources, page controls, and icons available for use in developer portal templates, see API Management developer portal templates reference.
<search-control></search-control>
<div class="row">
    <div class="col-md-9">
        <h2>{% localized "ProductsStrings|PageTitleProducts" %}</h2>
    </div>
</div>
<div class="row">
    <div class="col-md-12">
    {% if products.size > 0 %}
    <ul class="list-unstyled">
    {% for product in products %}
        <li>
            <h3><a href="/products/{{product.id}}">{{product.title}}</a></h3>
            {{product.description}}
        </li>
    {% endfor %}
    </ul>
    <paging-control></paging-control>
    {% else %}
    {% localized "CommonResources|NoItemsToDisplay" %}
    {% endif %}
    </div>
</div>
To save a template
To save a template, click save in the template editor.

Saved changes are not live in the developer portal until they are published.
To publish a template
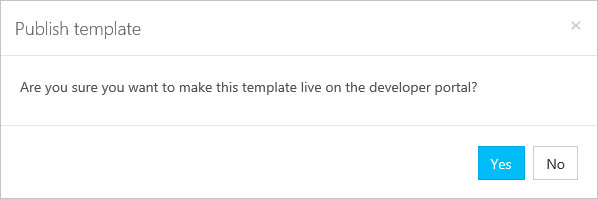
Saved templates can be published either individually, or all together. To publish an individual template, click publish in the template editor.

Click Yes to confirm and make the template live on the developer portal.
To publish all currently unpublished template versions, click Publish in the templates list. Unpublished templates are designated by an asterisk following the template name. In this example, the Product list and Product templates are being published.

Click Publish customizations to confirm.
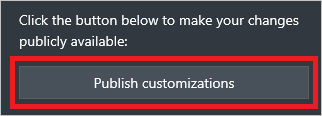
Newly published templates are effective immediately in the developer portal.
To revert a template to the previous version
To revert a template to the previous published version, click revert in the template editor.
Click Yes to confirm.
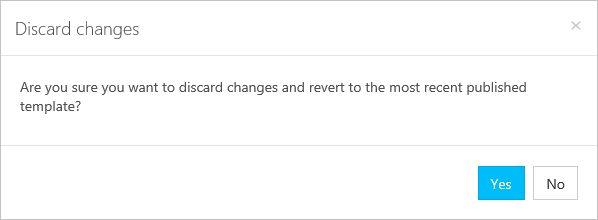
The previously published version of a template is live in the developer portal once the revert operation is complete.
To restore a template to the default version
Restoring templates to their default version is a two-step process. First the templates must be restored, and then the restored versions must be published.
To restore a single template to the default version click restore in the template editor.
Click Yes to confirm.

To restore all templates to their default versions, click Restore default templates on the template list.
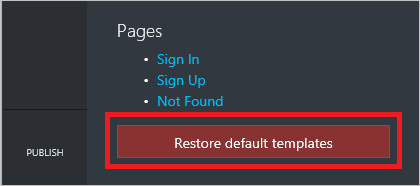
The restored templates must then be published individually or all at once by following the steps in To publish a template.
Next steps
For reference information for developer portal templates, string resources, icons, and page controls, see API Management developer portal templates reference.