Configure active geo-replication for Enterprise Azure Cache for Redis instances
In this article, you learn how to configure an active geo-replicated cache using the Azure portal.
Active geo-replication groups up to five instances of Enterprise Azure Cache for Redis into a single cache that spans across Azure regions. All instances act as the local, primary caches. An application decides which instance or instances to use for read and write requests.
Note
Data transfer between Azure regions is charged at standard bandwidth rates.
Scope of availability
| Tier | Basic, Standard | Premium | Enterprise, Enterprise Flash |
|---|---|---|---|
| Available | No | No | Yes |
The Premium tier of Azure Cache for Redis offers a version of geo-replication called passive geo-replication. Passive geo-replication provides an active-passive configuration.
Active geo-replication prerequisites
There are a few restrictions when using active geo replication:
- Only the RediSearch and RedisJSON modules are supported
- On the Enterprise Flash tier, only the No Eviction eviction policy can be used. All eviction policies are supported on the Enterprise tier.
- Data persistence isn't supported because active geo-replication provides a superior experience.
- You can't add an existing (that is, running) cache to a geo-replication group. You can only add a cache to a geo-replication group when you create the cache.
- All caches within a geo-replication group must have the same configuration. For example, all caches must have the same SKU, capacity, eviction policy, clustering policy, modules, and TLS setting.
- You can't use the
FLUSHALLandFLUSHDBRedis commands when using active geo-replication. Prohibiting the commands prevents unintended deletion of data. Use the flush control plane operation instead.
Create or join an active geo-replication group
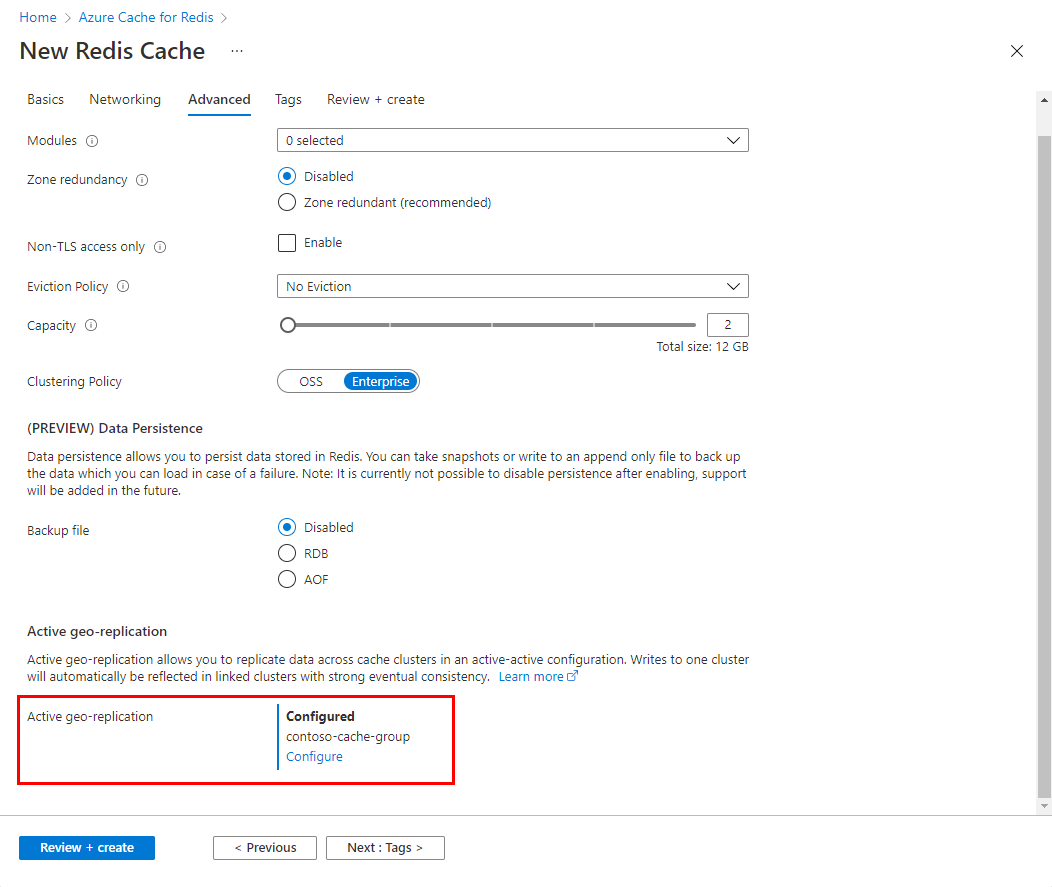
When creating a new Azure Cache for Redis resource, select the Advanced tab. Complete the first part of the form including clustering policy. For more information on choosing Clustering policy, see Clustering Policy.
Select Configure to set up Active geo-replication.

Create a new replication group for a first cache instance. Or, select an existing one from the list.
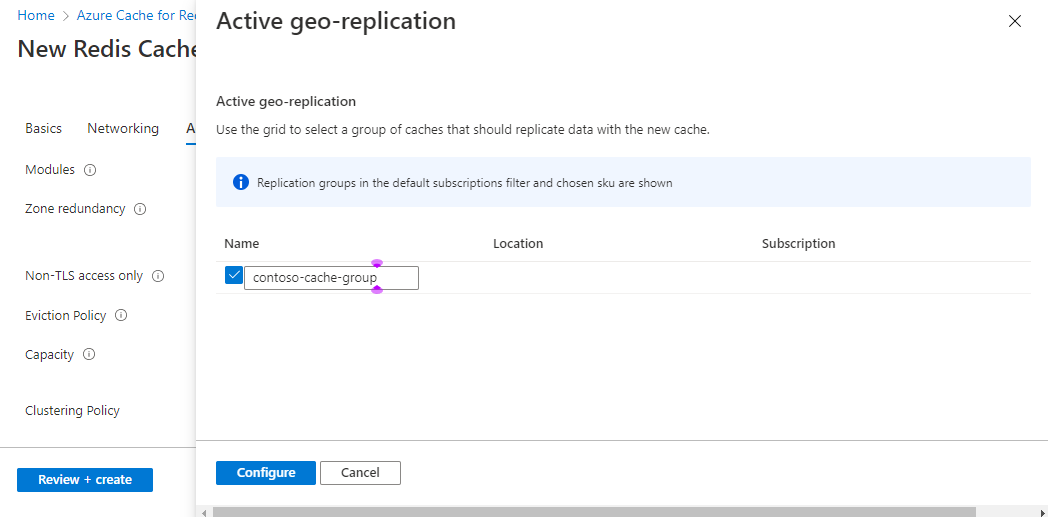
Select Configure to finish.
Wait for the first cache to be created successfully. When complete, you see Configured set for Active geo-replication. Repeat the above steps for each cache instance in the geo-replication group.
Remove from an active geo-replication group
To remove a cache instance from an active geo-replication group, you just delete the instance. The remaining instances then reconfigure themselves automatically.
Force-unlink if there's a region outage
In case one of the caches in your replication group is unavailable due to region outage, you can forcefully remove the unavailable cache from the replication group.
You should remove the unavailable cache because the remaining caches in the replication group start storing the metadata that hasn’t been shared to the unavailable cache. When this happens, the available caches in your replication group might run out of memory.
Go to Azure portal and select one of the caches in the replication group that is still available.
Select to Active geo-replication in the Resource menu on the left to see the settings in the working pane.
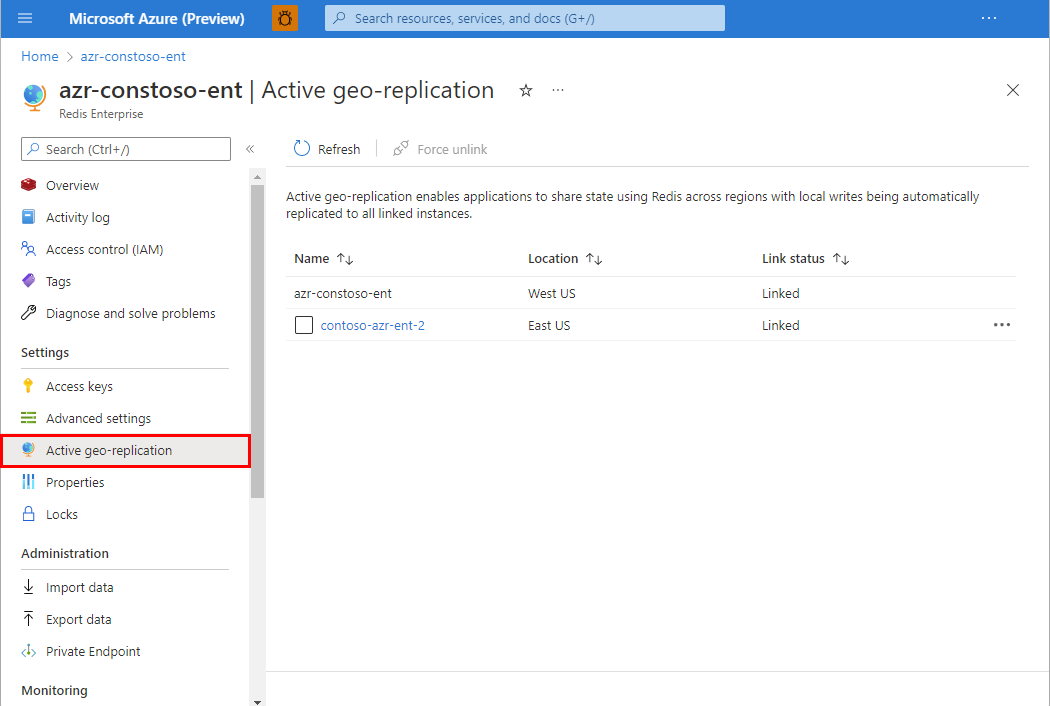
Select the cache that you need to force-unlink by checking the box.
Select Force unlink and then OK to confirm.
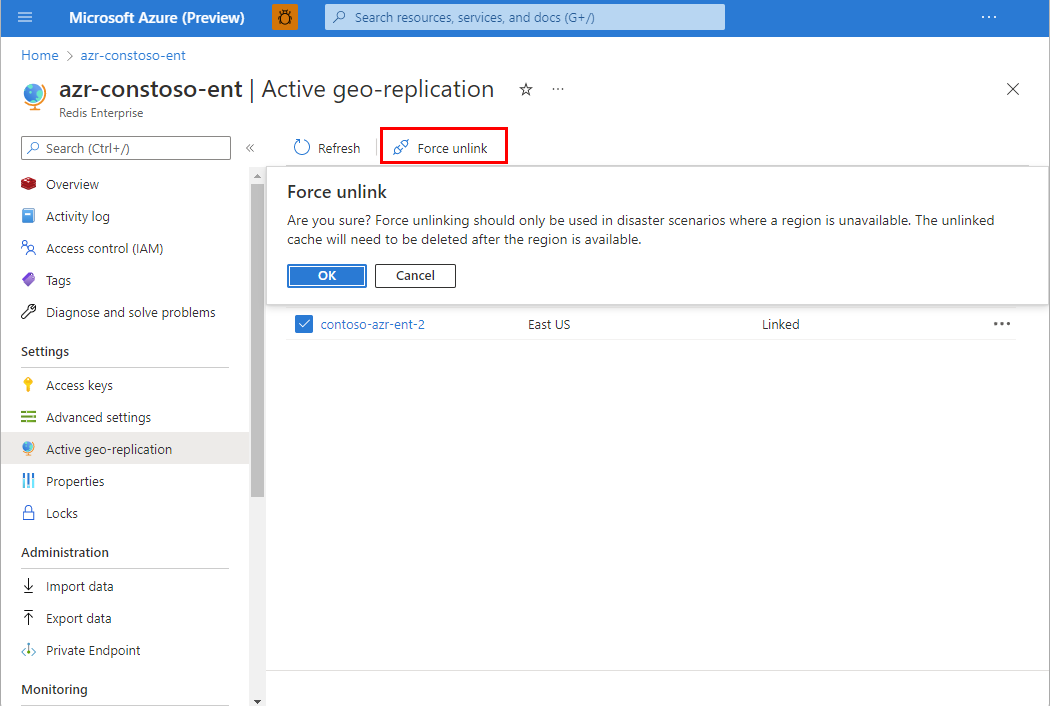
Once the affected region's availability is restored, you need to delete the affected cache, and recreate it to add it back to your replication group.
Set up active geo-replication using the Azure CLI or PowerShell
Azure CLI
Use the Azure CLI to create a new cache and geo-replication group, or to add a new cache to an existing geo-replication group. For more information, see az redisenterprise create.
Create new Enterprise instance in a new geo-replication group using Azure CLI
This example creates a new Azure Cache for Redis Enterprise E10 cache instance called Cache1 in the East US region. Then, the cache is added to a new active geo-replication group called replicationGroup:
az redisenterprise create --location "East US" --cluster-name "Cache1" --sku "Enterprise_E10" --resource-group "myResourceGroup" --group-nickname "replicationGroup" --linked-databases id="/subscriptions/34b6ecbd-ab5c-4768-b0b8-bf587aba80f6/resourceGroups/myResourceGroup/providers/Microsoft.Cache/redisEnterprise/Cache1/databases/default"
To configure active geo-replication properly, the ID of the cache instance being created must be added with the --linked-databases parameter. The ID is in the format:
/subscriptions/<your-subscription-ID>/resourceGroups/<your-resource-group-name>/providers/Microsoft.Cache/redisEnterprise/<your-cache-name>/databases/default
Create new Enterprise instance in an existing geo-replication group using Azure CLI
This example creates a new Enterprise E10 cache instance called Cache2 in the West US region. Then, the script adds the cache to the replicationGroup active geo-replication group create in a previous procedure. This way, it's linked in an active-active configuration with Cache1.
az redisenterprise create --location "West US" --cluster-name "Cache2" --sku "Enterprise_E10" --resource-group "myResourceGroup" --group-nickname "replicationGroup" --linked-databases id="/subscriptions/34b6ecbd-ab5c-4768-b0b8-bf587aba80f6/resourceGroups/myResourceGroup/providers/Microsoft.Cache/redisEnterprise/Cache1/databases/default" --linked-databases id="/subscriptions/34b6ecbd-ab5c-4768-b0b8-bf587aba80f6/resourceGroups/myResourceGroup/providers/Microsoft.Cache/redisEnterprise/Cache2/databases/default"
As before, you need to list both Cache1 and Cache2 using the --linked-databases parameter.
Azure PowerShell
Use Azure PowerShell to create a new cache and geo-replication group, or to add a new cache to an existing geo-replication group. For more information, see New-AzRedisEnterpriseCache.
Create new Enterprise instance in a new geo-replication group using PowerShell
This example creates a new Azure Cache for Redis Enterprise E10 cache instance called Cache1 in the East US region. Then, the cache is added to a new active geo-replication group called replicationGroup:
New-AzRedisEnterpriseCache -Name "Cache1" -ResourceGroupName "myResourceGroup" -Location "East US" -Sku "Enterprise_E10" -GroupNickname "replicationGroup" -LinkedDatabase '{id:"/subscriptions/34b6ecbd-ab5c-4768-b0b8-bf587aba80f6/resourceGroups/myResourceGroup/providers/Microsoft.Cache/redisEnterprise/Cache1/databases/default"}'
To configure active geo-replication properly, the ID of the cache instance being created must be added with the -LinkedDatabase parameter. The ID is in the format:
/subscriptions/<your-subscription-ID>/resourceGroups/<your-resource-group-name>/providers/Microsoft.Cache/redisEnterprise/<your-cache-name>/databases/default
Create new Enterprise instance in an existing geo-replication group using PowerShell
This example creates a new Enterprise E10 cache instance called Cache2 in the West US region. Then, the script adds the cache to the "replicationGroup" active geo-replication group created in the previous procedure. the links the two caches, Cache1 and Cache2, in an active-active configuration.
New-AzRedisEnterpriseCache -Name "Cache2" -ResourceGroupName "myResourceGroup" -Location "West US" -Sku "Enterprise_E10" -GroupNickname "replicationGroup" -LinkedDatabase '{id:"/subscriptions/34b6ecbd-ab5c-4768-b0b8-bf587aba80f6/resourceGroups/myResourceGroup/providers/Microsoft.Cache/redisEnterprise/Cache1/databases/default"}', '{id:"/subscriptions/34b6ecbd-ab5c-4768-b0b8-bf587aba80f6/resourceGroups/myResourceGroup/providers/Microsoft.Cache/redisEnterprise/Cache2/databases/default"}'
As before, you need to list both Cache1 and Cache2 using the -LinkedDatabase parameter.
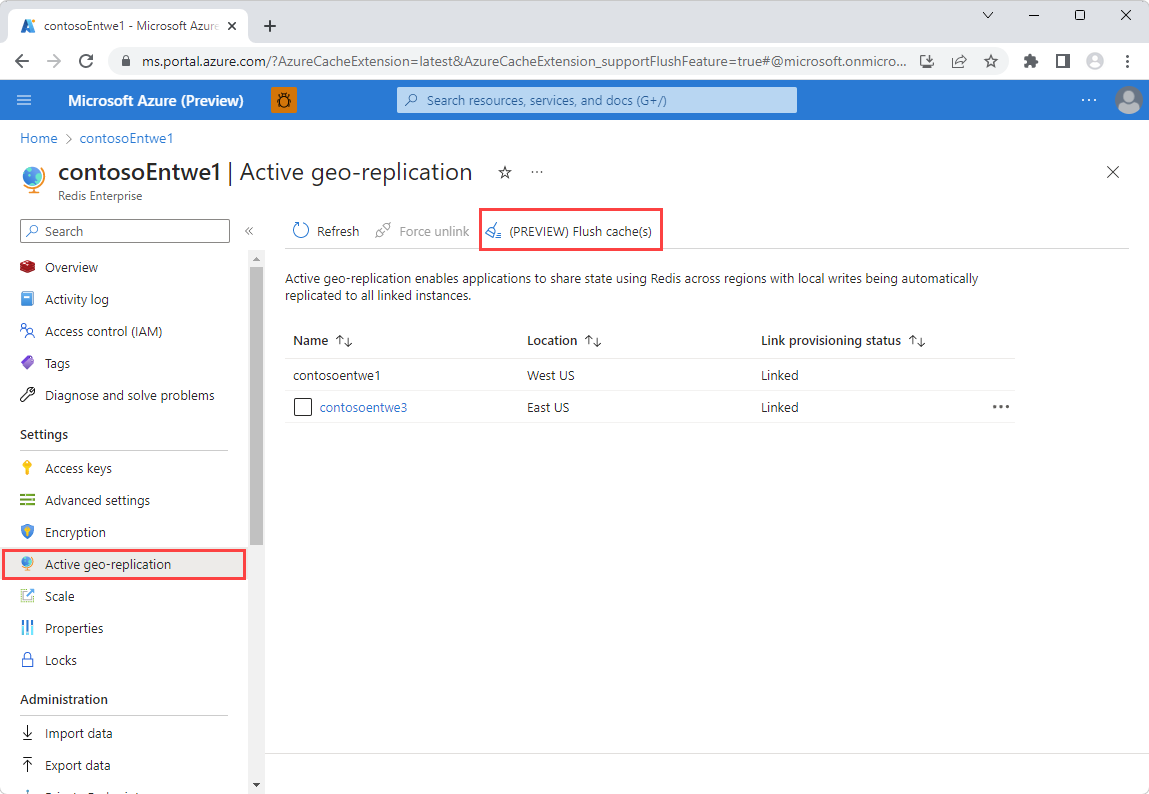
Flush operation
Due to the potential for inadvertent data loss, you can't use the FLUSHALL and FLUSHDB Redis commands with any cache instance residing in a geo-replication group. Instead, use the Flush Cache(s) button located at the top of the Active geo-replication working pane.
Flush caches using Azure CLI or PowerShell
The Azure CLI and PowerShell can also be used to trigger a flush operation. For more information on using Azure CLI, see az redisenterprise database flush. For more information on using PowerShell, see Invoke-AzRedisEnterpriseCacheDatabaseFlush.
Important
Be careful when using the Flush Caches feature. Selecting the button removes all data from the current cache and from ALL linked caches in the geo-replication group.
Manage access to the feature using Azure role-based access control. Only authorized users should be given access to flush all caches.
Next steps
Learn more about Azure Cache for Redis features.
Feedback
Coming soon: Throughout 2024 we will be phasing out GitHub Issues as the feedback mechanism for content and replacing it with a new feedback system. For more information see: https://aka.ms/ContentUserFeedback.
Submit and view feedback for