Create a CI/CD pipeline for GitHub repo using Azure DevOps Starter
Azure DevOps Starter presents a simplified process for creating a continuous integration (CI) and continuous delivery (CD) pipeline to Azure. You can bring your existing code and Git repo, or you can select a sample application.
You will:
- Use DevOps Starter to create a CI/CD pipeline
- Configure access to your GitHub repo and choose a framework
- Configure Azure DevOps and an Azure subscription
- Commit changes to GitHub and automatically deploy them to Azure
- Examine the Azure Pipelines CI/CD pipeline
- Clean up resources
Prerequisites
- An Azure subscription. You can get one free through Visual Studio Dev Essentials.
- Access to a GitHub or external Git repo that contains .NET, Java, PHP, Node.js, Python, or static web code.
Sign in to the Azure portal
Azure DevOps Starter creates a CI/CD pipeline in Azure Pipelines. You can create a new Azure DevOps organization or use an existing organization. Azure DevOps Starter also creates Azure resources in the Azure subscription of your choice.
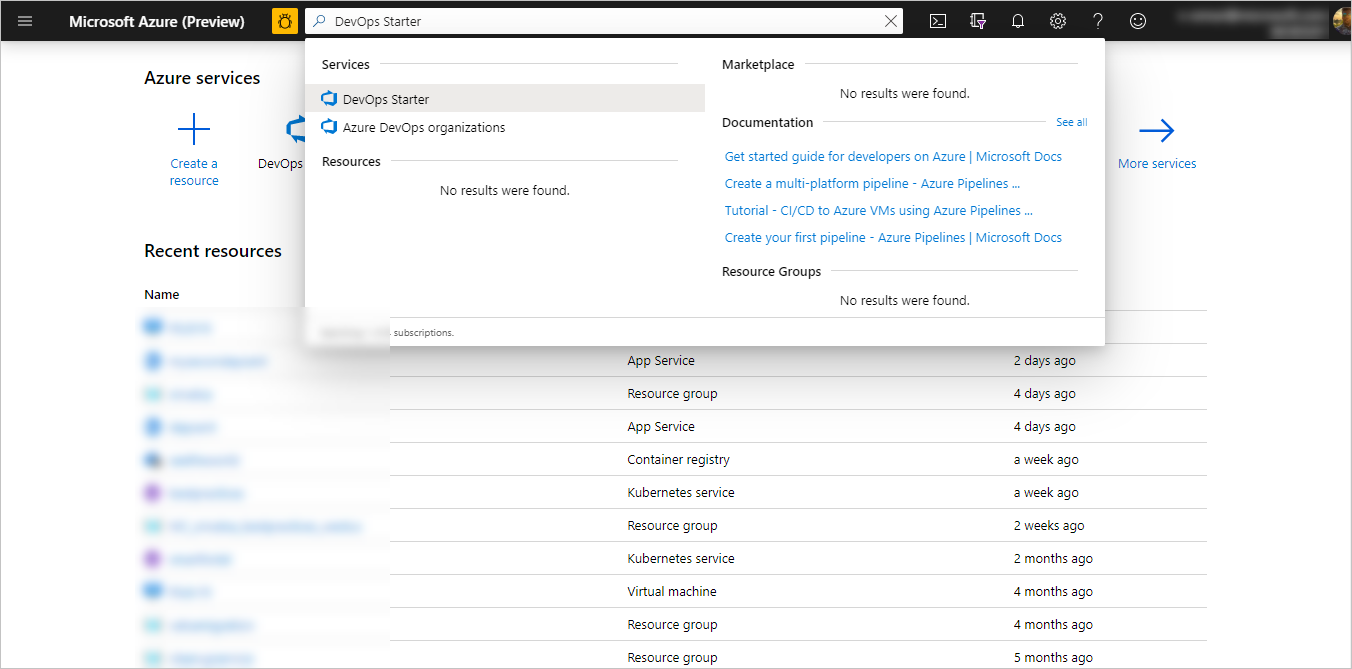
Sign in to the Azure portal.
In the search box, type DevOps Starter, and then select. Click on Add to create a new one.
Select Bring your own code, and then select Next.
Configure access to your GitHub repo and select a framework
Select either GitHub or an external Git code repository. For this tutorial, select GitHub. You might be required to authenticate with GitHub the first time to allow Azure to access your GitHub repository.
Select a Repository and a Branch, and then select Next.
If you're using Docker containers, change Is app Dockerized to YES. For this tutorial, leave NO selected, and then select Next. For more information about using Docker containers, hover over the i icon.
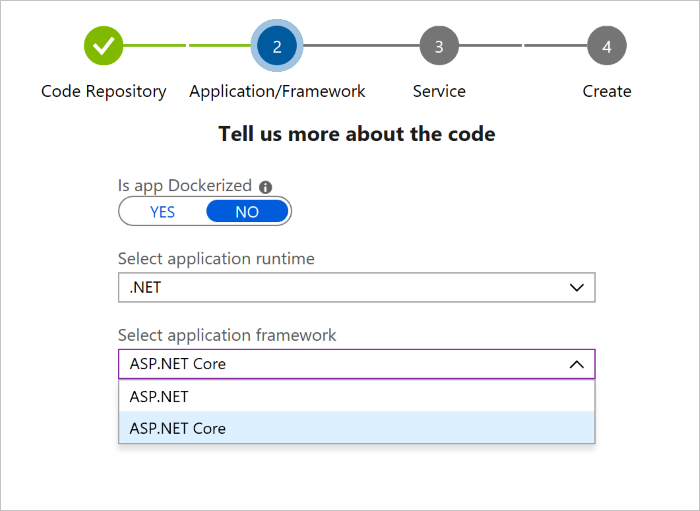
From the drop-down menus, select an application runtime and an application framework, and then select Next. The application framework dictates the type of Azure service deployment target that's available.
Select an Azure service to deploy the application, and then select Next.
Configure Azure DevOps and an Azure subscription
Enter a name for Project name.
Create a new free organization in Azure DevOps Organization or select an existing organization from the drop-down menu.
Select your subscription in Azure Subscription, and either enter a name in Web app or use the default. Select a Location, and then select Done. After a few minutes, the DevOps Starter deployment overview is displayed in the Azure portal.
Select Go to resource to view the DevOps Starter dashboard. In the upper-right corner, pin the Project to your dashboard for quick access. Azure DevOps Starter automatically configures a CI build and release trigger. Your code remains in your GitHub repo or another external repo, and a sample app is set up in a repo in Azure DevOps Organization. Azure DevOps Starter runs the build and deploys the app to Azure.

The dashboard shows your code repo, your CI/CD pipeline, and your app in Azure. At the right, under Azure resources, select Browse to view your running app.
Commit changes to GitHub and automatically deploy them to Azure
You're now ready to collaborate on your app with a team. The CI/CD process automatically deploys your latest work to your website. Each change to the GitHub repo starts a build in Azure DevOps, and a CD pipeline runs a deployment to Azure.
From your DevOps Starter dashboard, select Repositories. Your GitHub repository opens in a new browser tab. Make a change to your application, and then select Commit changes.
After a few moments, a build starts in Azure Pipelines. You can monitor the build status in the DevOps Starter dashboard. You can also monitor it in your Azure DevOps organization by selecting the Build pipelines tab from the DevOps Starter dashboard.
Examine the Azure Pipelines CI/CD pipeline
Azure DevOps Starter automatically configures a CI/CD pipeline in Azure Pipelines. Explore and customize the pipeline as needed. To familiarize yourself with the build and release pipelines, do the following:
From the DevOps Starter dashboard, select Build pipelines.
After your Azure Pipelines page opens, you'll see a history of the most recent builds and the status for each build.
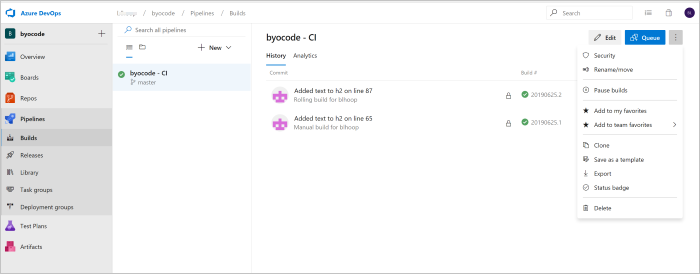
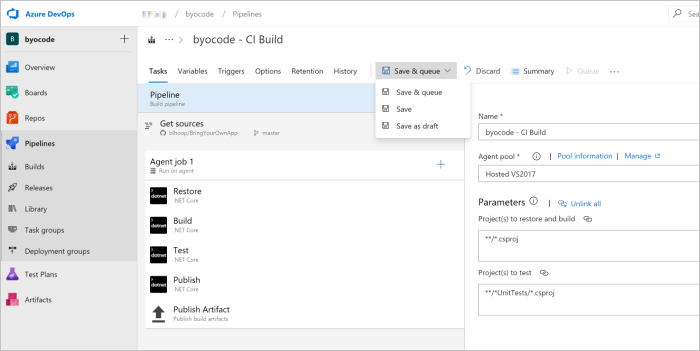
In the upper-right corner of the Builds page, you can select Edit to change the current build, Queue to add a new build, or the vertical ellipsis button (⋮) to open a menu with more options. Select Edit.
The build does various tasks, such as fetching sources from the repo, restoring dependencies, and publishing outputs for deployments. To the right, under Name, change the build pipeline name to something more descriptive. Select Save & Queue, and then select Save. Enter a comment, and then select Save again.
To see an audit trail of your recent changes for the build, select the History tab. Azure DevOps tracks any changes made to the build pipeline and allows you to compare versions.
Select the Triggers tab. Azure DevOps Projects automatically creates a CI trigger with some default settings. You can set triggers such as Enable continuous integration to run a build each time you commit a code change. You can also set triggers to schedule builds to run at specific times.
Clean up resources
When you no longer need Azure App Service and the related resources that you created in this tutorial, you can delete them. Use the Delete functionality on the DevOps Projects dashboard.
Next steps
When you configured your CI/CD process in this tutorial, you automatically created a build and release pipeline in Azure DevOps Projects. You can modify these build and release pipelines to meet the needs of your team.
To learn more about the CI/CD pipeline, see:
To learn more about application monitoring, see: