How to disenroll or revoke a device from Azure IoT Hub Device Provisioning Service
Proper management of device credentials is crucial for high-profile systems like IoT solutions. A best practice for such systems is to have a clear plan of how to revoke access for devices when their credentials, whether a shared access signatures (SAS) token or an X.509 certificate, might be compromised.
Enrollment in the Device Provisioning Service enables a device to be provisioned. A provisioned device is one that has been registered with IoT Hub, allowing it to receive its initial device twin state and begin reporting telemetry data.
This article describes how to revoke a device from your provisioning service instance, preventing it from being provisioned or reprovisioned in the future. Disabling an individual enrollment or enrollment group does not remove an existing device registration from IoT Hub. To learn how to deprovision a device that has already been provisioned to an IoT hub, see Manage deprovisioning.
Disallow a device by using an individual enrollment
To disallow a device from being provisioned through Device Provisioning Service, you can change the provisioning status of an individual enrollment to prevent the device from provisioning and reprovisioning. You can leverage this capability if the device is behaving outside its normal parameters or is assumed to be compromised, or as a way to test out provisioning retry mechanism of your devices.
If the device that you want to disallow was provisioned through an enrollment group, refer to the steps to Disallow specific devices from an X.509 enrollment group.
Note
Be aware of the retry policy of devices that you revoke access for. For example, a device that has an infinite retry policy might continuously try to register with the provisioning service. That situation consumes service resources such as service operation quotas and possibly affects performance.
Sign in to the Azure portal and navigate to your Device Provisioning Service instance.
Select Manage enrollments, and then select the Individual enrollments tab.
Select the enrollment entry for the device that you want to disallow.
On the enrollment details page, uncheck the Enable this enrollment box in the Provisioning status section then select Save.

If an IoT device is at the end of its device lifecycle and should no longer be allowed to provision to the IoT solution, the device enrollment should be removed from the Device Provisioning Service:
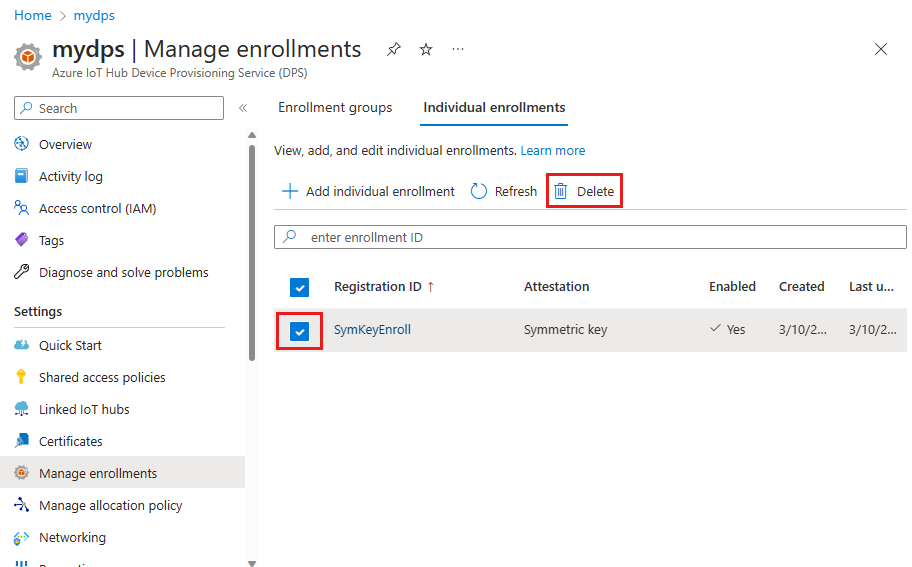
In your provisioning service, select Manage enrollments, and then select the Individual enrollments tab.
Select the check box next to the enrollment entry for the device that you want to disallow.
Select Delete at the top of the window, and then select Yes to confirm that you want to remove the enrollment.
Disallow an X.509 intermediate or root CA certificate by using an enrollment group
X.509 certificates are typically arranged in a certificate chain of trust. If a certificate at any stage in a chain becomes compromised, trust is broken. The certificate must be disallowed to prevent Device Provisioning Service from provisioning devices downstream in any chain that contains that certificate. To learn more about X.509 certificates and how they are used with the provisioning service, see X.509 certificates.
An enrollment group is an entry for devices that share a common attestation mechanism of X.509 certificates signed by the same intermediate or root CA. The enrollment group entry is configured with the X.509 certificate associated with the intermediate or root CA. The entry is also configured with any configuration values, such as twin state and IoT hub connection, that are shared by devices with that certificate in their certificate chain. To disallow the certificate, you can either disable or delete its enrollment group.
To temporarily disallow the certificate by disabling its enrollment group:
Sign in to the Azure portal and navigate to your Device Provisioning Service instance.
In your provisioning service, select Manage enrollments, and then select the Enrollment Groups tab.
Select the enrollment group using the certificate that you want to disallow.
On the enrollment details page, uncheck the Enable this enrollment box in the Provisioning status section then select Save.

To permanently disallow the certificate by deleting its enrollment group:
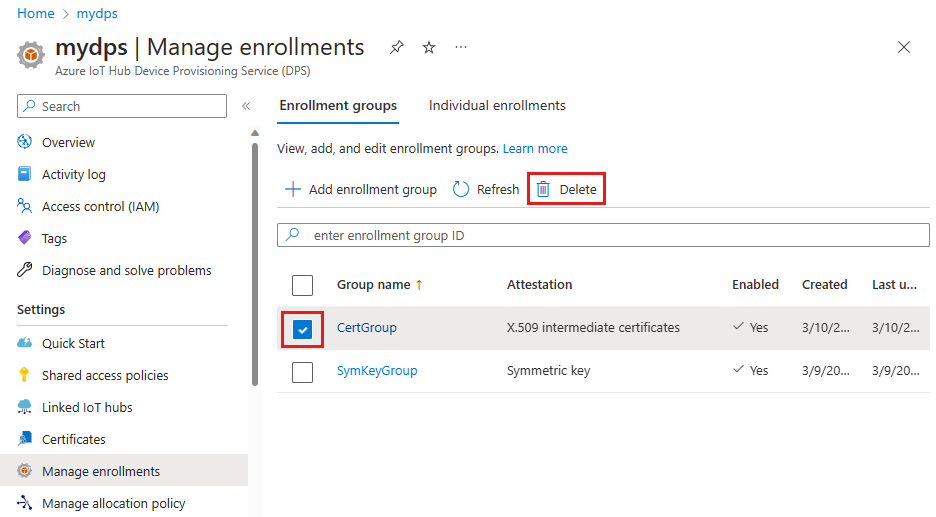
In your provisioning service, select Manage enrollments, and then select the Enrollment Groups tab.
Select the check box next to the enrollment group for the certificate that you want to disallow.
Select Delete at the top of the window, and then select Yes to confirm that you want to remove the enrollment group.
After you finish the procedure, you should see your entry removed from the list of enrollment groups.
Note
If you delete an enrollment group for a certificate, devices that have the certificate in their certificate chain might still be able to enroll if an enabled enrollment group for the root certificate or another intermediate certificate higher up in their certificate chain exists.
Note
Deleting an enrollment group doesn't delete the registration records for devices in the group. DPS uses the registration records to determine whether the maximum number of registrations has been reached for the DPS instance. Orphaned registration records still count against this quota. For the current maximum number of registrations supported for a DPS instance, see Quotas and limits.
You may want to delete the registration records for the enrollment group before deleting the enrollment group itself. You can see and manage the registration records for an enrollment group manually on the Registration status tab for the group in Azure portal. You can retrieve and manage the registration records programmatically using the Device Registration State REST APIs or equivalent APIs in the DPS service SDKs, or using the az iot dps enrollment-group registration Azure CLI commands.
Disallow specific devices from an X.509 enrollment group
If you have a device that was provisioned through an enrollment group that you want to disenroll, you can do so by creating a disabled individual enrollment for just that device. When a device connects and authenticates with Device Provisioning Service, the service first looks for an individual enrollment with the matching registration ID. Only if no individual enrollment is found for the device, then the service searches enrollment groups.
To disallow an individual device in an enrollment group, follow these steps:
Sign in to the Azure portal and navigate to your Device Provisioning Service instance.
In your provisioning service, select Manage enrollments, and then select the Individual enrollments tab.
Select Add individual enrollment.
Follow the appropriate step depending on whether you have the device (end-entity) certificate or not.
If you have the device certificate, provide the following values on the Add enrollment page:
Field Description Attestation mechanism Select X.509 client certificates Primary certificate file Upload the device certificate. For the certificate, use the signed end-entity certificate installed on the device. The device uses the signed end-entity certificate for authentication. If you don't have the device certificate, provide the following values on the Add enrollment page:
Field Description Attestation mechanism Select Symmetric key Generate symmetric keys automatically : Make sure this checkbox is selected. The keys don't matter for this scenario. Registration ID If the device has already been provisioned, use its IoT Hub device ID. You can find this in the registration records of the enrollment group, or in the IoT hub that the device was provisioned to. If the device has not yet been provisioned, enter the device certificate CN. (In this latter case, you don't need the device certificate, but you will need to know the CN.)
Scroll to the bottom of the Add enrollment page and uncheck the Enable this enrollment checkbox.
Select Review + create, then select Create.
When you successfully create your enrollment, you should see your disabled device enrollment listed on the Individual enrollments tab.
Next steps
Disenrollment is also part of the larger deprovisioning process. Deprovisioning a device includes both disenrollment from the provisioning service, and deregistering from IoT hub. To learn about the full process, see How to deprovision devices that were previously provisioned
Feedback
Coming soon: Throughout 2024 we will be phasing out GitHub Issues as the feedback mechanism for content and replacing it with a new feedback system. For more information see: https://aka.ms/ContentUserFeedback.
Submit and view feedback for