Tutorial: Build a business case or assess servers using an imported CSV file
Caution
This article references CentOS, a Linux distribution that is nearing End Of Life (EOL) status. Please consider your use and planning accordingly. For more information, see the CentOS End Of Life guidance.
As part of your migration journey to Azure, you discover your on-premises inventory and workloads.
This tutorial shows you how to build a business case or assess on-premises machines with the Azure Migrate: Discovery and Assessment tool, using an imported comma-separate values (CSV) file.
If you use a CSV file, you don't need to set up the Azure Migrate appliance to discover servers. You can control the data you share in the file, and much of the data is optional. This method is useful if:
- You want to create a quick, initial business case or assessment before you deploy the appliance.
- You can't deploy the Azure Migrate appliance in your organization.
- You can't share credentials that allow access to on-premises servers.
- Security constraints prevent you from gathering and sending data collected by the appliance to Azure.
Note
You can't migrate servers imported using a CSV file.
In this tutorial, you learn how to:
- Set up an Azure account
- Set up an Azure Migrate project
- Prepare a CSV file
- Import the file
- Assess servers
Note
Tutorials show the quickest path for trying out a scenario, and use default options where possible.
If you don't have an Azure subscription, create a free account before you begin.
Prerequisites
- You can add up to 20,000 servers in a single CSV file, and in an Azure Migrate project.
- Operating system names specified in the CSV file must contain and match supported names.
Prepare an Azure user account
To create an Azure Migrate project, you need an account with:
- Contributor or Owner permissions on an Azure subscription.
- Permissions to register Microsoft Entra apps.
If you just created a free Azure account, you're the owner of your subscription. If you're not the subscription owner, work with the owner to assign the permissions as follows:
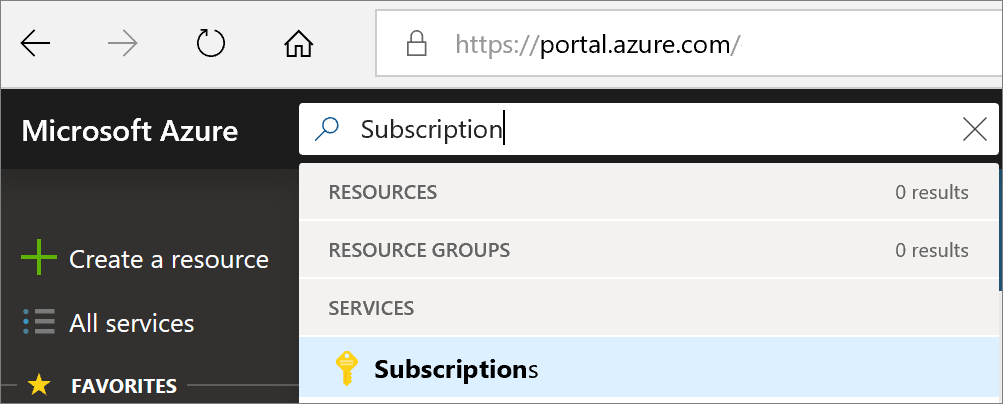
In the Azure portal, search for "subscriptions", and under Services, select Subscriptions.
In the Subscriptions page, select the subscription in which you want to create an Azure Migrate project.
Select Access control (IAM).
Select Add > Add role assignment to open the Add role assignment page.
Assign the following role. For detailed steps, see Assign Azure roles using the Azure portal.
Setting Value Role Contributor or Owner Assign access to User Members azmigrateuser 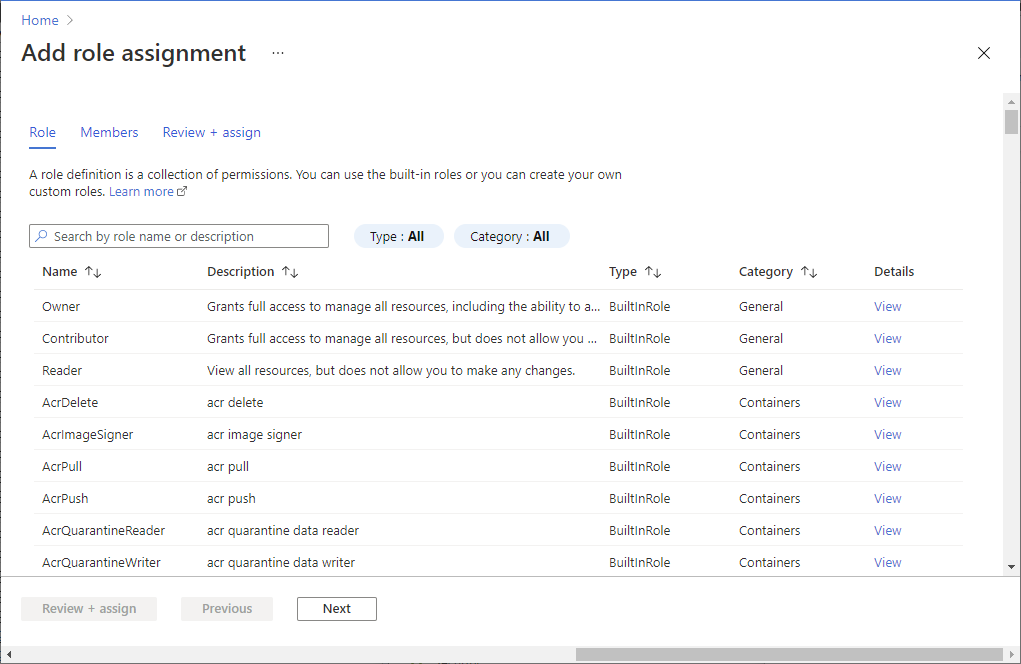
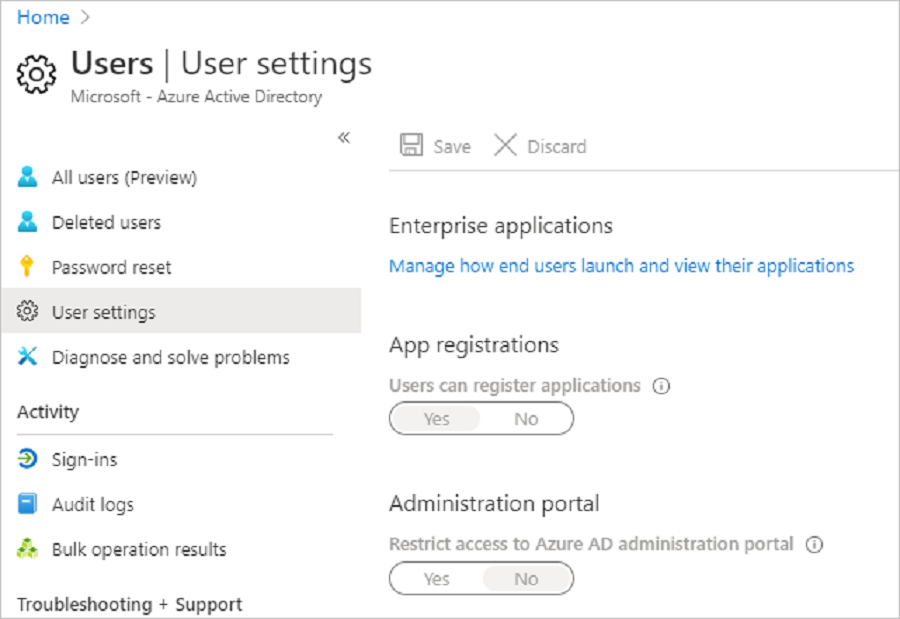
In the portal, search for users, and under Services, select Users.
In User settings, verify that Microsoft Entra users can register applications (set to Yes by default).
Set up a project
Set up a new Azure Migrate project if you don't have one.
In the Azure portal > All services, search for Azure Migrate.
Under Services, select Azure Migrate.
In Get started, select Create project.
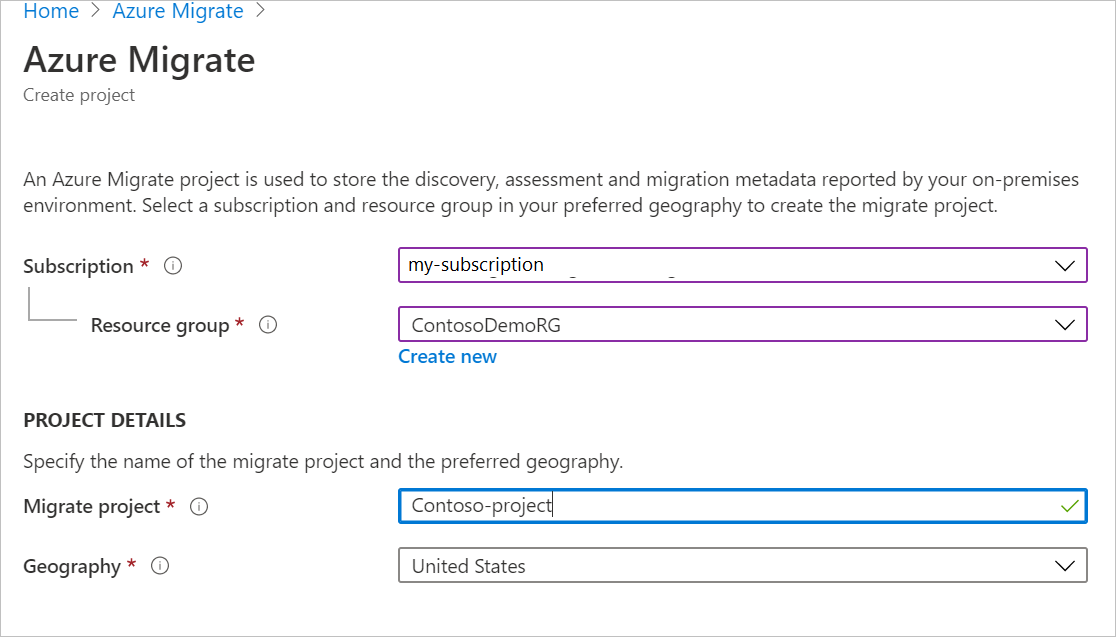
In Create project, select your Azure subscription and resource group. Create a resource group if you don't have one.
In Project Details, specify the project name and the geography in which you want to create the project. Review supported geographies for public and government clouds.
Note
- Use the Advanced configuration section to create an Azure Migrate project with private endpoint connectivity. Learn more.
- Ensure that you allow network access to the Azure vNet (selected during project creation with private endpoint connectivity) from the IP address of the machine that you choose to upload the CSV file from.
Select Create.
Wait a few minutes for the Azure Migrate project to deploy.
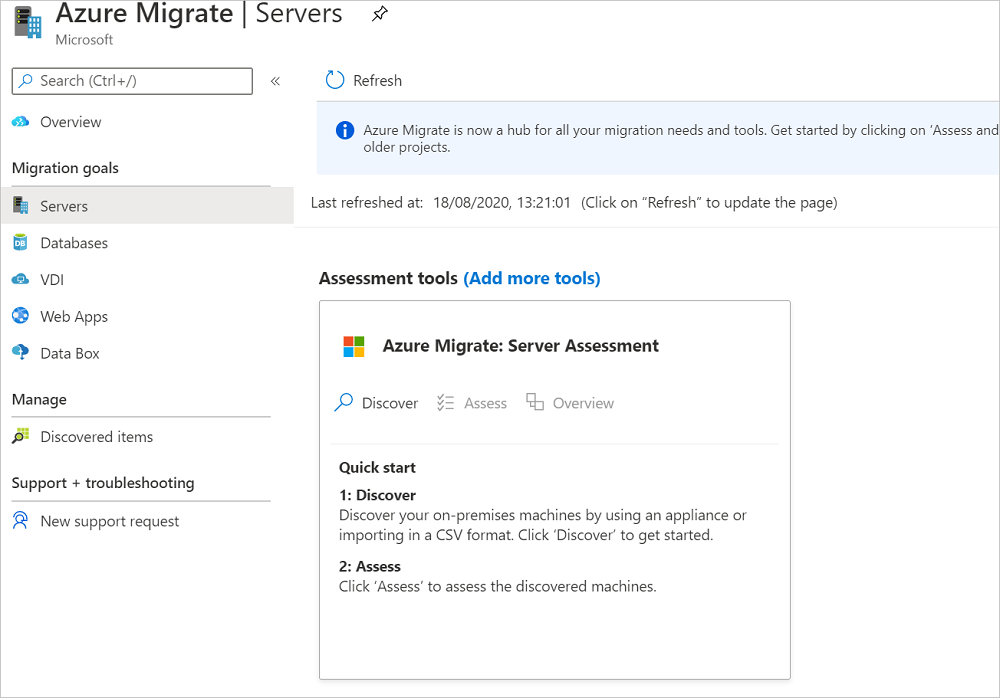
The Azure Migrate: Discovery and assessment tool is added by default to the new project.
Prepare the CSV
Download the CSV template and add server information to it.
Download the template
In Migration goals > Servers > Azure Migrate: Discovery and assessment, select Discover.
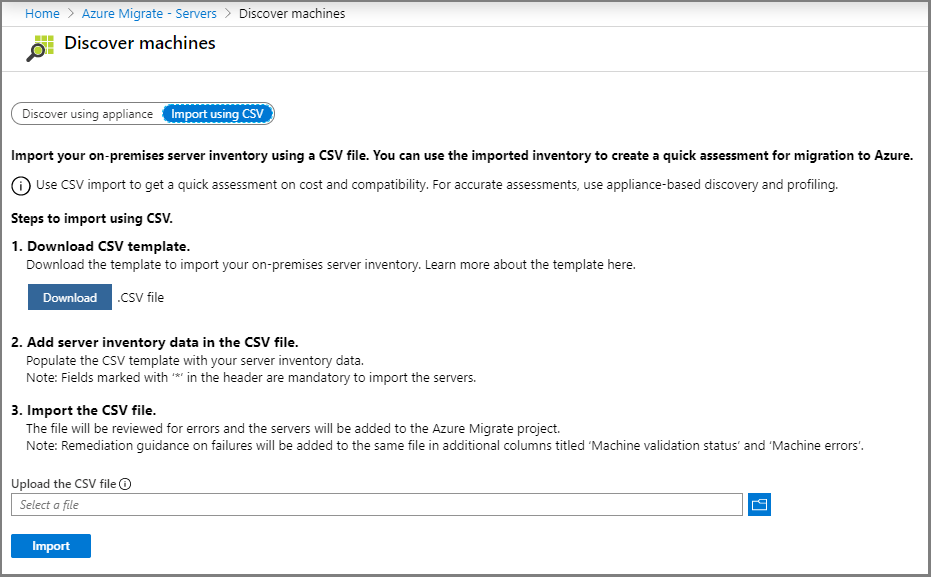
In Discover machines, select Import using CSV.
Select Download to download the CSV template. Alternatively, you can download it directly.
Add server information
Gather server data and add it to the CSV file.
- To gather data, you can export it from tools you use for on-premises server management, such as VMware vSphere or your configuration-management database (CMDB).
- To review sample data, download our example file.
The following table summarizes the file fields to fill in:
| Field name | Mandatory | Details |
|---|---|---|
| Server name | Yes | We recommend specifying the fully qualified domain name (FQDN). |
| IP address | No | Server address. |
| Cores | Yes | Number of processor cores allocated to the server. |
| Memory | Yes | Total RAM, in MB, allocated to the server. |
| OS name | Yes | Server operating system. Operating system names that match or contain the names in this list are recognized by the assessment. |
| OS version | No | Server operating system version. |
| OS architecture | No | Server OS architecture Valid values are: x64, x86, amd64, 32-bit or 64-bit |
| Server type | No | Type of server Valid values are: Virtual, Physical |
| Hypervisor | No | If server type is Virtual, specify hypervisor name Valid values are: VMware, Hyper-V |
| Number of disks | No | Not needed if individual disk details are provided. |
| Storage in use (In GB) | No | You can add how much storage is in use per server. This field will only be used in Azure VMware Solution assessment sizing logic. |
| Disk 1 size | No | Maximum size of disk, in GB. You can add details for more disks by adding columns in the template. You can add up to twenty disks. |
| Disk 1 read ops | No | Disk read operations per second. |
| Disk 1 write ops | No | Disk write operations per second. |
| Disk 1 read throughput | No | Data read from the disk per second, in MB per second. |
| Disk 1 write throughput | No | Data written to disk per second, in MB per second. |
| CPU utilization percentage | No | Percentage of CPU used. |
| Memory utilization percentage | No | Percentage of RAM used. |
| Total disks read ops | No | Disk-read operations per second. |
| Total disks write ops | No | Disk-write operations per second. |
| Total disks read throughput | No | Data read from the disk, in MB per second. |
| Total disks write throughput | No | Data written to disk, in MB per second. |
| Network In throughput | No | Data received by the server, in MB per second. |
| Network Out throughput | No | Data transmitted by the server, in MB per second. |
| Firmware type | No | Server firmware. Values can be "BIOS" or "UEFI". |
| No | Server MAC address. |
Add operating systems
Assessment recognizes specific operating system names. Any name you specify must exactly match one of the strings in the supported names list.
Add multiple disks
The template provides default fields for the first disk. You can add similar columns for up to twenty disks.
For example, to specify all fields for a second disk, add these columns:
- Disk 2 size
- Disk 2 read ops
- Disk 2 write ops
- Disk 2 read throughput
- Disk 2 write throughput
Import the server information
After adding information to the CSV template, import the CSV file.
- In Migration goals > Servers > Azure Migrate: Discovery and assessment, select Discover.
- In Discover machines, select Import using CSV
- Upload the .csv file and select Import.
- The import status is shown.
- If warnings appear in the status, you can either fix them or continue without addressing them.
- To improve assessment accuracy, improve the server information as suggested in warnings.
- To view and fix warnings, select Download warning details .CSV. This operation downloads the CSV with warnings included. Review the warnings and fix issues as needed.
- If errors appear in the status so that the import status is Failed, you must fix those errors before you can continue with the import:
- Download the CSV, which now includes error details.
- Review and address the errors as necessary.
- Upload the modified file again.
- When the import status is Completed, the server information has been imported. Refresh if the import process doesn't seem to be complete.
Update server information
You can update the information for a server by importing the data for the server again with the same Server name. You can't modify the Server name field. Deleting servers is currently not supported.
Verify servers in the portal
To verify that the servers appear in the Azure portal after discovery:
- Open the Azure Migrate dashboard.
- On the Azure Migrate - Servers > Azure Migrate: Discovery and assessment page, select the icon that displays the count for Discovered servers.
- Select the Import based tab.
Supported operating system names
Operating system names provided in the CSV must contain and match. If they don't, you won't be able to assess them.
| A-H | I-R | S-T | U-Z |
|---|---|---|---|
| Asianux 3 Asianux 4 Asianux 5 CentOS CentOS 4/5 CoreOS Linux Debian GNU/Linux 4 Debian GNU/Linux 5 Debian GNU/Linux 6 Debian GNU/Linux 7 Debian GNU/Linux 8 FreeBSD |
IBM OS/2 macOS X 10 MS-DOS Novell NetWare 5 Novell NetWare 6 Oracle Linux Oracle Linux 4/5 Oracle Solaris 10 Oracle Solaris 11 Red Hat Enterprise Linux 2 Red Hat Enterprise Linux 3 Red Hat Enterprise Linux 4 Red Hat Enterprise Linux 5 Red Hat Enterprise Linux 6 Red Hat Enterprise Linux 7 Red Hat Fedora |
SCO OpenServer 5 SCO OpenServer 6 SCO UnixWare 7 Serenity Systems eComStation Serenity Systems eComStation 1 Serenity Systems eComStation 2 Sun Microsystems Solaris 8 Sun Microsystems Solaris 9 SUSE Linux Enterprise 10 SUSE Linux Enterprise 11 SUSE Linux Enterprise 12 SUSE Linux Enterprise 8/9 SUSE Linux Enterprise 11 SUSE openSUSE |
Ubuntu Linux VMware ESXi 4 VMware ESXi 5 VMware ESXi 6 Windows 10 Windows 2000 Windows 3 Windows 7 Windows 8 Windows 95 Windows 98 Windows NT Windows Server (R) 2008 Windows Server 2003 Windows Server 2008 Windows Server 2008 R2 Windows Server 2012 Windows Server 2012 R2 Windows Server 2016 Windows Server 2019 Windows Server Threshold Windows Vista Windows Web Server 2008 R2 Windows XP Professional |
Business case considerations
- If you import servers by using a CSV file and build a business case:
- Performance history duration in Azure settings will not be applicable
- Servers where no performance data is specified will be classified as unknown in the business case utilization insights chart and will be sized as-is without rightsizing for Azure cost
- Servers where server type and virtualization are not specified will be classified as Not applicable in virtualization distribution and no virtualization software cost will be added in on-premises cost
Assessment considerations
- If you import servers by using a CSV file and creating an assessment with sizing criteria as "performance-based":
- For Azure VM assessment, the performance values you specify (CPU utilization, Memory utilization, Disk IOPS and throughput) are used if you choose performance-based sizing. You will not be able to provide performance history and percentile information.
- For Azure VMware Solution assessment, the performance values you specify (CPU utilization, Memory utilization, Storage in use(GB)) are used if you choose performance-based sizing. You will not be able to provide performance history and percentile information.
- To get an accurate OS suitability/readiness in Azure VM and Azure VMware Solution assessment, please enter the Operating system version and architecture in the respective columns.
Next steps
In this tutorial, you:
- Created an Azure Migrate project.
- Discovered servers using an imported CSV file. Now, build a quick business case or run an assessment for migration to Azure VMs.
Feedback
Coming soon: Throughout 2024 we will be phasing out GitHub Issues as the feedback mechanism for content and replacing it with a new feedback system. For more information see: https://aka.ms/ContentUserFeedback.
Submit and view feedback for