Work with Jupyter Notebooks in an Azure Quantum workspace
Learn how to run Q# or Python code in a Jupyter Notebook in an Azure Quantum workspace. A Jupyter Notebook is a document that contains both rich text and code and can run in your browser.
Prerequisites
You need the following prerequisites to use Jupyter Notebooks in an Azure Quantum workspace.
- An Azure account with an active subscription. If you don’t have an Azure account, register for free and sign up for a pay-as-you-go subscription.
- An Azure Quantum workspace. See Create an Azure Quantum workspace.
Get a sample notebook
To get started, you can use a sample notebook from the sample gallery.
Select your Azure Quantum workspace in the Azure portal.
Select Notebooks.
Select Sample gallery.
Select the sample you want to use, and select Copy to my notebooks.
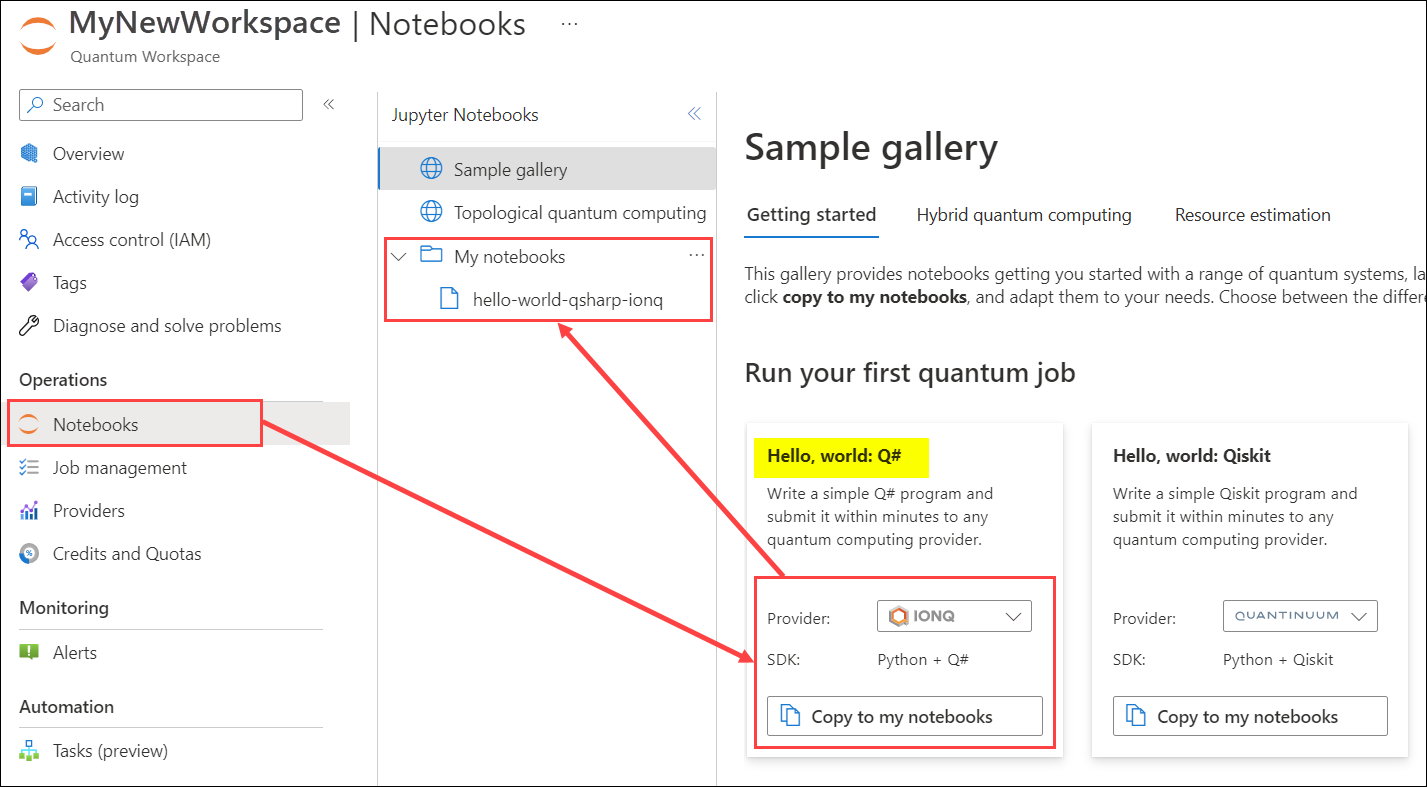
The sample notebook can be found under My notebooks and you can now run the notebook.
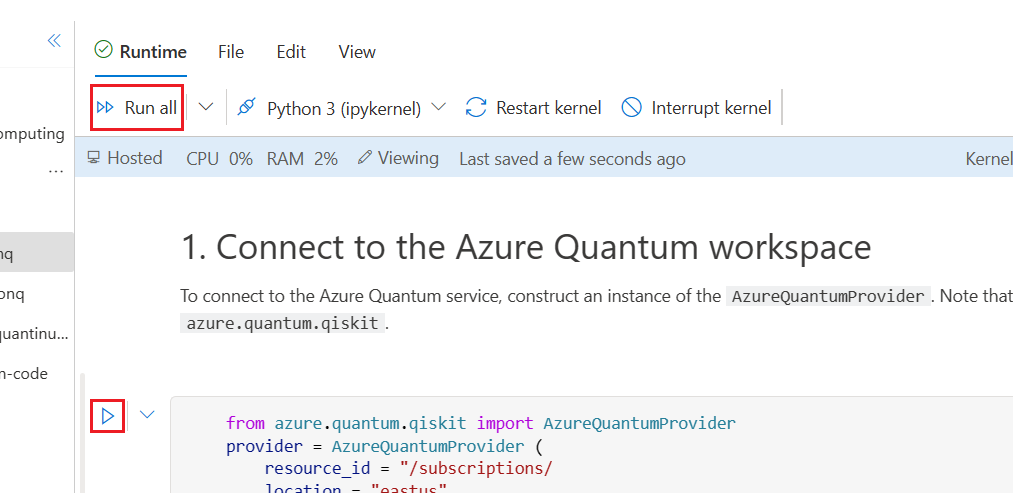
Run a notebook
To run Q# or Python code in a Jupyter Notebook, follow these steps.
Select your Azure Quantum workspace in the Azure portal.
Select Notebooks.
Select your notebook in My notebooks.
Select the cell you want to run and select the run icon to run the code in the cell, or select Run all to run all cells in the notebook.
Create a new notebook
Follow these steps to create a new Jupyter Notebook using Q# or Python.
Select your Azure Quantum workspace in the Azure portal.
Select Notebooks.
Select My notebooks and select Add new
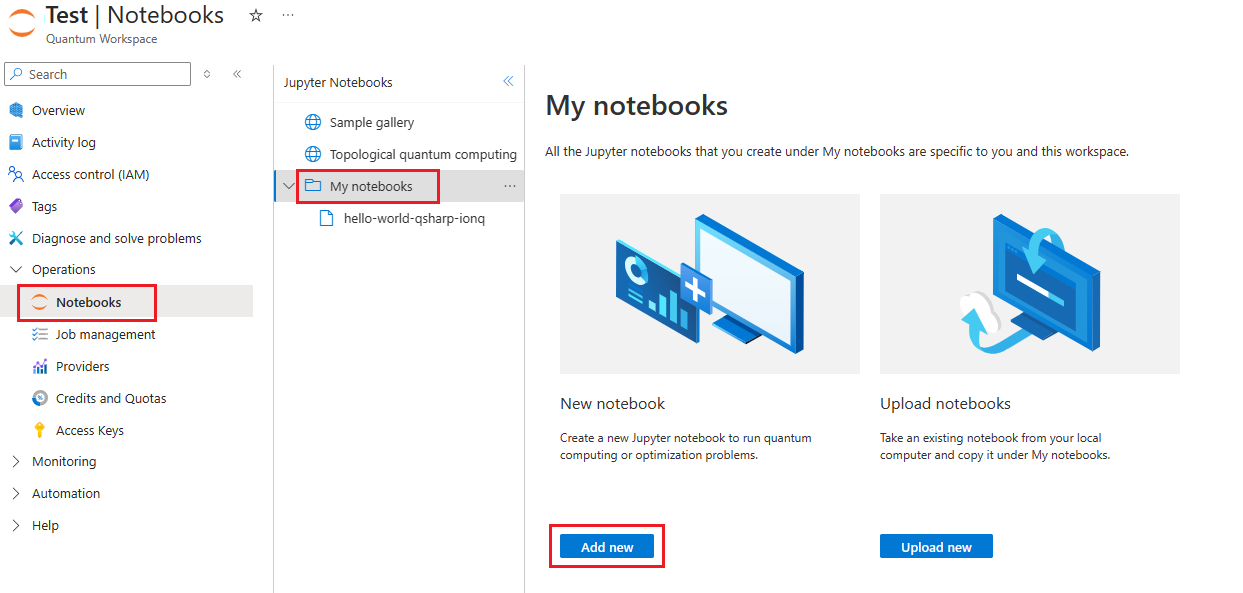
Type a File Name and select Create file.
The first cell of the notebook is populated automatically with the connection string to the Azure Quantum workspace.
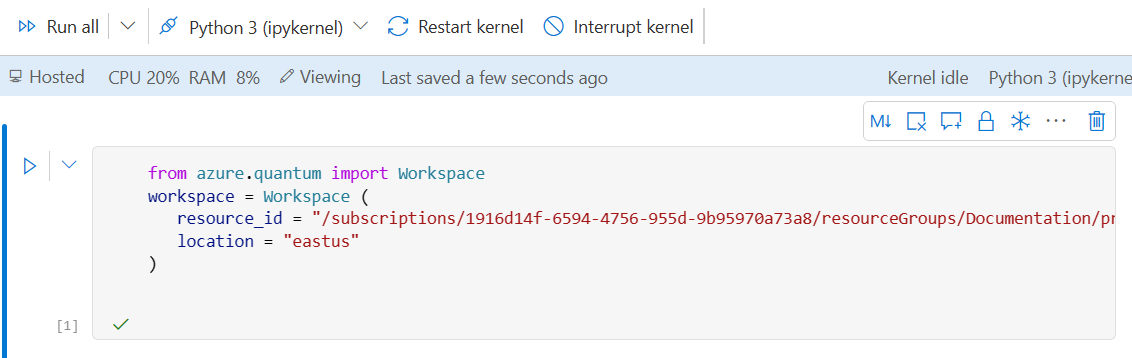
Select + Code or + Markdown to add a code or markdown text cell.
Tip
A notebook auto-saves every 30 seconds. You can also manually save by pressing CTRL + S.
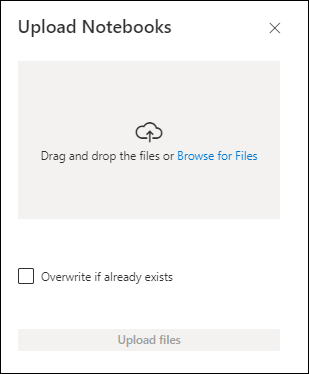
Upload notebooks
You can upload one or more existing Jupyter Notebooks to an Azure Quantum workspace.
Caution
You should only upload and run Jupyter Notebooks from trusted sources, and only install packages from trusted sources. While notebooks in Azure Quantum protects you by sandboxing outputs, Jupyter Notebooks is built for arbitrary code execution, so there are inherent risks to uploading or running notebooks from an untrusted source.
Select your Azure Quantum workspace in the Azure portal.
Select Notebooks.
Select My notebooks.
Select Upload new.
Drag and drop your notebook files, or select Browse for Files and select the notebook files you want to upload.
If you want to overwrite already existing files, select Overwrite if already exists.
Select Upload files.
After the notebooks have been uploaded, you can find them under My notebooks.
Note
If you're uploading a notebook that was saved from another Azure Quantum workspace, you may need to update the connection information, such as Subscription, Resource group, workspace name, Location, or Resource ID, before running the notebook.
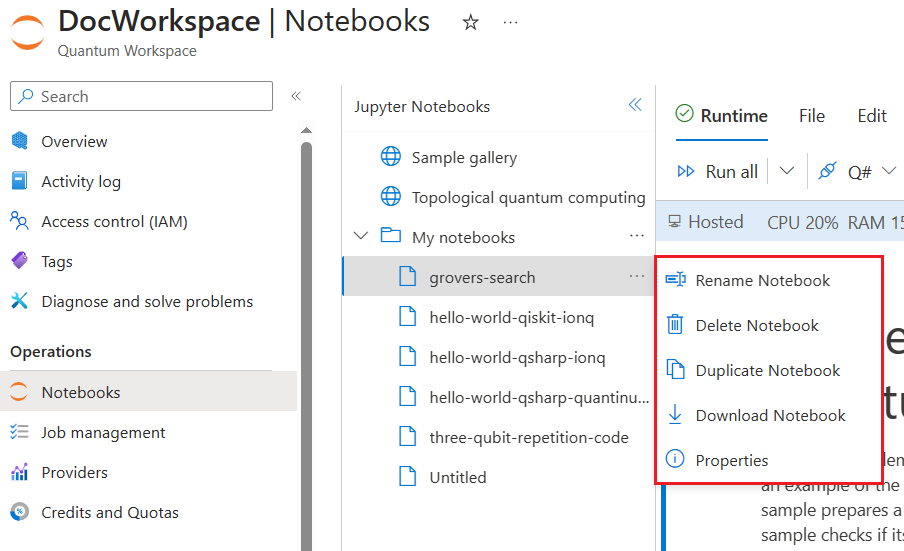
Manage notebooks
You can rename, delete, duplicate, and download existing notebooks.
Select your Azure Quantum workspace in the Azure portal.
Select Notebooks.
Select your notebook in My notebooks
Click on the context pane, which is ... to the right of your notebook's name.
Select Rename Notebook, Delete Notebook, Duplicate Notebook, or Download Notebook.
Isolation
Jupyter notebooks in an Azure Quantum workspace are isolated from other users' notebooks.
- Your Jupyter Notebook instance is hosted by Azure Quantum with hypervisor-level isolation from other users' instances.
- Notebooks are stored in your linked storage account in your subscription.
- A Jupyter Notebook instance is scoped to a combination of you and a specific workspace. If you visit another workspace, you will get a different Jupyter Notebook instance. If another user visits the same workspace, they will get a different Jupyter Notebook instance than you.
- Notebooks are scoped to you and a specific workspace. If you visit another workspace, the same notebooks will not appear under My notebooks. If another user visits that workspace, they will not see your notebooks.
Storage of notebooks
Jupyter Notebooks are stored in an Azure Storage account linked to your Azure Quantum workspace.
Note
When an Azure Quantum workspace is created, Cross-Origin Resource Sharing (CORS) in enabled on the linked Azure Storage account. This is required for using Jupyter Notebooks in the portal. If you do not plan to use Jupyter Notebooks in the portal and you do not want to enable CORS for your Azure Storage account, you can directly edit your storage account to remove the CORS rule. In the storage account properties, under Settings, select Resource Sharing (CORS) and remove the rule under File Service. Be aware that if you open the Notebooks blade again in your workspace, the rule will be recreated automatically.
Limitations
The following are limitations with Jupyter Notebooks in an Azure Quantum workspace.
- As it is free, the Jupyter Notebook instance will live up to a maximum of 12 hours (after that time, your instance will be deleted or recreated, and you will need to reinstall any custom packages).
- Azure Quantum may need to delete your Jupyter Notebook instance to apply security patches or roll out emergency changes. When possible, it will not interrupt your workflow.
- Notebook instances have pre-allocated 2 vCPU and 4 GB of memory.
- Idle kernels are terminated after 30 minutes. After that time, you will need to rerun the cells.
- The location of your storage account and workspace will affect the performance of Jupyter Notebooks in an Azure Quantum workspace. When possible, try to create the storage account and workspace in a region close to where you will be using your notebooks.
- There can be no more than 10 notebooks open concurrently in one region per subscription. To open more than 10 notebooks concurrently, you should deploy workspaces across multiple regions.
- A single user can open no more than five notebooks concurrently in one region per subscription.
Next steps
Feedback
Coming soon: Throughout 2024 we will be phasing out GitHub Issues as the feedback mechanism for content and replacing it with a new feedback system. For more information see: https://aka.ms/ContentUserFeedback.
Submit and view feedback for