Power Query connectors (preview - retired)
Important
Power Query connector support was introduced as a gated public preview under Supplemental Terms of Use for Microsoft Azure Previews, but is now discontinued. If you have a search solution that uses a Power Query connector, please migrate to an alternative solution.
Migrate by November 28, 2022
The Power Query connector preview was announced in May 2021 and won't be moving forward into general availability. The following migration guidance is available for Snowflake and PostgreSQL. If you're using a different connector and need migration instructions, please use the email contact information provided in your preview sign up to request help or open a ticket with Azure Support.
Prerequisites
- An Azure Storage account. If you don't have one, create a storage account.
- An Azure Data Factory. If you don't have one, create a Data Factory. See Data Factory Pipelines Pricing before implementation to understand the associated costs. Also, check Data Factory pricing through examples.
Migrate a Snowflake data pipeline
This section explains how to copy data from a Snowflake database to an Azure Cognitive Search index. There's no process for directly indexing from Snowflake to Azure Cognitive Search, so this section includes a staging phase that copies database content to an Azure Storage blob container. You'll then index from that staging container using a Data Factory pipeline.
Step 1: Retrieve Snowflake database information
Go to Snowflake and sign in to your Snowflake account. A Snowflake account looks like https://<account_name>.snowflakecomputing.com.
Once you're signed in, collect the following information from the left pane. You'll use this information in the next step:
- From Data, select Databases and copy the name of the database source.
- From Admin, select Users & Roles and copy the name of the user. Make sure the user has read permissions.
- From Admin, select Accounts and copy the LOCATOR value of the account.
- From the Snowflake URL, similar to
https://app.snowflake.com/<region_name>/xy12345/organization). copy the region name. For example, inhttps://app.snowflake.com/south-central-us.azure/xy12345/organization, the region name issouth-central-us.azure. - From Admin, select Warehouses and copy the name of the warehouse associated with the database you'll use as the source.
Step 2: Configure Snowflake Linked Service
Sign in to Azure Data Factory Studio with your Azure account.
Select your data factory and then select Continue.
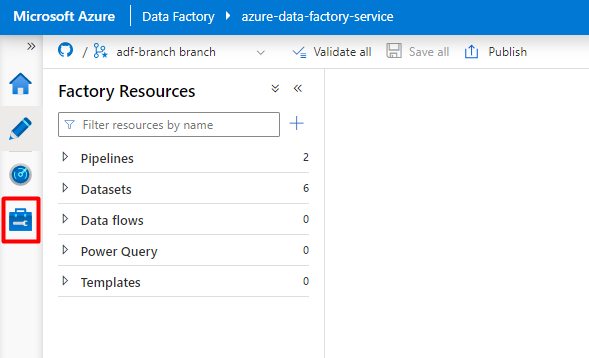
From the left menu, select the Manage icon.
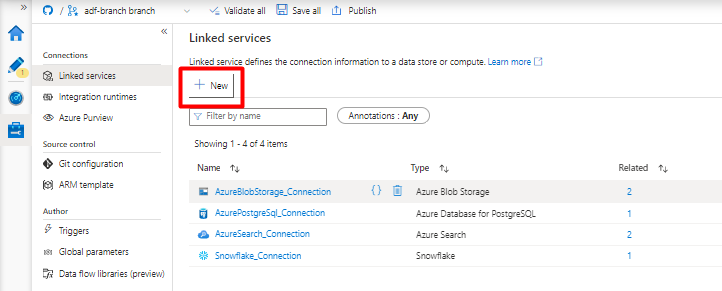
Under Linked services, select New.
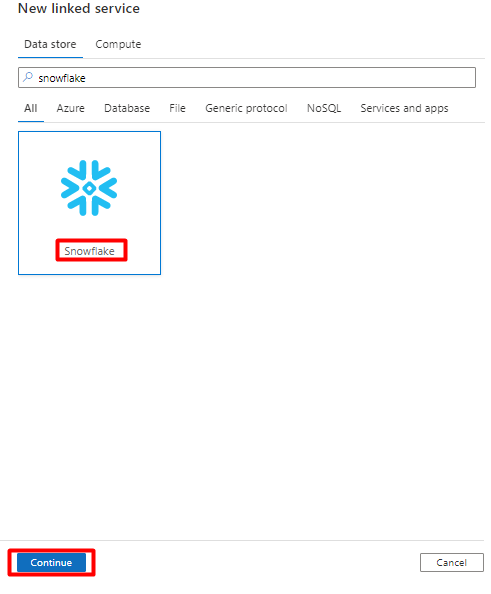
On the right pane, in the data store search, enter "snowflake". Select the Snowflake tile and select Continue.
Fill out the New linked service form with the data you collected in the previous step. The Account name includes a LOCATOR value and the region (for example:
xy56789south-central-us.azure).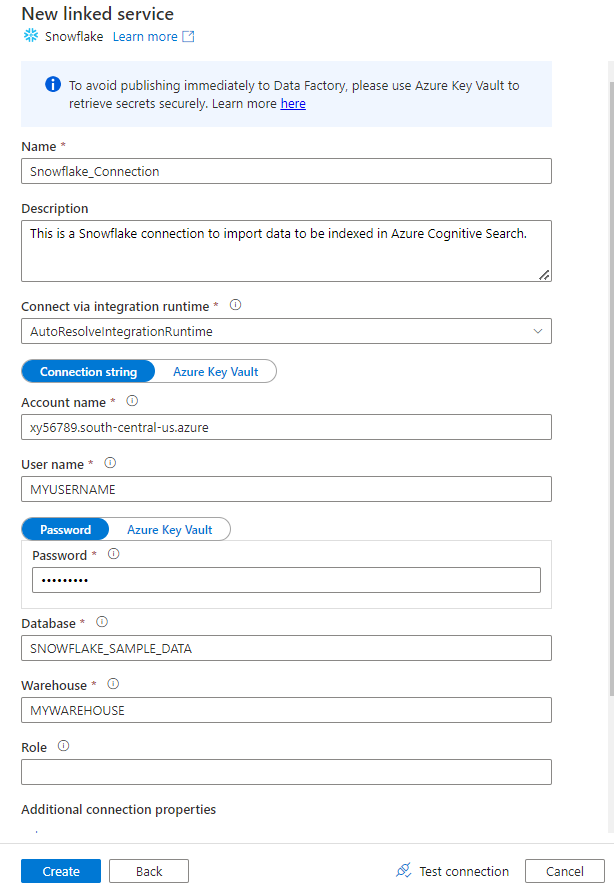
After the form is completed, select Test connection.
If the test is successful, select Create.
Step 3: Configure Snowflake Dataset
From the left menu, select the Author icon.
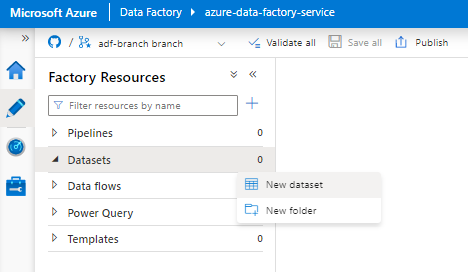
Select Datasets, and then select the Datasets Actions ellipses menu (
...).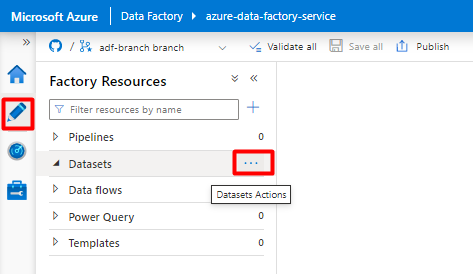
Select New dataset.
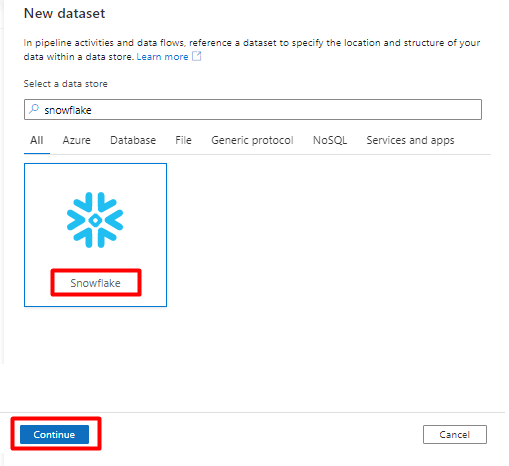
On the right pane, in the data store search, enter "snowflake". Select the Snowflake tile and select Continue.
In Set Properties:
- Select the Linked Service you created in Step 2.
- Select the table that you would like to import, and then select OK.
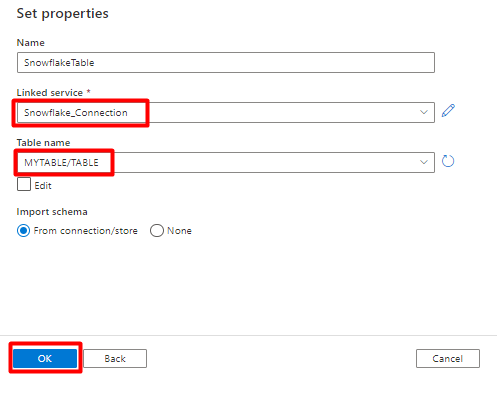
Select Save.
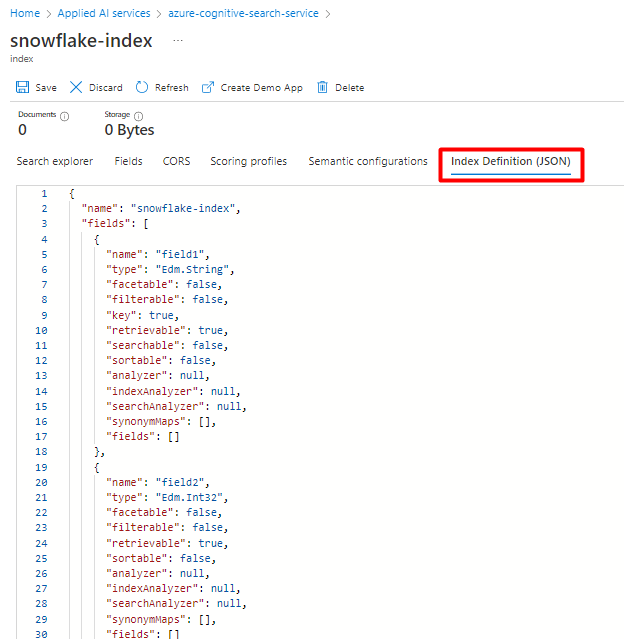
Step 4: Create a new index in Azure Cognitive Search
Create a new index in your Azure Cognitive Search service with the same schema as the one you have currently configured for your Snowflake data.
You can repurpose the index you're currently using for the Snowflake Power Connector. In the Azure portal, find the index and then select Index Definition (JSON). Select the definition and copy it to the body of your new index request.
Step 5: Configure Azure Cognitive Search Linked Service
From the left menu, select Manage icon.
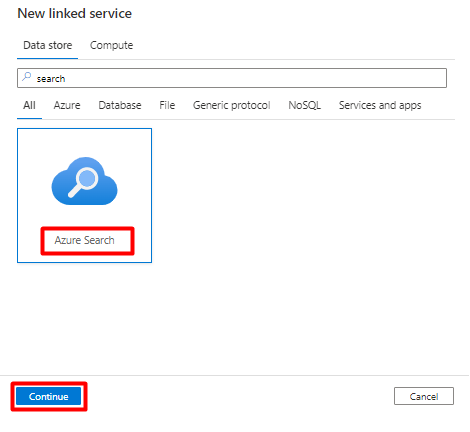
Under Linked services, select New.
On the right pane, in the data store search, enter "search". Select the Azure Search tile and select Continue.
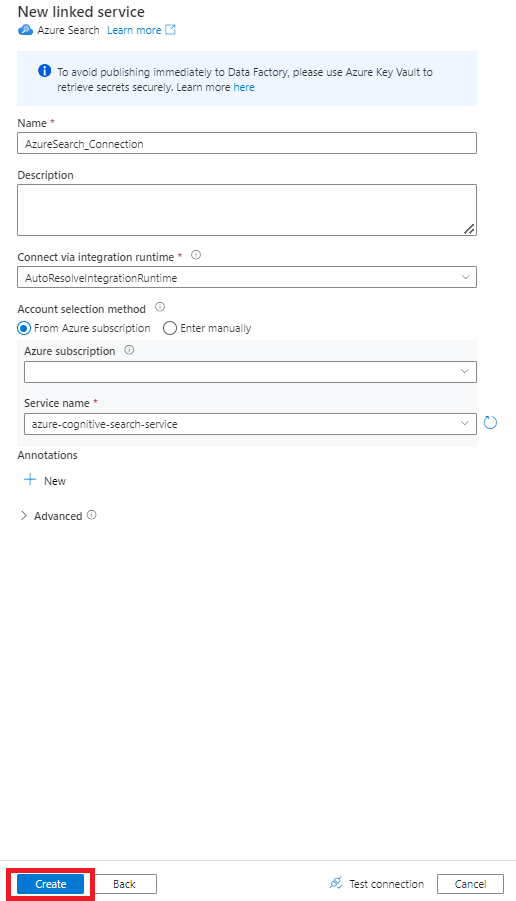
Fill out the New linked service values:
- Choose the Azure subscription where your Azure Cognitive Search service resides.
- Choose the Azure Cognitive Search service that has your Power Query connector indexer.
- Select Create.
Step 6: Configure Azure Cognitive Search Dataset
From the left menu, select Author icon.
Select Datasets, and then select the Datasets Actions ellipses menu (
...).
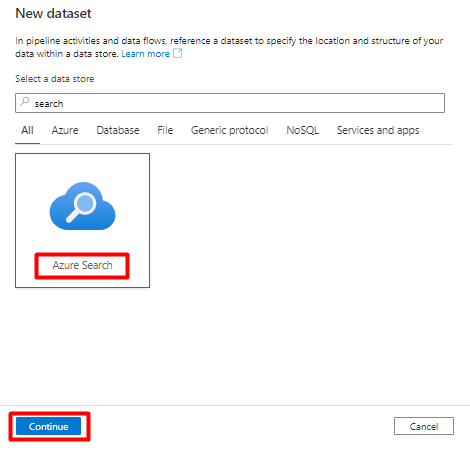
Select New dataset.
On the right pane, in the data store search, enter "search". Select the Azure Search tile and select Continue.
In Set properties:
Select Save.

Step 7: Configure Azure Blob Storage Linked Service
From the left menu, select Manage icon.
Under Linked services, select New.
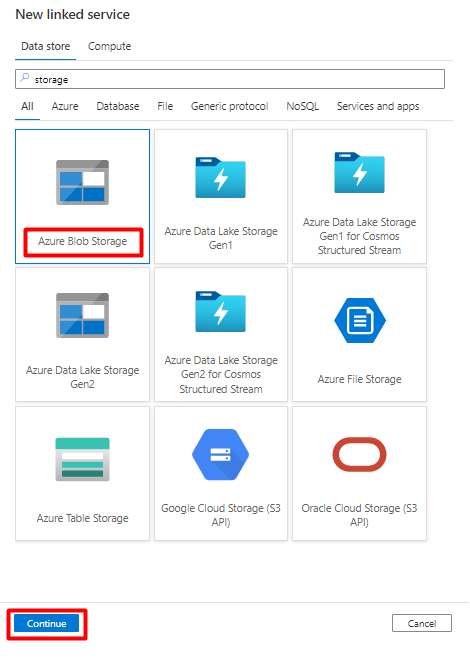
On the right pane, in the data store search, enter "storage". Select the Azure Blob Storage tile and select Continue.
Fill out the New linked service values:
Choose the Authentication type: SAS URI. Only this authentication type can be used to import data from Snowflake into Azure Blob Storage.
Generate a SAS URL for the storage account you'll be using for staging. Paste the Blob SAS URL into the SAS URL field.
Select Create.

Step 8: Configure Storage dataset
From the left menu, select Author icon.
Select Datasets, and then select the Datasets Actions ellipses menu (
...).
Select New dataset.
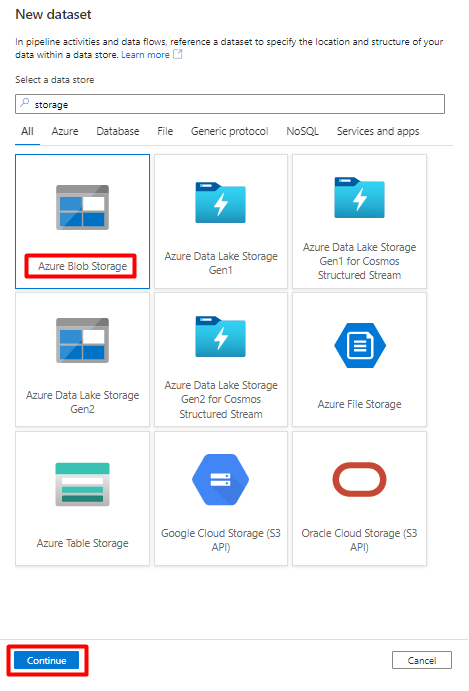
On the right pane, in the data store search, enter "storage". Select the Azure Blob Storage tile and select Continue.
Select DelimitedText format and select Continue.
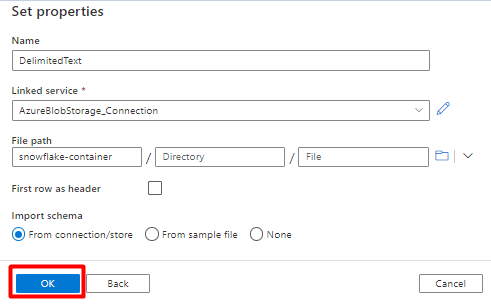
In Set Properties:
Under Linked service, select the linked service created in Step 7.
Under File path, choose the container that will be the sink for the staging process and select OK.
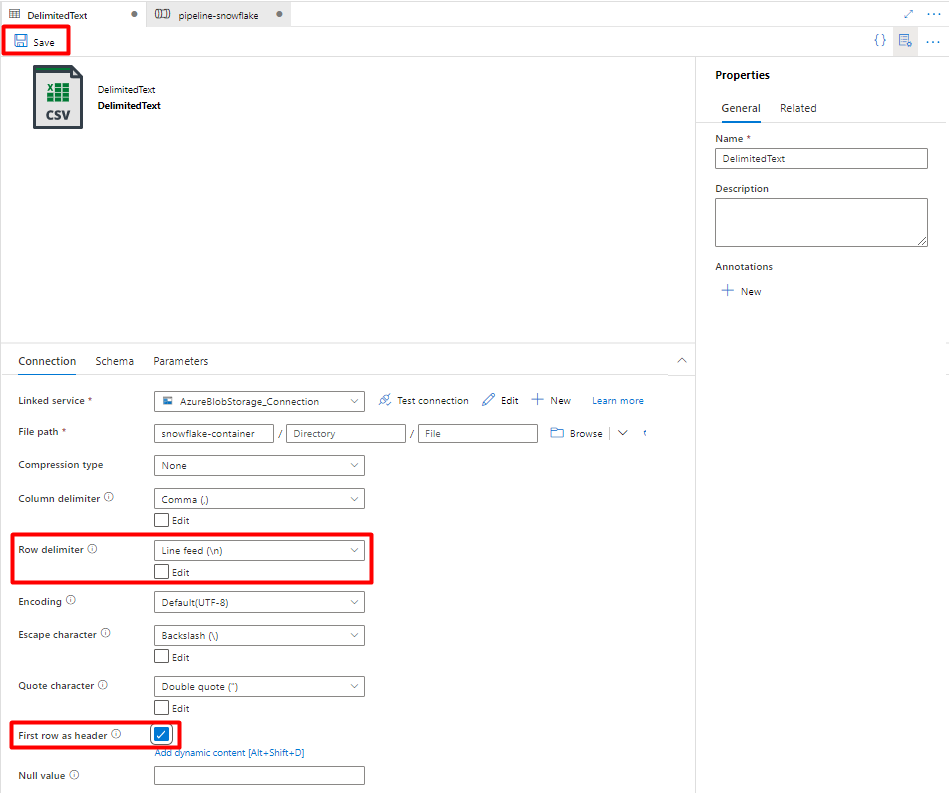
In Row delimiter, select Line feed (\n).
Check First row as a header box.
Select Save.
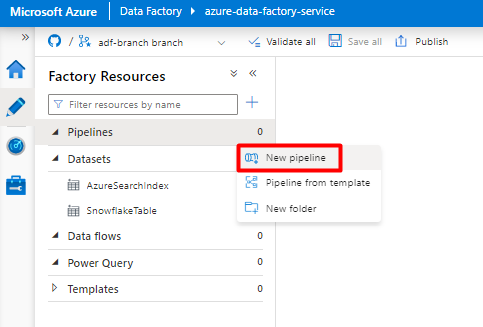
Step 9: Configure Pipeline
From the left menu, select Author icon.
Select Pipelines, and then select the Pipelines Actions ellipses menu (
...).
Select New pipeline.
Create and configure the Data Factory activities that copy from Snowflake to Azure Storage container:
Expand Move & transform section and drag and drop Copy Data activity to the blank pipeline editor canvas.
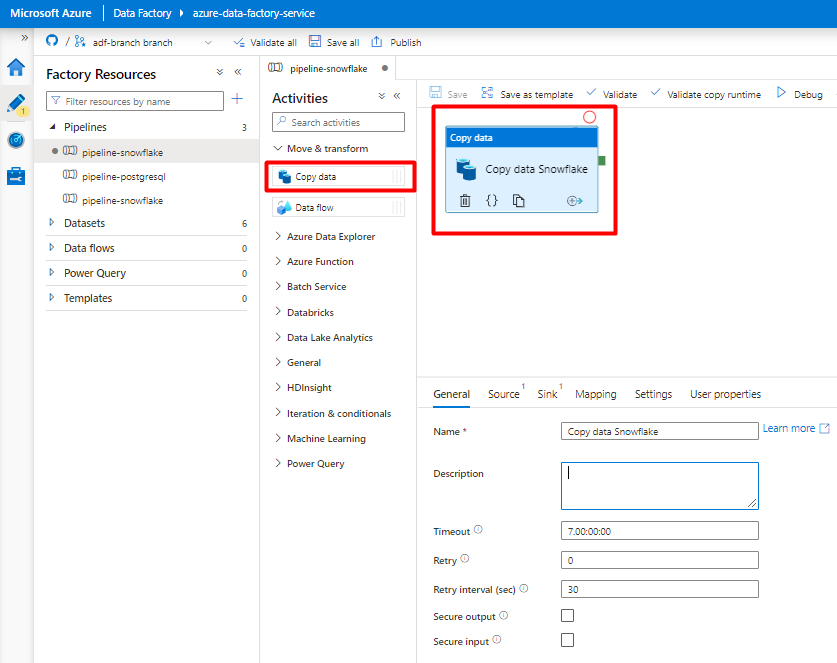
Open the General tab. Accept the default values unless you need to customize the execution.
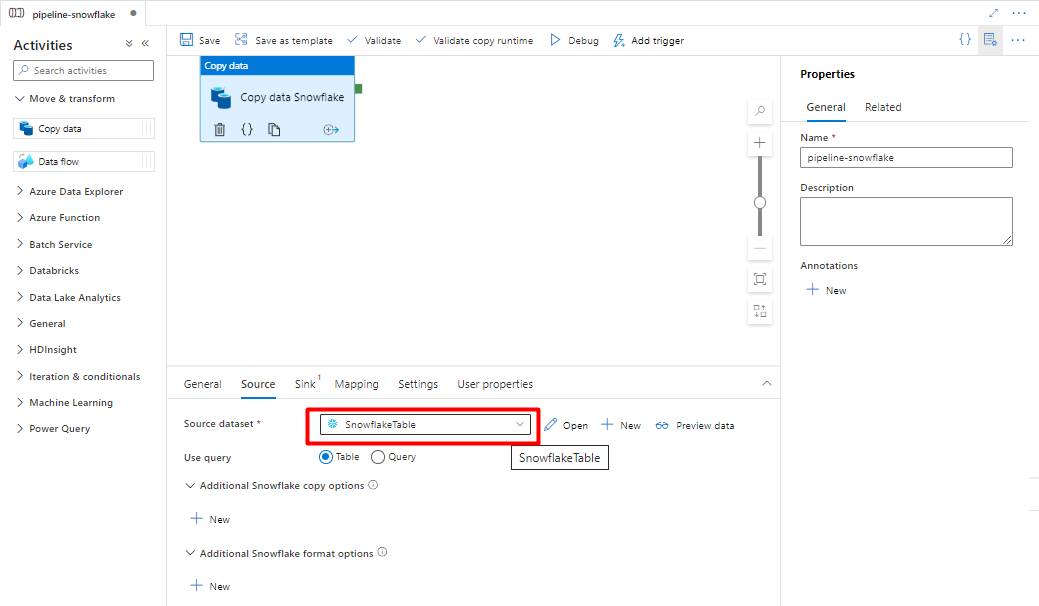
In the Source tab, select your Snowflake table. Leave the remaining options with the default values.
In the Sink tab:
Select Storage DelimitedText dataset created in Step 8.
In File Extension, add .csv.
Leave the remaining options with the default values.

Select Save.
Configure the activities that copy from Azure Storage Blob to a search index:
Expand Move & transform section and drag and drop Copy Data activity to the blank pipeline editor canvas.

In the General tab, accept the default values, unless you need to customize the execution.
In the Source tab:
- Select Storage DelimitedText dataset created in Step 8.
- In the File path type select Wildcard file path.
- Leave all remaining fields with default values.
In the Sink tab, select your Azure Cognitive Search index. Leave the remaining options with the default values.
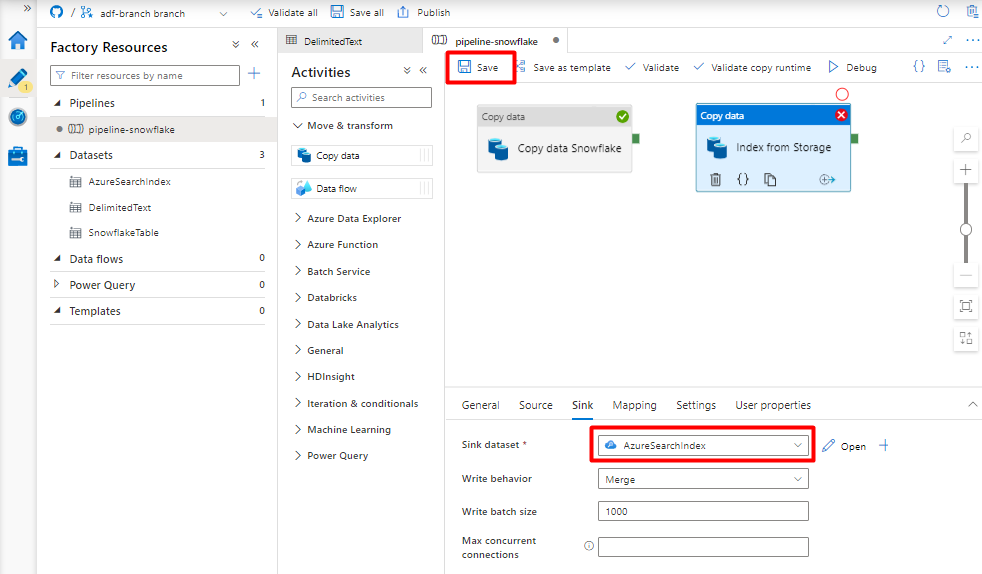
Select Save.
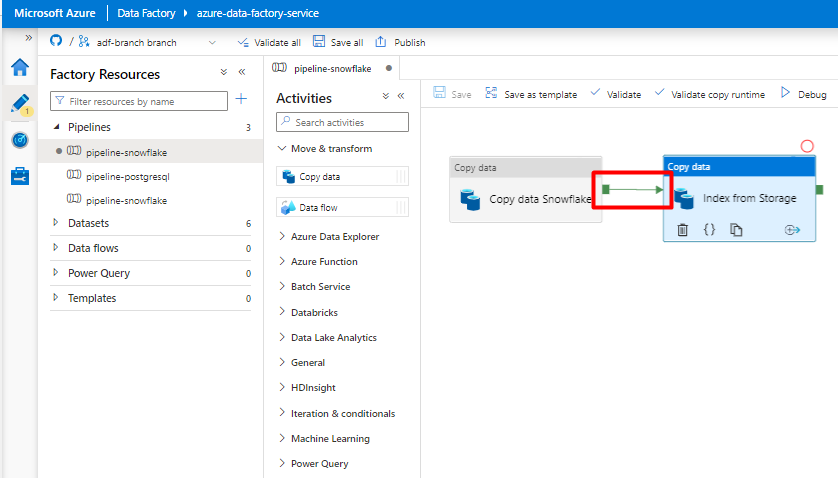
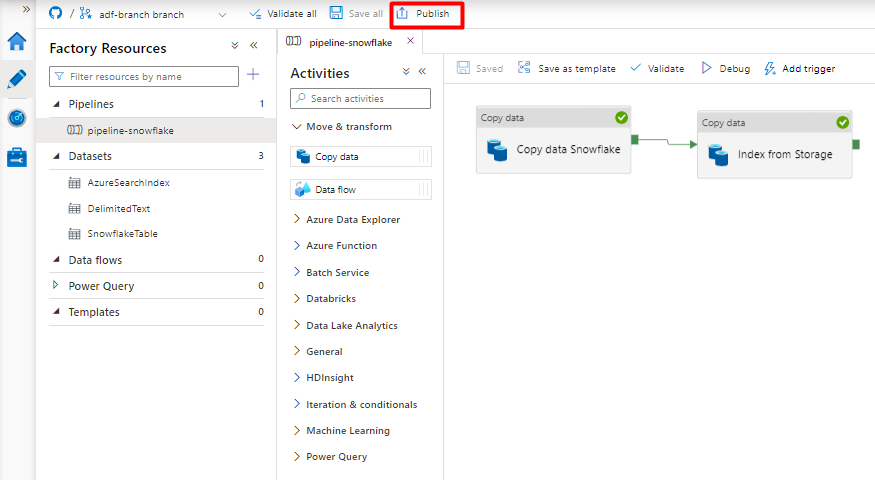
Step 10: Configure Activity order
In the Pipeline canvas editor, select the little green square at the edge of the pipeline activity tile. Drag it to the "Indexes from Storage Account to Azure Cognitive Search" activity to set the execution order.
Select Save.
Step 11: Add a Pipeline trigger
Select Add trigger to schedule the pipeline run and select New/Edit.
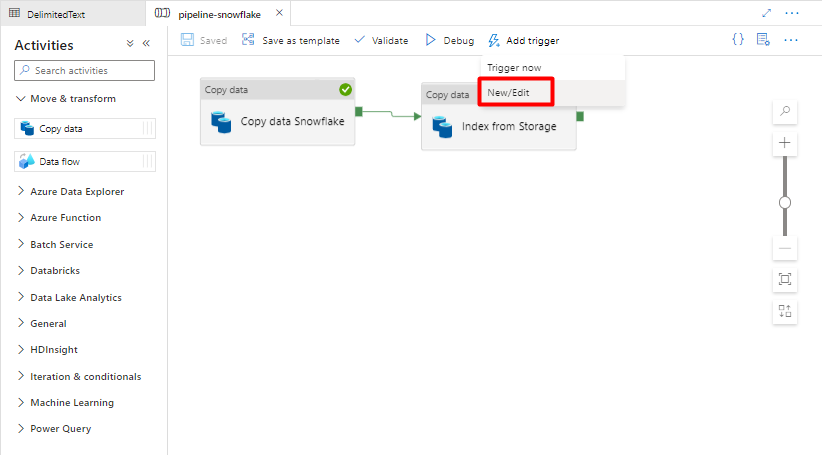
From the Choose trigger dropdown, select New.
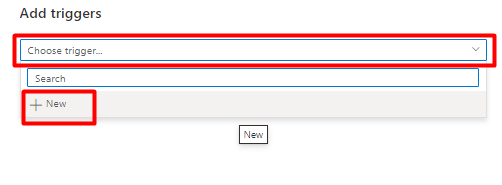
Review the trigger options to run the pipeline and select OK.
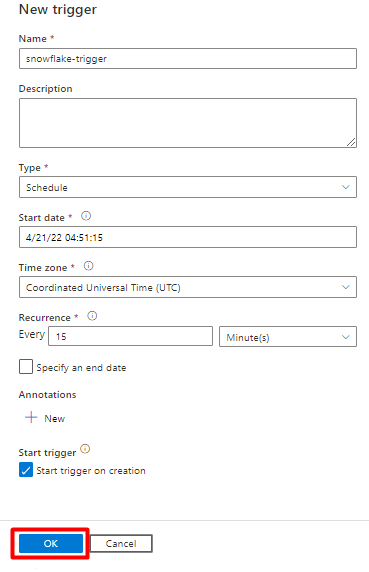
Select Save.
Select Publish.
Migrate a PostgreSQL data pipeline
This section explains how to copy data from a PostgreSQL database to an Azure Cognitive Search index. There's no process for directly indexing from PostgreSQL to Azure Cognitive Search, so this section includes a staging phase that copies database content to an Azure Storage blob container. You'll then index from that staging container using a Data Factory pipeline.
Step 1: Configure PostgreSQL Linked Service
Sign in to Azure Data Factory Studio with your Azure account.
Choose your Data Factory and select Continue.
From the left menu, select the Manage icon.
Under Linked services, select New.
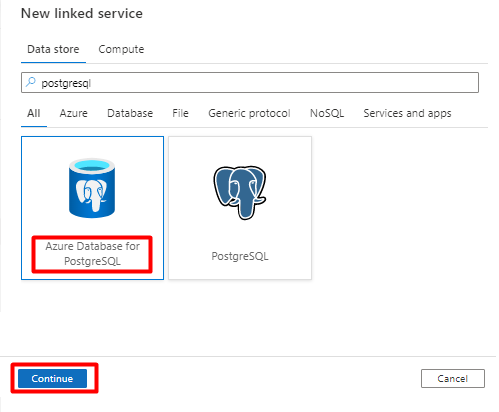
On the right pane, in the data store search, enter "postgresql". Select the PostgreSQL tile that represents where your PostgreSQL database is located (Azure or other) and select Continue. In this example, PostgreSQL database is located in Azure.
Fill out the New linked service values:
In Account selection method, select Enter manually.
From your Azure Database for PostgreSQL Overview page in the Azure portal, paste the following values into their respective field:
- Add Server name to Fully qualified domain name.
- Add Admin username to User name.
- Add Database to Database name.
- Enter the Admin username password to Username password.
- Select Create.

Step 2: Configure PostgreSQL Dataset
From the left menu, select Author icon.
Select Datasets, and then select the Datasets Actions ellipses menu (
...).
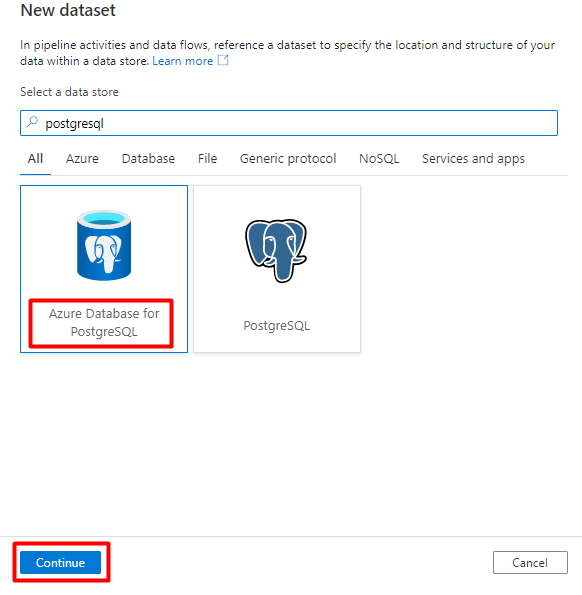
Select New dataset.
On the right pane, in the data store search, enter "postgresql". Select the Azure PostgreSQL tile. Select Continue.
Fill out the Set properties values:
Choose the PostgreSQL Linked Service created in Step 1.
Select the table you would like to import/index.
Select OK.
Select Save.
Step 3: Create a new index in Azure Cognitive Search
Create a new index in your Azure Cognitive Search service with the same schema as the one used for your PostgreSQL data.
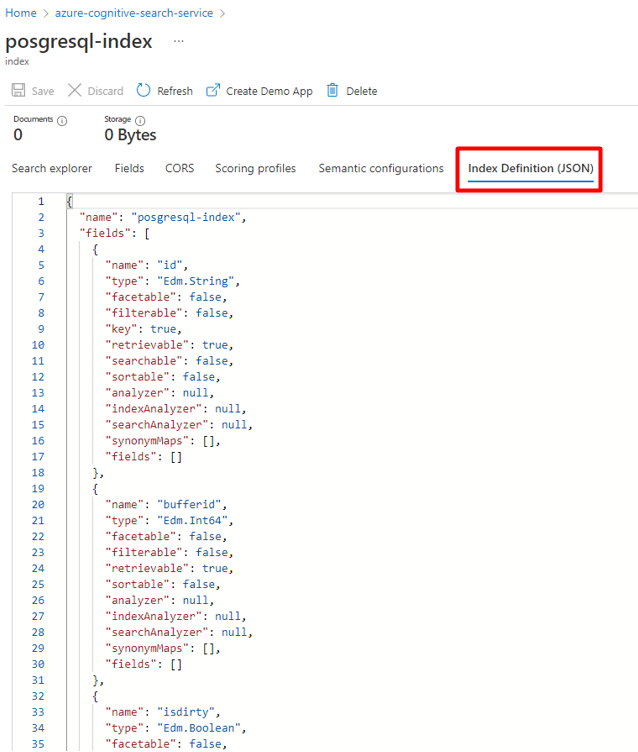
You can repurpose the index you're currently using for the PostgreSQL Power Connector. In the Azure portal, find the index and then select Index Definition (JSON). Select the definition and copy it to the body of your new index request.
Step 4: Configure Azure Cognitive Search Linked Service
From the left menu, select the Manage icon.
Under Linked services, select New.
On the right pane, in the data store search, enter "search". Select Azure Search tile and select Continue.
Fill out the New linked service values:
- Choose the Azure subscription where your Azure Cognitive Search service resides.
- Choose the Azure Cognitive Search service that has your Power Query connector indexer.
- Select Create.
Step 5: Configure Azure Cognitive Search Dataset
From the left menu, select Author icon.
Select Datasets, and then select the Datasets Actions ellipses menu (
...).
Select New dataset.
On the right pane, in the data store search, enter "search". Select the Azure Search tile and select Continue.
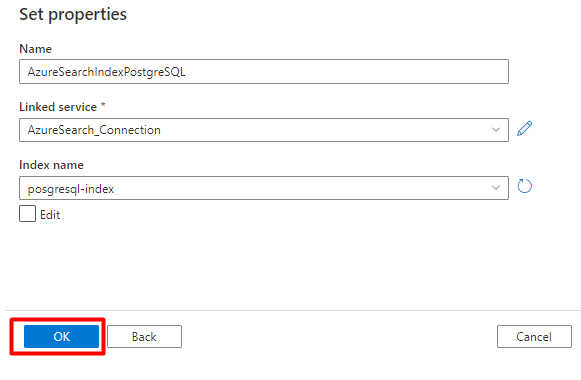
In Set properties:
Select Save.
Step 6: Configure Azure Blob Storage Linked Service
From the left menu, select Manage icon.
Under Linked services, select New.
On the right pane, in the data store search, enter "storage". Select the Azure Blob Storage tile and select Continue.
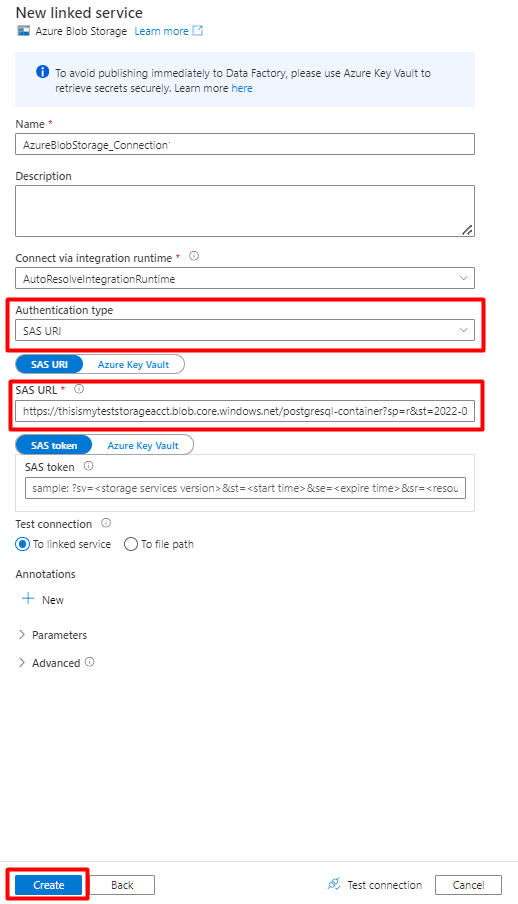
Fill out the New linked service values:
Choose the Authentication type: SAS URI. Only this method can be used to import data from PostgreSQL into Azure Blob Storage.
Generate a SAS URL for the storage account you will be using for staging and copy the Blob SAS URL to SAS URL field.
Select Create.
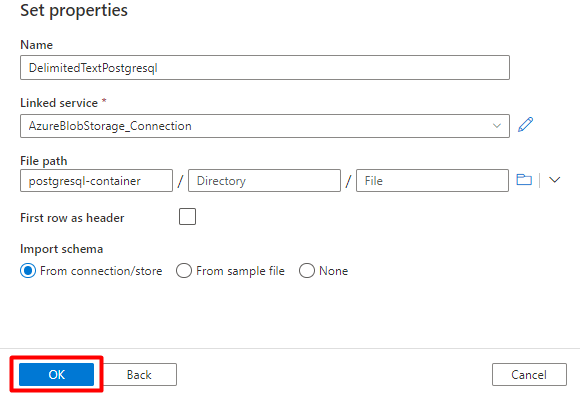
Step 7: Configure Storage dataset
From the left menu, select Author icon.
Select Datasets, and then select the Datasets Actions ellipses menu (
...).
Select New dataset.
On the right pane, in the data store search, enter "storage". Select the Azure Blob Storage tile and select Continue.
Select DelimitedText format and select Continue.
In Row delimiter, select Line feed (\n).
Check First row as a header box.
Select Save.

Step 8: Configure Pipeline
From the left menu, select Author icon.
Select Pipelines, and then select the Pipelines Actions ellipses menu (
...).
Select New pipeline.
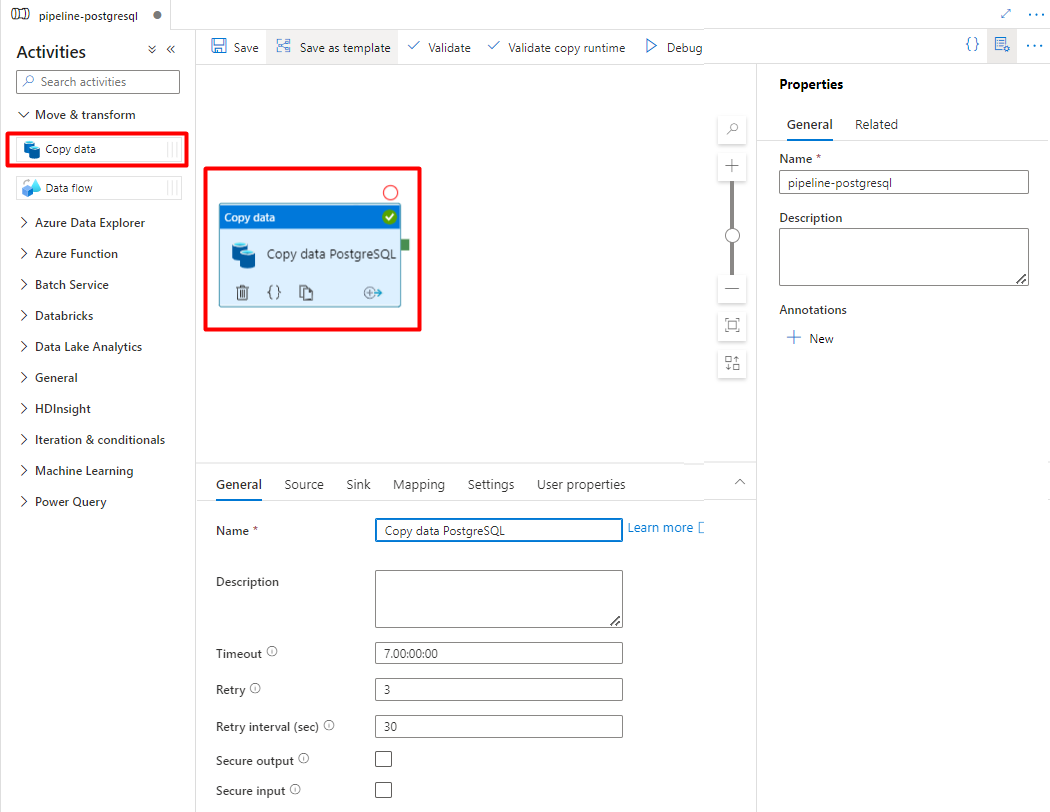
Create and configure the Data Factory activities that copy from PostgreSQL to Azure Storage container.
Expand Move & transform section and drag and drop Copy Data activity to the blank pipeline editor canvas.
Open the General tab, accept the default values, unless you need to customize the execution.
In the Source tab, select your PostgreSQL table. Leave the remaining options with the default values.
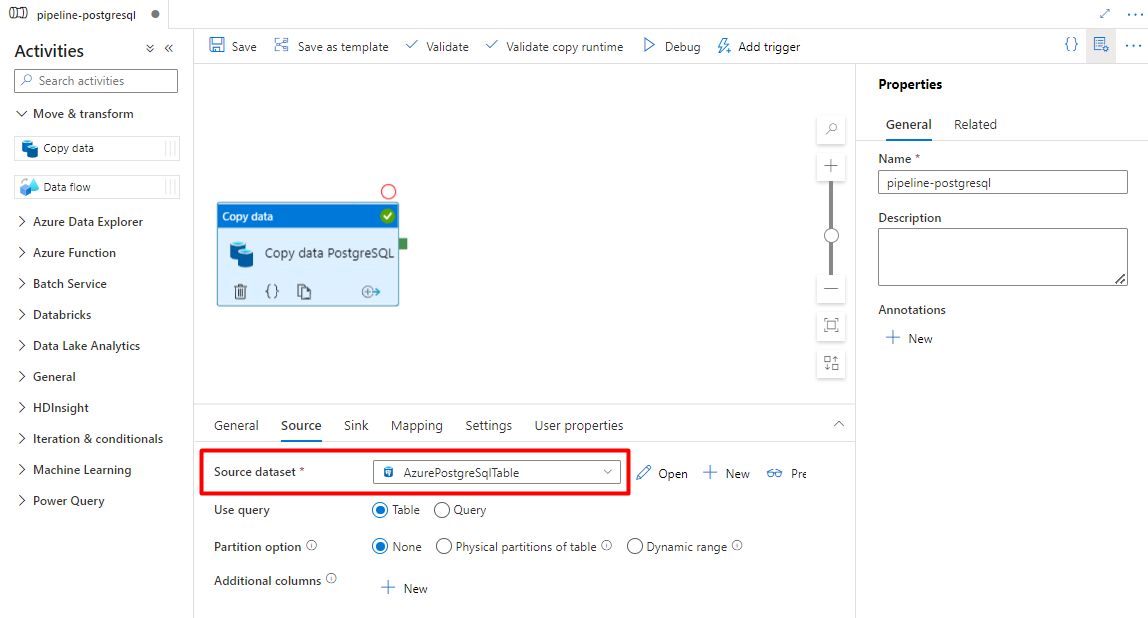
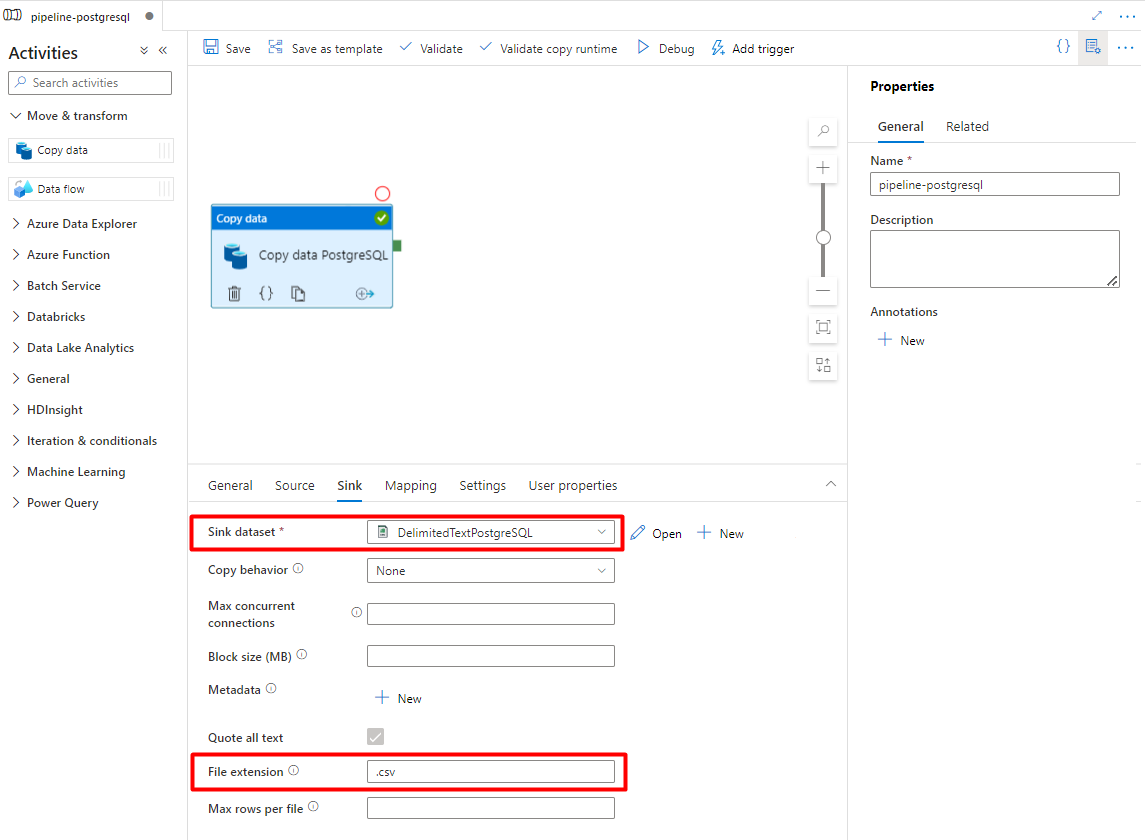
In the Sink tab:
Select the Storage DelimitedText PostgreSQL dataset configured in Step 7.
In File Extension, add .csv
Leave the remaining options with the default values.
Select Save.
Configure the activities that copy from Azure Storage to a search index:
Expand Move & transform section and drag and drop Copy Data activity to the blank pipeline editor canvas.
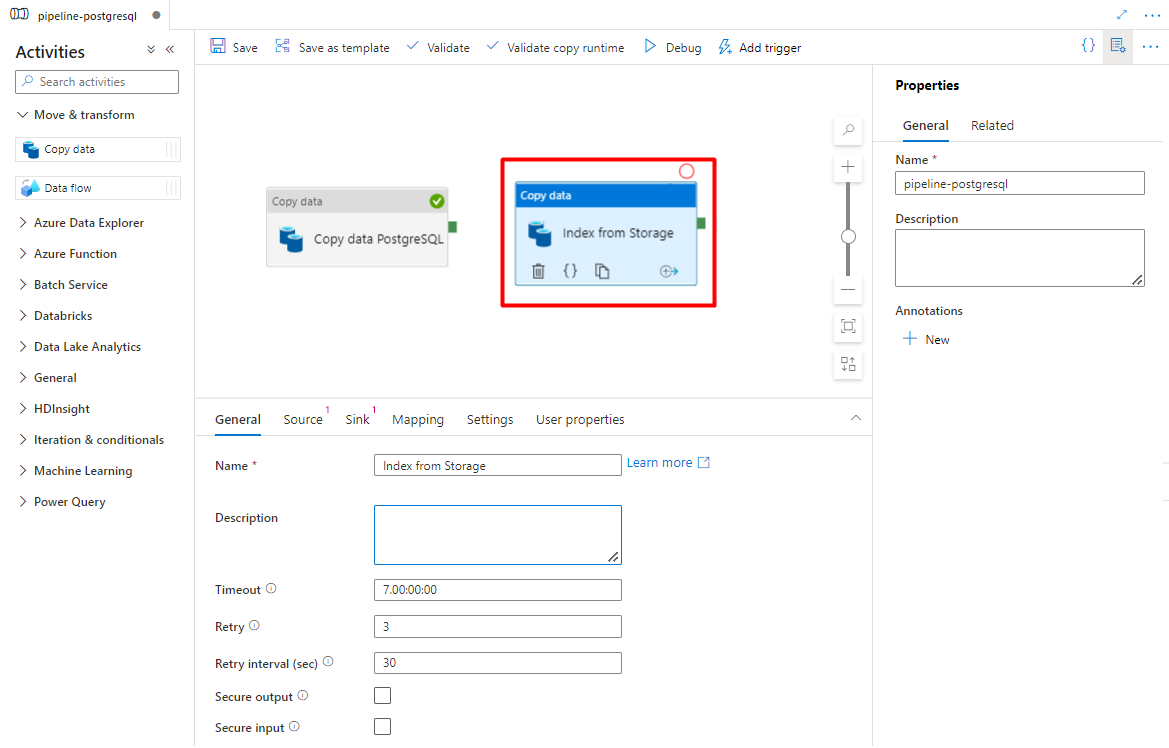
In the General tab, leave the default values, unless you need to customize the execution.
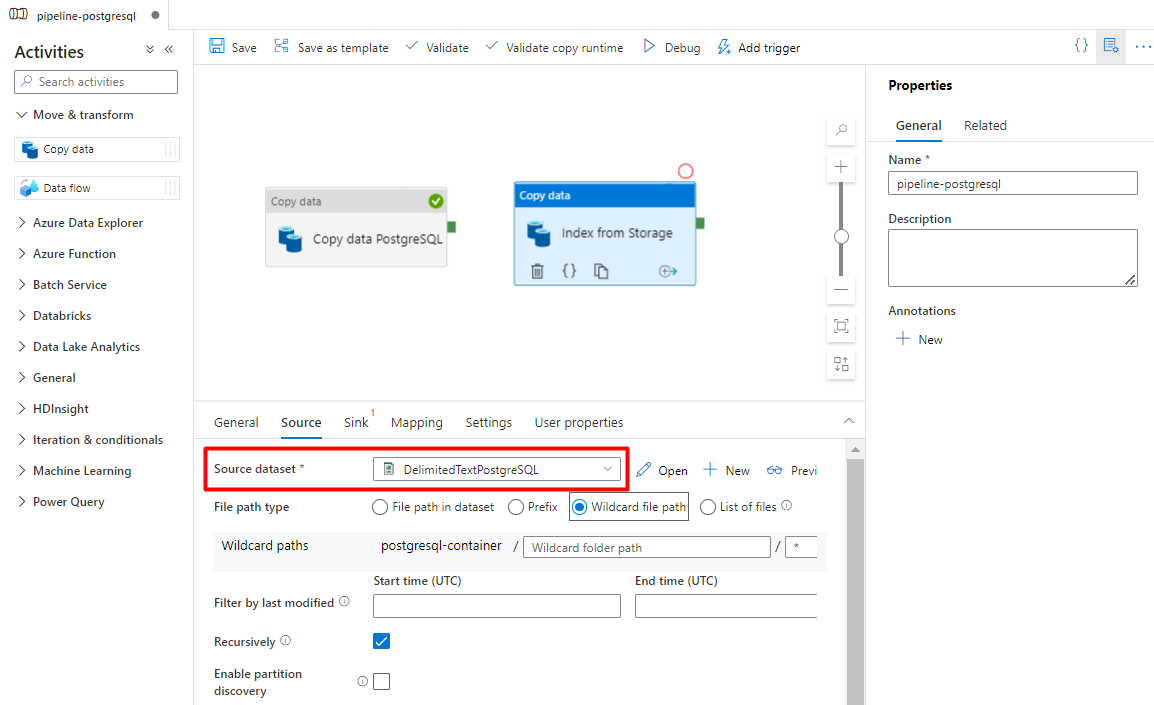
In the Source tab:
- Select the Storage source dataset configured in Step 7.
- In the File path type field, select Wildcard file path.
- Leave all remaining fields with default values.
In the Sink tab, select your Azure Cognitive Search index. Leave the remaining options with the default values.

Select Save.
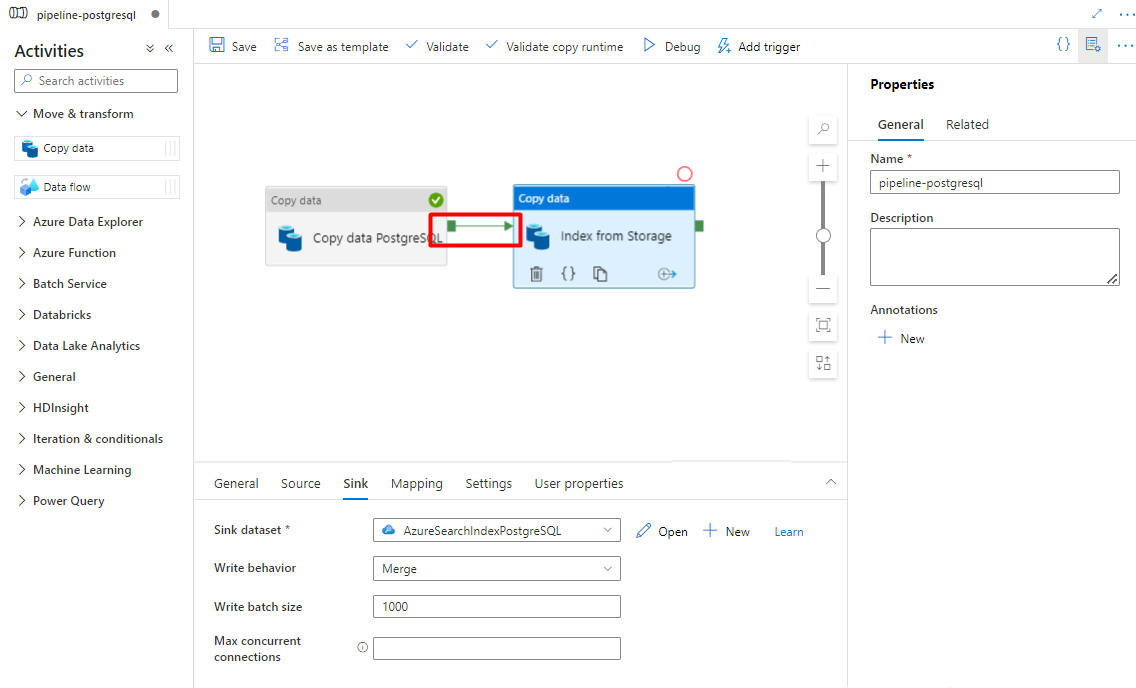
Step 9: Configure Activity order
In the Pipeline canvas editor, select the little green square at the edge of the pipeline activity. Drag it to the "Indexes from Storage Account to Azure Cognitive Search" activity to set the execution order.
Select Save.
Step 10: Add a Pipeline trigger
Select Add trigger to schedule the pipeline run and select New/Edit.
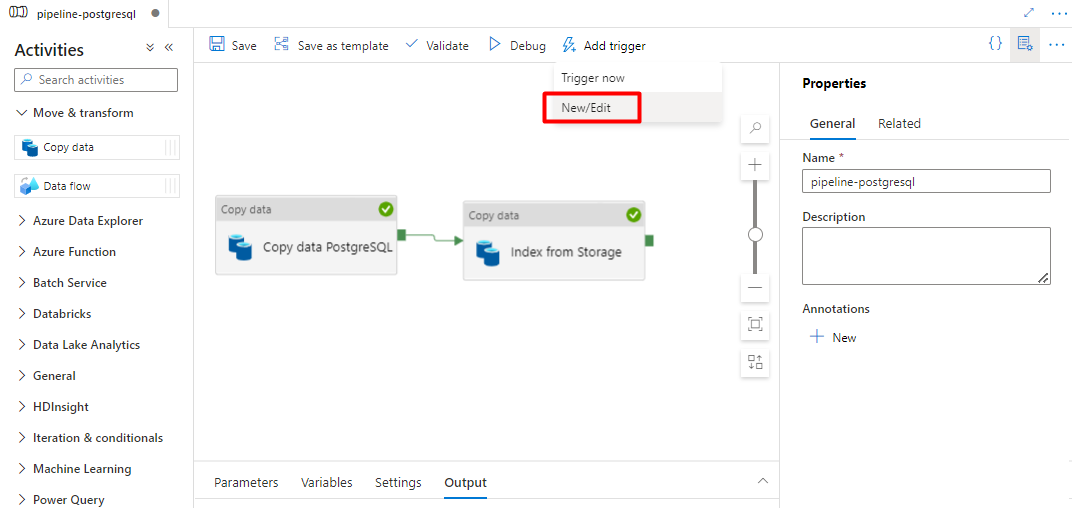
From the Choose trigger dropdown, select New.
Review the trigger options to run the pipeline and select OK.
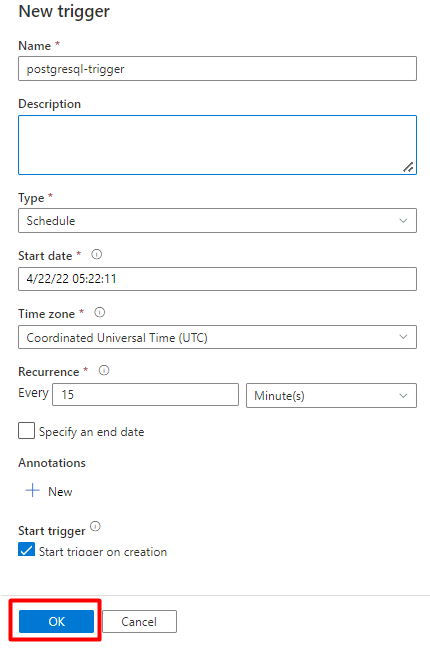
Select Save.
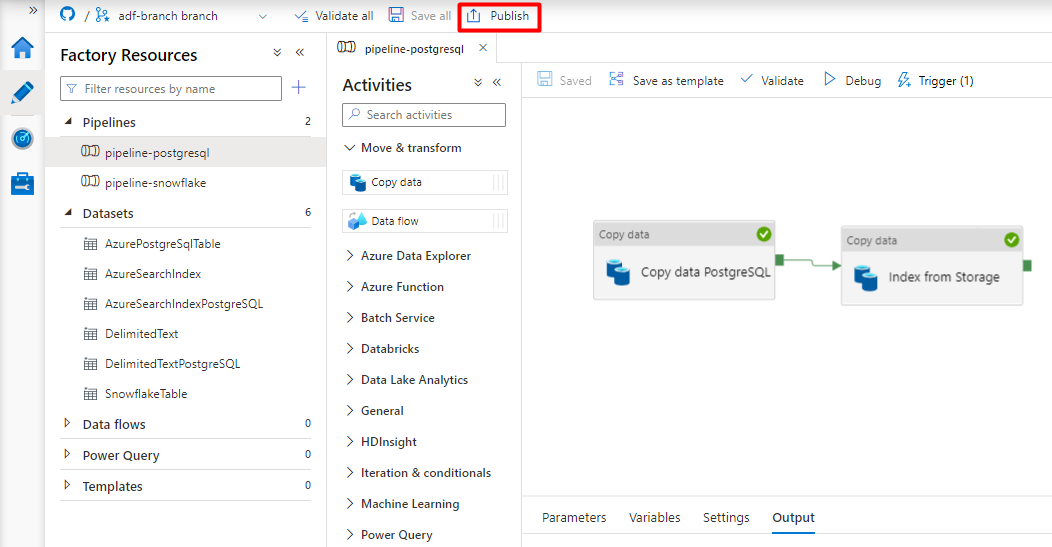
Select Publish.
Legacy content for Power Query connector preview
A Power Query connector is used with a search indexer to automate data ingestion from various data sources, including those on other cloud providers. It uses Power Query to retrieve the data.
Data sources supported in the preview include:
- Amazon Redshift
- Elasticsearch
- PostgreSQL
- Salesforce Objects
- Salesforce Reports
- Smartsheet
- Snowflake
Supported functionality
Power Query connectors are used in indexers. An indexer in Azure Cognitive Search is a crawler that extracts searchable data and metadata from an external data source and populates an index based on field-to-field mappings between the index and your data source. This approach is sometimes referred to as a 'pull model' because the service pulls data in without you having to write any code that adds data to an index. Indexers provide a convenient way for users to index content from their data source without having to write their own crawler or push model.
Indexers that reference Power Query data sources have the same level of support for skillsets, schedules, high water mark change detection logic, and most parameters that other indexers support.
Prerequisites
Although you can no longer use this feature, it had the following requirements while in preview:
Azure Cognitive Search service in a supported region.
Preview registration. This feature must be enabled on the backend.
Azure Blob Storage account, used as an intermediary for your data. The data will flow from your data source, then to Blob Storage, then to the index. This requirement only exists with the initial gated preview.
Regional availability
The preview was only available on search services in the following regions:
- Central US
- East US
- East US 2
- North Central US
- North Europe
- South Central US
- West Central US
- West Europe
- West US
- West US 2
Preview limitations
This section describes the limitations that are specific to the current version of the preview.
Pulling binary data from your data source isn't supported.
Debug session isn't supported.
Getting started using the Azure portal
The Azure portal provides support for the Power Query connectors. By sampling data and reading metadata on the container, the Import data wizard in Azure Cognitive Search can create a default index, map source fields to target index fields, and load the index in a single operation. Depending on the size and complexity of source data, you could have an operational full text search index in minutes.
The following video shows how to set up a Power Query connector in Azure Cognitive Search.
Step 1 – Prepare source data
Make sure your data source contains data. The Import data wizard reads metadata and performs data sampling to infer an index schema, but it also loads data from your data source. If the data is missing, the wizard will stop and return and error.
Step 2 – Start Import data wizard
After you're approved for the preview, the Azure Cognitive Search team will provide you with an Azure portal link that uses a feature flag so that you can access the Power Query connectors. Open this page and start the wizard from the command bar in the Azure Cognitive Search service page by selecting Import data.
Step 3 – Select your data source
There are a few data sources that you can pull data from using this preview. All data sources that use Power Query will include a "Powered By Power Query" on their tile. Select your data source.
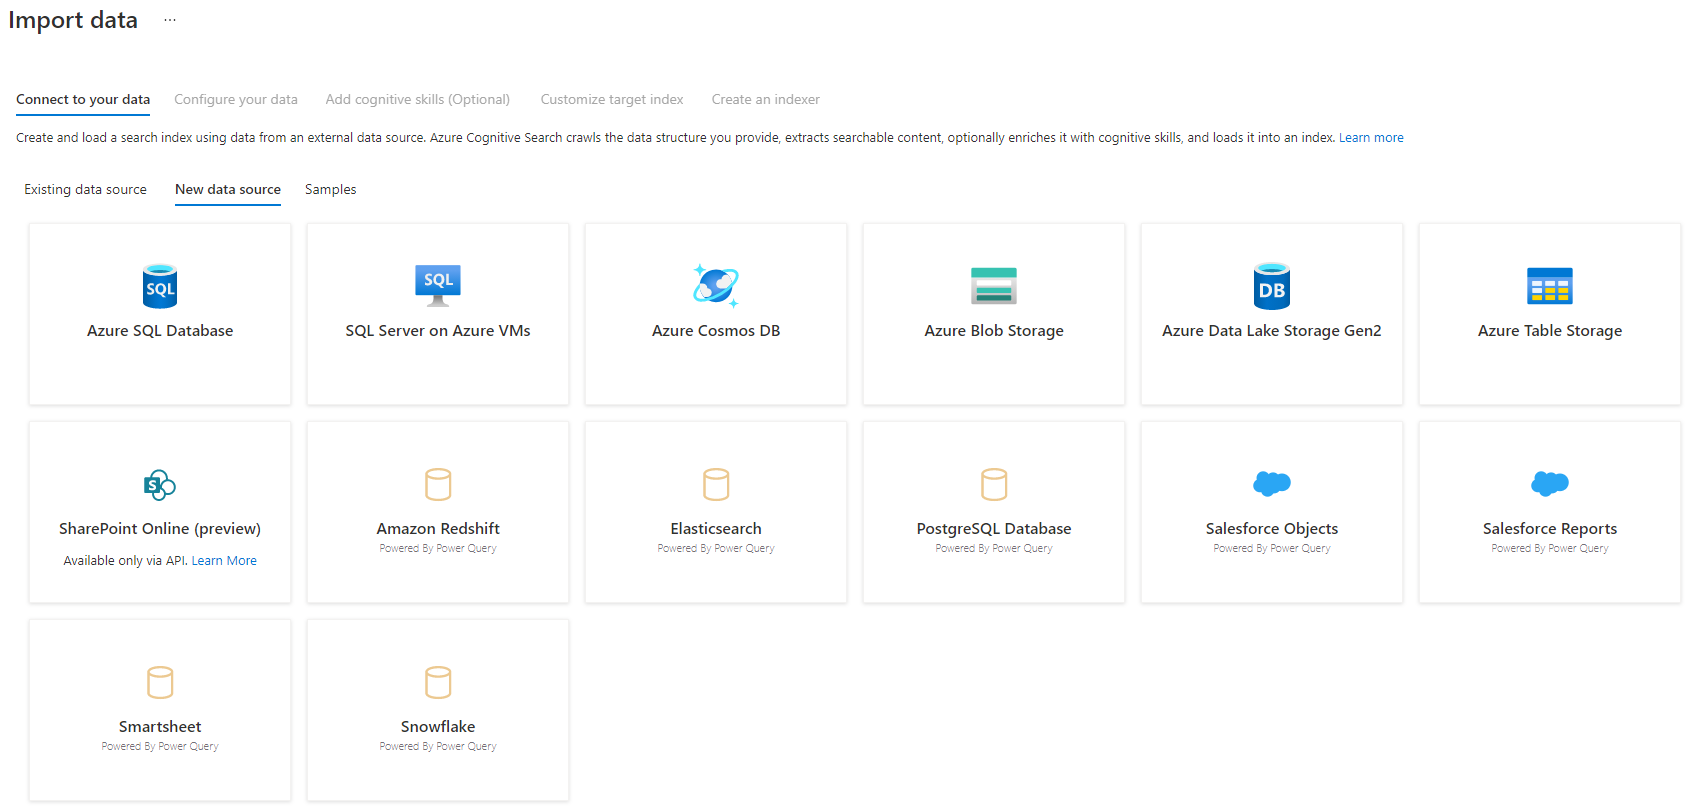
After you've selected your data source, select Next: Configure your data to move to the next section.
Step 4 – Configure your data
In this step, you'll configure your connection. Each data source will require different information. For a few data sources, the Power Query documentation provides more detail on how to connect to your data.
After you've provided your connection credentials, select Next.
Step 5 – Select your data
The import wizard will preview various tables that are available in your data source. In this step, you'll check one table that contains the data you want to import into your index.
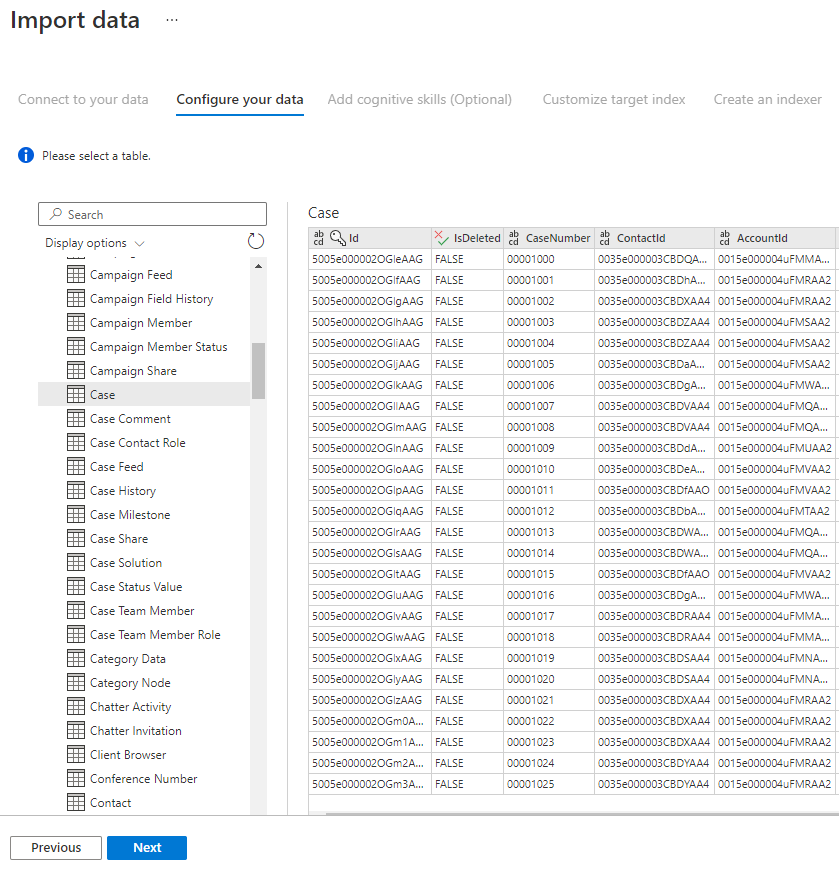
Once you've selected your table, select Next.
Step 6 – Transform your data (Optional)
Power Query connectors provide you with a rich UI experience that allows you to manipulate your data so you can send the right data to your index. You can remove columns, filter rows, and much more.
It's not required that you transform your data before importing it into Azure Cognitive Search.

For more information about transforming data with Power Query, look at Using Power Query in Power BI Desktop.
After data is transformed, select Next.
Step 7 – Add Azure Blob storage
The Power Query connector preview currently requires you to provide a blob storage account. This step only exists with the initial gated preview. This blob storage account will serve as temporary storage for data that moves from your data source to an Azure Cognitive Search index.
We recommend providing a full access storage account connection string:
{ "connectionString" : "DefaultEndpointsProtocol=https;AccountName=<your storage account>;AccountKey=<your account key>;" }
You can get the connection string from the Azure portal by navigating to the storage account blade > Settings > Keys (for Classic storage accounts) or Settings > Access keys (for Azure Resource Manager storage accounts).
After you've provided a data source name and connection string, select “Next: Add cognitive skills (Optional)”.
Step 8 – Add cognitive skills (Optional)
AI enrichment is an extension of indexers that can be used to make your content more searchable.
You can add any enrichments that add benefit to your scenario. When complete, select Next: Customize target index.
Step 9 – Customize target index
On the Index page, you should see a list of fields with a data type and a series of checkboxes for setting index attributes. The wizard can generate a fields list based on metadata and by sampling the source data.
You can bulk-select attributes by selecting the checkbox at the top of an attribute column. Choose Retrievable and Searchable for every field that should be returned to a client app and subject to full text search processing. You'll notice that integers aren't full text or fuzzy searchable (numbers are evaluated verbatim and are often useful in filters).
Review the description of index attributes and language analyzers for more information.
Take a moment to review your selections. Once you run the wizard, physical data structures are created and you won't be able to edit most of the properties for these fields without dropping and recreating all objects.
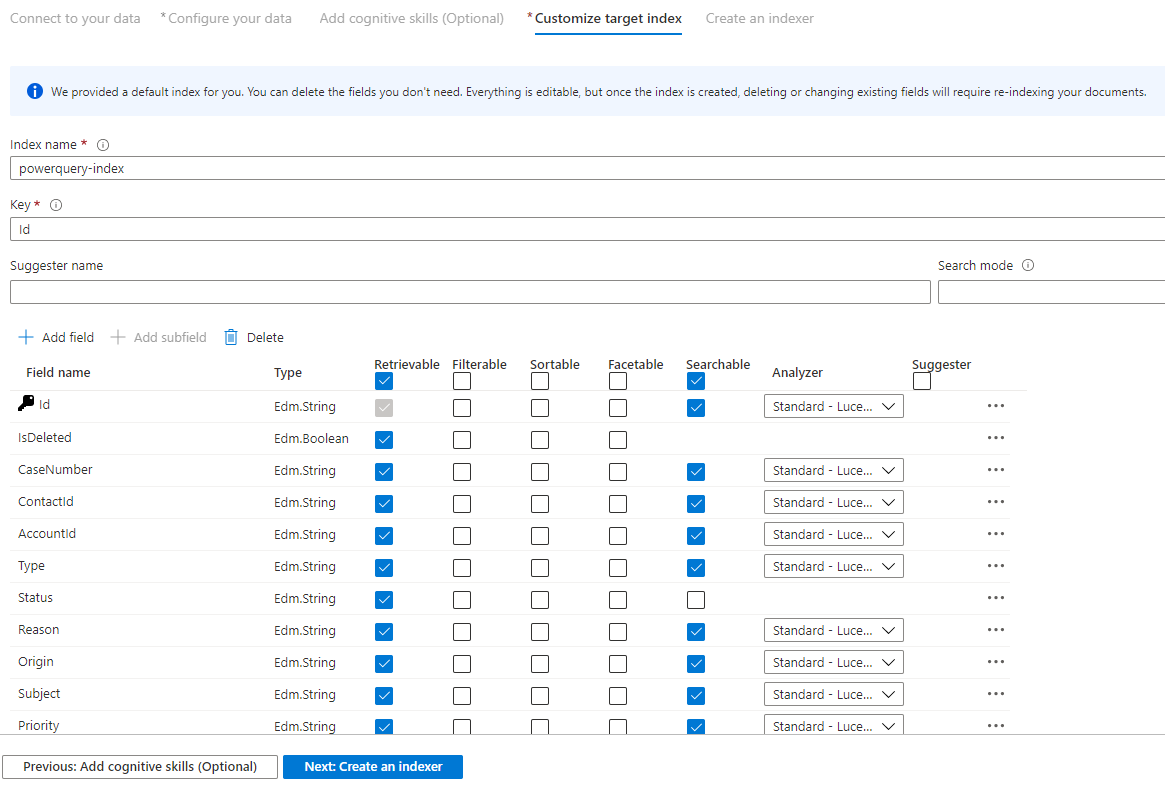
When complete, select Next: Create an Indexer.
Step 10 – Create an indexer
The last step creates the indexer. Naming the indexer allows it to exist as a standalone resource, which you can schedule and manage independently of the index and data source object, created in the same wizard sequence.
The output of the Import data wizard is an indexer that crawls your data source and imports the data you selected into an index on Azure Cognitive Search.
When creating the indexer, you can optionally choose to run the indexer on a schedule and add change detection. To add change detection, designate a 'high water mark' column.
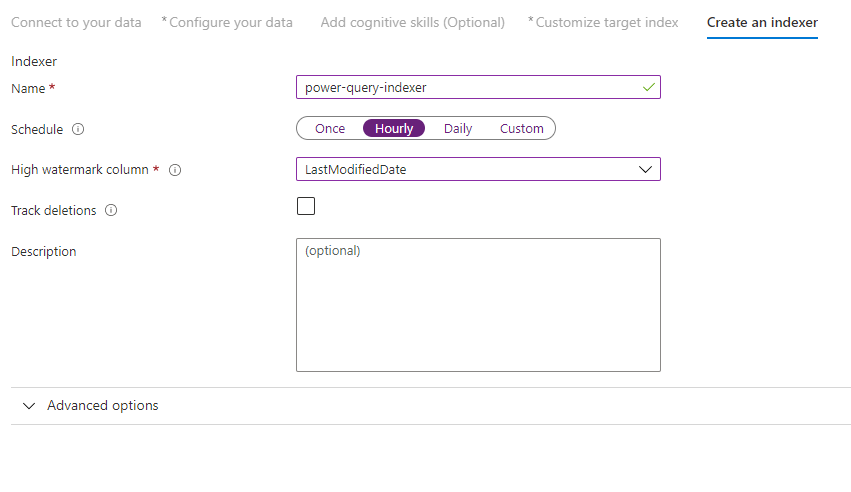
After you've finished filling out this page select Submit.
High Water Mark Change Detection policy
This change detection policy relies on a "high water mark" column capturing the version or time when a row was last updated.
Requirements
- All inserts specify a value for the column.
- All updates to an item also change the value of the column.
- The value of this column increases with each insert or update.
Unsupported column names
Field names in an Azure Cognitive Search index have to meet certain requirements. One of these requirements is that some characters such as "/" aren't allowed. If a column name in your database does not meet these requirements, the index schema detection won't recognize your column as a valid field name and you won't see that column listed as a suggested field for your index. Normally, using field mappings would solve this problem but field mappings aren't supported in the portal.
To index content from a column in your table that has an unsupported field name, rename the column during the "Transform your data" phase of the import data process. For example, you can rename a column named "Billing code/Zip code" to "zipcode". By renaming the column, the index schema detection will recognize it as a valid field name and add it as a suggestion to your index definition.
Next steps
This article explained how to pull data using the Power Query connectors. Because this preview feature is discontinued, it also explains how to migrate existing solutions to a supported scenario.
To learn more about indexers, see Indexers in Azure Cognitive Search.