Get started with Azure Synapse Link for Azure SQL Database
This article is a step-by-step guide for getting started with Azure Synapse Link for Azure SQL Database. For an overview of this feature, see Azure Synapse Link for Azure SQL Database.
Prerequisites
To get Azure Synapse Link for SQL, see Create a new Azure Synapse workspace. The current tutorial is to create Azure Synapse Link for SQL in a public network. This article assumes that you selected Disable Managed virtual network and Allow connections from all IP address when you created an Azure Synapse workspace. If you want to configure Azure Synapse Link for Azure SQL Database with network security, also see Configure Azure Synapse Link for Azure SQL Database with network security.
For database transaction unit (DTU)-based provisioning, make sure that your Azure SQL Database service is at least Standard tier with a minimum of 100 DTUs. Free, Basic, or Standard tiers with fewer than 100 DTUs provisioned aren't supported.
Configure your source Azure SQL database
Sign in to the Azure portal.
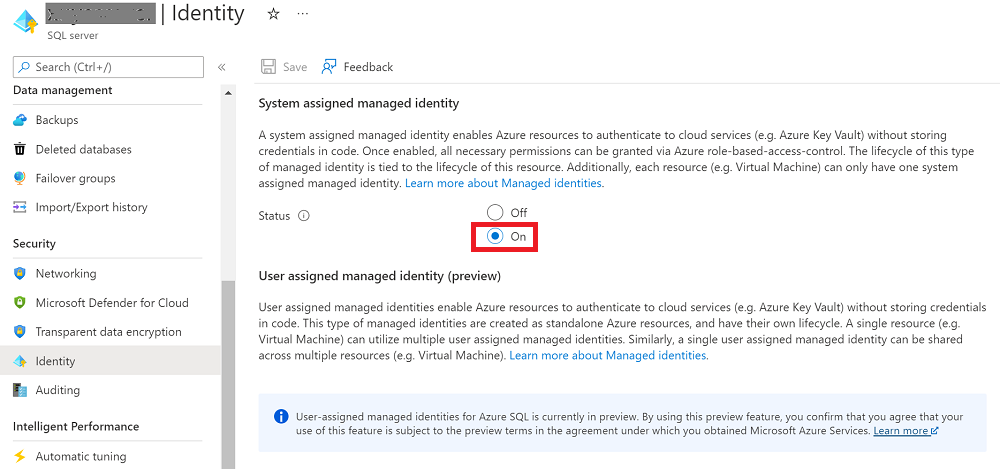
Go to your Azure SQL logical server, select Identity, and then set System assigned managed identity to On.
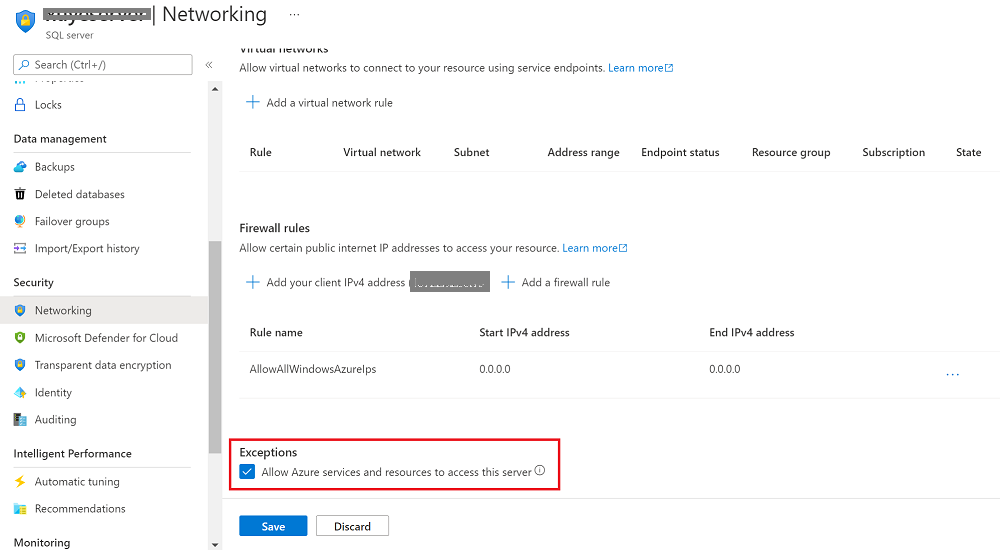
Go to Networking, and then select the Allow Azure services and resources to access this server checkbox.
Using Microsoft SQL Server Management Studio (SSMS) or Azure Data Studio, connect to the logical server. If you want to have your Azure Synapse workspace connect to your Azure SQL database by using a managed identity, set the Microsoft Entra admin permissions on the logical server. To apply the privileges in step 6, use the same admin name to connect to the logical server with administrative privileges.
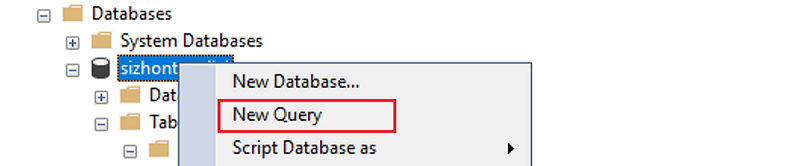
Expand Databases, right-click the database you've created, and then select New Query.
If you want to have your Azure Synapse workspace connect to your source Azure SQL database by using a managed identity, run the following script to provide the managed identity permission to the source database.
You can skip this step if you instead want to have your Azure Synapse workspace connect to your source Azure SQL database via SQL authentication.
CREATE USER <workspace name> FROM EXTERNAL PROVIDER;
ALTER ROLE [db_owner] ADD MEMBER <workspace name>;
You can create a table with your own schema. The following code is just an example of a
CREATE TABLEquery. You can also insert some rows into this table to ensure that there's data to be replicated.CREATE TABLE myTestTable1 (c1 int primary key, c2 int, c3 nvarchar(50))
Create your target Azure Synapse SQL pool
Open Synapse Studio.
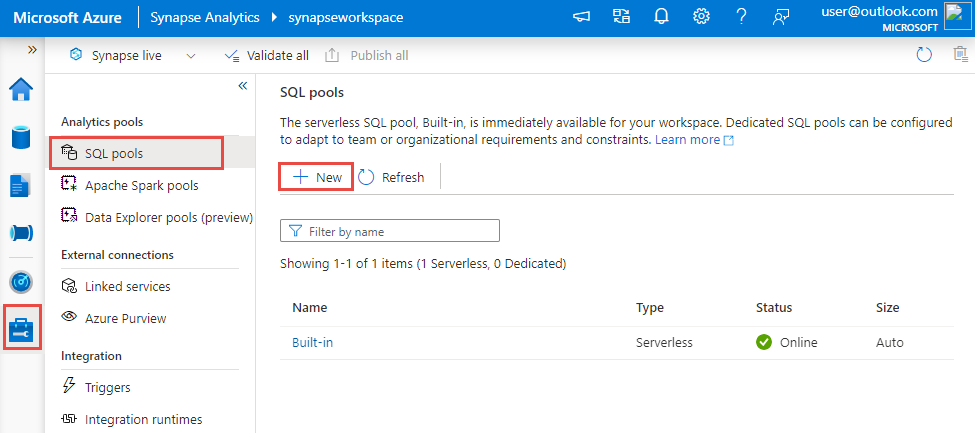
Go to the Manage hub, select SQL pools, and then select New.
Enter a unique pool name, use the default settings, and create the dedicated pool.
You need to create a schema if your expected schema isn't available in the target Azure Synapse SQL database. If your schema is database owner (dbo), you can skip this step.
Create the Azure Synapse Link connection
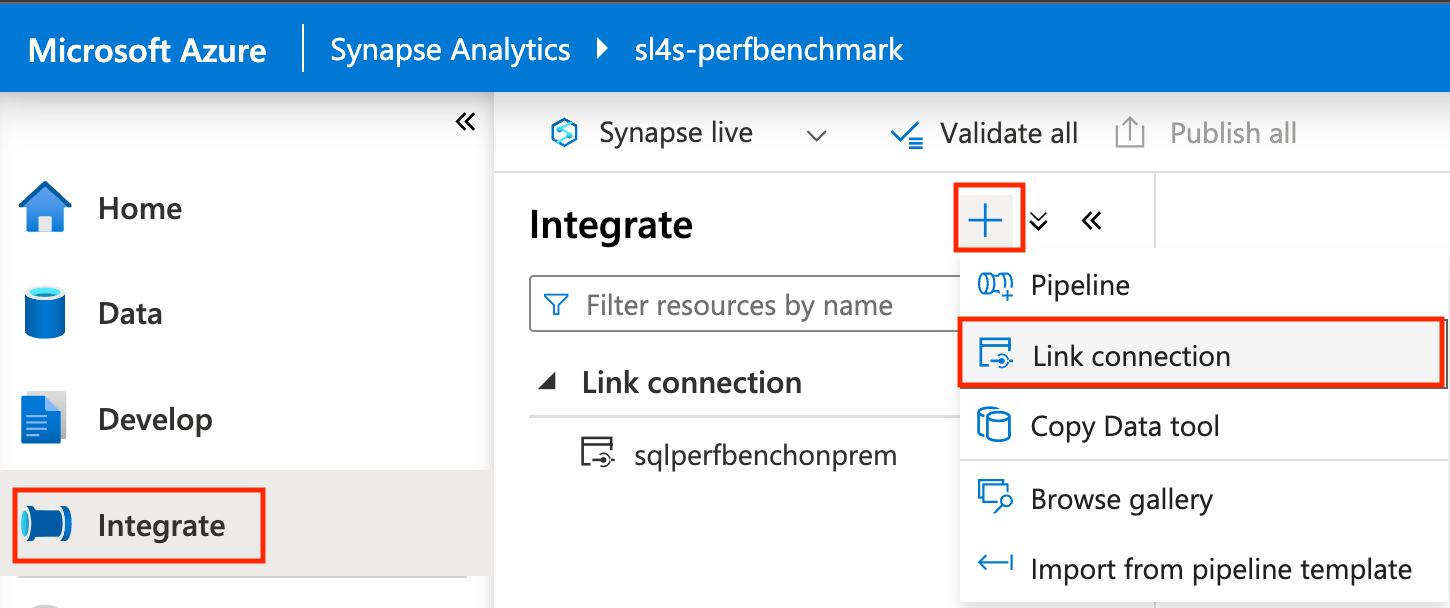
On the left pane of the Azure portal, select Integrate.
On the Integrate pane, select the plus sign (+), and then select Link connection.
Under Source linked service, select New.
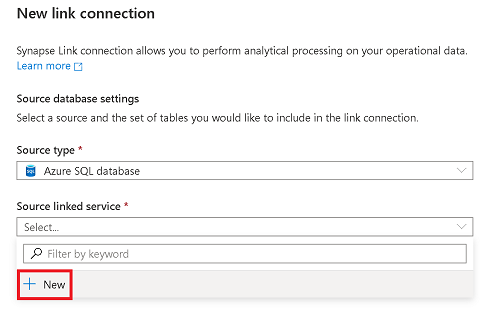
Enter the information for your source Azure SQL database.
- Select the subscription, server, and database corresponding to your Azure SQL database.
- Do either of the following:
- To connect your Azure Synapse workspace to the source database by using the workspace's managed identity, set Authentication type to Managed Identity.
- To use SQL authentication instead, if you know the username and password to use, select SQL Authentication.

Select Test connection to ensure that the firewall rules are properly configured and the workspace can successfully connect to the source Azure SQL database.
Select Create.
Note
The linked service that you create here isn't dedicated to Azure Synapse Link for SQL. It can be used by any workspace user who has the appropriate permissions. Take time to understand the scope of users who might have access to this linked service and its credentials. For more information about permissions in Azure Synapse workspaces, see Azure Synapse workspace access control overview - Azure Synapse Analytics.
Select one or more source tables to replicate to your Azure Synapse workspace, and then select Continue.
Note
A specified source table can be enabled in only one link connection at a time.
Select a target Azure Synapse SQL database and pool.
Provide a name for your Azure Synapse Link connection, and select the number of cores for the link connection compute. These cores will be used for the movement of data from the source to the target.
Note
- The number of cores you select here are allocated to the ingestion service for processing data loading and changes. They don't affect the source Azure SQL Database configuration or the target dedicated SQL pool confiruation.
- We recommend starting low and increasing the number of cores as needed.
Select OK.
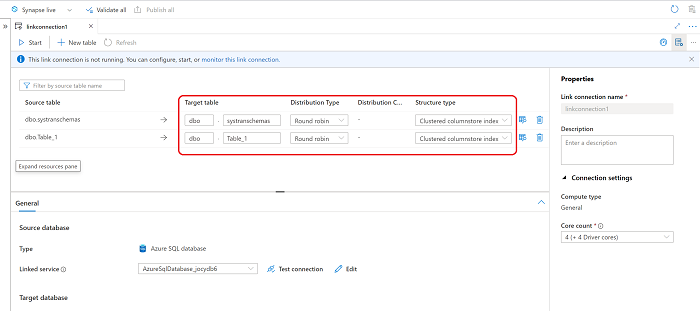
With the new Azure Synapse Link connection open, you can update the target table name, distribution type, and structure type.
Note
- Consider using heap table for the structure type when your data contains varchar(max), nvarchar(max), and varbinary(max).
- Make sure that the schema in your Azure Synapse SQL dedicated pool has already been created before you start the link connection. Azure Synapse Link for SQL will create tables automatically under your schema in the Azure Synapse SQL dedicated pool.
Select Publish all to save the new link connection to the service.
Start the Azure Synapse Link connection
Select Start, and then wait a few minutes for the data to be replicated.
Note
A link connection will start from a full initial load from your source database, followed by incremental change feeds via the change feed feature in Azure SQL Database. For more information, see Azure Synapse Link for SQL change feed.
Monitor the status of the Azure Synapse Link connection
You can monitor the status of your Azure Synapse Link connection, see which tables are being initially copied over (snapshotting), and see which tables are in continuous replication mode (replicating).
Go to the Monitor hub, and then select Link connections.
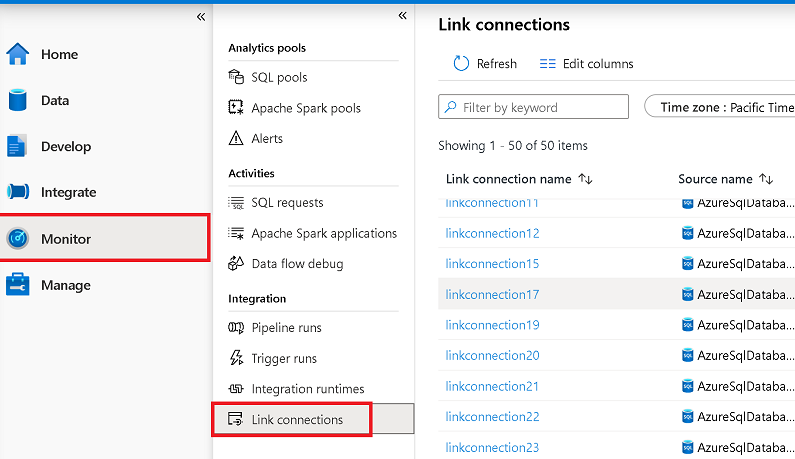
Open the Azure Synapse Link connection that you started, and view the status of each table.
Select Refresh on the monitoring view for your connection to observe any updates to the status.
Query the replicated data
Wait for a few minutes, and then check to ensure that the target database has the expected table and data. You can also now explore the replicated tables in your target Azure Synapse SQL dedicated pool.
In the Data hub, under Workspace, open your target database.
Under Tables, right-click one of your target tables.
Select New SQL script, and then select Top 100 rows.
Run this query to view the replicated data in your target Azure Synapse SQL dedicated pool.
You can also query the target database by using SSMS or other tools. Use the SQL dedicated endpoint for your workspace as the server name. This name is usually
<workspacename>.sql.azuresynapse.net. AddDatabase=databasename@poolnameas an extra connection string parameter when you're connecting via SSMS or other tools.
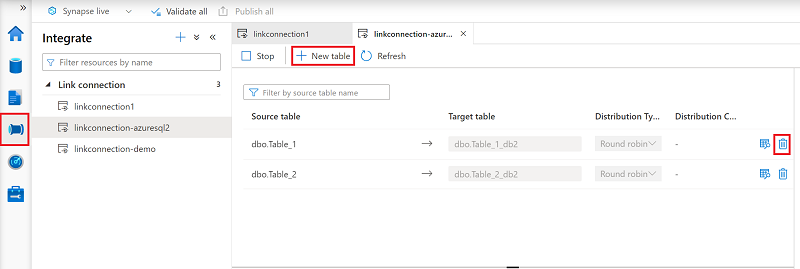
Add or remove a table in an existing Azure Synapse Link connection
To add or remove tables in Synapse Studio, do the following:
Open the Integrate hub.
Select the link connection that you want to edit, and then open it.
Do either of the following:
- To add a table, select New table.
- To remove a table, select the trash can icon next to it.
Note
You can directly add or remove tables when a link connection is running.
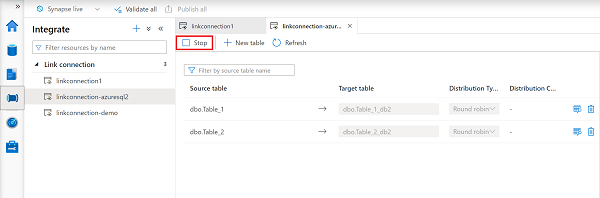
Stop the Azure Synapse Link connection
To stop the Azure Synapse Link connection in Synapse Studio, do the following:
In your Azure Synapse workspace, open the Integrate hub.
Select the link connection that you want to edit, and then open it.
Select Stop to stop the link connection, and it will stop replicating your data.
Note
If you restart a link connection after stopping it, it will start from a full initial load from your source database, and incremental change feeds will follow.
Next steps
If you're using a database other than an Azure SQL database, see:
Feedback
Coming soon: Throughout 2024 we will be phasing out GitHub Issues as the feedback mechanism for content and replacing it with a new feedback system. For more information see: https://aka.ms/ContentUserFeedback.
Submit and view feedback for