Quickstart: Publish and subscribe to MQTT messages on Event Grid Namespace with Azure portal
In this article, you use the Azure portal to do the following tasks:
- Create an Event Grid namespace and enable MQTT broker
- Create sub resources such as clients, client groups, and topic spaces
- Grant clients access to publish and subscribe to topic spaces
- Publish and receive messages between clients
Prerequisites
- Create an Azure free account If you don't have an Azure subscription.
- Read through Event Grid overview before starting this tutorial, if you're new to Azure Event Grid.
- Ensure that port 8883 is open in your firewall. The sample in this tutorial uses the MQTT protocol, which communicates over port 8883. This port may be blocked in some corporate and educational network environments.
- You need an X.509 client certificate to generate the thumbprint and authenticate the client connection.
Generate sample client certificate and thumbprint
If you don't already have a certificate, you can create a sample certificate using the step CLI. Consider installing manually for Windows.
After a successful installation of Step, you should open a command prompt in your user profile folder (Win+R type %USERPROFILE%).
To create root and intermediate certificates, run the following command. Remember the password, which needs to be used in the next step.
step ca init --deployment-type standalone --name MqttAppSamplesCA --dns localhost --address 127.0.0.1:443 --provisioner MqttAppSamplesCAProvisionerUse the CA files generated to create a certificate for the first client. Ensure to use the correct path for the cert and secrets files in the command.
step certificate create client1-authn-ID client1-authn-ID.pem client1-authn-ID.key --ca .step/certs/intermediate_ca.crt --ca-key .step/secrets/intermediate_ca_key --no-password --insecure --not-after 2400hTo view the thumbprint, run the Step command.
step certificate fingerprint client1-authn-ID.pemNow, create a certificate for the second client.
step certificate create client2-authn-ID client2-authn-ID.pem client2-authn-ID.key --ca .step/certs/intermediate_ca.crt --ca-key .step/secrets/intermediate_ca_key --no-password --insecure --not-after 2400hTo view the thumbprint to use with the second client, run the Step command.
step certificate fingerprint client2-authn-ID.pem
Create a namespace
Sign in to Azure portal.
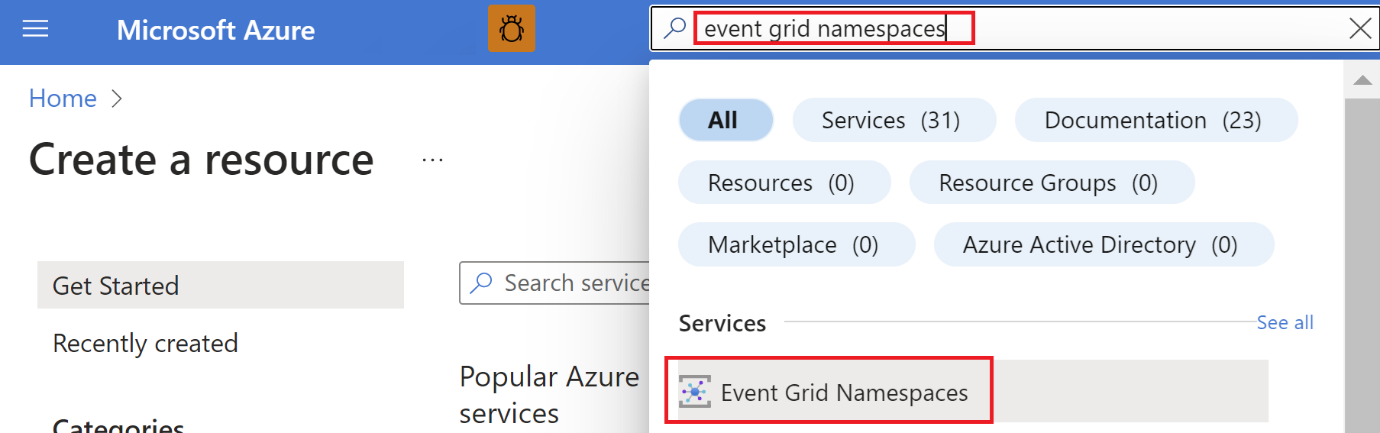
In the search bar, type Event Grid Namespaces, and then select Event Grid Namespaces from the drop-down list.
On the Event Grid Namespaces page, select + Create on the toolbar.
On the Create namespace page, follow these steps:
Select your Azure subscription.
Select an existing resource group or select Create new and enter a name for the resource group.
Provide a unique name for the namespace. The namespace name must be unique per region because it represents a DNS entry. Don't use the name shown in the image. Instead, create your own name - it must be between 3-50 characters and contain only values a-z, A-Z, 0-9, and
-.Select a location for the Event Grid namespace. Currently, Event Grid namespace is available only in select regions.
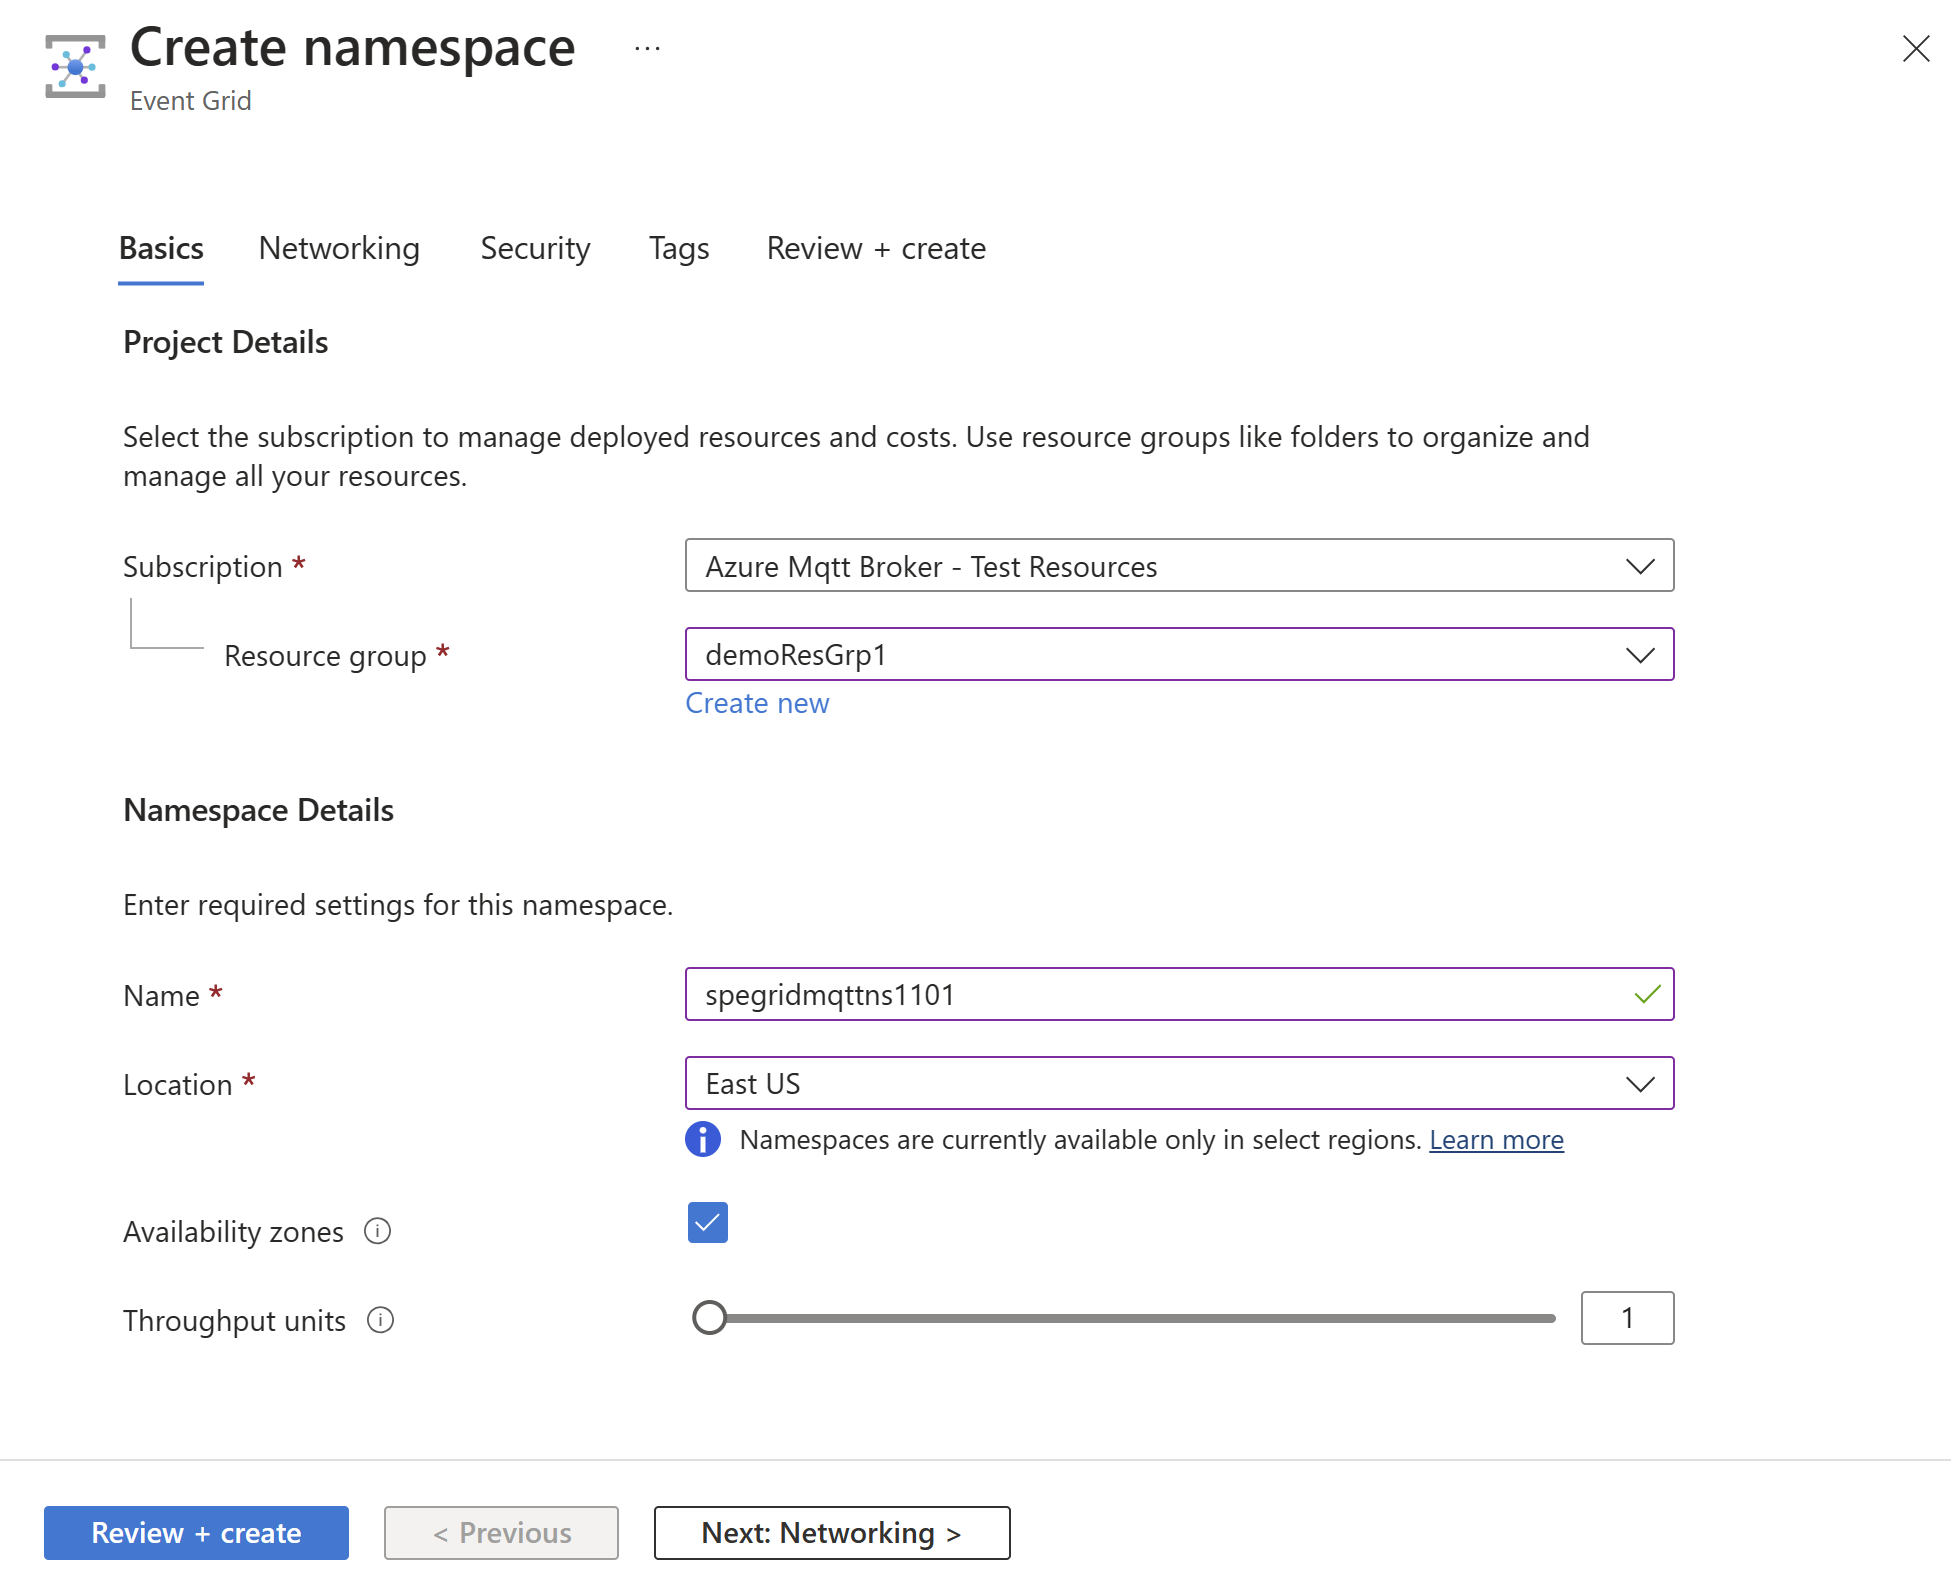
Select Review + create at the bottom of the page.
On the Review + create tab of the Create namespace page, select Create.
Note
To keep the QuickStart simple, you'll be using only the Basics page to create a namespace. For detailed steps about configuring network, security, and other settings on other pages of the wizard, see Create a Namespace.
After the deployment succeeds, select Go to resource to navigate to the Event Grid Namespace Overview page for your namespace.
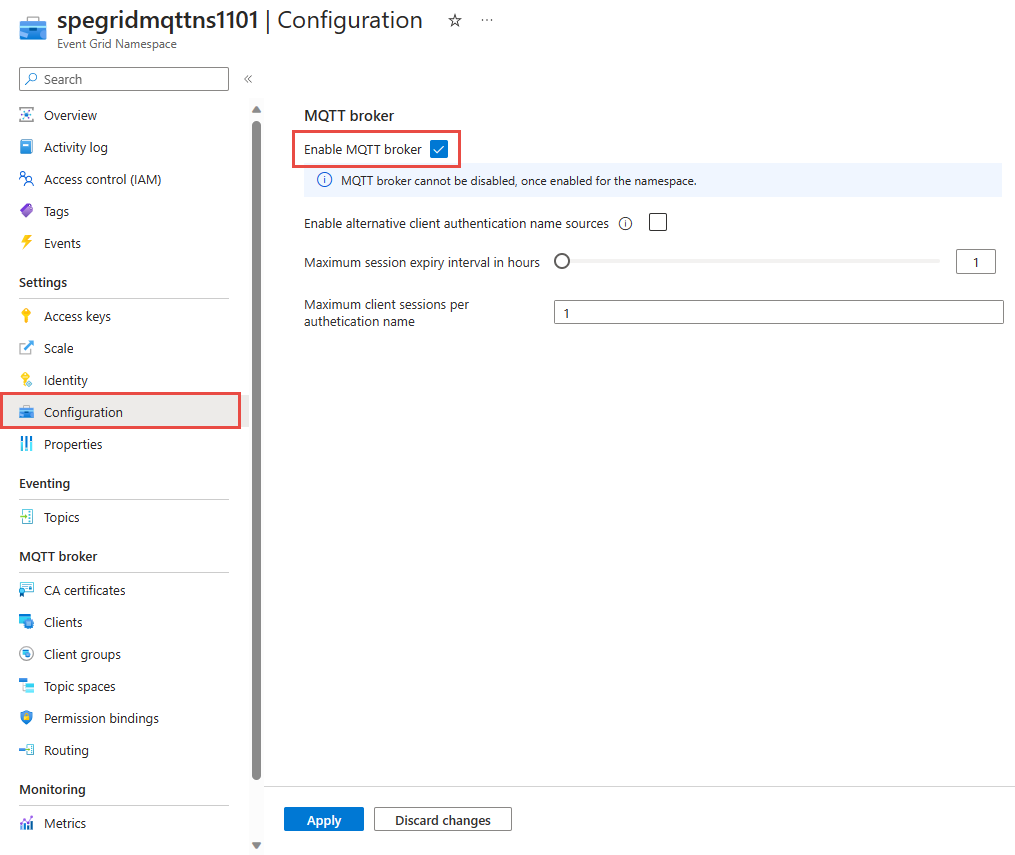
In the Overview page, you see that the MQTT broker is in Disabled state. To enable MQTT broker, select the Disabled link, it will redirect you to Configuration page.
On Configuration page, select the Enable MQTT broker option, and then select Apply to apply the settings.

Create clients
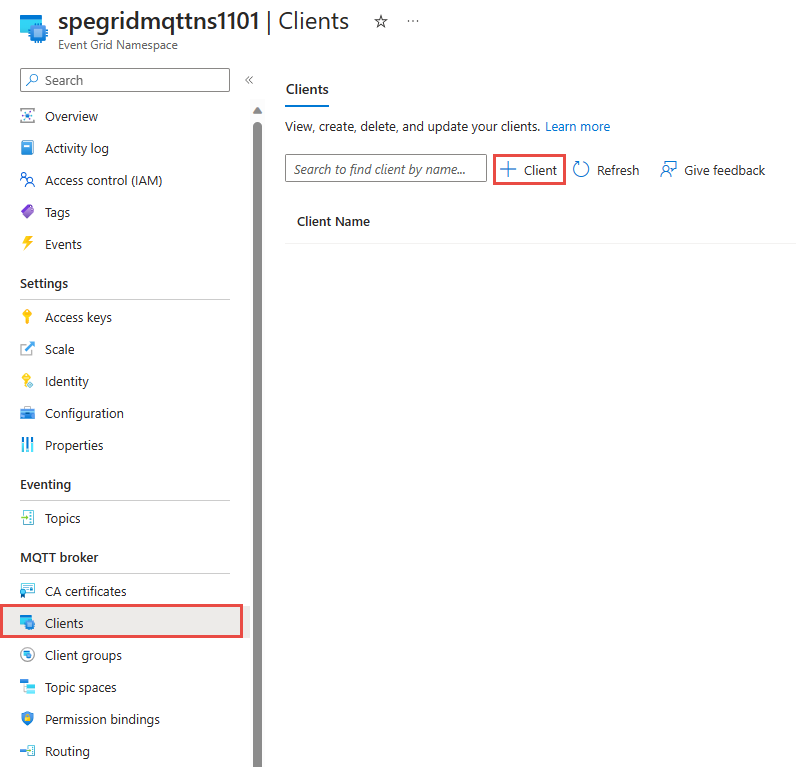
On the left menu, select Clients in the MQTT broker section.
On the Clients page, select + Client on the toolbar.
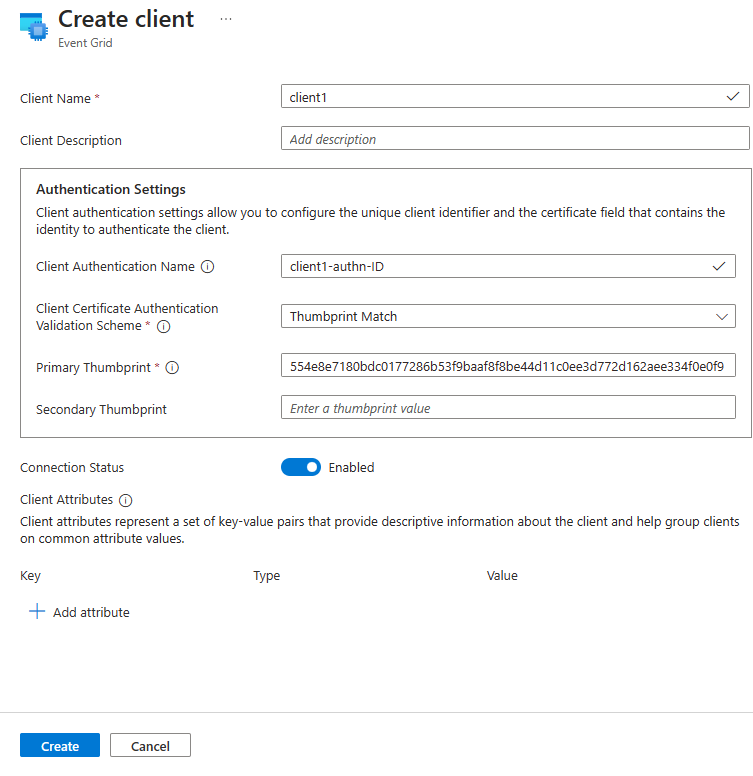
On the Create client page, enter a name for the client. Client names must be unique in a namespace.
Client authentication name is defaulted to the client name. For this tutorial, change it to
client1-authn-ID. You need to include this name asUsernamein the CONNECT packet.In this tutorial, you use thumbprint based authentication. Include the first client certificate’s thumbprint in the Primary Thumbprint.
Select Create on the toolbar to create another client.
Repeat the above steps to create a second client named
client2. Change the authentication name toclient2-authn-IDand include the second client certificate’s thumbprint in the Primary Thumbprint.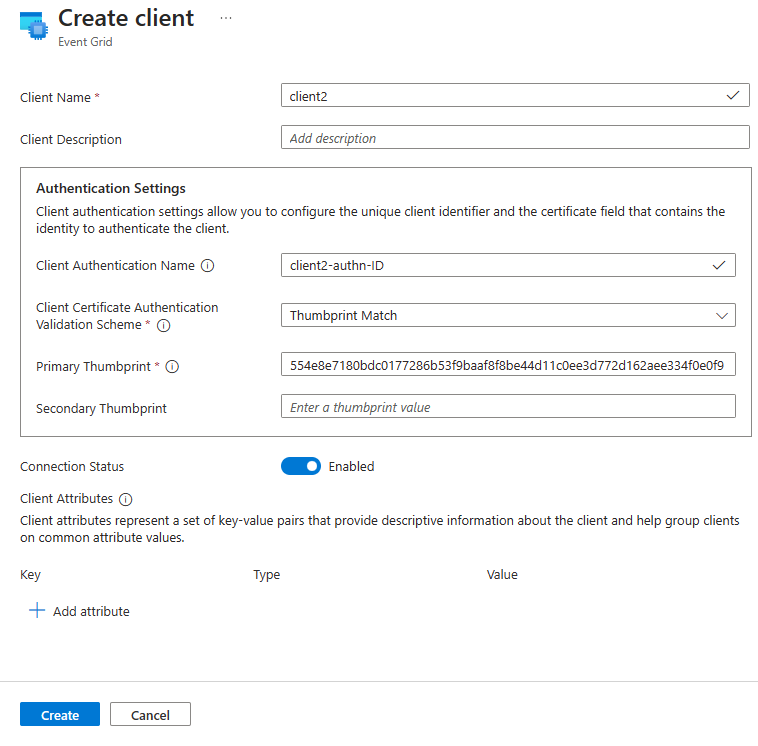
Note
- To keep the QuickStart simple, you'll be using Thumbprint match for authentication. For detailed steps on using X.509 CA certificate chain for client authentication, see client authentication using certificate chain.
- Also, we use the default
$allclient group, which includes all the clients in the namespace for this exercise. To learn more about creating custom client groups using client attributes, see client groups.

Create topic spaces
On the left menu, select Topic spaces in the MQTT broker section.
On the Topic spaces page, select + Topic space on the toolbar.

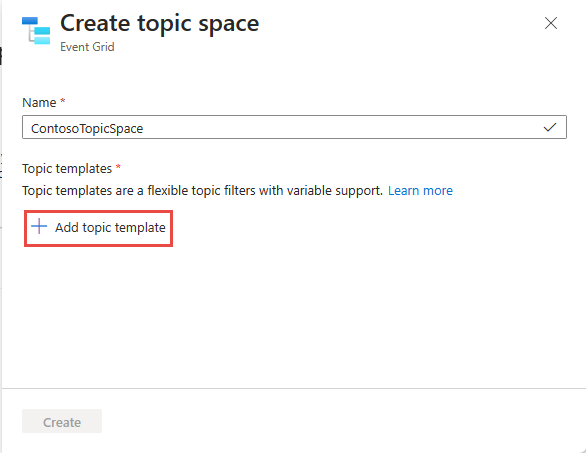
Provide a name for the topic space, on the Create topic space page.
Select + Add topic template.
Enter
contosotopics/topic1for the topic template, and then select Create to create the topic space.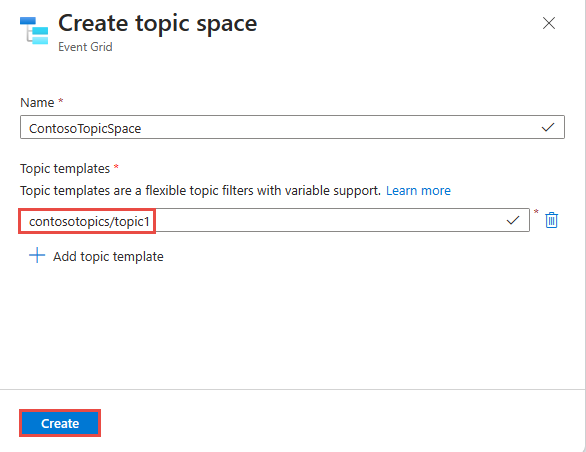

Configuring access control using permission bindings
On the left menu, select Permission bindings in the MQTT broker section.
On the Permission bindings page, select + Permission binding on the toolbar.

Configure the permission binding as follows:
Provide a name for the permission binding. For example,
contosopublisherbinding.For client group name, select $all.
For Topic space name, select the topic space you created in the previous step.
Grant the Publisher permission to the client group on the topic space.
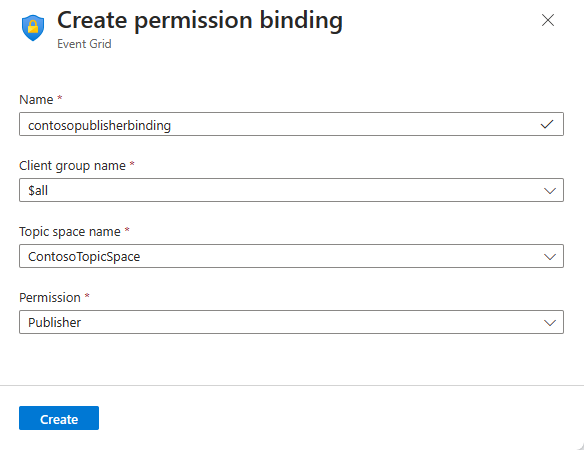
Select Create to create the permission binding.
Create one more permission binding (
contososubscriberbinding) by selecting + Permission binding on the toolbar.Provide a name and give $all client group Subscriber access to the ContosoTopicSpace as shown.
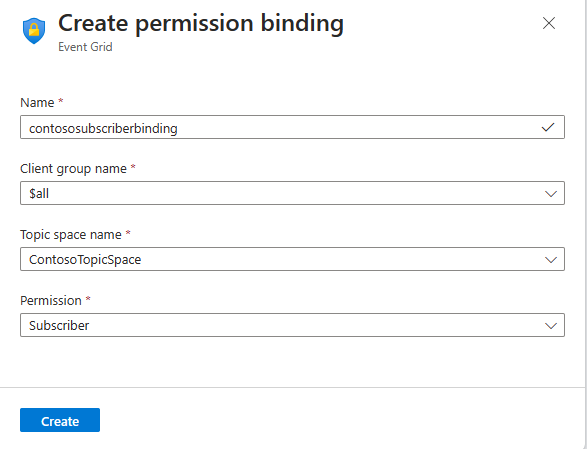
Select Create to create the permission binding.

Connecting the clients to the EG Namespace using MQTTX app
For publish / subscribe MQTT messages, you can use any of your favorite tools. For demonstration purpose, publish / subscribe is shown using MQTTX app, which can be downloaded from https://mqttx.app/.
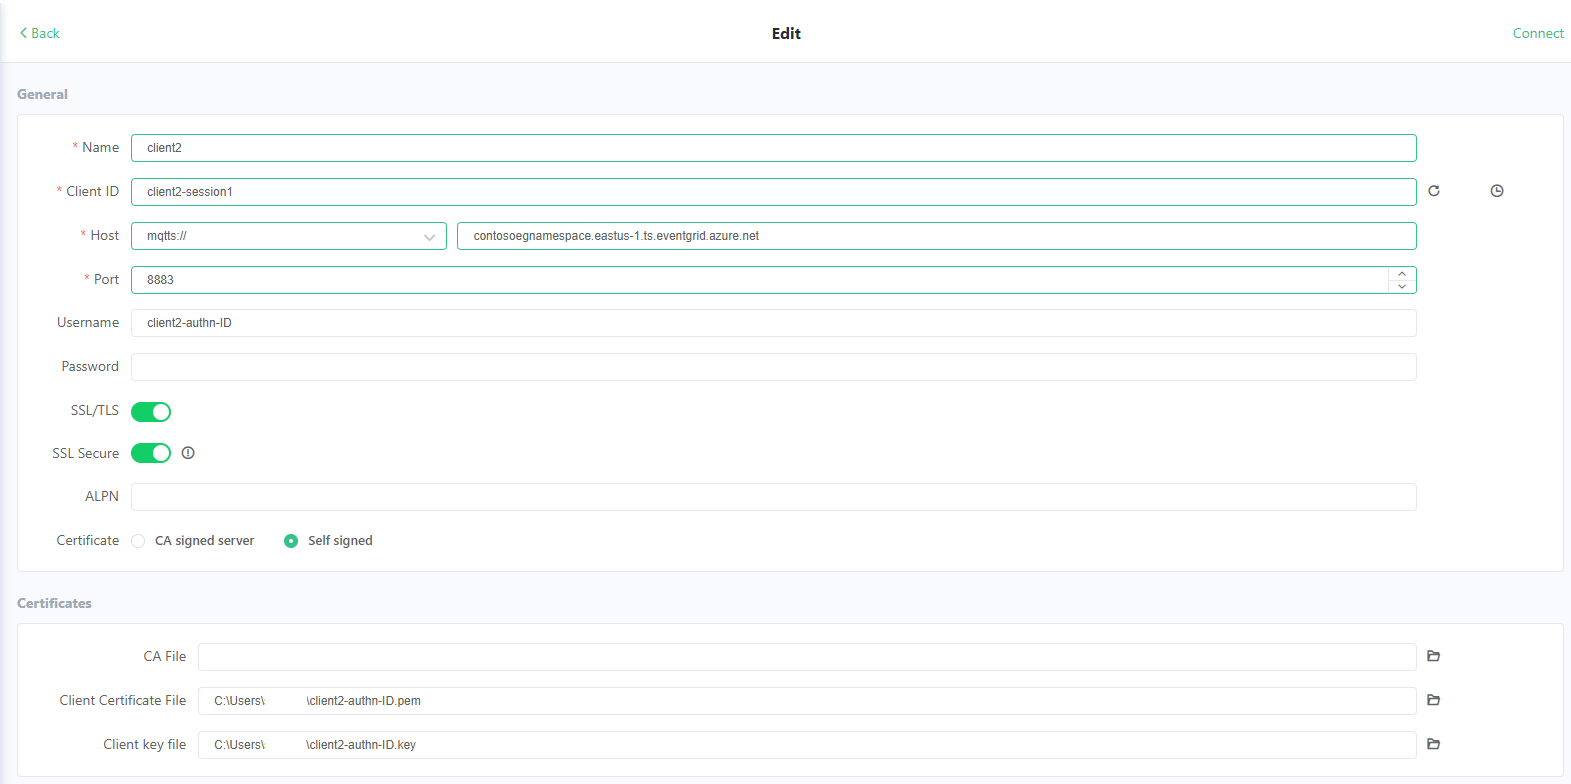
Configure client1 with
Name as
client1(this value can be anything)Client ID as
client1-session1(Client ID in the CONNECT packet is used to identify the session ID for the client connection)Username as
client1-authn-ID. This value must match the value of Client Authentication Name that you specified when you created the client in the Azure portal.Important
Username must match the client authentication name in client metadata.
Update the host name to MQTT hostname from the Overview page of the namespace.

Update the port to 8883.
Toggle SSL/TLS to ON.
Toggle SSL Secure to ON, to ensure service certificate validation.
Select Certificate as Self signed.
Provide the path for client certificate file.
Provide the path for the client key file.
Rest of the settings can be left with predefined default values.

Select Connect to connect the client to the MQTT broker.
Repeat the above steps to connect the second client client2, with corresponding authentication information as shown.


Publish/subscribe using MQTTX app
After connecting the clients, for client2, select the + New Subscription button.
Add
contosotopics/topic1as topic and select Confirm. You can leave the other fields with existing default values.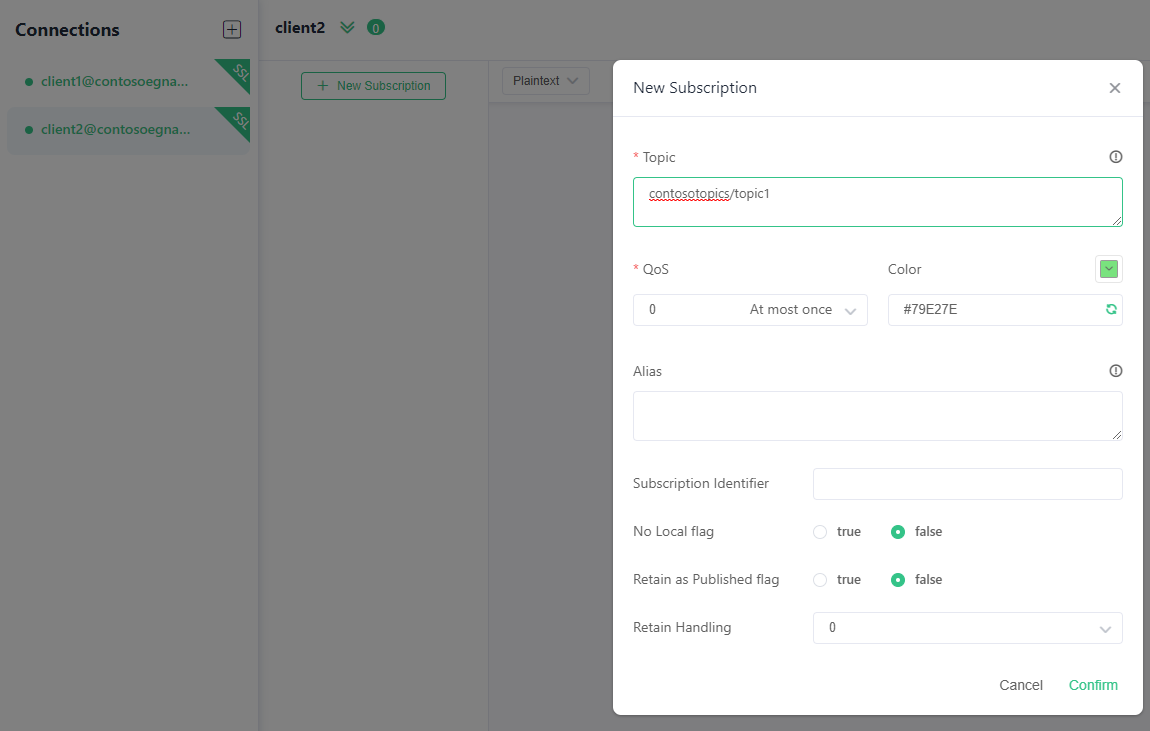
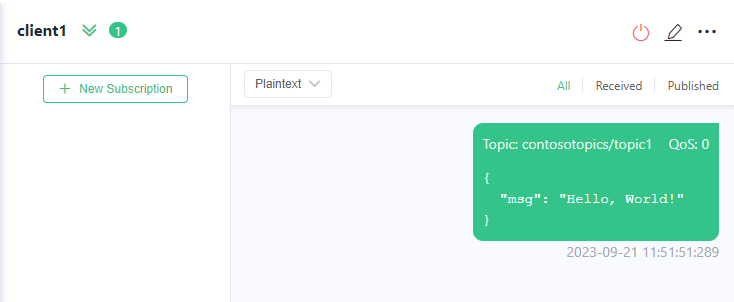
Select client1 in left rail.
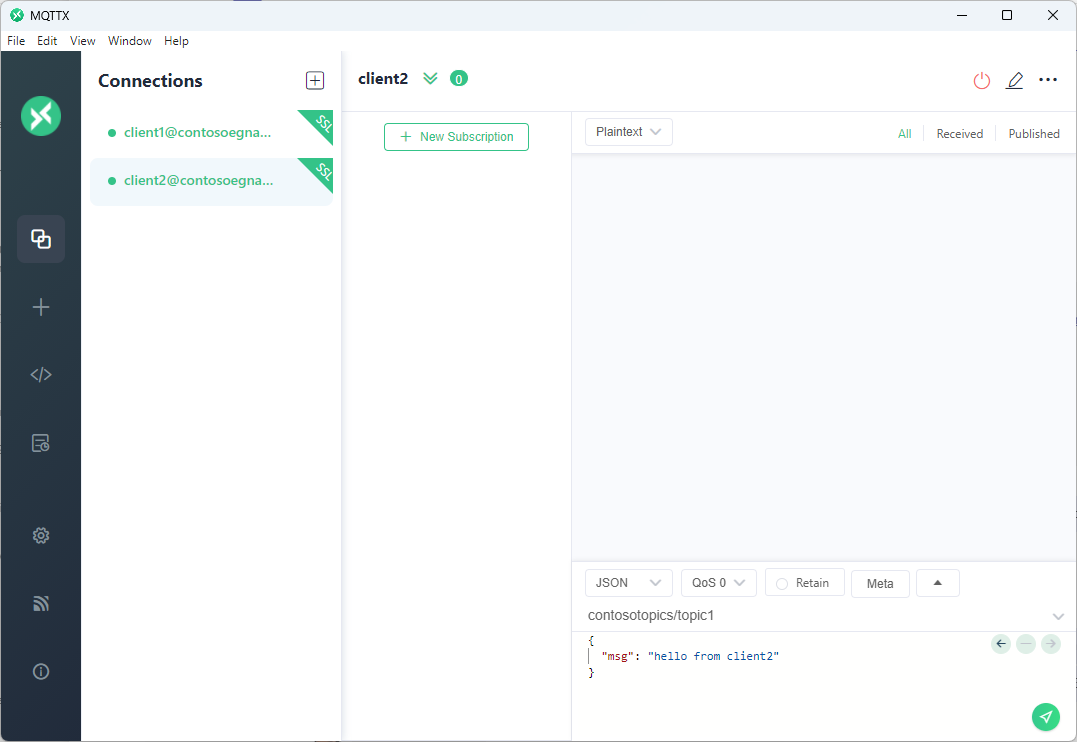
For client1, on top of the message compose box, type
contosotopics/topic1as the topic to publish on.Compose a message. You can use any format or a JSON as shown.
Select the Send button.

The message should be seen as published in client 1.
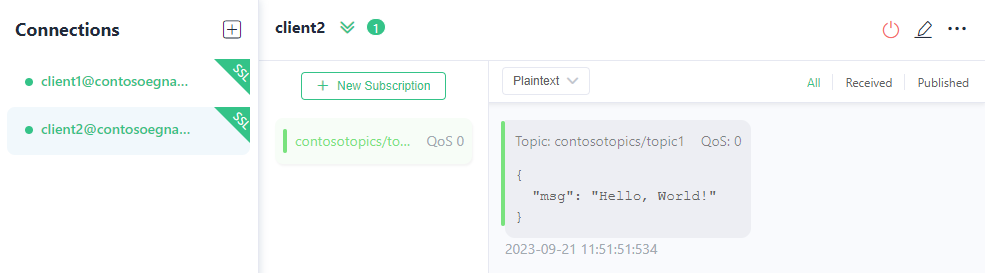
Switch to client2. Confirm that client2 received the message.


Next steps
Povratne informacije
Uskoro: tokom 2024. postepeno ćemo ukidati probleme s uslugom GitHub kao mehanizam povratnih informacija za sadržaj i zamijeniti ga novim sistemom povratnih informacija. Za više informacija, pogledajte https://aka.ms/ContentUserFeedback.
Pošalјite i prikažite povratne informacije za