How to add web services and authentication to applications
Important
This content is being retired and may not be updated in the future. The support for Machine Learning Server will end on July 1, 2022. For more information, see What's happening to Machine Learning Server?
Applies to: Machine Learning Server, Microsoft R Server 9.x
Learn how to build and use API Client libraries from Swagger to integrate into your applications. Swagger is a machine-readable representation of a RESTful API that enables support for interactive documentation, client SDK generation, and discoverability.
While data scientists can work with R / Python directly in a console window or IDE, application developers often need a different set of tools to leverage R inside applications. As an application developer integrating with these web services, typically your interest is in executing R / Python code, not writing it. Data scientists with the R programming skills write the R / Python code. Then, using some core APIs, this code can be published as a Machine Learning Server-hosted analytics Web service.
To simplify the integration of your R / Python analytics web services, Machine Learning Server (formerly R Server) provides Swagger templates for operationalization. These Swagger-based JSON files define the list of calls and resources available in the REST APIs.
To access these RESTful APIs outside of R / Python, generate an API client library in your preferred programming language, such as .NET, C#, Java, JS, Python, or node.js. This library is built with a Swagger tool. The resulting API client library simplifies the making of calls, encoding of data, and markup response handling on the API.
Swagger workflow

Get the Swagger file
Machine Learning Server provides a Swagger template to simplify the integration. This template defines the available resources in the REST API and defines the operations you can call on those resources. A standard set of core operationalization APIs is available and defined in mlserver-swagger-<version>.json, where is the 3-digit product version number. Additionally, another Swagger-based JSON file is generated for each web service version. For R Server users, replace mlserver-swagger with rserver-swagger in the filename.
| API Types | Corresponding Swagger-based JSON File |
|---|---|
| Core APIs | Download Swagger file containing the set of core operationalization APIs from https://microsoft.github.io/deployr-api-docs/<version>/swagger/mlserver-swagger-<version>.json, where <version> is the 3-digit product version number.• For 9.2.1: https://microsoft.github.io/deployr-api-docs/9.2.1/swagger/mlserver-swagger-9.2.1.json • For 9.1.0 https://microsoft.github.io/deployr-api-docs/9.1.0/swagger/rserver-swagger-9.1.0.json |
| Service-specific APIs | Get the service-specific APIs defined in swagger.json so you can consume that service. Obtain it directly from the user that published the service or retrieve yourself using 'GET /api/{service}/{version}/swagger.json'. Learn more... |
Build the core client library
Option 1. Build using a Swagger code generator
To build a client library, run the file through the Swagger code generator, and specify the language you want. Popular Swagger code generation tools include Azure AutoRest (requires node.js) and Swagger Codegen.
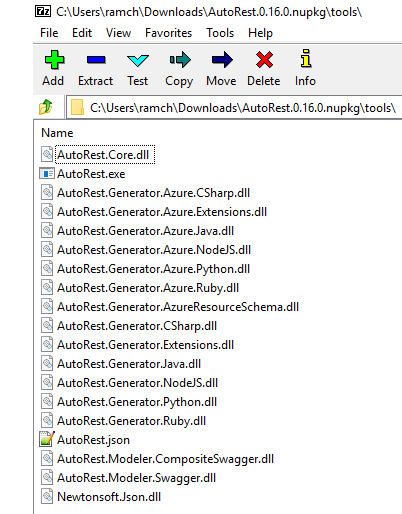
Familiarize yourself with the tool so you can generate the API client libraries in your preferred programming language.
If you use AutoRest to generate a C# client library, it might look like the following command:
AutoRest.exe -CodeGenerator CSharp -Modeler Swagger -Input mlserver-swagger-<version>.json -Namespace MyNamespace
where <version> is the 3-digit product version number.
You can now provide some custom headers and make other changes before using the generated client library stub. See the Command Line Interface documentation for details regarding different configuration options and preferences.
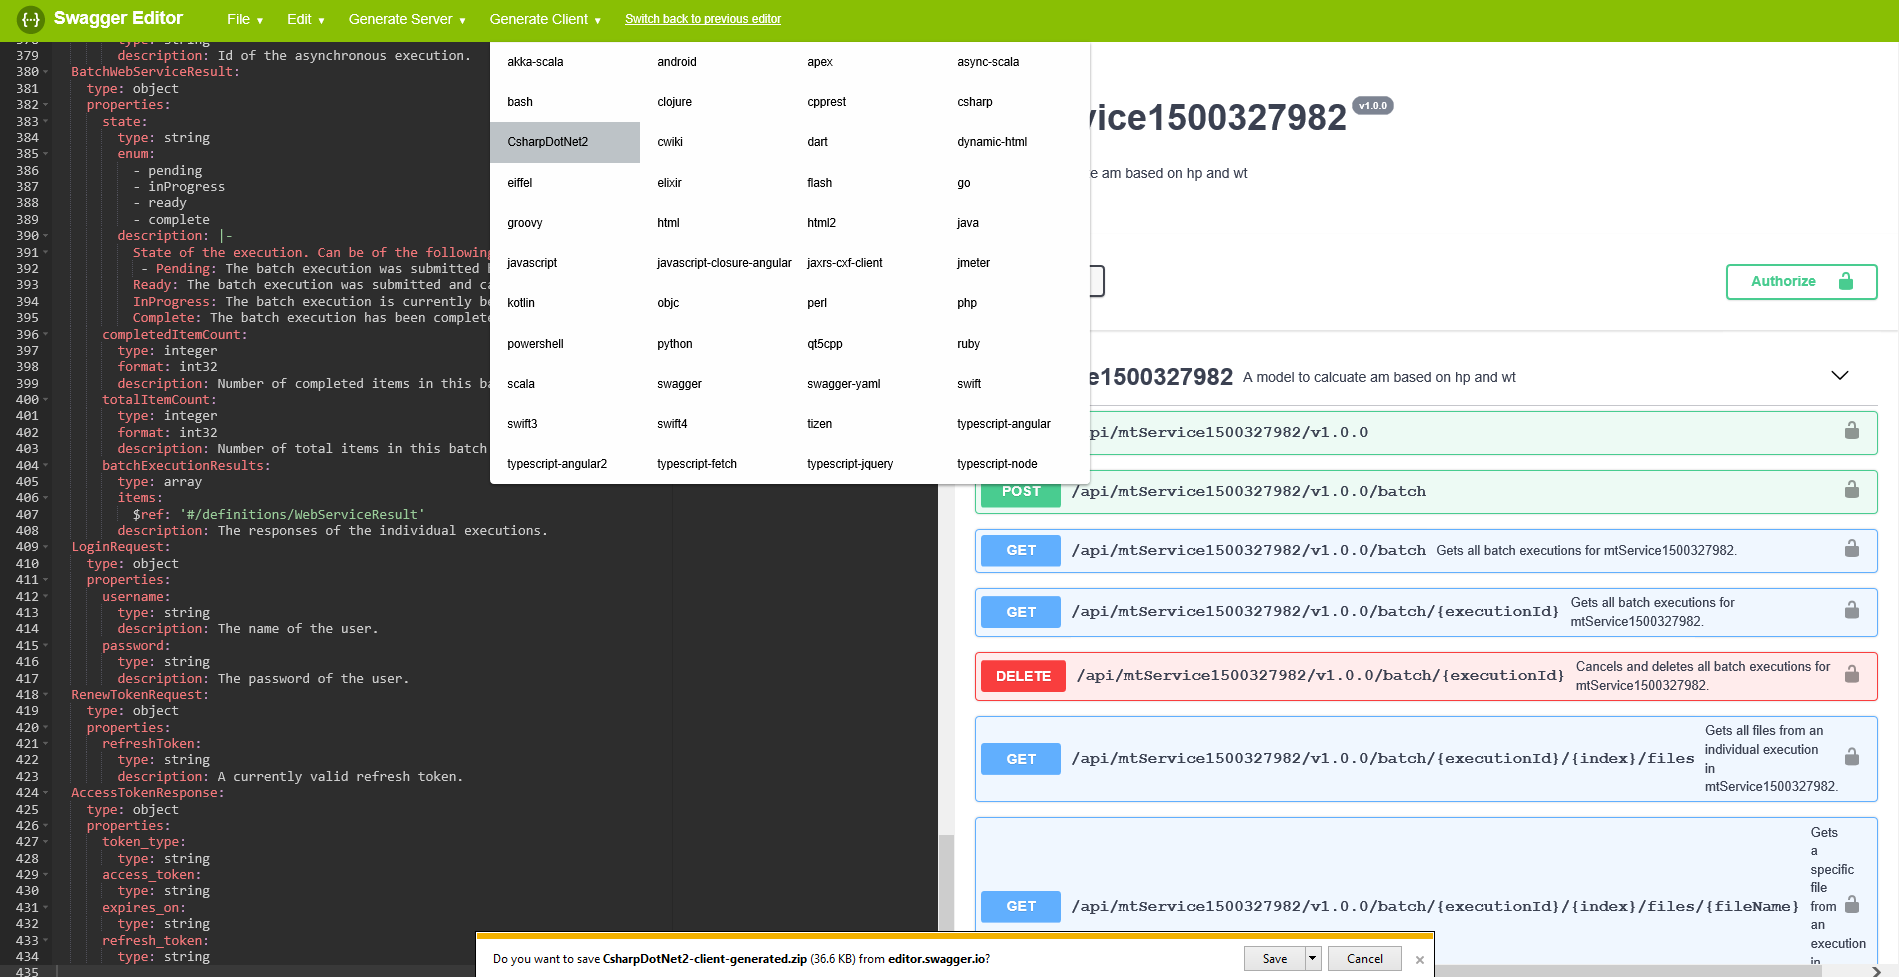
Option 2. Build using an online Swagger editor
You are not required to install a Swagger code generator on your machine. Instead, you can build the client library in your preferred language using an online Swagger editor.
- Go to http://editor.swagger.io/. The editor appears with default contents.
- Delete the default contents so the editor is empty.
- Open the Swagger file on your local machine in a text editor of your choice.
- Copy the Swagger contents to your clipboard.
- Switch back to the Swagger site and paste the contents into the online editor.
- Click the Generate Client button on the toolbar.
- Choose the language for the client. The client library is generated.
Option 3. Build using httr package in R
You can also build a client library directly in R using the httr package. Like option 2, this option does not require you to install a Swagger code generator on your machine. This is very convenient when you want to publish a web service and immediately generate a client library from the resulting Swagger file. Learn more in this blog post.
Add Authentication Workflow Logic
Keep in mind that all APIs require authentication. Therefore, all users must authenticate when making an API call using the POST /login API or through Azure Active Directory (AAD).
To simplify this process, bearer access tokens are issued so that users need not provide their credentials for every single call. This bearer token is a lightweight security token that grants the “bearer” access to a protected resource, in this case, Machine Learning Server's operationalization APIs. After a user has provided authentication credentials, the application must validate the user’s bearer token to ensure that authentication was successful. Learn more about managing these tokens.
Before you interact with the core APIs, you must authenticate, get the bearer access token, and then include the token in each header for each subsequent request.
Azure Active Directory (AAD)
Add code to pass the AAD credentials, authority, and client ID. In turn, AAD issues the token.
Here is an example of Azure Active Directory authentication in CSharp:
<swagger-client-title> client = new <swagger-client-title>(new Uri("https://<host>:<port>"));

// -------------------------------------------------------------------------
// Note - Update these sections with your appropriate values
// -------------------------------------------------------------------------

// Address of the authority to issue token.
const string tenantId = "microsoft.com";
const string authority = "https://login.windows.net/" + tenantId;

// Identifier of the client requesting the token
const string clientId = "00000000-0000-0000-0000-000000000000";

// Secret of the client requesting the token
const string clientKey = "00000000-0000-0000-0000-00000000000";

var authenticationContext = new AuthenticationContext(authority);
var authenticationResult = await authenticationContext.AcquireTokenAsync(
     clientId, new ClientCredential(clientId, clientKey));

// Set Authorization header with `Bearer` and access-token
var headers = client.HttpClient.DefaultRequestHeaders;
var accessToken = authenticationResult.AccessToken;

headers.Remove("Authorization");
headers.Add("Authorization", $"Bearer {accessToken}");
Active Directory LDAP or Local Admin
For these authentication methods, you must call the
POST /loginAPI in order to authenticate. Now you can pass in theusernameandpasswordfor the local administrator, or if Active Directory is enabled, pass the LDAP account information. In turn, Machine Learning Server issues you a bearer/access token. After authenticated, the user does not need to provide credentials again as long as the token is still valid.Here is an example of Active Directory/LDAP authentication in CSharp:
<swagger-client-title> client = new <swagger-client-title>(new Uri("https://<host>:<port>"));

// Authenticate using username/password
var loginRequest = new LoginRequest("LDAP_USER_NAME", "LDAP_PASSWORD");
var loginResponse = await client.LoginAsync(loginRequest);

// Set Authorization header with `Bearer` and access-token
var headers = <swagger-client-title>.HttpClient.DefaultRequestHeaders;
var accessToken = loginResponse.AccessToken;

headers.Remove("Authorization");
headers.Add("Authorization", $"Bearer {accessToken}");
Interact with the APIs
Now that you have generated the client library and added authentication logic to your application, you can interact with the core operationalization APIs.
<swagger-client-title> client = new <swagger-client-title>(new Uri("https://<host>:<port>"));
Example: Core Client Library from Swagger (in CSharp)
This example shows how you can use the mlserver-swagger-9.2.1.json swagger file to build a client library to interact with the core operationalization APIs from your application. For other versions, get the file from https://microsoft.github.io/deployr-api-docs/<version>/swagger/mlserver-swagger-<version>.json where is the server product version.
Build and use a core Machine Learning Server 9.2.1 client library from swagger in CSharp and Azure Active Directory authentication:
Download
mlserver-swagger-9.2.1.jsonfrom https://microsoft.github.io/deployr-api-docs/9.2.1/swagger/mlserver-swagger-9.2.1.json.Build the statically generated client library files for CSharp from the
mlserver-swagger-9.2.1.jsonswagger. Notice the language isCSharpand the namespace isIO.Swagger.Client.AutoRest.exe -CodeGenerator CSharp -Modeler Swagger -Input mlserver-swagger-9.2.1.json -Namespace IO.Swagger.ClientIn Visual Studio, add the following
NuGetpackage dependencies to your VS project.Microsoft.Rest.ClientRuntimeMicrosoft.IdentityModel.Clients.ActiveDirectory
Open the Package Manager Console for NuGet and add them with this command:
PM> Install-Package Microsoft.Rest.ClientRuntime
PM> Install-Package Microsoft.IdentityModel.Clients.ActiveDirectory
Use the statically generated client library files to call the operationalization APIs. In your application code, import the required namespace types and create an API client to manage the API calls:
// --- IMPORT NAMESPACE TYPES -------------------------------------------------------
// Use the namespace provided with `AutoRest.exe -Namespace IO.Swagger.Client`
using IO.Swagger.Client;
using IO.Swagger.Client.Models;

using Microsoft.IdentityModel.Clients.ActiveDirectory;
using Microsoft.Rest

// --- CREATE API CLIENT -------------------------------------------------------------
SwaggerClientTitle client = new SwaggerClientTitle(new Uri("https://rserver.contoso.com:12800"));
Add the authentication workflow to your application. In this example, the organization has Azure Active Directory.
Since all APIs require authentication, we first need to obtain our
Beareraccess token such that it can be included in every request header like this:GET /resource HTTP/1.1 Host: rserver.contoso.com Authorization: Bearer mFfl_978_.G5p-4.94gM-In your application code, insert the following:
// --- AUTHENTICATE WITH AAD ------------------------------------------------------
// Note - Update these sections with your appropriate values
// Once authenticated, user do not provide credentials again until token is invalid.
// You can now begin to interact with the core Op APIs
// --------------------------------------------------------------------------------

//
// ADDRESS OF AUTHORITY ISSUING TOKEN
//
const string tenantId = "microsoft.com";
const string authority = "https://login.windows.net/" + tenantId;

//
// ID OF CLIENT REQUESTING TOKEN
//
const string clientId = "00000000-0000-0000-0000-000000000000";

//
// SECRET OF CLIENT REQUESTING TOKEN
//
const string clientKey = "00000000-0000-0000-0000-00000000000";

var authenticationContext = new AuthenticationContext(authority);
var authenticationResult = await authenticationContext.AcquireTokenAsync(
       clientId, new ClientCredential(clientId, clientKey));

//
// SET AUTHORIZATION HEADER WITH BEARER ACCESS TOKEN FOR FUTURE CALLS
//
var headers = client.HttpClient.DefaultRequestHeaders;
var accessToken = authenticationResult.AccessToken;

headers.Remove("Authorization");
headers.Add("Authorization", $"Bearer {accessToken}");
Begin consuming the core operationalization APIs.
// --- INVOKE API -----------------------------------------------------------------

// Try creating an R Session `POST /sessions`
var createSessionResponse = client.CreateSession(
      new CreateSessionRequest("Session One"));

Console.WriteLine("Session ID: " + createSessionResponse.SessionId);
Example: Service Consumption Client Library from Swagger (in CSharp)
This example shows how you can use the swagger.json swagger file for version 1.0.0 of a service named transmission to build a client library to interact with published service from your application.
Build and use a service consumption client library from swagger in CSharp and Active Directory LDAP authentication:
Get the
swagger.jsonfor the service you want to consume namedtransmission:GET /api/transmission/1.0.0/swagger.jsonBuild the statically generated client library files for CSharp from the
swagger.jsonswagger. Notice the language isCSharpand the namespace isTransmission.AutoRest.exe -CodeGenerator CSharp -Modeler Swagger -Input swagger.json -Namespace TransmissionIn Visual Studio, add the following
NuGetpackage dependencies to your VS project.Microsoft.Rest.ClientRuntimeMicrosoft.IdentityModel.Clients.ActiveDirectory
Open the Package Manager Console for NuGet and add them with this command:
PM> Install-Package Microsoft.Rest.ClientRuntime
PM> Install-Package Microsoft.IdentityModel.Clients.ActiveDirectory
Use the statically-generated client library files to call the operationalization APIs. In your application code, import the required namespace types and create an API client to manage the API calls:
// --- IMPORT NAMESPACE TYPES -------------------------------------------------------
// Use the namespace provided with `AutoRest.exe -Namespace Transmission`
using System;

using Transmission;
using Transmission.Models;

using Microsoft.IdentityModel.Clients.ActiveDirectory;
using Microsoft.Rest

// --- CREATE API CLIENT -------------------------------------------------------------
Transmission client = new Transmission(new Uri("https://rserver.contoso.com:12800”));
Add the authentication workflow to your application. In this example, the organization has Active Directory/LDAP.
Since all APIs require authentication, first get the
Beareraccess token so it can be included in every request header. For example:GET /resource HTTP/1.1 Host: rserver.contoso.com Authorization: Bearer mFfl_978_.G5p-4.94gM-In your application code, insert the following code:
// --- AUTHENTICATE WITH ACTIVE DIRECTORY -----------------------------------------
// Note - Update these with your appropriate values
// Once authenticated, user won't provide credentials again until token is invalid.
// You can now begin to interact with the operationalization APIs
// --------------------------------------------------------------------------------
var loginRequest = new LoginRequest("LDAP_USERNAME", "LDAP_PASSWORD");
var loginResponse = client.Login(loginRequest);

//
// SET AUTHORIZATION HEADER WITH BEARER ACCESS TOKEN FOR FUTURE CALLS
//
var headers = client.HttpClient.DefaultRequestHeaders;
var accessToken = loginResponse.AccessToken;
headers.Remove("Authorization");
headers.Add("Authorization", $"Bearer {accessToken}");
Begin consuming the service consumption APIs.
// --- INVOKE API -----------------------------------------------------------------
InputParameters inputs = new InputParameters() { Hp = 120, Wt = 2.8 };
var serviceResult = client.ManualTransmission(inputs);

Console.Out.WriteLine(serviceResult.OutputParameters.Answer);
Example in Java
The following blog article shows how to create a Java client.