Add a self-service sign-up user flow to an app
Tip
This article applies to B2B collaboration user flows. If your tenant is configured for customer identity and access management, see Create a sign-up and sign-in user flow for customers.
For applications you build, you can create user flows that allow a user to sign up for an app and create a new guest account. A self-service sign-up user flow defines the series of steps the user follows during sign-up, the identity providers you allow them to use, and the user attributes you want to collect. You can associate one or more applications with a single user flow.
Note
You can associate user flows with apps built by your organization. User flows can't be used for Microsoft apps, like SharePoint or Teams.
Before you begin
Add identity providers (optional)
Microsoft Entra ID is the default identity provider for self-service sign-up. This means that users are able to sign up by default with a Microsoft Entra account. In your self-service sign-up user flows, you can also include social identity providers like Google and Facebook, Microsoft Account, and the email one-time passcode feature. For more information, see these articles:
- Add Google to your list of social identity providers
- Add Facebook to your list of social identity providers
- Add Microsoft account as an identity provider
- Email one-time passcode authentication
Define custom attributes (optional)
User attributes are values collected from the user during self-service sign-up. Microsoft Entra External ID comes with a built-in set of attributes, but you can create custom attributes for use in your user flow. You can also read and write these attributes by using the Microsoft Graph API. See Define custom attributes for user flows.
Enable self-service sign-up for your tenant
Tip
Steps in this article might vary slightly based on the portal you start from.
Before you can add a self-service sign-up user flow to your applications, you need to enable the feature for your tenant. Then controls become available that let you associate the user flow with an application.
Note
This setting can also be configured with the authenticationFlowsPolicy resource type in the Microsoft Graph API.
Sign in to the Microsoft Entra admin center as at least a User Administrator.
Browse to Identity > External Identities > External collaboration settings.
Set the Enable guest self-service sign up via user flows toggle to Yes.
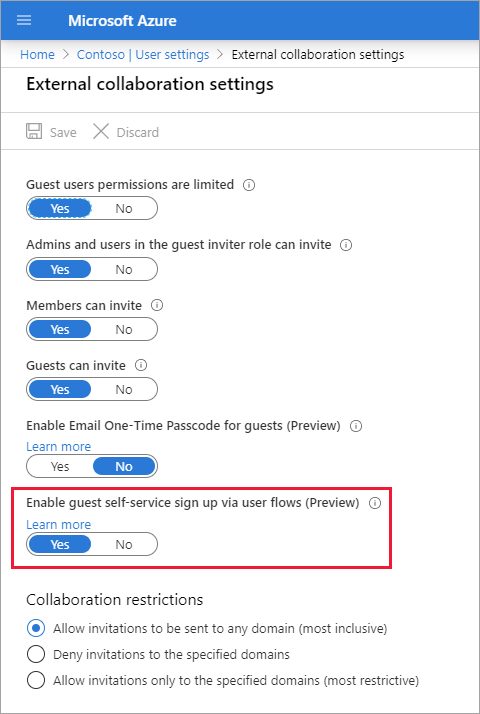
Select Save.
Create the user flow for self-service sign-up
Next, you create the user flow for self-service sign-up and add it to an application.
Sign in to the Microsoft Entra admin center as at least a User Administrator.
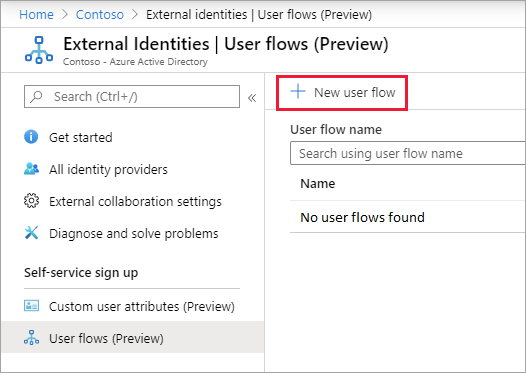
Browse to Identity > External Identities > User flows, and then select New user flow.
Select the user flow type (for example, Sign up and sign in).
Select the version (Recommended or Preview), and then select Create.
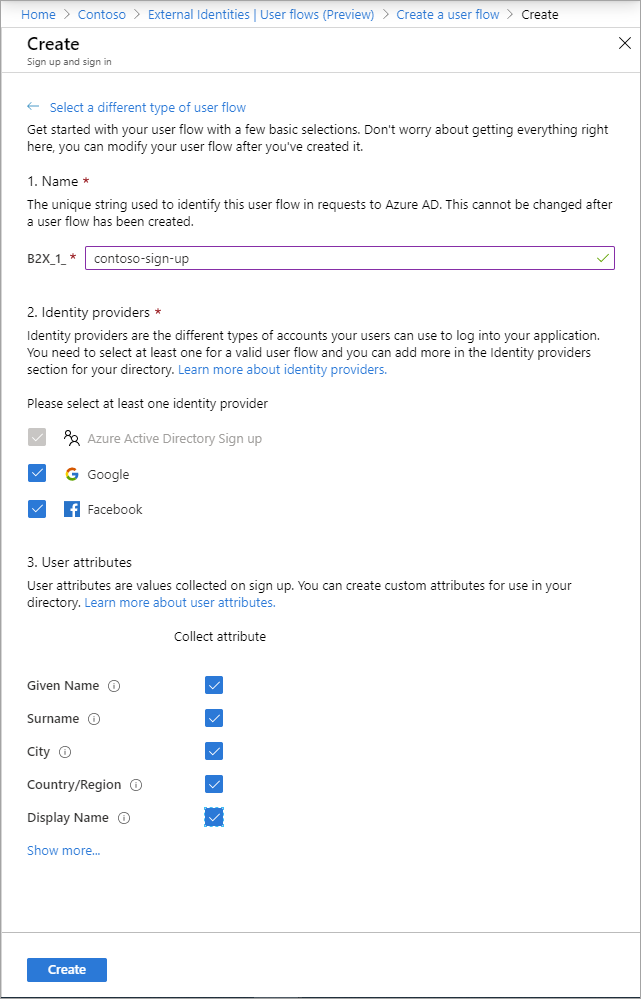
On the Create page, enter a Name for the user flow. The name is automatically prefixed with B2X_1_.
In the Identity providers list, select one or more identity providers that your external users can use to log into your application. (See Before you begin earlier in this article to learn how to add identity providers.)
Under User attributes, choose the attributes you want to collect from the user. For more attributes, select Show more. For example, select Show more, and then choose attributes and claims for Country/Region, Display Name, and Postal Code. Select OK.
Note
You can only collect attributes when a user signs up for the first time. After a user signs up, they will no longer be prompted to collect attribute information, even if you change the user flow.
Select Create.
The new user flow appears in the User flows list. If necessary, refresh the page.
Select the layout of the attribute collection form
You can choose order in which the attributes are displayed on the sign-up page.
- Sign in to the Microsoft Entra admin center as at least a User Administrator.
- Browse to Identity > External Identities > User flows.
- Select the self-service sign-up user flow from the list.
- Under Customize, select Page layouts.
- The attributes you chose to collect are listed. To change the order of display, select an attribute, and then select Move up, Move down, Move to top, or Move to bottom.
- Select Save.
Add applications to the self-service sign-up user flow
Now you associate applications with the user flow to enable sign-up for those applications. New users who access the associated applications are presented with your new self-service sign-up experience.
Sign in to the Microsoft Entra admin center as at least a User Administrator.
Browse to Identity > External Identities > User flows
Select the self-service sign-up user flow from the list.
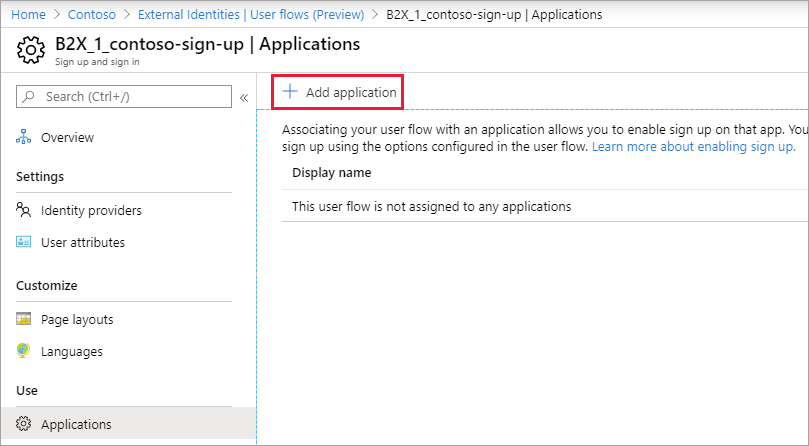
In the left menu, under Use, select Applications.
Select Add application.
Select the application from the list. Or use the search box to find the application, and then select it.
Choose Select.
Next steps
Feedback
Kommer snart: I hele 2024 udfaser vi GitHub-problemer som feedbackmekanisme for indhold og erstatter det med et nyt feedbacksystem. Du kan få flere oplysninger under: https://aka.ms/ContentUserFeedback.
Indsend og få vist feedback om