Install the Azure Backup MARS agent
This article explains how to install the Microsoft Azure Recovery Services (MARS) agent. MARS is also known as the Azure Backup agent.
About the MARS agent
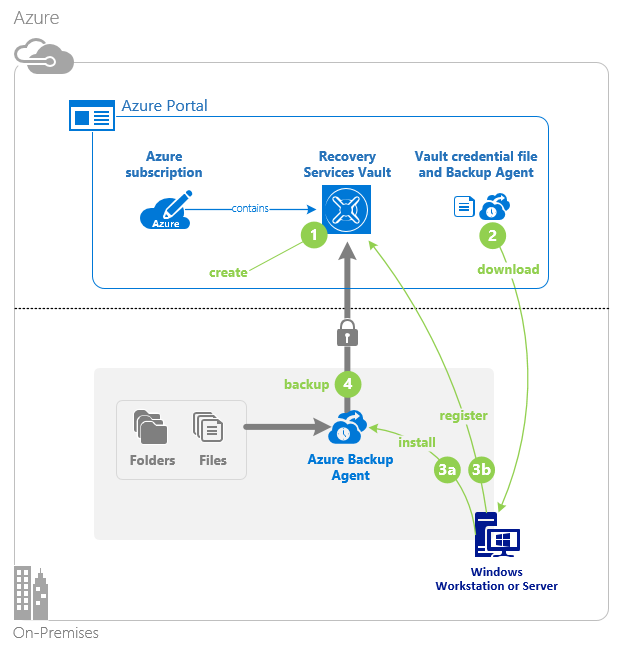
Azure Backup uses the MARS agent to back up files, folders, and system state from on-premises machines and Azure VMs. Those backups are stored in a Recovery Services vault in Azure. You can run the agent:
- Directly on on-premises Windows machines. These machines can back up directly to a Recovery Services vault in Azure.
- On Azure VMs that run Windows side by side with the Azure VM backup extension. The agent backs up specific files and folders on the VM.
- On a Microsoft Azure Backup Server (MABS) instance or a System Center Data Protection Manager (DPM) server. In this scenario, machines and workloads back up to MABS or Data Protection Manager. Then MABS or Data Protection Manager uses the MARS agent to back up to a vault in Azure.
The data that's available for backup depends on where the agent is installed.
Note
Generally, you back up an Azure VM by using an Azure Backup extension on the VM. This method backs up the entire VM. If you want to back up specific files and folders on the VM, install and use the MARS agent alongside the extension. For more information, see Architecture of a built-in Azure VM backup.
Before you start
- Learn how Azure Backup uses the MARS agent to back up Windows machines.
- Learn about the backup architecture that runs the MARS agent on a secondary MABS or Data Protection Manager server.
- Review what's supported and what you can back up by the MARS agent.
- Make sure that you have an Azure account if you need to back up a server or client to Azure. If you don't have an account, you can create a free one in just a few minutes.
- Verify internet access on the machines that you want to back up.
- Ensure the user installing and configuring the MARS agent has local administrator privileges on the server to be protected.
- Ensure your server is running on TLS 1.2.
- To prevent errors during vault registration, ensure that the latest MARS agent version is used. If not, we recommend you to download it from here or from the Azure portal as mentioned in this section.
Create a Recovery Services vault
A Recovery Services vault is a management entity that stores recovery points that are created over time, and it provides an interface to perform backup-related operations. These operations include taking on-demand backups, performing restores, and creating backup policies.
To create a Recovery Services vault:
Sign in to the Azure portal.
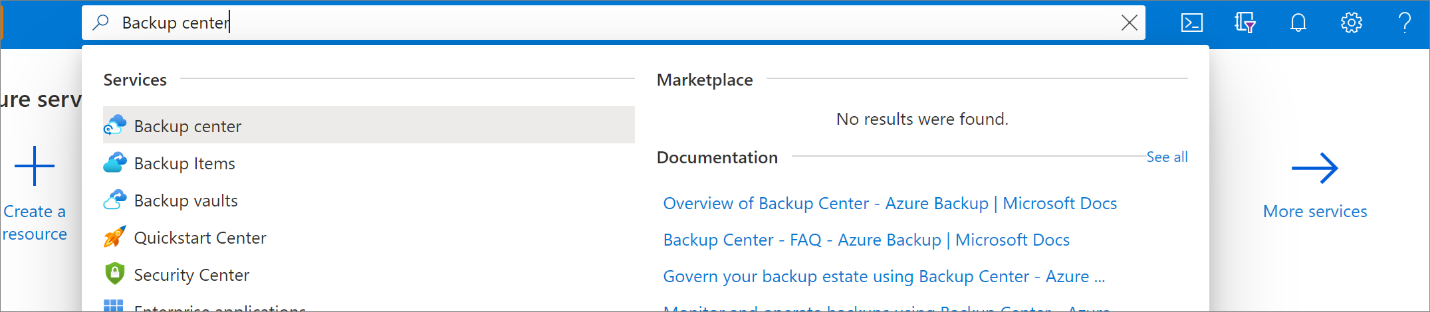
Search for Backup center, and then go to the Backup center dashboard.
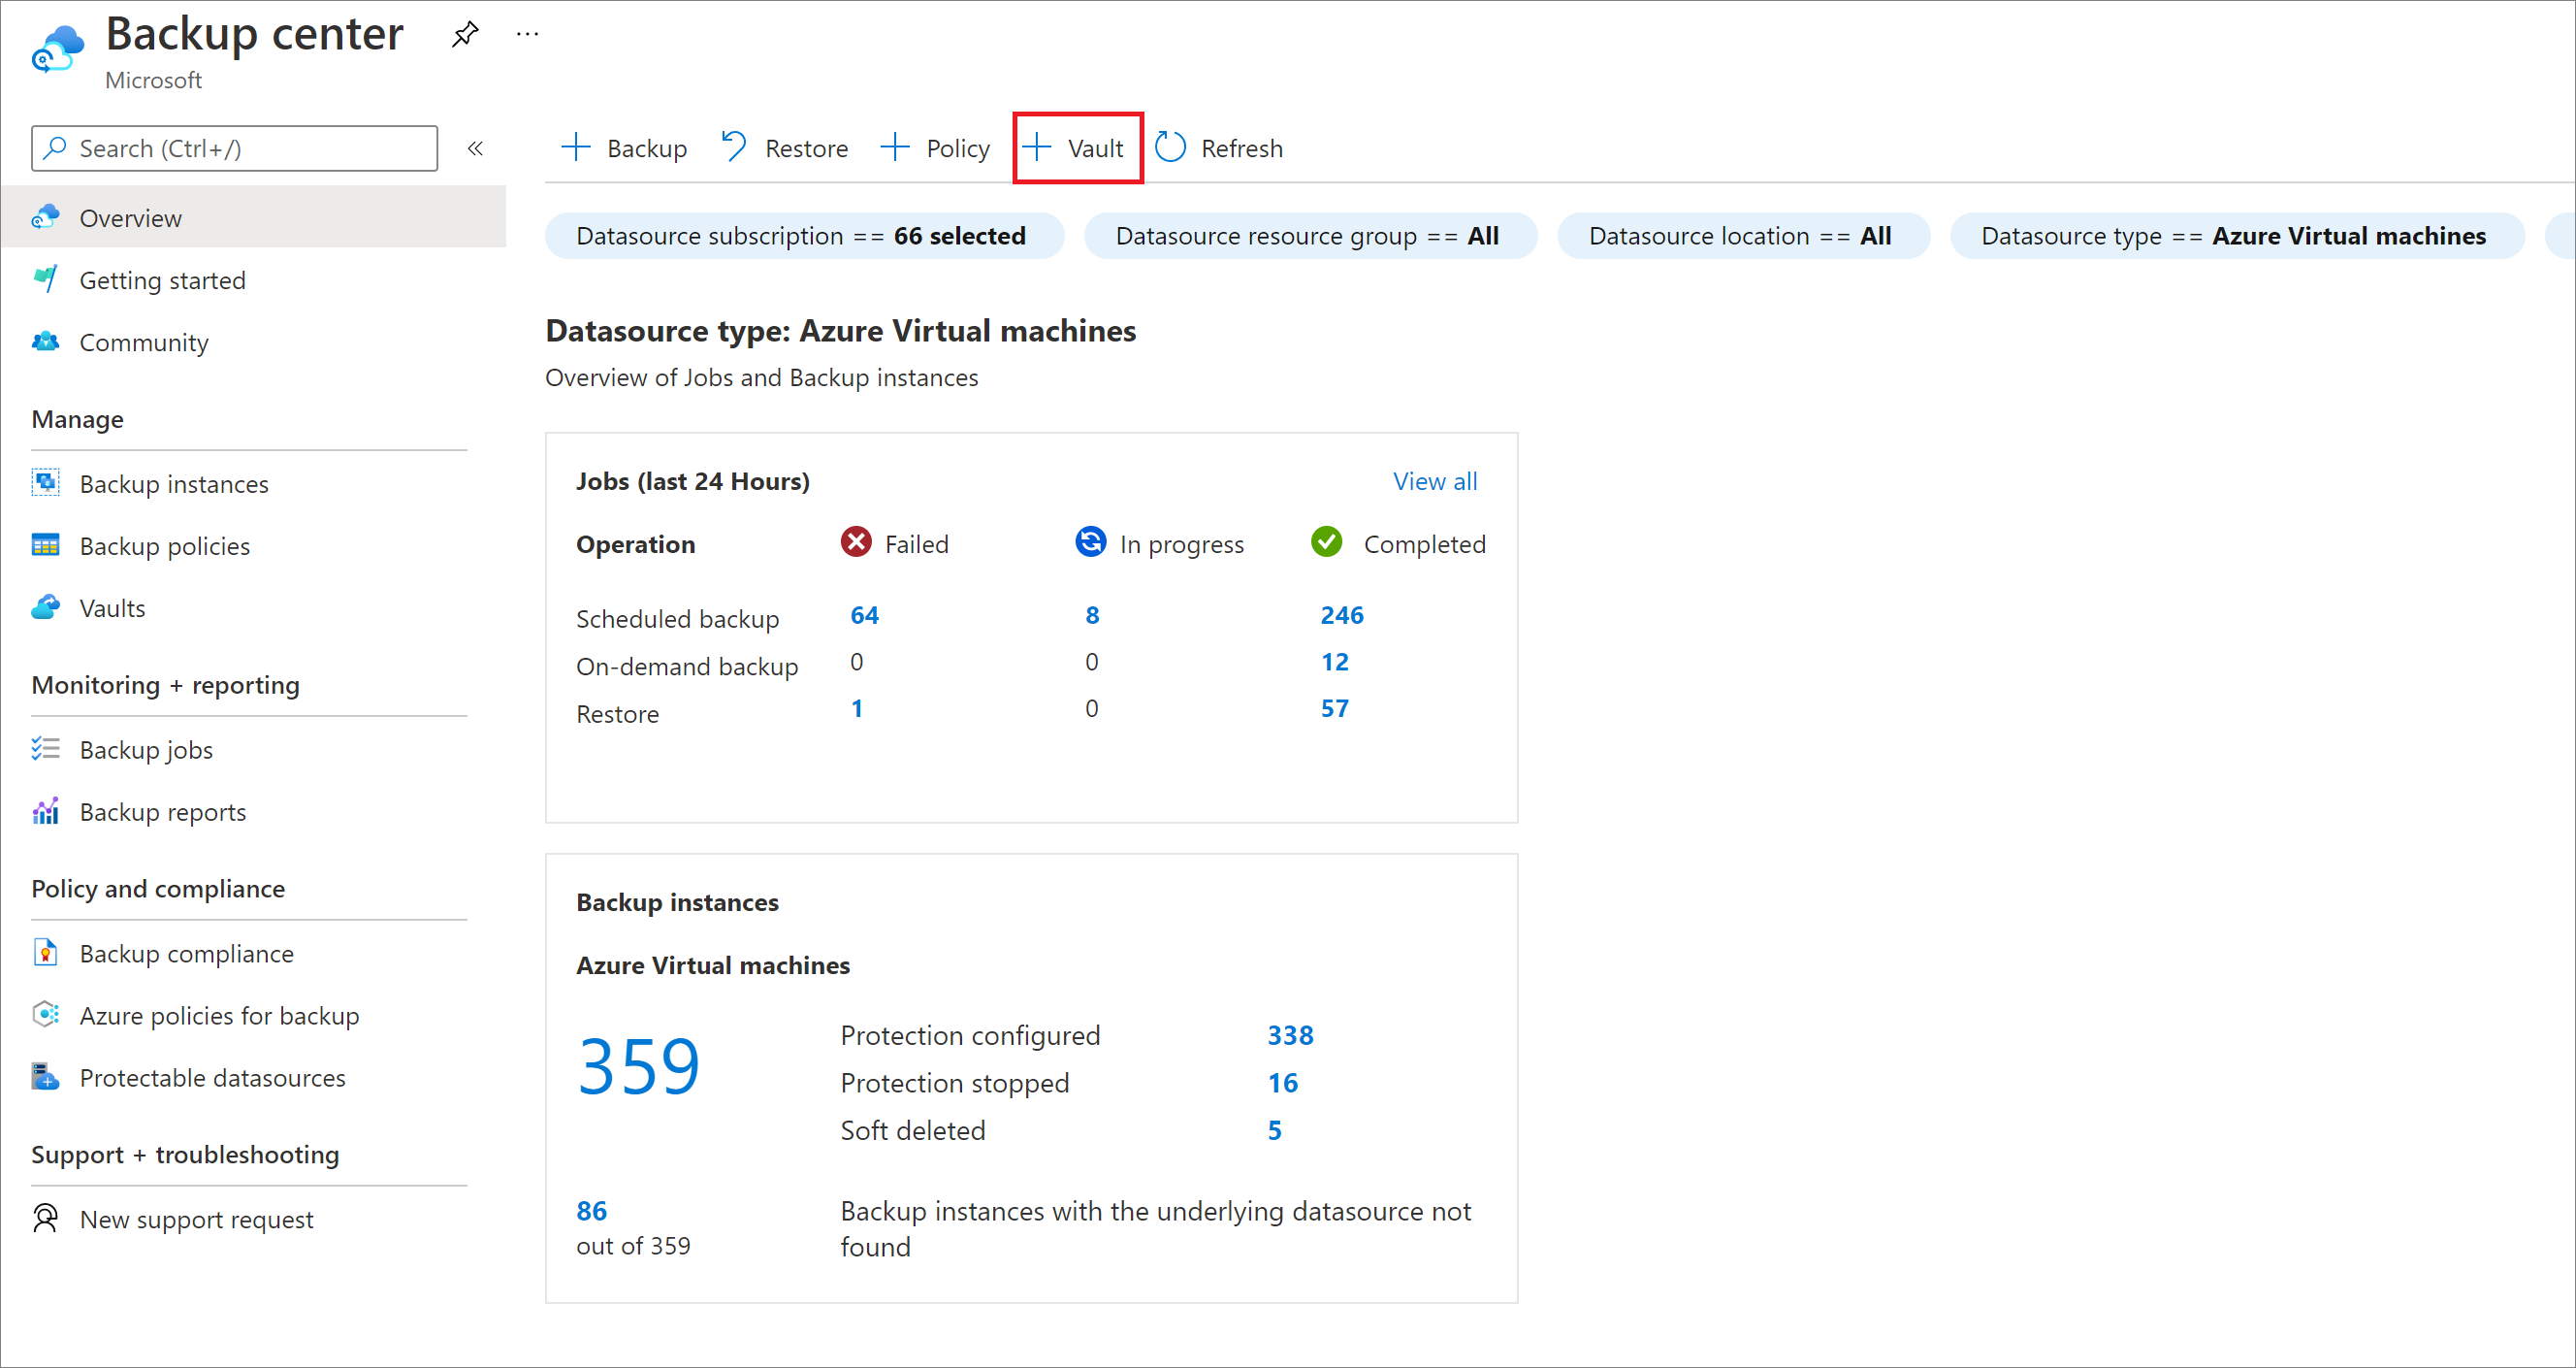
On the Overview pane, select Vault.
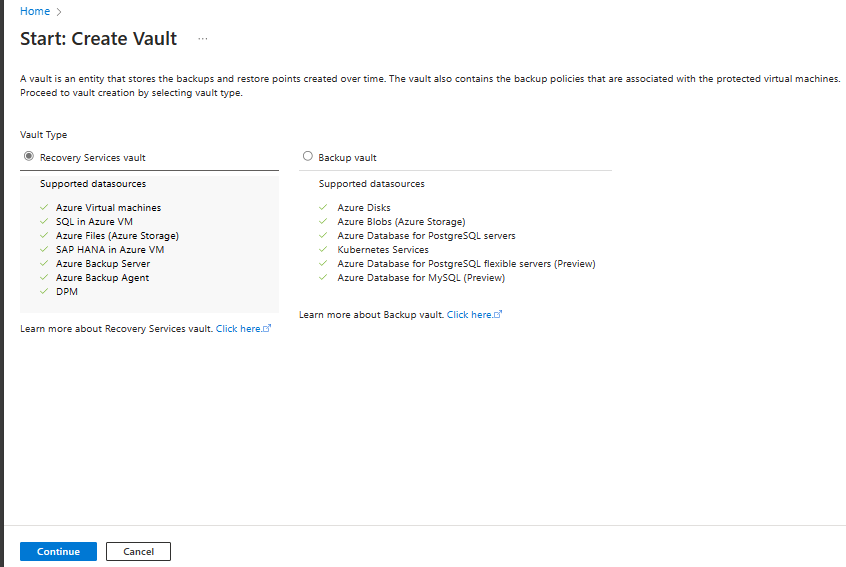
Select Recovery Services vault > Continue.
On the Recovery Services vault pane, enter the following values:
Subscription: Select the subscription to use. If you're a member of only one subscription, you'll see that name. If you're not sure which subscription to use, use the default subscription. There are multiple choices only if your work or school account is associated with more than one Azure subscription.
Resource group: Use an existing resource group or create a new one. To view a list of available resource groups in your subscription, select Use existing, and then select a resource in the dropdown list. To create a new resource group, select Create new, and then enter the name. For more information about resource groups, see Azure Resource Manager overview.
Vault name: Enter a friendly name to identify the vault. The name must be unique to the Azure subscription. Specify a name that has at least 2 but not more than 50 characters. The name must start with a letter and consist only of letters, numbers, and hyphens.
Region: Select the geographic region for the vault. For you to create a vault to help protect any data source, the vault must be in the same region as the data source.
Important
If you're not sure of the location of your data source, close the window. Go to the list of your resources in the portal. If you have data sources in multiple regions, create a Recovery Services vault for each region. Create the vault in the first location before you create a vault in another location. There's no need to specify storage accounts to store the backup data. The Recovery Services vault and Azure Backup handle that automatically.
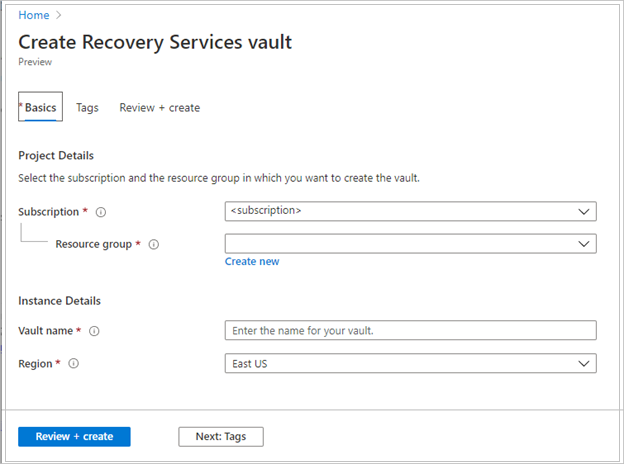
After providing the values, select Review + create.
To finish creating the Recovery Services vault, select Create.
It can take a while to create the Recovery Services vault. Monitor the status notifications in the Notifications area at the upper right. After the vault is created, it appears in the list of Recovery Services vaults. If the vault doesn't appear, select Refresh.

Note
Azure Backup now supports immutable vaults that help you ensure that recovery points once created can't be deleted before their expiry as per the backup policy. You can make the immutability irreversible for maximum protection to your backup data from various threats, including ransomware attacks and malicious actors. Learn more.
Modify storage replication
By default, vaults use geo-redundant storage (GRS).
- If the vault is your primary backup mechanism, we recommend that you use GRS.
- You can use locally redundant storage (LRS) to reduce Azure storage costs.
To modify the storage replication type:
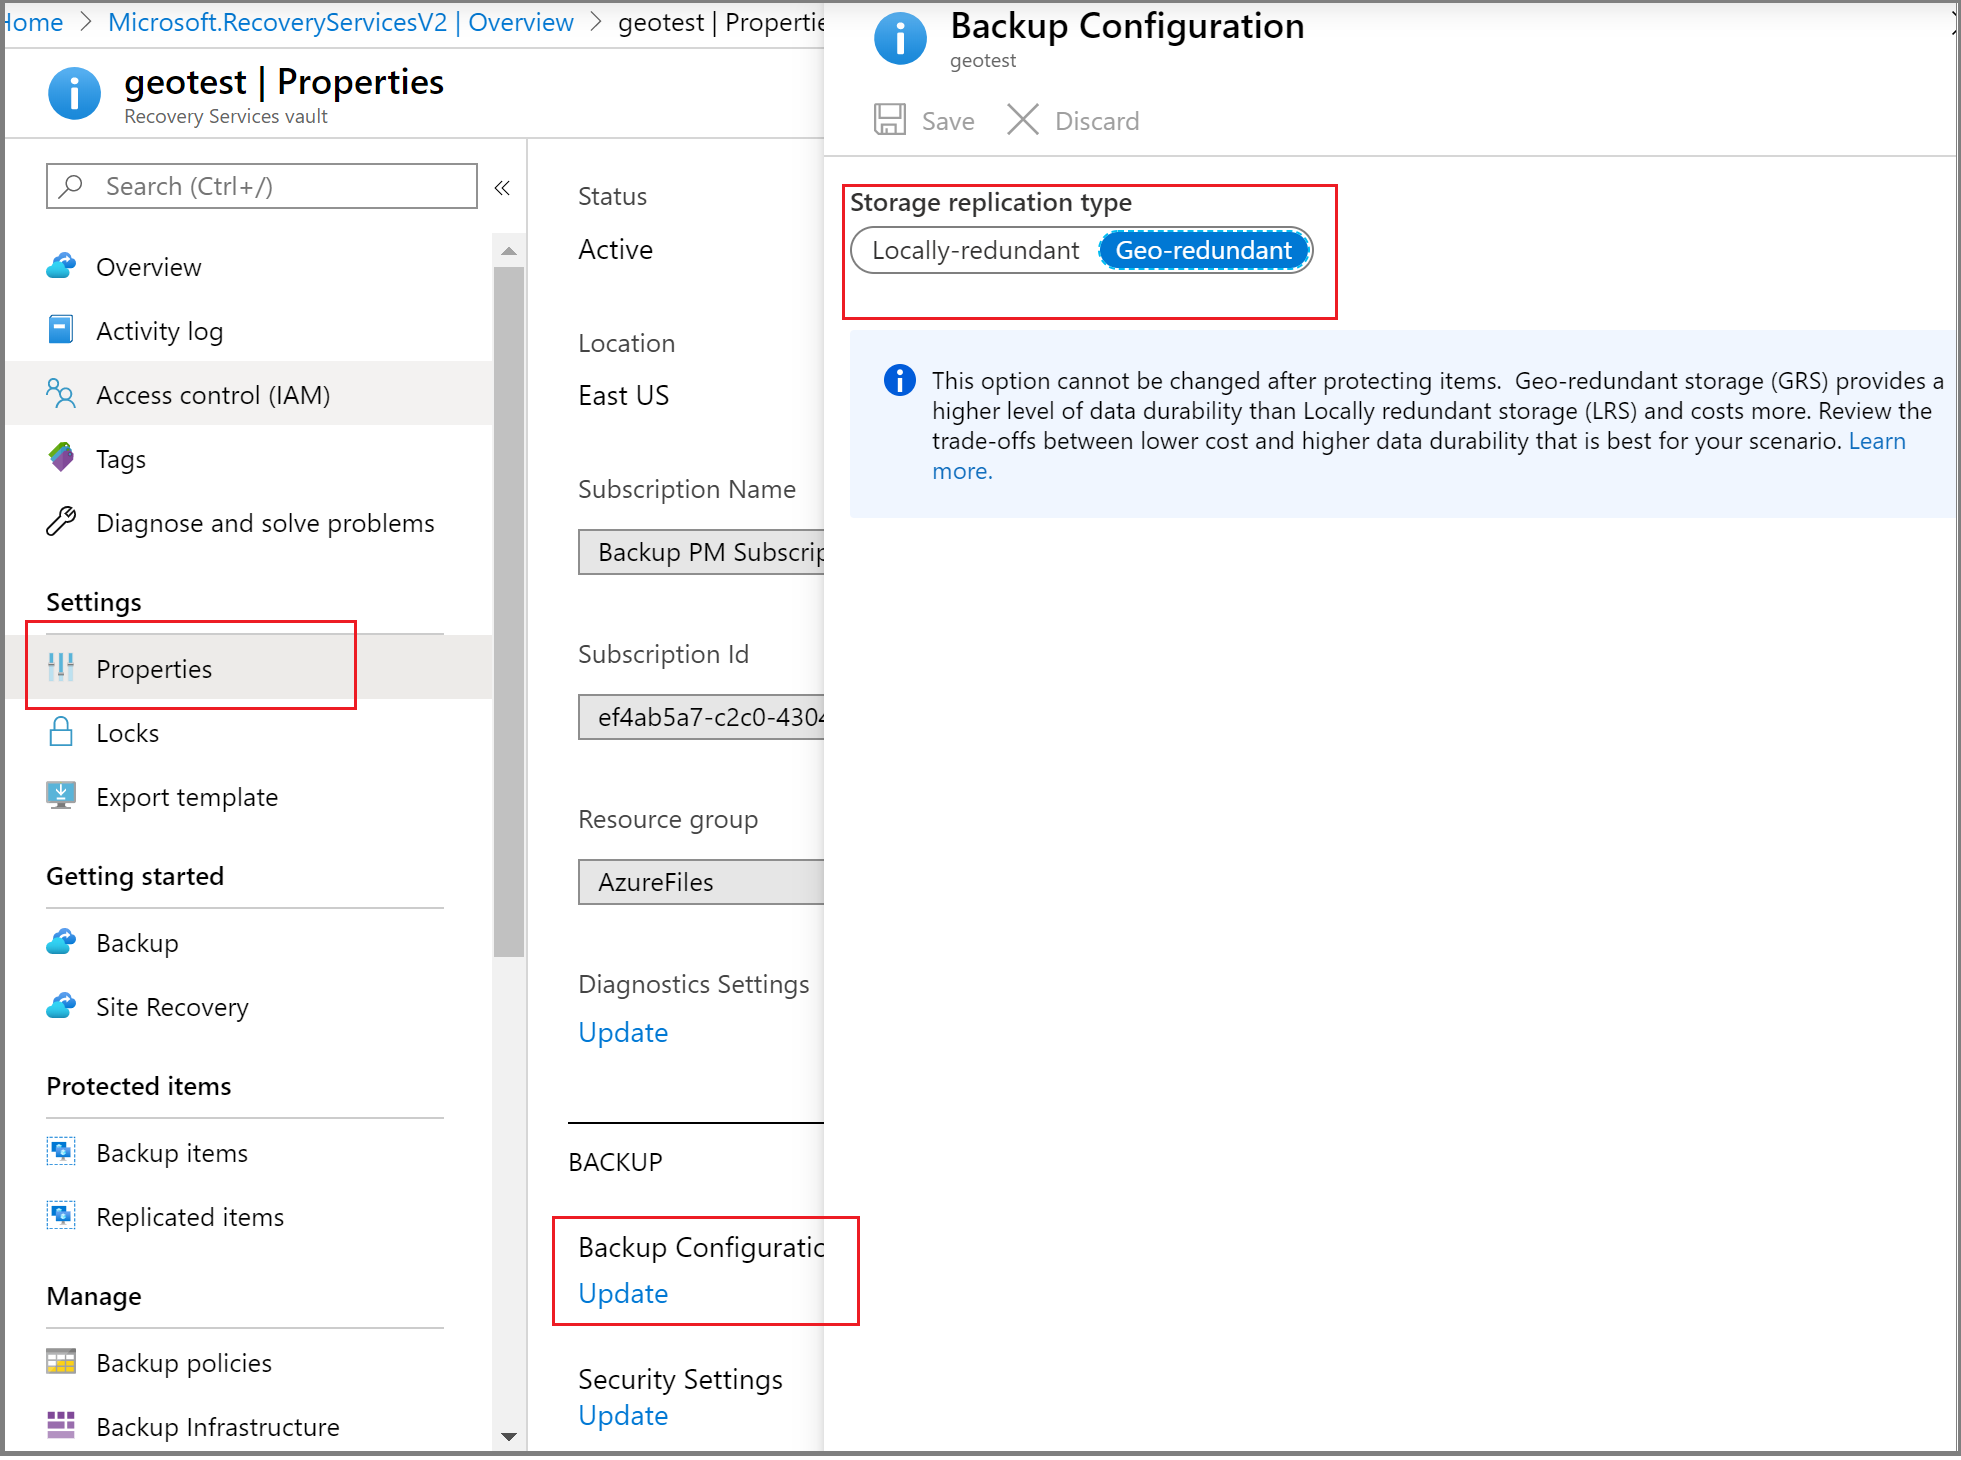
In the new vault, select Properties under the Settings section.
On the Properties page, under Backup Configuration, select Update.
Select the storage replication type, and select Save.
Note
You can't modify the storage replication type after the vault is set up and contains backup items. If you want to do this, you need to re-create the vault.
Configure Recovery Services vault to save passphrase to Recovery Services vault
Azure Backup using the Recovery Services agent (MARS) allows you to back up file or folder and system state data to Azure Recovery Services vault. This data is encrypted using a passphrase provided during the installation and registration of the MARS agent. This passphrase is required to retrieve and restore the backup data and needs to be saved in a secure external location, such as Azure Key Vault.
We recommend you to create a Key Vault and provide permissions to your Recovery Services vault to save the passphrase to the Key Vault. Learn more.
Verify internet access
The MARS agent requires access to Microsoft Entra ID, Azure Storage, and Azure Backup service endpoints. To obtain the public IP ranges, see the JSON file. Allow access to the IPs corresponding to Azure Backup (AzureBackup), Azure Storage (Storage), and Microsoft Entra ID (AzureActiveDirectory). Also, depending on your Windows version, network connectivity checks of the operating system will need access to www.msftconnecttest.com, or www.msftncsi.com.
If your machine has limited internet access, ensure that firewall, proxy, and network settings allow access to the following FQDNs and public IP addresses.
URL and IP access
FQDNs
*.microsoft.com*.windowsazure.com*.microsoftonline.com*.windows.net*.blob.core.windows.net*.queue.core.windows.net*.blob.storage.azure.net
If you are a US Government customer, ensure that you have access to the following URLs:
www.msftncsi.com*.microsoft.com*.windowsazure.us*.microsoftonline.us*.windows.net*.usgovcloudapi.net*.blob.core.windows.net*.queue.core.windows.net*.blob.storage.azure.net
Access to all of the URLs and IP addresses listed above uses the HTTPS protocol on port 443.
When backing up files and folders from Azure VMs using the MARS Agent, you also need to configure the Azure virtual network to allow access. If you use Network Security Groups (NSG), use the AzureBackup service tag to allow outbound access to Azure Backup. In addition to the Azure Backup tag, you also need to allow connectivity for authentication and data transfer by creating similar NSG rules for Microsoft Entra ID (AzureActiveDirectory) and Azure Storage (Storage).
To create a rule for the Azure Backup tag, follow these steps:
- In All Services, go to Network security groups and select the network security group.
- Select Outbound security rules under Settings.
- Select Add.
- Provide all required details for creating a new rule as described in security rule settings.
Ensure the options are set as below:- Destination is set to Service Tag.
- Destination service tag is set to AzureBackup.
- Select Add to save the newly created outbound security rule.
You can similarly create NSG outbound security rules for Azure Storage and Microsoft Entra ID. To learn more about service tags, see Virtual network service tags.
Azure ExpressRoute support
You can back up your data through Azure ExpressRoute by using public peering (available for old circuits). We don’t support Microsoft peering Backup over private peering.
To use public peering, ensure that the following domains and addresses have HTTPS access on port 443 to:
*.microsoft.com*.windowsazure.com*.microsoftonline.com*.windows.net*.blob.core.windows.net*.queue.core.windows.net*.blob.storage.azure.net
To use Microsoft peering, select the following services, regions, and relevant community values:
- Microsoft Entra ID (12076:5060)
- Azure region, according to the location of your Recovery Services vault
- Azure Storage, according to the location of your Recovery Services vault
Learn more about ExpressRoute routing requirements.
Note
Public peering is deprecated for new circuits.
Private Endpoint support
You can now use Private Endpoints to back up your data securely from servers to your Recovery Services vault. As Microsoft Entra ID can’t be accessed via private endpoints, you need to allow IPs and FQDNs required for Microsoft Entra ID for outbound access separately.
When you use the MARS agent to back up your on-premises resources, ensure that your on-premises network (containing your resources to be backed up) is peered with the Azure VNet that contains a private endpoint for the vault. You can then continue to install the MARS agent and configure backup. However, you must ensure all communication for backup happens through the peered network only.
If you remove private endpoints for the vault after a MARS agent has been registered to it, you'll need to re-register the container with the vault. You don't need to stop protection for them. For more information, see Private endpoints for Azure Backup.
Throttling support
| Feature | Details |
|---|---|
| Bandwidth control | Supported. In the MARS agent, use Change Properties to adjust bandwidth. |
| Network throttling | Not available for backed-up machines that run Windows Server 2008 R2, Windows Server 2008 SP2, or Windows 7. |
Download the MARS agent
Download the MARS agent so that you can install it on the machines that you want to back up.
If you've already installed the agent on any machines, ensure you're running the latest agent version. Find the latest version in the portal, or download from here.
In the vault, under Getting Started, select Backup.

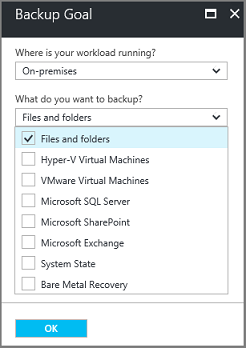
Under Where is your workload running?, select On-premises. Select this option even if you want to install the MARS agent on an Azure VM.
Under What do you want to back up?, select Files and folders. You can also select System State. Many other options are available, but these options are supported only if you're running a secondary backup server. Select Prepare Infrastructure.
For Prepare infrastructure, under Install Recovery Services agent, download the MARS agent.
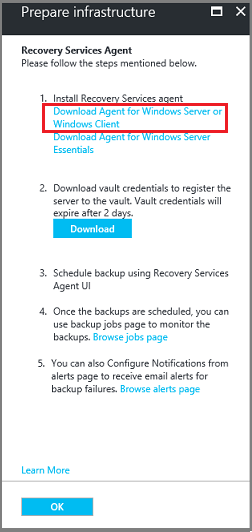
In the download menu, select Save. By default, the MARSagentinstaller.exe file is saved to your Downloads folder.
Select Already download or using the latest Recovery Services Agent, and then download the vault credentials.
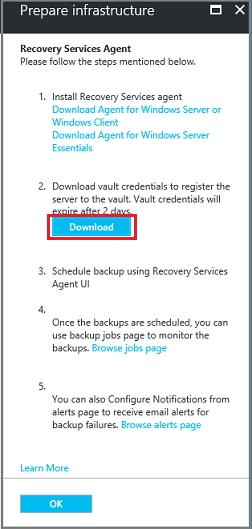
Select Save. The file is downloaded to your Downloads folder. You can't open the vault credentials file.
Install and register the agent
Run the MARSagentinstaller.exe file on the machines that you want to back up.
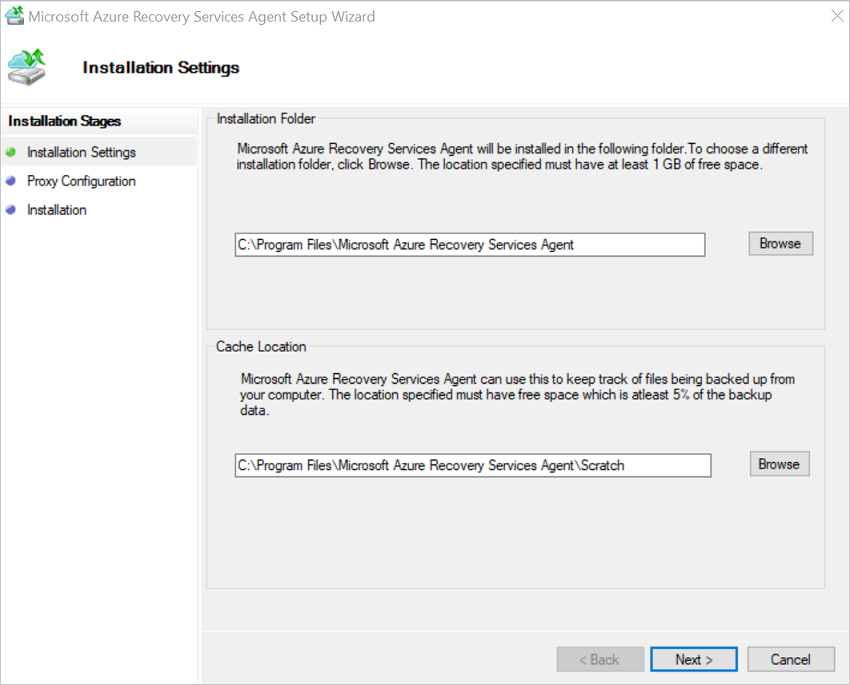
In the MARS Agent Setup Wizard, select Installation Settings. There, choose where to install the agent, and choose a location for the cache. Then select Next.
- Azure Backup uses the cache to store data snapshots before sending them to Azure.
- The cache location should have free space equal to at least 5 percent of the size of the data you'll back up.
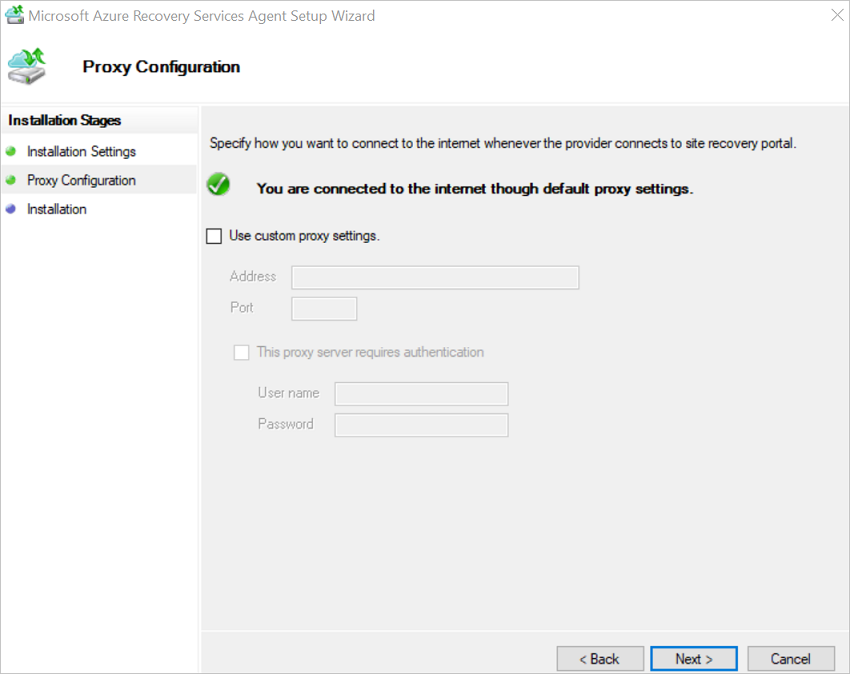
For Proxy Configuration, specify how the agent that runs on the Windows machine will connect to the internet. Then select Next.
- If you use a custom proxy, specify any necessary proxy settings and credentials.
- Remember that the agent needs access to specific URLs.
For Installation, review the prerequisites, and select Install.
After the agent is installed, select Proceed to Registration.
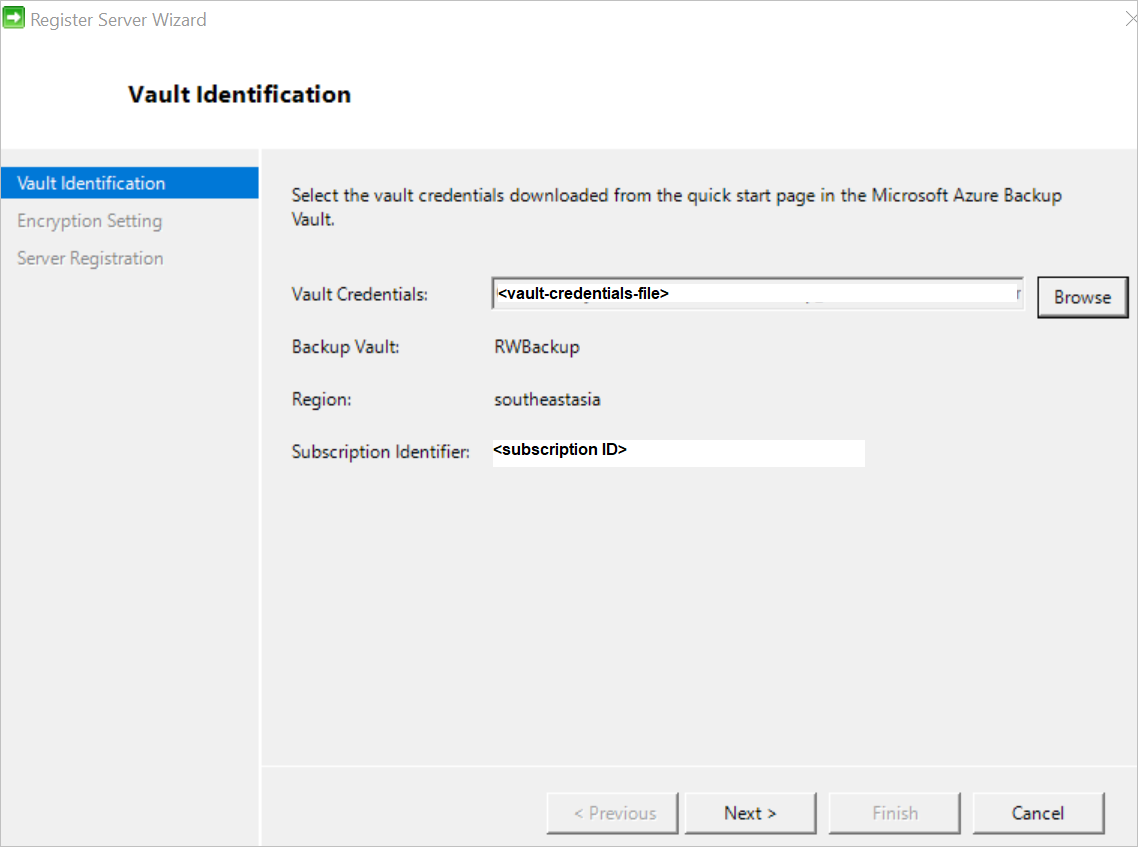
In Register Server Wizard > Vault Identification, browse to and select the credentials file that you downloaded. Then select Next.
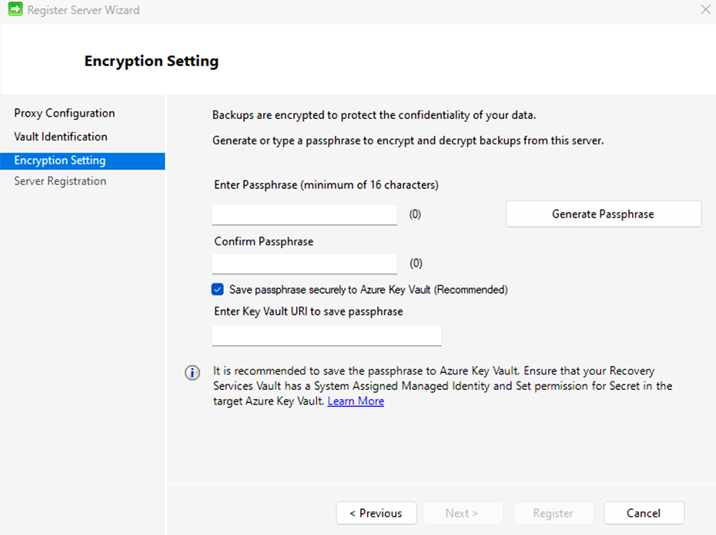
On the Encryption Setting page, specify a passphrase that will be used to encrypt and decrypt backups for the machine. Learn more about the allowed passphrase characters.
- Save the passphrase in a secure location. You need it to restore a backup.
- If you lose or forget the passphrase, Microsoft can't help you recover the backup data.
The MARS agent can automatically save the passphrase securely to Azure Key Vault. So, we recommend you create a Key Vault and grant permissions to your Recovery Services vault to save the passphrase to the Key Vault before registering your first MARS agent to the vault. Learn more.
After granting the required permissions, you can save the passphrase to the Key Vault by copying the Key Vault URI from the Azure portal and to the Register Server Wizard.
Select Finish. The agent is now installed, and your machine is registered to the vault. You're ready to configure and schedule your backup.
If you are running into issues during vault registration, see the troubleshooting guide.
Note
We recommend to save your passphrase in an alternate secure location, such as the Azure key vault. Microsoft can't recover the data without the passphrase. Learn how to store a secret in a Key Vault.
Next steps
Learn how to Back up Windows machines by using the Azure Backup MARS agent
Feedback
Kommer snart: I hele 2024 udfaser vi GitHub-problemer som feedbackmekanisme for indhold og erstatter det med et nyt feedbacksystem. Du kan få flere oplysninger under: https://aka.ms/ContentUserFeedback.
Indsend og få vist feedback om