Connect to a remote skill with Composer
APPLIES TO: Composer v1.x and v2.x
You can build a user-facing bot and extend it by calling conversational logic in a separate skill bot. This article describes how to connect a root bot running locally to an already deployed skill. The local root bot uses an Azure Bot resource and ngrok to provide an endpoint in the cloud that forwards to a local endpoint on your machine.
Your user-facing bot is referred to as either a root bot or a skill consumer. The bot your bot consumes is referred to as a skill bot or skill.
To develop and test a local root bot that accesses a deployed skill:
- The root bot must expose a skills endpoint, distinct from its messaging endpoint.
- The user's channel sends activities to the root bot's messaging endpoint, and the root bot forwards these to the skill.
- The skill sends activities to the root bot's skills endpoint, and the root bot forwards the skill's replies to the user.
- The manually configured skills endpoint is used by your root bot only when it's running locally. When it's running remotely, the skills endpoint connects directly to your deployed bot.
- The deployed skill bot must provide a skill manifest that describes its capabilities.
- The skill developer can provide the manifest online or as a compressed file.
- When Composer exports a skill, it creates the skill manifest file and publishes it for you.
If you don't have a skill yet or you're looking for how to create a remote skill with Composer, read the Export a skill article.
Important
Connecting to a skill in Composer is a technical process that involves many steps such as setting up Composer and configuring Azure resources. A high level of technical proficiency is necessary to execute this process.
Prerequisites
- A subscription to Microsoft Azure.
- A remote skill and access to its skill manifest.
- A basic bot built with Composer.
- A good understanding of skills.
- ngrok installed.
Choose a remote skill for your root bot to consume
If you don't yet have a local root bot and a remote skill:
- Create the root bot or skill bot described in how to Create and test a local skill.
- Follow how to Publish a skill to Azure to prepare the remote skill.
These two articles describe the root bot and skill used as an example in this article. The bots are named RootBot and EchoSkill, respectively.
Connect to the remote skill
Provision resources for your root bot
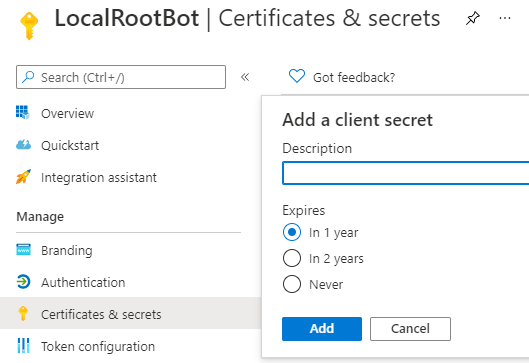
To access a remote skill, your root bot needs a valid app ID and password. If you've published your root bot before, you can skip this step.
- Go to the Publish page.
- Select the Publishing profile tab.
- Select the root bot in the bot list.
- Select Add new.
- On the Create a publishing profile page:
- Enter a name for the profile.
- Select Publish bot to Azure for the Publishing target.
- Then, select Next.
- Follow the steps to create the resources. For more information, see how to Publish a bot to Azure.
- When Composer displays a provision success message, your resources are ready.
Configure the root bot
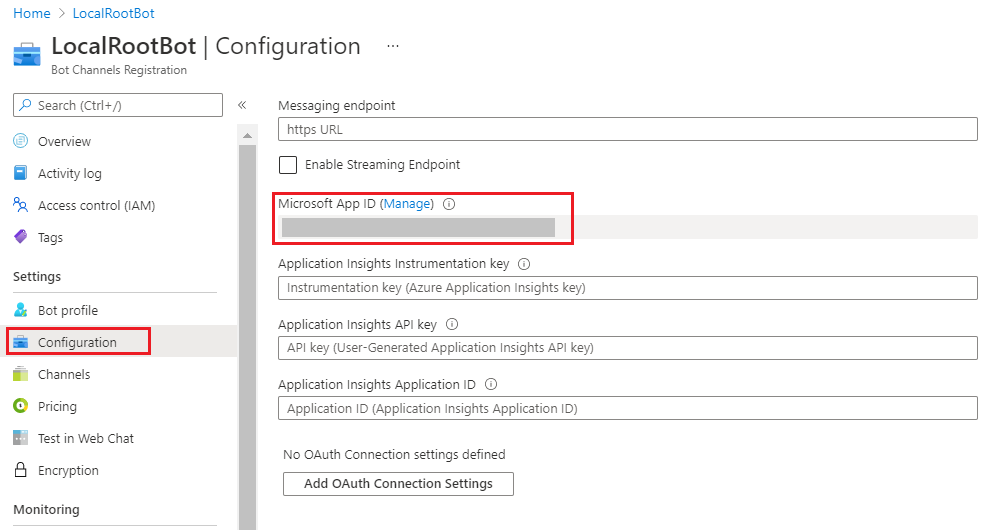
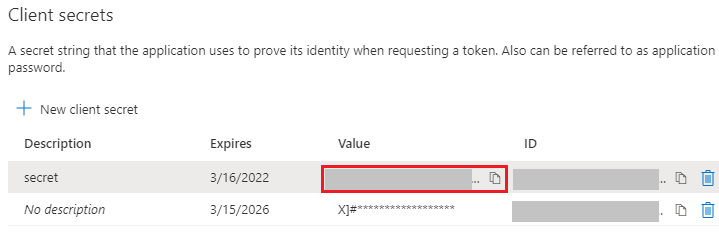
To retrieve the root bot's app ID and password:
- Go to the Configure page.
- Select the root bot and select the Development resources tab.
- Scroll to the bottom of the pane and select Retrieve App ID.
- On the Retrieve App ID from publishing profile page, select the profile to use and select Save App ID.
- Copy the root bot's app ID for the next step.
Composer will apply these credentials when starting your root locally.
Update the skill's allowed callers list and republish the skill
The remote skill won't allow the root bot to consume it, unless the root bot's app ID is added to the skill's allowed callers list.
If another group maintains the skill, request that they add your bot to the skill's allowed callers list. Then wait for their confirmation before continuing.
Otherwise, follow these steps to update the skill's allowed callers list yourself.
- Go to the Configure page.
- Select the skill bot and select the Skill configuration tab.
- Select Add new caller and enter the root bot's app ID.
- Go to the Publish page.
- Select the Publish tab.
- Select the skill bot.
- Select the skill's publishing profile to use.
- Near the top-left of the pane, select Publish selected bots.
- On the Publish page, optionally enter a publishing comment, and then select Okay.
- Composer re-publishes your skill with the updated information, which can take a few minutes.
- Copy the skill manifest URL for the skill bot. The URL is needed when you add the remote skill to the project.
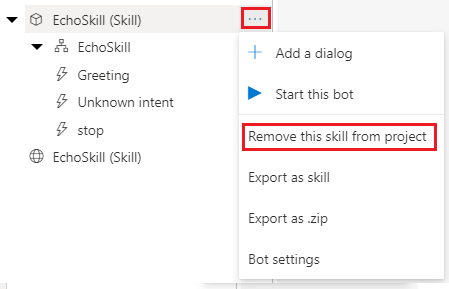
Remove the local skill
To avoid confusion, if your root bot is currently using a local version of your remote skill, remove the local skill from the root bot's project. Composer won't delete any files, and you can continue to maintain and publish the skill from its own project.
Go to the Create page and select More options next to the local skill. Then select Remove this skill from project.
When Composer shows a warning about removing the local skill from the project, select Yes to continue. You'll update your root bot to access the remote version of the skill in the next step.
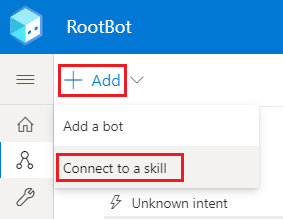
Add the remote skill
To add the remote version of the skill that you published earlier:
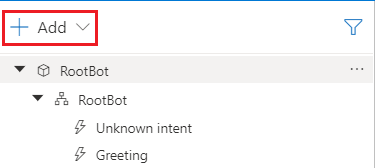
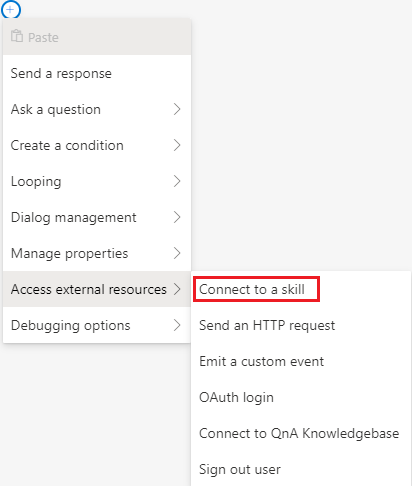
Go to the Create page. At the top of the bot explorer, select + Add , then Connect to a skill.
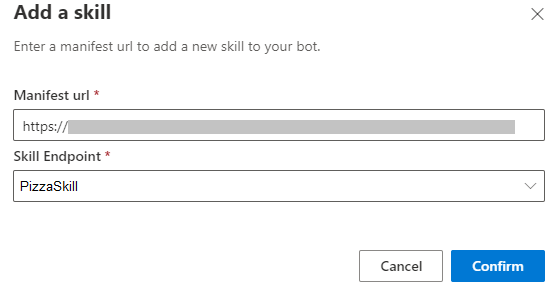
On the Add a skill page, enter the skill manifest URL for your remote skill and select Next.
- This URL can be either a remote manifest file or a local copy of the compressed manifests folder for the skill.
- If you get a Manifest URL can not be accessed error, check whether your skill is published and its manifest URL is entered correctly.
- If Composer can access the URL, it displays information from the manifest.
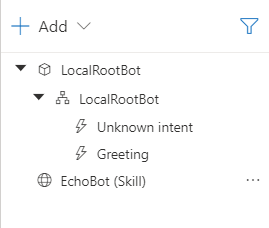
Select Done to add the remote skill to your root bot.
Composer adds an entry for the remote skill to the bot explorer.

Update the root bot to reference the remote skill
To update the root bot to access the remote skill:
- Go to the Create page.
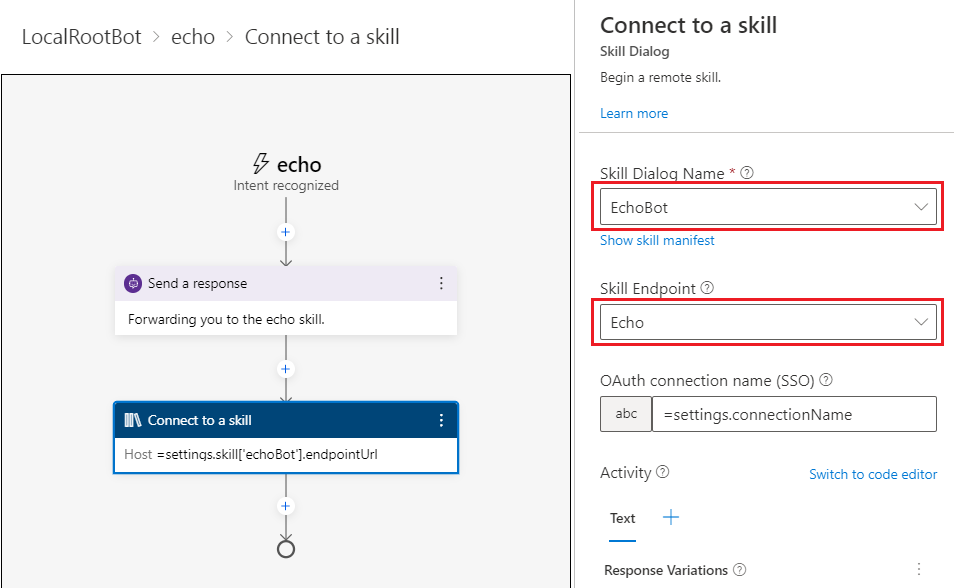
- Select the trigger in your root bot that contains the Connect to a skill action and select the Connect to a skill action.
- In this article, this is the echo trigger in the RootBot dialog.
- In the properties pane for the action:
- For Skill Dialog Name, select the remote skill.
- For Skill Endpoint, select the endpoint you want to access. If your skill has just one endpoint, the endpoint is selected by default.
Now your root bot will access the remote skill, using the information in the skill's manifest.
Test your root bot in the Emulator
You can now test your local root bot's ability to connect to the remote skill.
With a local root bot and a remote skill, the skill is running in the cloud and your root bot is running on your machine. For the two to communicate, you need to configure a URL for your root bot that the skill can access from the cloud.
Start the local root bot
The first time you start a bot that connects to a remote skill, Composer displays the ngrok command to use to create a forwarding endpoint.
- Select Start bot to start the root bot.
- If Composer displays the ngrok command to use. Copy the command for a later step. Then, close the pop-up window.
- Otherwise, Composer displays the Local bot runtime manager.
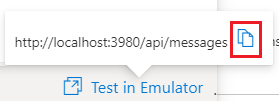
- Hover over Test in Emulator.
- Copy the port number for the root bot. For example, if the messaging endpoint is
http://localhost:3980/api/messages, the port number is3980. You need this to create the forwarding endpoint.
Create a forwarding URL
Open a command prompt or terminal.
If ngrok isn't in your path, change to the directory that contains
ngrok.exe.Run the command you copied from Composer earlier. It should look similar to this, where
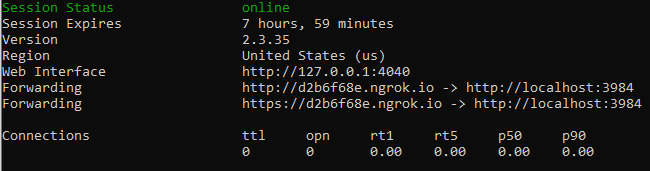
<port-number>is the port number for your root bot.ngrok.exe http <port-number> --host-header=localhostngrok creates a forwarding URL in the cloud that directs to the port on which your local bot is hosted.
Copy the https URL from ngrok and leave the command running.
- The forwarding URL expires when the ngrok session expires or when you end the ngrok process.
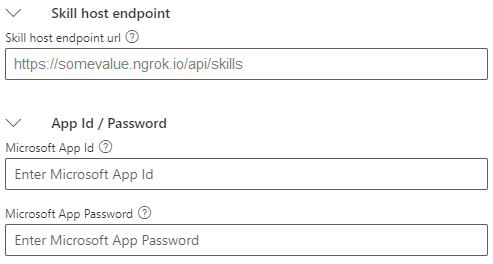
Update the skill host endpoint
In Composer, go to the Configure page.
Select your root bot
Select the Skill configuration tab.
Under Call skills, change the Skill host endpoint URL to use the forwarding URL as its base, instead of the localhost port.
For example, if your local port is
3980and your forwarding URL ishttps://37bab15eb6e2.ngrok.io, then you would changehttp://localhost:3980/api/skillstohttps://37bab15eb6e2.ngrok.io/api/skills.
Your root bot will use this URL to receive responses from the skill bot.
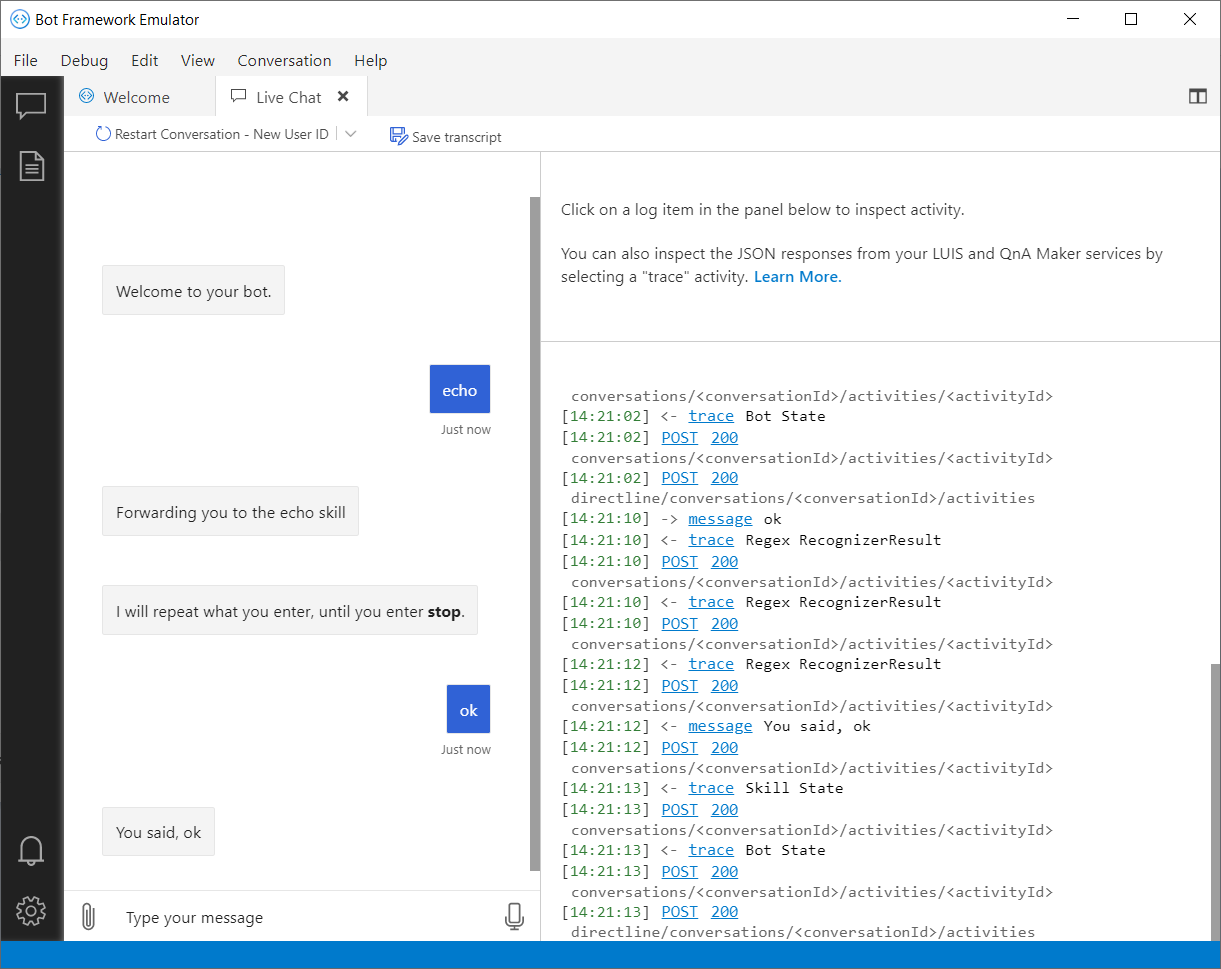
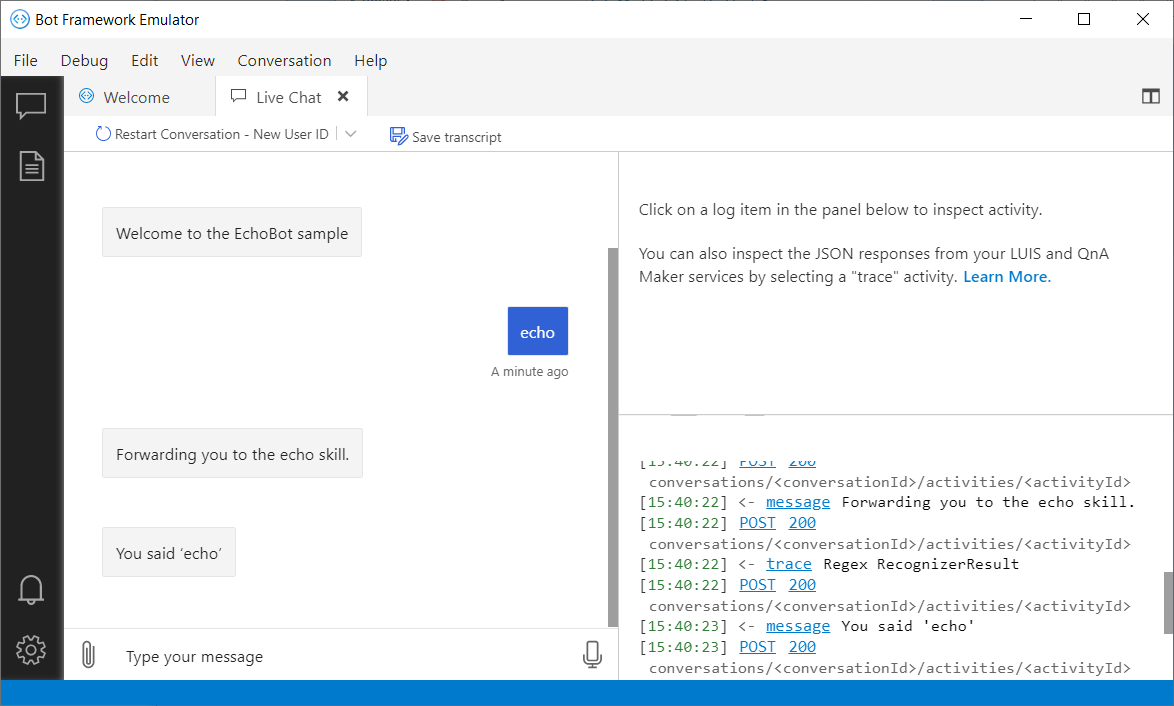
Start the root bot and open it in Emulator
Restart your root bot from Composer.
From the Local bot runtime manager, select Test in Emulator.
Composer opens your root bot in the Bot Framework Emulator.
Enter text in the Emulator and see the response.

Additional information
A skill's manifest can include dispatch and language model information. This information describes the intents and questions the skill is designed to respond to. It can also provide language models for multiple locales.
- When you publish your skill, Composer can add dispatch and language model information to the skill's manifest. It uses the language models from the skill bot to do so.
- When you create a bot that consumes a skill, Composer can use the skill's manifest to generate triggers in the root bot to invoke the skill.
For more information, see About skills in Composer and reuse of conversation logic between bots.
Next steps
For information about developing and publishing skills in Composer, see how to Create and test a local skill and Publish a skill to Azure.
Feedback
Bald verfügbar: Im Laufe des Jahres 2024 werden wir GitHub-Issues stufenweise als Feedbackmechanismus für Inhalte abbauen und durch ein neues Feedbacksystem ersetzen. Weitere Informationen finden Sie unter https://aka.ms/ContentUserFeedback.
Feedback senden und anzeigen für