Schnellstart: Erstellen eines neuen Mandanten in Microsoft Entra ID
Sie können alle Verwaltungsaufgaben über das Microsoft Entra Admin Center ausführen. Dazu gehört auch das Erstellen eines neuen Mandanten für Ihre Organisation.
In diesem Schnellstart erfahren Sie, wie Sie das Azure-Portal und Microsoft Entra ID aufrufen, und wie Sie einen Basismandanten für Ihre Organisation erstellen.
Hinweis
Nur kostenpflichtige Kunden können einen neuen Mitarbeitermandanten in der Microsoft Entra-ID erstellen. Kunden, die einen kostenlosen Mandanten oder ein Testabonnement verwenden, können keine zusätzlichen Mandanten aus dem Microsoft Entra Admin Center erstellen. Kunden mit diesem Szenario, die einen neuen Mandanten benötigen, können sich für ein kostenloses Konto registrieren.
Erstellen eines neuen Mandanten für Ihre Organisation
Tipp
Die Schritte in diesem Artikel können je nach dem Portal, mit dem Sie beginnen, geringfügig variieren.
Nach der Anmeldung beim Azure-Portal können Sie einen neuen Mandanten für Ihre Organisation erstellen. Ihr neuer Mandant stellt Ihre Organisation dar und unterstützt Sie dabei, eine bestimmte Instanz von Microsoft Cloud-Diensten für Ihre internen und externen Benutzer zu verwalten.
Hinweis
- Wenn Sie keinen Microsoft Entra ID- oder Azure AD B2C-Mandanten erstellen können, überprüfen Sie ihre Seite mit den Benutzereinstellungen, um sicherzustellen, dass die Mandantenerstellung nicht deaktiviert ist. Wenn sie nicht aktiviert ist, müssen Sie mindestens der Rolle Mandantenersteller zugewiesen werden.
- In diesem Artikel wird das Erstellen einer externen Mandantenkonfiguration benutzerseitige Apps nicht behandelt. Erfahren Sie mehr über die Verwendung von Microsoft Entra External ID für Ihre CIAM-Szenarios (Customer Identity and Access Management, Verwaltung von Identität und Zugriff für Kunden).
Erstellen eines neuen Mandanten
Melden Sie sich beim Azure-Portal an.
Navigieren Sie im Menü des Azure-Portals Microsoft Entra ID aus.
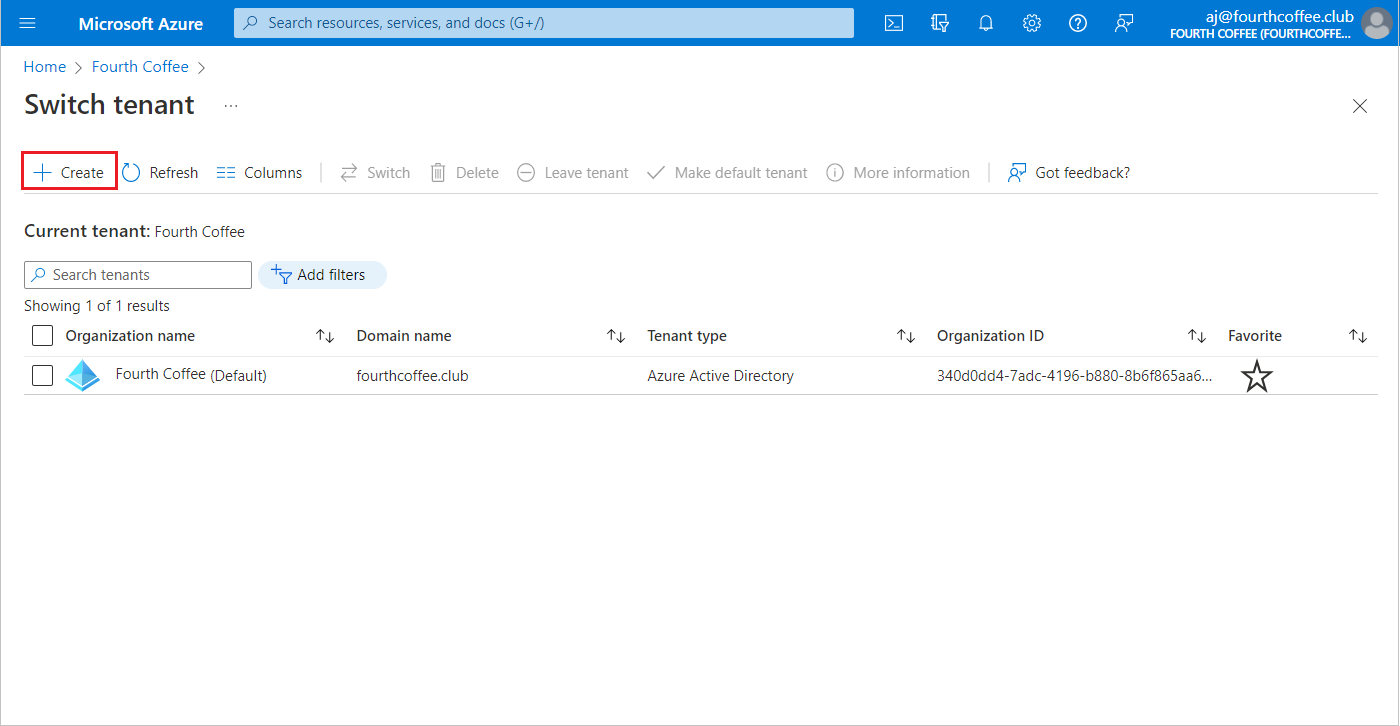
Browsen Sie zu Identität>Überblick>Mandanten verwalten.
Klicken Sie auf Erstellen.
Wählen Sie auf der Registerkarte „Grundlagen“ den Typ des Mandanten aus, den Sie erstellen möchten, entweder Microsoft Entra ID oder Microsoft Entra ID (B2C).
Wählen Sie Weiter: Konfiguration aus, um zur Registerkarte „Konfiguration“ zu wechseln.
Geben Sie auf der Registerkarte „Konfiguration“ die folgenden Informationen ein:
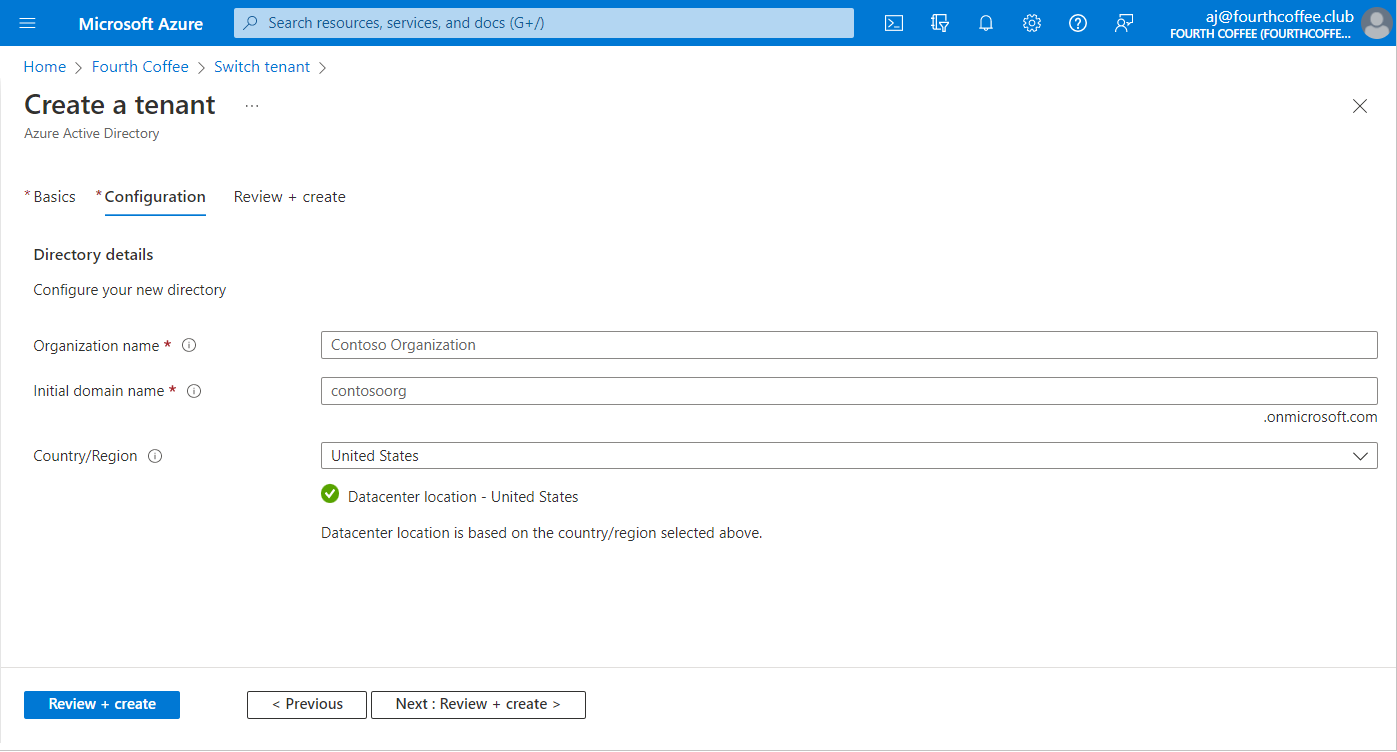
- Geben Sie Ihren gewünschten Organisationsnamen (z. B. Contoso Organization) in das Feld Organisationsname ein.
- Geben Sie den gewünschten anfänglichen Domänennamen (z. B. Contosoorg) in das Feld Anfänglicher Domänenname ein.
- Wählen Sie Ihr gewünschtes Land/Ihre gewünschte Region aus, oder behalten Sie die Option USA im Feld Land oder Region bei.
Klicken Sie auf Weiter: Überprüfen + erstellen. Überprüfen Sie die von Ihnen eingegebenen Informationen und wählen Sie unten links Erstellen aus, wenn die Informationen korrekt sind.
Ihr neuer Mandant wird mit der Domäne „contoso.onmicrosoft.com“ erstellt.
Ihr Benutzerkonto im neuen Mandanten
Wenn Sie einen neuen Microsoft Entra-Mandanten erstellen, werden Sie der erste Benutzer dieses Mandanten. Als erstem Benutzer/erster Benutzerin wird Ihnen automatisch die Rolle Globaler Administrator zugewiesen. Sehen Sie sich Ihr Benutzerkonto an, indem Sie zur Seite Benutzer navigieren.
Standardmäßig werden Sie auch als technischer Kontakt für den Mandanten aufgeführt. Die Informationen zum technischen Kontakt können unter Eigenschaften geändert werden.
Warnung
Stellen Sie sicher, dass Ihrem Verzeichnis mindestens zwei Konten mit Berechtigungen vom Typ „Globaler Administrator“ zugewiesen sind. Dies hilft bei dem Fall, dass eine gesperrt ist. Weitere Details finden Sie im Artikel Verwalten von Notfallzugriffskonten in Microsoft Entra ID.
Bereinigen von Ressourcen
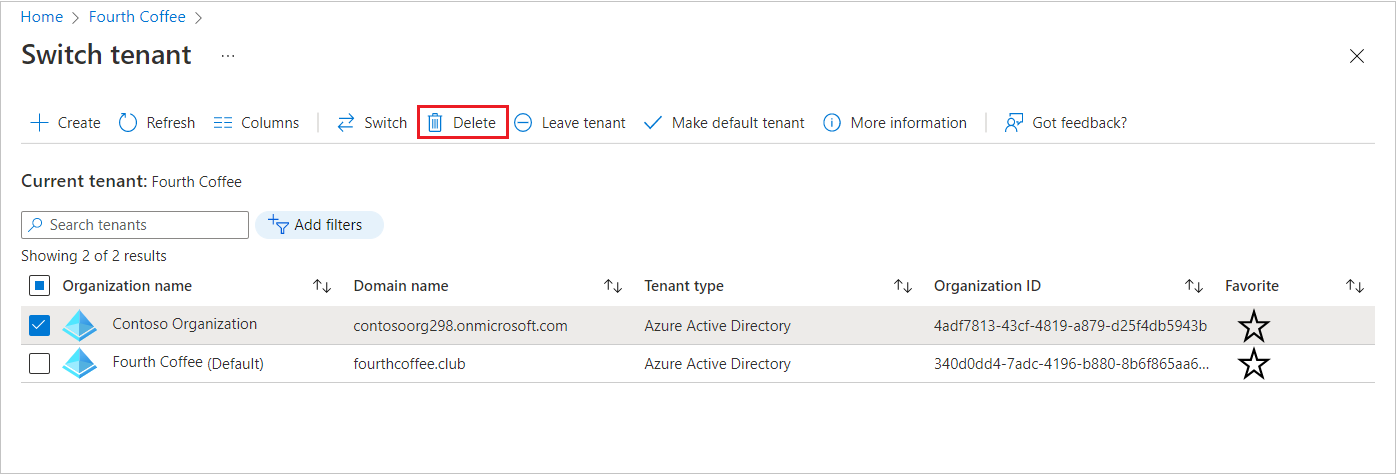
Wenn Sie diese Anwendung nicht mehr verwenden möchten, können Sie den Mandanten folgendermaßen löschen:
Vergewissern Sie sich anhand des Filters Verzeichnis + Abonnement im Azure-Portal, dass Sie bei dem Verzeichnis angemeldet sind, das Sie löschen möchten. Wechseln Sie ggf. zum Zielverzeichnis.
Wählen Sie Microsoft Entra ID, die Seite Contoso – Übersicht und dann Verzeichnis löschen aus.
Der Mandant und die zugehörigen Informationen werden gelöscht.
Nächste Schritte
Ändern oder fügen Sie andere Domänennamen hinzu, siehe Hinzufügen eines benutzerdefinierten Domänennamens zu Microsoft Entra ID.
Weitere Informationen zum Hinzufügen von Benutzern finden Sie unter Hinzufügen oder Löschen eines neuen Benutzers.
Der Artikel Erstellen einer Basisgruppe und Hinzufügen von Mitgliedern erläutert, wie Sie Gruppen und Mitglieder hinzufügen.
Informieren Sie sich über die rollenbasierte Zugriffssteuerung in Azure (Role-Based Access Control, RBAC) und bedingten Zugriff, um den Zugriff auf die Anwendungen und Ressourcen Ihrer Organisation zu verwalten.
Weitere Informationen zu Microsoft Entra ID finden Sie unter Was ist Microsoft Entra?. Dieser Artikel enthält allgemeine Lizenzierungsinformationen sowie Details zu Terminologie und zugehörigen Features.