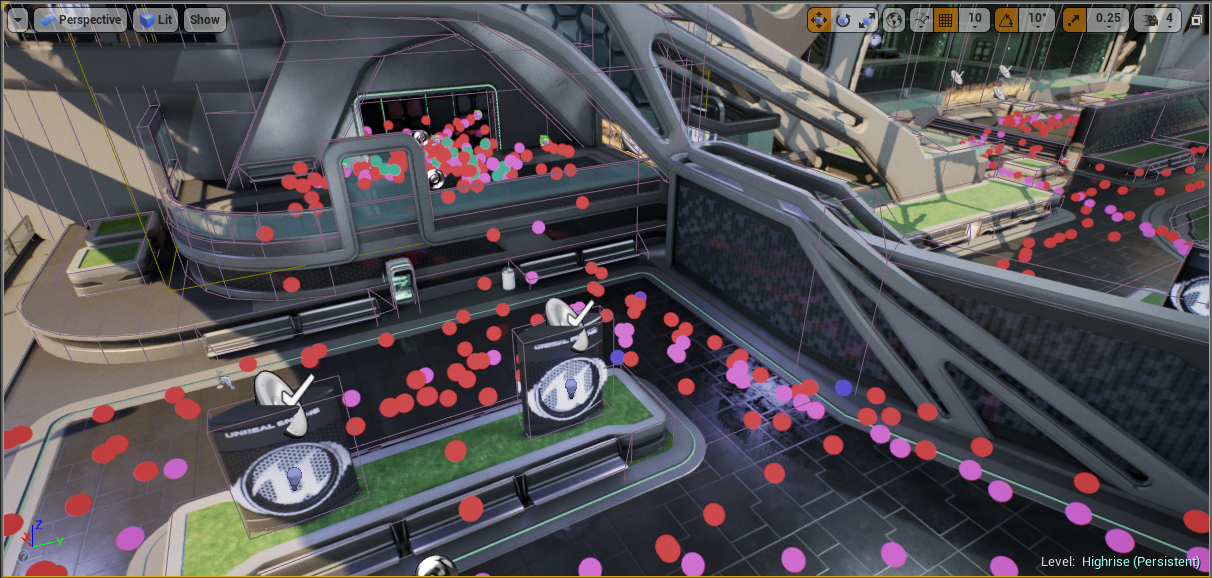
In-editor game telemetry visualization
This is an example of how a developer could implement an in-editor telemetry visualization solution for their game. In fact, we developed an Unreal Engine Plugin and Unity Plugin using this sample as its backend. The service component is game engine agnostic.
It utilizes Azure Functions to implement an API to ingest, process, and query the telemetry. Azure Event Hub buffers the incoming telemetry before it is finally stored in Azure Cosmos DB.

Deployment Process
The service components can be deployed to Azure using the Azure Resource Manager (ARM) template. It will:
- Create the Azure Event Hub Namespace and Event Hub
- Create the Azure Cosmos DB Account
- Create the Azure Function Application and configure the connection strings in the application settings
Guidelines for filling out the parameters
Cosmos DB Account Name: Must be all lower case, 3-31 characters (letters, numbers and hyphens allowed)
- Note: If the name contains invalid characters, the deployment will fail
Event Hub Sku: While there are other features that Standard provides over Basic, in this scenario, the deciding factor would be the limitation of consumer groups. Choose Standard if you plan to have more than one function reading from the telemetry event hub, or you plan to modify the logic of the event handling and wish to test locally without impacting other consumers. This can be changed after deployment.
- Basic: If only using a single consumer group
- Standard: If using more than one consumer group
Event Hub SKU Capacity: Throughput Units to determine throttling. The service makes use of compression and one event per batch, so leave this at default unless you expect there to be a lot more data.
Message Retention In Days: Data is ultimately stored in Cosmos DB, so this only affects how long the data is available if you want to re-ingest it.
- Basic: 1 Day max
- Standard: 7 Day max
Partition Count: Throughput units are shared across partitions. More partitions enable faster writes through less contention. Reads are much less impacted by additional partitions. For most small dev scenarios, 4 partitions is enough. This cannot be changed after deployment without creating a new event hub.
Storage Account Type: This is the storage used by the Function App itself. Standard Locally Redundant Storage (LRS) should be fine in most cases.
Software dependencies
Calculate Cost Estimates
A cost calculation guide is available here
Build and Test
Note: Even if you run it locally, you must still have deployed the azure resources. There is currently no local emulator for Event Hub.
Telemetry Service
To run locally, you will need a local.settings.json file in the TelemetryAPI/ project folder. This is not checked in to source control because it often contains sensitive information. The instructions below explain how to generate this file from the settings on the server.
Visual Studio Users
- Set up the publish profile as described in the Azure Documentation*
- You can populate the
local.settings.jsonfile by copying the values from the remote values in theManage Application Settings...menu of the Publish UI - Compile the project
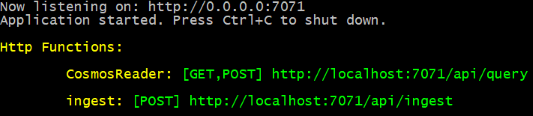
- Running the project will launch the Azure Functions Core Tools host server
* If you deployed using the ARM template above, you will want to Select Existing app service in the wizard
It is recommended that you use "UseDevelopmentStorage=true" for the following storage connection strings when running locally.
"AzureWebJobsStorage": "UseDevelopmentStorage=true",
"AzureWebJobsDashboard": "UseDevelopmentStorage=true",
"WEBSITE_CONTENTAZUREFILECONNECTIONSTRING": "UseDevelopmentStorage=true"
Included with the project are two console apps for testing the service.
Publishing the code
- Right-click the TelemetryAPI project in Visual Studio and choose 'Publish'
- Create a New profile
- Set 'Target' to Azure, select 'Next'
- Set 'Specific target' to Azure Function App, select 'Next'
- Under 'Functions instance', locate the Azure Function App you created with the template, select 'Next'
- Set 'Deployment type' to Publish, select 'Finish'
- The project should build and will be packaged into a .zip file for deployment. Select 'Close' and then click the 'Publish' button to deploy.
- The first time you publish to your Functions App, you may be asked to update the Functions version on Azure, select 'Yes'. If you miss this step, you can change the settings in Azure by navigating to your Function App, select Configuration > FUNCTIONS_EXTENSION_VERSION, set the 'Value' to ~4 and press 'OK'.
Locating your Authorization Key
Azure Documentation For Authorization Keys
- Open the Azure Portal in your browser
- Locate your Function App under All Resources
- Choose App keys under the Functions section
- Copy the value of the default key, or create a new key for your use
Test your deployment with the TelemetryEmitter by changing the line:
const string INGEST_URL = "http://localhost:7071/api/ingest";
to
const string INGEST_URL = "https://<your_function_app_name>.azurewebsites.net/api/ingest?code=<your_authorization_key>";