Erstellen eines Windows Hello-Anmeldediensts
Dies ist Teil 2 einer vollständigen exemplarischen Vorgehensweise zur Verwendung Windows Hello als Alternative zu herkömmlichen Authentifizierungssystemen für Benutzername und Kennwort in Windows 10- und Windows 11 UWP-Apps (Universelle Windows-Plattform). In diesem Artikel wird erläutert, wo Teil 1, Windows Hello Anmelde-App aufgehört hat, und erweitert die Funktionalität, um zu veranschaulichen, wie Sie Windows Hello in Ihre vorhandene Anwendung integrieren können.
Die Erstellung dieses Projekts setzt Erfahrung mit C# und XAML voraus. Sie müssen auch Visual Studio 2015 (Community Edition oder höher) auf einem Windows 10 oder Windows 11 Computer verwenden.
Übung 1: Serverseitige Logik
In dieser Übung beginnen Sie mit der Windows Hello Anwendung, die im ersten Lab erstellt wurde, und erstellen einen lokalen Mockserver und eine lokale Datenbank. Dieses praktische Lab soll vermitteln, wie Windows Hello in ein bestehendes System integriert werden können. Mit einem Pseudoserver und einer Pseudodatenbank wird Setup ohne Bezug entfernt. In Ihren eigenen Anwendungen müssen Sie die Pseudoobjekte durch die echten Dienste und Datenbanken ersetzen.
Öffnen Sie zunächst die PassportLogin-Projektmappe aus der ersten praktischen Übung für Passport.
Beginnen Sie mit dem Implementieren des Pseudoservers und der Pseudodatenbank. Erstellen Sie einen neuen Ordner namens „AuthService“. Klicken Sie im Projektmappen-Explorer mit der rechten Maustaste auf die Projektmappe "PassportLogin (Universelles Windows)", und wählen Sie Neuen Ordner hinzufügen > aus.
Erstellen Sie UserAccount- und PassportDevices-Klassen, die als Modelle für in der Pseudodatenbank zu speichernde Daten dienen. Das Benutzerkonto ist ähnlich wie das auf einem herkömmlichen Authentifizierungsserver implementierte Benutzermodell. Klicken Sie mit der rechten Maustaste auf den Ordner „AuthService“, und fügen Sie die neue Klasse „UserAccount.cs“ hinzu.

Ändern Sie die Klassendefinition in öffentlich, und fügen Sie die folgenden öffentlichen Eigenschaften hinzu. Sie benötigen den folgenden Verweis.
using System.ComponentModel.DataAnnotations;

namespace PassportLogin.AuthService
{
    public class UserAccount
    {
        [Key, Required]
        public Guid UserId { get; set; }
        [Required]
        public string Username { get; set; }
        public string Password { get; set; }
        // public List<PassportDevice> PassportDevices = new List<PassportDevice>();
    }
}
Möglicherweise haben Sie die auskommentierte Liste von PassportDevices bemerkt. Dies ist eine Änderung, die Sie an einem vorhandenen Benutzermodell in der aktuellen Implementierung vornehmen müssen. Die Liste der PassportDevices enthält eine deviceID, den öffentlichen Schlüssel aus Windows Hello und ein KeyCredentialAttestationResult. Für dieses praktische Lab müssen Sie keyAttestationResult implementieren, da sie nur von Windows Hello auf Geräten bereitgestellt werden, die über einen TPM-Chip (Trusted Platform Modules) verfügen. Das KeyCredentialAttestationResult ist eine Kombination aus mehreren Eigenschaften und muss zum Speichern und Laden mit einer Datenbank geteilt werden.
Erstellen Sie im Ordner „AuthService“ die neue Klasse „PassportDevice.cs“. Dies ist das Modell für die Windows Hello-Geräte, wie oben erläutert. Definieren Sie die Klasse als öffentliche Klasse, und fügen Sie die folgenden Eigenschaften hinzu.
namespace PassportLogin.AuthService
{
    public class PassportDevice
    {
        // These are the new variables that will need to be added to the existing UserAccount in the Database
        // The DeviceName is used to support multiple devices for the one user.
        // This way the correct public key is easier to find as a new public key is made for each device.
        // The KeyAttestationResult is only used if the User device has a TPM (Trusted Platform Module) chip,
        // in most cases it will not. So will be left out for this hands on lab.
        public Guid DeviceId { get; set; }
        public byte[] PublicKey { get; set; }
        // public KeyCredentialAttestationResult KeyAttestationResult { get; set; }
    }
}
Kehren Sie zu userAccount.cs zurück, und heben Sie die Auskommentierung der Liste der Windows Hello Geräte auf.
using System.Collections.Generic;

namespace PassportLogin.AuthService
{
    public class UserAccount
    {
        [Key, Required]
        public Guid UserId { get; set; }
        [Required]
        public string Username { get; set; }
        public string Password { get; set; }
        public List<PassportDevice> PassportDevices = new List<PassportDevice>();
    }
}
Da das Modell für das Benutzerkonto und PassportDevice erstellt wurde, müssen Sie in AuthService eine weitere neue Klasse erstellen, die als Pseudodatenbank dient. Dies ist die Pseudodatenbank, aus der Sie eine Liste von Benutzerkonten lokal speichern und laden. In der realen Welt wäre dies Ihre Datenbankimplementierung. Erstellen Sie in AuthService die neue Klasse „MockStore.cs“. Definieren Sie die Klasse als öffentliche Klasse.
Das der Pseudospeicher eine Liste von Benutzerkonten lokal speichert und lädt, können Sie die Logik zum Speichern und Laden dieser Liste mit einem XmlSerializer-Element implementieren. Außerdem müssen Sie sich den Dateinamen und Speicherort merken. Implementieren Sie Folgendes in „MockStore.cs“:
    using System.IO;
    using System.Linq;
    using System.Xml.Serialization;
    using Windows.Storage;

    namespace PassportLogin.AuthService
    {
        public class MockStore
        {
            private const string USER_ACCOUNT_LIST_FILE_NAME = "userAccountsList.txt";
            // This cannot be a const because the LocalFolder is accessed at runtime
            private string _userAccountListPath = Path.Combine(
                ApplicationData.Current.LocalFolder.Path, USER_ACCOUNT_LIST_FILE_NAME);
            private List<UserAccount> _mockDatabaseUserAccountsList;

    #region Save and Load Helpers
            /// <summary>
            /// Create and save a useraccount list file. (Replacing the old one)
            /// </summary>
            private async void SaveAccountListAsync()
            {
                string accountsXml = SerializeAccountListToXml();

                if (File.Exists(_userAccountListPath))
                {
                    StorageFile accountsFile = await StorageFile.GetFileFromPathAsync(_userAccountListPath);
                    await FileIO.WriteTextAsync(accountsFile, accountsXml);
                }
                else
                {
                    StorageFile accountsFile = await ApplicationData.Current.LocalFolder.CreateFileAsync(USER_ACCOUNT_LIST_FILE_NAME);
                    await FileIO.WriteTextAsync(accountsFile, accountsXml);
                }
            }

            /// <summary>
            /// Gets the useraccount list file and deserializes it from XML to a list of useraccount objects.
            /// </summary>
            /// <returns>List of useraccount objects</returns>
            private async void LoadAccountListAsync()
            {
                if (File.Exists(_userAccountListPath))
                {
                    StorageFile accountsFile = await StorageFile.GetFileFromPathAsync(_userAccountListPath);

                    string accountsXml = await FileIO.ReadTextAsync(accountsFile);
                    DeserializeXmlToAccountList(accountsXml);
                }

                // If the UserAccountList does not contain the sampleUser Initialize the sample users
                // This is only needed as it in a Hand on Lab to demonstrate a user migrating
                // In the real world user accounts would just be in a database
                if (!_mockDatabaseUserAccountsList.Any(f => f.Username.Equals("sampleUsername")))
                {
                    //If the list is empty InitializeSampleAccounts and return the list
                    //InitializeSampleUserAccounts();
                }
            }

            /// <summary>
            /// Uses the local list of accounts and returns an XML formatted string representing the list
            /// </summary>
            /// <returns>XML formatted list of accounts</returns>
            private string SerializeAccountListToXml()
            {
                XmlSerializer xmlizer = new XmlSerializer(typeof(List<UserAccount>));
                StringWriter writer = new StringWriter();
                xmlizer.Serialize(writer, _mockDatabaseUserAccountsList);
                return writer.ToString();
            }

            /// <summary>
            /// Takes an XML formatted string representing a list of accounts and returns a list object of accounts
            /// </summary>
            /// <param name="listAsXml">XML formatted list of accounts</param>
            /// <returns>List object of accounts</returns>
            private List<UserAccount> DeserializeXmlToAccountList(string listAsXml)
            {
                XmlSerializer xmlizer = new XmlSerializer(typeof(List<UserAccount>));
                TextReader textreader = new StreamReader(new MemoryStream(Encoding.UTF8.GetBytes(listAsXml)));
                return _mockDatabaseUserAccountsList = (xmlizer.Deserialize(textreader)) as List<UserAccount>;
            }
    #endregion
        }
    }
In der Load-Methode haben Sie möglicherweise bemerkt, dass eine InitializeSampleUserAccounts-Methode auskommentiert wurde. Sie müssen diese Methode in MockStore.cs erstellen. Diese Methode füllt die Liste der Benutzerkonten, sodass eine Anmeldung stattfinden kann. In der realen Welt würde die Benutzerdatenbank bereits gefüllt sein. In diesem Schritt erstellen Sie auch einen Konstruktor, der die Benutzerliste und den Ladeaufruf initialisiert.
namespace PassportLogin.AuthService
{
    public class MockStore
    {
        private const string USER_ACCOUNT_LIST_FILE_NAME = "userAccountsList.txt";
        // This cannot be a const because the LocalFolder is accessed at runtime
        private string _userAccountListPath = Path.Combine(
            ApplicationData.Current.LocalFolder.Path, USER_ACCOUNT_LIST_FILE_NAME);
        private List<UserAccount> _mockDatabaseUserAccountsList;

        public MockStore()
        {
            _mockDatabaseUserAccountsList = new List& lt; UserAccount & gt; ();
            LoadAccountListAsync();
        }

        private void InitializeSampleUserAccounts()
        {
            // Create a sample Traditional User Account that only has a Username and Password
            // This will be used initially to demonstrate how to migrate to use Windows Hello

            UserAccount sampleUserAccount = new UserAccount()
            {
                UserId = Guid.NewGuid(),
                Username = "sampleUsername",
                Password = "samplePassword",
            };

            // Add the sampleUserAccount to the _mockDatabase
            _mockDatabaseUserAccountsList.Add(sampleUserAccount);
            SaveAccountListAsync();
        }
    }
}
Entfernen Sie nun, da die InitalizeSampleUserAccounts-Methode vorhanden ist, Kommentare aus dem Methodenaufruf in der LoadAccountListAsync-Methode.
private async void LoadAccountListAsync()
{
    if (File.Exists(_userAccountListPath))
    {
        StorageFile accountsFile = await StorageFile.GetFileFromPathAsync(_userAccountListPath);

        string accountsXml = await FileIO.ReadTextAsync(accountsFile);
        DeserializeXmlToAccountList(accountsXml);
    }

    // If the UserAccountList does not contain the sampleUser Initialize the sample users
    // This is only needed as it in a Hand on Lab to demonstrate a user migrating
    // In the real world user accounts would just be in a database
    if (!_mockDatabaseUserAccountsList.Any(f = > f.Username.Equals("sampleUsername")))
            {
        //If the list is empty InitializeSampleAccounts and return the list
        InitializeSampleUserAccounts();
    }
}
Die Liste der Benutzerkonten im Pseudospeicher kann jetzt gespeichert und geladen werden. Andere Teile der Anwendung müssen Zugriff auf diese Liste haben, es müssen also Methoden zum Abrufen dieser Daten vorhanden sein. Fügen Sie unter der InitializeSampleUserAccounts-Methode die folgenden get-Methoden hinzu. Sie ermöglichen es Ihnen, eine Benutzer-ID, einen einzelnen Benutzer, eine Liste von Benutzern für ein bestimmtes Windows Hello Gerät abzurufen und auch den öffentlichen Schlüssel für den Benutzer auf einem bestimmten Gerät abzurufen.
public Guid GetUserId(string username)
{
    if (_mockDatabaseUserAccountsList.Any())
    {
        UserAccount account = _mockDatabaseUserAccountsList.FirstOrDefault(f => f.Username.Equals(username));
        if (account != null)
        {
            return account.UserId;
        }
    }
    return Guid.Empty;
}

public UserAccount GetUserAccount(Guid userId)
{
    return _mockDatabaseUserAccountsList.FirstOrDefault(f => f.UserId.Equals(userId));
}

public List<UserAccount> GetUserAccountsForDevice(Guid deviceId)
{
    List<UserAccount> usersForDevice = new List<UserAccount>();

    foreach (UserAccount account in _mockDatabaseUserAccountsList)
    {
        if (account.PassportDevices.Any(f => f.DeviceId.Equals(deviceId)))
        {
            usersForDevice.Add(account);
        }
    }

    return usersForDevice;
}

public byte[] GetPublicKey(Guid userId, Guid deviceId)
{
    UserAccount account = _mockDatabaseUserAccountsList.FirstOrDefault(f => f.UserId.Equals(userId));
    if (account != null)
    {
        if (account.PassportDevices.Any())
        {
            return account.PassportDevices.FirstOrDefault(p => p.DeviceId.Equals(deviceId)).PublicKey;
        }
    }
    return null;
}
Die nächsten zu implementierenden Methoden führen einfache Vorgänge zum Hinzufügen und Entfernen eines Kontos sowie zum Entfernen eines Geräts durch. Das Gerät entfernen ist erforderlich, da Windows Hello gerätespezifisch ist. Für jedes Gerät, bei dem Sie sich anmelden, wird von Windows Hello ein neues öffentliches und privates Schlüsselpaar erstellt. Das ist vergleichbar mit einem unterschiedlichen Kennwort für jedes Gerät, bei dem Sie sich anmelden. Der einzige Unterschied besteht darin, dass nicht Sie sich alle diese Kennwörter merken müssen, sondern der Server. Fügen Sie die folgenden Methoden in „MockStore.cs“ hinzu.
public UserAccount AddAccount(string username)
{
    UserAccount newAccount = null;
    try
    {
        newAccount = new UserAccount()
        {
            UserId = Guid.NewGuid(),
            Username = username,
        };

        _mockDatabaseUserAccountsList.Add(newAccount);
        SaveAccountListAsync();
    }
    catch (Exception)
    {
        throw;
    }
    return newAccount;
}

public bool RemoveAccount(Guid userId)
{
    UserAccount userAccount = GetUserAccount(userId);
    if (userAccount != null)
    {
        _mockDatabaseUserAccountsList.Remove(userAccount);
        SaveAccountListAsync();
        return true;
    }
    return false;
}

public bool RemoveDevice(Guid userId, Guid deviceId)
{
    UserAccount userAccount = GetUserAccount(userId);
    PassportDevice deviceToRemove = null;
    if (userAccount != null)
    {
        foreach (PassportDevice device in userAccount.PassportDevices)
        {
            if (device.DeviceId.Equals(deviceId))
            {
                deviceToRemove = device;
                break;
            }
        }
    }

    if (deviceToRemove != null)
    {
        //Remove the PassportDevice
        userAccount.PassportDevices.Remove(deviceToRemove);
        SaveAccountListAsync();
    }

    return true;
}
Fügen Sie in der MockStore-Klasse eine Methode hinzu, die Windows Hello zugehörigen Informationen zu einem vorhandenen UserAccount hinzufügt. Diese Methode wird PassportUpdateDetails genannt und verwendet Parameter, um den Benutzer und die Windows Hello Details zu identifizieren. Das KeyAttestationResult ist beim Erstellen eines PassportDevice auskommentiert, in einer echten Anwendung würden Sie dies anfordern.
using Windows.Security.Credentials;

public void PassportUpdateDetails(Guid userId, Guid deviceId, byte[] publicKey,
    KeyCredentialAttestationResult keyAttestationResult)
{
    UserAccount existingUserAccount = GetUserAccount(userId);
    if (existingUserAccount != null)
    {
        if (!existingUserAccount.PassportDevices.Any(f => f.DeviceId.Equals(deviceId)))
        {
            existingUserAccount.PassportDevices.Add(new PassportDevice()
            {
                DeviceId = deviceId,
                PublicKey = publicKey,
                // KeyAttestationResult = keyAttestationResult
            });
        }
    }
    SaveAccountListAsync();
}
Die MockStore-Klasse ist jetzt fertig. Da dies die Datenbank darstellt, sollte sie als privat eingestuft werden. Zum Zugriff auf MockStore ist eine AuthService-Klasse zum Bearbeiten der Daten in der Datenbank erforderlich. Erstellen Sie im Ordner „AuthService“ die neue Klasse „AuthService.cs“. Definieren Sie die Klasse als öffentliche Klasse, und fügen Sie ein Singleton-Instanzmuster hinzu, um sicherzustellen, dass nur eine Instanz erstellt wird.
namespace PassportLogin.AuthService
{
    public class AuthService
    {
        // Singleton instance of the AuthService
        // The AuthService is a mock of what a real world server and service implementation would be
        private static AuthService _instance;
        public static AuthService Instance
        {
            get
            {
                if (null == _instance)
                {
                    _instance = new AuthService();
                }
                return _instance;
            }
        }

        private AuthService()
        { }
    }
}
Die AuthService-Klasse muss eine Instanz der MockStore-Klasse erstellen und den Zugriff auf die Eigenschaften des MockStore-Objekts gewähren.
namespace PassportLogin.AuthService
{
    public class AuthService
    {
        //Singleton instance of the AuthService
        //The AuthService is a mock of what a real world server and database implementation would be
        private static AuthService _instance;
        public static AuthService Instance
        {
            get
            {
                if (null == _instance)
                {
                    _instance = new AuthService();
                }
                return _instance;
            }
        }

        private MockStore _mockStore = new MockStore();

        public Guid GetUserId(string username)
        {
            return _mockStore.GetUserId(username);
        }

        public UserAccount GetUserAccount(Guid userId)
        {
            return _mockStore.GetUserAccount(userId);
        }

        public List<UserAccount> GetUserAccountsForDevice(Guid deviceId)
        {
            return _mockStore.GetUserAccountsForDevice(deviceId);
        }
    }
}
Sie benötigen Methoden in der AuthService-Klasse für den Zugriff auf Methoden zum Hinzufügen, Entfernen und Aktualisieren von Passport-Details im MockStore-Objekt. Fügen Sie am Ende der AuthService-Klassendatei die folgenden Methoden hinzu.
using Windows.Security.Credentials;

public void Register(string username)
{
    _mockStore.AddAccount(username);
}

public bool PassportRemoveUser(Guid userId)
{
    return _mockStore.RemoveAccount(userId);
}

public bool PassportRemoveDevice(Guid userId, Guid deviceId)
{
    return _mockStore.RemoveDevice(userId, deviceId);
}

public void PassportUpdateDetails(Guid userId, Guid deviceId, byte[] publicKey,
    KeyCredentialAttestationResult keyAttestationResult)
{
    _mockStore.PassportUpdateDetails(userId, deviceId, publicKey, keyAttestationResult);
}
Die AuthService-Klasse muss eine Methode zum Überprüfen der Anmeldeinformationen bereitstellen. Diese Methode verwendet einen Benutzernamen und ein Kennwort und stellt sicher, dass das Konto vorhanden und das Kennwort gültig ist. Ein vorhandenes System würde über eine äquivalente Methode verfügen, die überprüft, ob der Benutzer autorisiert ist. Fügen Sie die folgende ValidateCredentials-Methode der Datei „AuthService.cs“ hinzu.
public bool ValidateCredentials(string username, string password)
{
    if (!string.IsNullOrEmpty(username) && !string.IsNullOrEmpty(password))
    {
        // This would be used for existing accounts migrating to use Passport
        Guid userId = GetUserId(username);
        if (userId != Guid.Empty)
        {
            UserAccount account = GetUserAccount(userId);
            if (account != null)
            {
                if (string.Equals(password, account.Password))
                {
                    return true;
                }
            }
        }
    }
    return false;
}
Die AuthService-Klasse benötigt eine Abfrageanforderungsmethode, die eine Abfrage an den Client zurückgibt, um den jeweiligen Benutzer zu identifizieren. Dann wird eine Methode in der AuthService-Klasse benötigt, um die signierte Abfrage vom Client zu empfangen. Für diese praktische Übung wurde die Methode, mit der Sie ermitteln, ob die signierte Abfrage abgeschlossen wurde, unvollständig gelassen. Jede Implementierung von Windows Hello in ein vorhandenes Authentifizierungssystem unterscheidet sich geringfügig. Der auf dem Server gespeicherte öffentliche Schlüssel muss mit dem Ergebnis übereinstimmen, das der Client an den Server zurückgegeben hat. Fügen Sie diese beiden Methoden zu „AuthService.cs“ hinzu.
using Windows.Security.Cryptography;
using Windows.Storage.Streams;

public IBuffer PassportRequestChallenge()
{
    return CryptographicBuffer.ConvertStringToBinary("ServerChallenge", BinaryStringEncoding.Utf8);
}

public bool SendServerSignedChallenge(Guid userId, Guid deviceId, byte[] signedChallenge)
{
    // Depending on your company polices and procedures this step will be different
    // It is at this point you will need to validate the signedChallenge that is sent back from the client.
    // Validation is used to ensure the correct user is trying to access this account.
    // The validation process will use the signedChallenge and the stored PublicKey
    // for the username and the specific device signin is called from.
    // Based on the validation result you will return a bool value to allow access to continue or to block the account.

    // For this sample validation will not happen as a best practice solution does not apply and will need to
       // be configured for each company.
    // Simply just return true.

    // You could get the User's Public Key with something similar to the following:
    byte[] userPublicKey = _mockStore.GetPublicKey(userId, deviceId);
    return true;
}
Übung 2: Clientseitige Logik
In dieser Übung ändern Sie die clientseitigen Ansichten und Hilfsklassen aus der ersten Übung, um die AuthService-Klasse zu verwenden. In der realen Welt wäre AuthService der Authentifizierungsserver, und Sie müssten Web-APIs zum Senden und Empfangen von Daten vom Server verwenden. Für diese praktische Übung sind Client und Server der Einfachheit halber lokal. Das Ziel besteht darin, zu erfahren, wie Sie die Windows Hello-APIs verwenden.
In „MainPage.Xaml.cs“ können Sie den AccountHelper.LoadAccountListAsync-Methodenaufruf in der geladenen Methode entfernen, da die AuthService-Klasse eine Instanz von MockStore erstellt, die die Kontenliste lädt. Die geladene Methode sollte nun wie unten dargestellt aussehen. Dabei wird die Definition der asynchronen Methode entfernt, da nichts erwartet wird.
private void MainPage_Loaded(object sender, RoutedEventArgs e)
{
    Frame.Navigate(typeof(UserSelection));
}
Aktualisieren Sie die Schnittstelle der Anmeldeseite, um die Eingabe eines Kennworts anzufordern. In diesem praktischen Lab wird veranschaulicht, wie ein vorhandenes System migriert werden kann, um Windows Hello zu verwenden und vorhandene Konten einen Benutzernamen und ein Kennwort haben. Aktualisieren Sie außerdem die Erklärung am unteren Rand der XAML, damit das Standardkennwort enthalten ist. Aktualisieren Sie die folgende XAML in „Login.xaml“.
<Grid Background="{ThemeResource ApplicationPageBackgroundThemeBrush}">
  <StackPanel Orientation="Vertical">
    <TextBlock Text="Login" FontSize="36" Margin="4" TextAlignment="Center"/>

    <TextBlock x:Name="ErrorMessage" Text="" FontSize="20" Margin="4" Foreground="Red" TextAlignment="Center"/>

    <TextBlock Text="Enter your credentials below" Margin="0,0,0,20"
               TextWrapping="Wrap" Width="300"
               TextAlignment="Center" VerticalAlignment="Center" FontSize="16"/>

    <StackPanel Orientation="Horizontal" HorizontalAlignment="Center">
      <!-- Username Input -->
      <TextBlock x:Name="UserNameTextBlock" Text="Username: "
             FontSize="20" Margin="4" Width="100"/>
      <TextBox x:Name="UsernameTextBox" PlaceholderText="sampleUsername" Width="200" Margin="4"/>
    </StackPanel>

    <StackPanel Orientation="Horizontal" HorizontalAlignment="Center">
      <!-- Password Input -->
      <TextBlock x:Name="PasswordTextBlock" Text="Password: "
             FontSize="20" Margin="4" Width="100"/>
      <PasswordBox x:Name="PasswordBox" PlaceholderText="samplePassword" Width="200" Margin="4"/>
    </StackPanel>

    <Button x:Name="PassportSignInButton" Content="Login" Background="DodgerBlue" Foreground="White"
        Click="PassportSignInButton_Click" Width="80" HorizontalAlignment="Center" Margin="0,20"/>

    <TextBlock Text="Don't have an account?"
                TextAlignment="Center" VerticalAlignment="Center" FontSize="16"/>
    <TextBlock x:Name="RegisterButtonTextBlock" Text="Register now"
               PointerPressed="RegisterButtonTextBlock_OnPointerPressed"
               Foreground="DodgerBlue"
               TextAlignment="Center" VerticalAlignment="Center" FontSize="16"/>

    <Border x:Name="PassportStatus" Background="#22B14C"
               Margin="0,20" Height="100">
      <TextBlock x:Name="PassportStatusText" Text="Windows Hello is ready to use!"
             Margin="4" TextAlignment="Center" VerticalAlignment="Center" FontSize="20"/>
    </Border>

    <TextBlock x:Name="LoginExplaination" FontSize="24" TextAlignment="Center" TextWrapping="Wrap"
        Text="Please Note: To demonstrate a login, validation will only occur using the default username
        'sampleUsername' and default password 'samplePassword'"/>

  </StackPanel>
</Grid>
Im CodeBehind der Login-Klasse müssen Sie die private Kontovariable oben in der Klasse in eine Benutzerkontovariable ändern. Ändern Sie das OnNavigateTo-Ereignis zum Umwandeln des Typs in ein Benutzerkonto. Sie benötigen den folgenden Verweis.
using PassportLogin.AuthService;

namespace PassportLogin.Views
{
    public sealed partial class Login : Page
    {
        private UserAccount _account;
        private bool _isExistingAccount;

        public Login()
        {
            this.InitializeComponent();
        }

        protected override async void OnNavigatedTo(NavigationEventArgs e)
        {
            //Check Windows Hello is setup and available on this machine
            if (await MicrosoftPassportHelper.MicrosoftPassportAvailableCheckAsync())
            {
                if (e.Parameter != null)
                {
                    _isExistingAccount = true;
                    //Set the account to the existing account being passed in
                    _account = (UserAccount)e.Parameter;
                    UsernameTextBox.Text = _account.Username;
                    SignInPassport();
                }
            }
        }
    }
}
Da die Anmeldeseite ein UserAccount-Objekt statt des vorherigen Account-Objekts verwendet, muss „MicrosoftPassportHelper.cs“ aktualisiert werden, um ein Benutzerkonto als Parameter für bestimmte Methoden zu verwenden. Sie müssen die folgenden Parameter für die Methoden CreatePassportKeyAsync, RemovePassportAccountAsync und GetPassportAuthenticationMessageAsync ändern. Da die UserAccount-Klasse eine GUID für eine Benutzer-ID enthält, verwenden Sie zu Beginn die ID an mehreren Orten, um spezifischer sein.
public static async Task<bool> CreatePassportKeyAsync(Guid userId, string username)
{
    KeyCredentialRetrievalResult keyCreationResult = await KeyCredentialManager.RequestCreateAsync(username, KeyCredentialCreationOption.ReplaceExisting);
}

public static async void RemovePassportAccountAsync(UserAccount account)
{

}
public static async Task<bool> GetPassportAuthenticationMessageAsync(UserAccount account)
{
    KeyCredentialRetrievalResult openKeyResult = await KeyCredentialManager.OpenAsync(account.Username);
    //Calling OpenAsync will allow the user access to what is available in the app and will not require user credentials again.
    //If you wanted to force the user to sign in again you can use the following:
    //var consentResult = await Windows.Security.Credentials.UI.UserConsentVerifier.RequestVerificationAsync(account.Username);
    //This will ask for the either the password of the currently signed in Microsoft Account or the PIN used for Windows Hello.

    if (openKeyResult.Status == KeyCredentialStatus.Success)
    {
        //If OpenAsync has succeeded, the next thing to think about is whether the client application requires access to backend services.
        //If it does here you would Request a challenge from the Server. The client would sign this challenge and the server
        //would check the signed challenge. If it is correct it would allow the user access to the backend.
        //You would likely make a new method called RequestSignAsync to handle all this
        //for example, RequestSignAsync(openKeyResult);
        //Refer to the second Windows Hello sample for information on how to do this.

        //For this sample there is not concept of a server implemented so just return true.
        return true;
    }
    else if (openKeyResult.Status == KeyCredentialStatus.NotFound)
    {
        //If the _account is not found at this stage. It could be one of two errors.
        //1. Windows Hello has been disabled
        //2. Windows Hello has been disabled and re-enabled cause the Windows Hello Key to change.
        //Calling CreatePassportKey and passing through the account will attempt to replace the existing Windows Hello Key for that account.
        //If the error really is that Windows Hello is disabled then the CreatePassportKey method will output that error.
        if (await CreatePassportKeyAsync(account.UserId, account.Username))
        {
            //If the Passport Key was again successfully created, Windows Hello has just been reset.
            //Now that the Passport Key has been reset for the _account retry sign in.
            return await GetPassportAuthenticationMessageAsync(account);
        }
    }

    // Can't use Passport right now, try again later
    return false;
}
Die SignInPassport-Methode in der Datei „Login.xaml.cs“ muss aktualisiert werden, um AuthService anstelle von AccountHelper zu verwenden. Die Überprüfung der Anmeldeinformationen erfolgt über AuthService. Für diese praktische Übung ist „sampleUsername“ das einzige konfigurierte Konto. Dieses Konto wird in der InitializeSampleUserAccounts-Methode in „MockStore.cs“ erstellt. Aktualisieren Sie jetzt die SignInPassport-Methode in „Login.xaml.cs“ entsprechend dem folgenden Codeausschnitt.
private async void SignInPassportAsync()
{
    if (_isExistingLocalAccount)
    {
        if (await MicrosoftPassportHelper.GetPassportAuthenticationMessageAsync(_account))
        {
            Frame.Navigate(typeof(Welcome), _account);
        }
    }
    else if (AuthService.AuthService.Instance.ValidateCredentials(UsernameTextBox.Text, PasswordBox.Password))
    {
        Guid userId = AuthService.AuthService.Instance.GetUserId(UsernameTextBox.Text);

        if (userId != Guid.Empty)
        {
            //Now that the account exists on server try and create the necessary passport details and add them to the account
            bool isSuccessful = await MicrosoftPassportHelper.CreatePassportKeyAsync(userId, UsernameTextBox.Text);
            if (isSuccessful)
            {
                Debug.WriteLine("Successfully signed in with Windows Hello!");
                //Navigate to the Welcome Screen.
                _account = AuthService.AuthService.Instance.GetUserAccount(userId);
                Frame.Navigate(typeof(Welcome), _account);
            }
            else
            {
                //The passport account creation failed.
                //Remove the account from the server as passport details were not configured
                AuthService.AuthService.Instance.PassportRemoveUser(userId);

                ErrorMessage.Text = "Account Creation Failed";
            }
        }
    }
    else
    {
        ErrorMessage.Text = "Invalid Credentials";
    }
}
Da Windows Hello für jedes Konto auf jedem Gerät ein anderes öffentliches und privates Schlüsselpaar erstellen, muss auf der Willkommensseite eine Liste der registrierten Geräte für das angemeldete Konto angezeigt werden, und jedes konto kann vergessen werden. Fügen Sie in „Welcome.xaml“ in der folgenden XAML darunter ForgetButton hinzu. Dadurch wird die Schaltfläche „Gerät vergessen“, ein Fehlertextbereich und eine Liste zum Anzeigen aller Geräte implementiert.
<Grid Background="{ThemeResource ApplicationPageBackgroundThemeBrush}">
  <StackPanel Orientation="Vertical">
    <TextBlock x:Name="Title" Text="Welcome" FontSize="40" TextAlignment="Center"/>
    <TextBlock x:Name="UserNameText" FontSize="28" TextAlignment="Center" Foreground="Black"/>

    <Button x:Name="BackToUserListButton" Content="Back to User List" Click="Button_Restart_Click"
           HorizontalAlignment="Center" Margin="0,20" Foreground="White" Background="DodgerBlue"/>

    <Button x:Name="ForgetButton" Content="Forget Me" Click="Button_Forget_User_Click"
           Foreground="White"
           Background="Gray"
           HorizontalAlignment="Center"/>

    <Button x:Name="ForgetDeviceButton" Content="Forget Device" Click="Button_Forget_Device_Click"
           Foreground="White"
           Background="Gray"
           Margin="0,40,0,20"
           HorizontalAlignment="Center"/>

    <TextBlock x:Name="ForgetDeviceErrorTextBlock" Text="Select a device first"
              TextWrapping="Wrap" Width="300" Foreground="Red"
              TextAlignment="Center" VerticalAlignment="Center" FontSize="16" Visibility="Collapsed"/>

    <ListView x:Name="UserListView" MaxHeight="500" MinWidth="350" Width="350" HorizontalAlignment="Center">
      <ListView.ItemTemplate>
        <DataTemplate>
          <Grid Background="Gray" Height="50" Width="350" HorizontalAlignment="Center" VerticalAlignment="Stretch" >
            <TextBlock Text="{Binding DeviceId}" HorizontalAlignment="Center" TextAlignment="Center" VerticalAlignment="Center"
                      Foreground="White"/>
          </Grid>
        </DataTemplate>
      </ListView.ItemTemplate>
    </ListView>
  </StackPanel>
</Grid>
In der Datei „Welcome.xaml.cs“ müssen Sie die private Kontovariable oben in der Klasse in eine private Benutzerkontovariable ändern. Aktualisieren Sie dann die OnNavigatedTo-Methode, um AuthService zu verwenden und Informationen für das aktuelle Konto abzurufen. Wenn Sie die Kontoinformationen haben, können Sie die ItemSource der Liste zum Anzeigen der Geräte konfigurieren. Sie müssen einen Verweis auf den AuthService-Namespace hinzufügen.
using PassportLogin.AuthService;

namespace PassportLogin.Views
{
    public sealed partial class Welcome : Page
    {
        private UserAccount _activeAccount;

        public Welcome()
        {
            InitializeComponent();
        }

        protected override void OnNavigatedTo(NavigationEventArgs e)
        {
            _activeAccount = (UserAccount)e.Parameter;
            if (_activeAccount != null)
            {
                UserAccount account = AuthService.AuthService.Instance.GetUserAccount(_activeAccount.UserId);
                if (account != null)
                {
                    UserListView.ItemsSource = account.PassportDevices;
                    UserNameText.Text = account.Username;
                }
            }
        }
    }
}
Da Sie den AuthService beim Entfernen eines Kontos verwenden, kann der Verweis auf accountHelper in der Button_Forget_User_Click-Methode entfernt werden. Die Methode sollte nun folgendermaßen aussehen.
private void Button_Forget_User_Click(object sender, RoutedEventArgs e)
{
    //Remove it from Windows Hello
    MicrosoftPassportHelper.RemovePassportAccountAsync(_activeAccount);

    Debug.WriteLine("User " + _activeAccount.Username + " deleted.");

    //Navigate back to UserSelection page.
    Frame.Navigate(typeof(UserSelection));
}
Die MicrosoftPassportHelper-Methode verwendet AuthService nicht, um das Konto zu entfernen. Sie müssen einen Aufruf für AuthService durchführen und die Benutzer-ID übergeben.
public static async void RemovePassportAccountAsync(UserAccount account)
{
    //Open the account with Windows Hello
    KeyCredentialRetrievalResult keyOpenResult = await KeyCredentialManager.OpenAsync(account.Username);

    if (keyOpenResult.Status == KeyCredentialStatus.Success)
    {
        // In the real world you would send key information to server to unregister
        AuthService.AuthService.Instance.PassportRemoveUser(account.UserId);
    }

    //Then delete the account from the machines list of Passport Accounts
    await KeyCredentialManager.DeleteAsync(account.Username);
}
Bevor Sie die Implementierung der Welcome-Seitenklasse abschließen können, müssen Sie eine Methode in „MicrosoftPassportHelper.cs“ erstellen, mit der ein Gerät entfernt werden kann. Erstellen Sie eine neue Methode, die PassportRemoveDevice in AuthService PassportRemoveDevice aufruft.
public static void RemovePassportDevice(UserAccount account, Guid deviceId)
{
    AuthService.AuthService.Instance.PassportRemoveDevice(account.UserId, deviceId);
}
Implementieren Sie in „Welcome.xaml.cs“ das Forget Device-Click-Ereignis. Dadurch wird das ausgewählte Gerät aus der Liste mit den Geräten verwendet und „Gerät entfernen“ mit PassportHelper aufgerufen.
private void Button_Forget_Device_Click(object sender, RoutedEventArgs e)
{
    PassportDevice selectedDevice = UserListView.SelectedItem as PassportDevice;
    if (selectedDevice != null)
    {
        //Remove it from Windows Hello
        MicrosoftPassportHelper.RemovePassportDevice(_activeAccount, selectedDevice.DeviceId);

        Debug.WriteLine("User " + _activeAccount.Username + " deleted.");

        if (!UserListView.Items.Any())
        {
            //Navigate back to UserSelection page.
            Frame.Navigate(typeof(UserSelection));
        }
    }
    else
    {
        ForgetDeviceErrorTextBlock.Visibility = Visibility.Visible;
    }
}
Die nächste Seite, die Sie aktualisieren, ist die UserSelection-Seite. Die UserSelection-Seite muss AuthService verwenden, um alle Benutzerkonten für das aktuelle Gerät abzurufen. Zurzeit besteht keine Möglichkeit für Sie, eine Geräte-ID zur Übergabe an AuthService abzurufen, damit Benutzerkonten für dieses Gerät zurückgegeben werden können. Erstellen Sie im Ordner „Utils“ die neue Klasse „Helpers.cs“. Definieren Sie die Klasse als öffentliche, statische Klasse, und fügen Sie dann die folgende Methode hinzu, mit der Sie die aktuelle Geräte-ID abrufen können.
using Windows.Security.ExchangeActiveSyncProvisioning;

namespace PassportLogin.Utils
{
    public static class Helpers
    {
        public static Guid GetDeviceId()
        {
            //Get the Device ID to pass to the server
            EasClientDeviceInformation deviceInformation = new EasClientDeviceInformation();
            return deviceInformation.Id;
        }
    }
}
In der UserSelection-Seitenklasse muss nur der CodeBehind geändert werden, nicht die Benutzeroberfläche. Aktualisieren Sie in „UserSelection.xaml.cs“ die geladene Methode und die Methode zur Benutzerauswahl, damit die UserAccount-Klasse anstelle der Account-Klasse verwendet wird. Sie müssen außerdem alle Benutzer für dieses Gerät über AuthService abrufen.
using System.Linq;
using PassportLogin.AuthService;

namespace PassportLogin.Views
{
    public sealed partial class UserSelection : Page
    {
        public UserSelection()
        {
            InitializeComponent();
            Loaded += UserSelection_Loaded;
        }

        private void UserSelection_Loaded(object sender, RoutedEventArgs e)
        {
            List<UserAccount> accounts = AuthService.AuthService.Instance.GetUserAccountsForDevice(Helpers.GetDeviceId());

            if (accounts.Any())
            {
                UserListView.ItemsSource = accounts;
                UserListView.SelectionChanged += UserSelectionChanged;
            }
            else
            {
                //If there are no accounts navigate to the LoginPage
                Frame.Navigate(typeof(Login));
            }
        }

        /// <summary>
        /// Function called when an account is selected in the list of accounts
        /// Navigates to the Login page and passes the chosen account
        /// </summary>
        private void UserSelectionChanged(object sender, RoutedEventArgs e)
        {
            if (((ListView)sender).SelectedValue != null)
            {
                UserAccount account = (UserAccount)((ListView)sender).SelectedValue;
                if (account != null)
                {
                    Debug.WriteLine("Account " + account.Username + " selected!");
                }
                Frame.Navigate(typeof(Login), account);
            }
        }
    }
}
Die PassportRegister-Seite muss den CodeBehind aktualisieren, die Benutzeroberfläche muss nicht geändert werden. Entfernen Sie in „PassportRegister.xaml.cs“ die private Kontovariable oben in der Klasse, da sie nicht mehr benötigt wird. Aktualisieren Sie das RegisterButton-Click-Ereignis für die Verwendung von AuthService. Diese Methode erstellt ein neues Benutzerkonto und versucht dann, dessen Passport-Details zu aktualisieren. Falls Passport keinen Passport-Schlüssel erstellen kann, wird das Konto entfernt, da der Registrierungsprozess fehlgeschlagen ist.
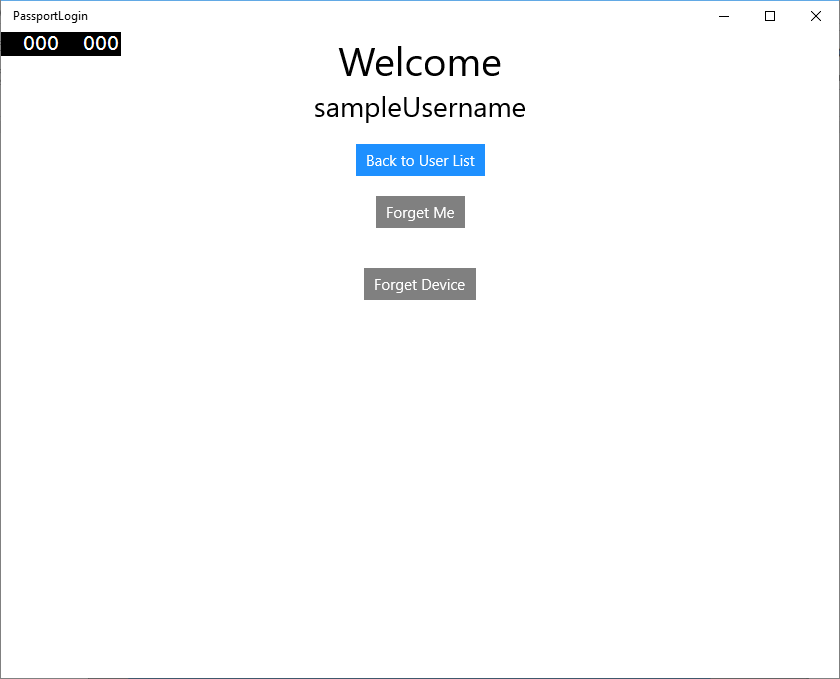
private async void RegisterButton_Click_Async(object sender, RoutedEventArgs e)
{
    ErrorMessage.Text = "";

    //Validate entered credentials are acceptable
    if (!string.IsNullOrEmpty(UsernameTextBox.Text))
    {
        //Register an Account on the AuthService so that we can get back a userId
        AuthService.AuthService.Instance.Register(UsernameTextBox.Text);
        Guid userId = AuthService.AuthService.Instance.GetUserId(UsernameTextBox.Text);

        if (userId != Guid.Empty)
        {
            //Now that the account exists on server try and create the necessary passport details and add them to the account
            bool isSuccessful = await MicrosoftPassportHelper.CreatePassportKeyAsync(userId, UsernameTextBox.Text);
            if (isSuccessful)
            {
                //Navigate to the Welcome Screen.
                Frame.Navigate(typeof(Welcome), AuthService.AuthService.Instance.GetUserAccount(userId));
            }
            else
            {
                //The passport account creation failed.
                //Remove the account from the server as passport details were not configured
                AuthService.AuthService.Instance.PassportRemoveUser(userId);

                ErrorMessage.Text = "Account Creation Failed";
            }
        }
    }
    else
    {
        ErrorMessage.Text = "Please enter a username";
    }
}
Erstellen Sie die Anwendung, und führen Sie sie aus (F5). Melden Sie sich beim Beispielbenutzerkonto mit den Anmeldeinformationen „sampleUsername“ und „samplePassword“ an. Auf dem Willkommensbildschirm bemerken Sie vielleicht, dass die Schaltfläche „Gerät vergessen“ angezeigt wird, es aber keine Geräte gibt. Wenn Sie einen Benutzer erstellen oder migrieren, um mit Windows Hello arbeiten, werden die Passinformationen nicht an den AuthService gepusht.

Um die Passinformationen für den AuthService abzurufen, muss microsoftPassportHelper.cs aktualisiert werden. In der CreatePassportKeyAsync-Methode müssen Sie, damit im Erfolgsfall nicht nur „true“ zurückgegeben wird, eine neue Methode aufrufen, die versucht, KeyAttestation abzurufen. In dieser praktischen Übung werden diese Informationen nicht in AuthService aufgezeichnet. Sie erfahren jedoch, wie diese Informationen clientseitig abgerufen werden. Aktualisieren Sie die CreatePassportKeyAsync-Methode.
public static async Task<bool> CreatePassportKeyAsync(Guid userId, string username)
{
    KeyCredentialRetrievalResult keyCreationResult = await KeyCredentialManager.RequestCreateAsync(username, KeyCredentialCreationOption.ReplaceExisting);

    switch (keyCreationResult.Status)
    {
        case KeyCredentialStatus.Success:
            Debug.WriteLine("Successfully made key");
            await GetKeyAttestationAsync(userId, keyCreationResult);
            return true;
        case KeyCredentialStatus.UserCanceled:
            Debug.WriteLine("User cancelled sign-in process.");
            break;
        case KeyCredentialStatus.NotFound:
            // User needs to setup Windows Hello
            Debug.WriteLine("Windows Hello is not setup!\nPlease go to Windows Settings and set up a PIN to use it.");
            break;
        default:
            break;
    }

    return false;
}
Erstellen Sie diese GetKeyAttestationAsync-Methode in „MicrosoftPassportHelper.cs“. Diese Methode veranschaulicht, wie Sie alle erforderlichen Informationen abrufen, die von Windows Hello für jedes Konto auf einem bestimmten Gerät bereitgestellt werden können.
using Windows.Storage.Streams;

private static async Task GetKeyAttestationAsync(Guid userId, KeyCredentialRetrievalResult keyCreationResult)
{
    KeyCredential userKey = keyCreationResult.Credential;
    IBuffer publicKey = userKey.RetrievePublicKey();
    KeyCredentialAttestationResult keyAttestationResult = await userKey.GetAttestationAsync();
    IBuffer keyAttestation = null;
    IBuffer certificateChain = null;
    bool keyAttestationIncluded = false;
    bool keyAttestationCanBeRetrievedLater = false;
    KeyCredentialAttestationStatus keyAttestationRetryType = 0;

    if (keyAttestationResult.Status == KeyCredentialAttestationStatus.Success)
    {
        keyAttestationIncluded = true;
        keyAttestation = keyAttestationResult.AttestationBuffer;
        certificateChain = keyAttestationResult.CertificateChainBuffer;
        Debug.WriteLine("Successfully made key and attestation");
    }
    else if (keyAttestationResult.Status == KeyCredentialAttestationStatus.TemporaryFailure)
    {
        keyAttestationRetryType = KeyCredentialAttestationStatus.TemporaryFailure;
        keyAttestationCanBeRetrievedLater = true;
        Debug.WriteLine("Successfully made key but not attestation");
    }
    else if (keyAttestationResult.Status == KeyCredentialAttestationStatus.NotSupported)
    {
        keyAttestationRetryType = KeyCredentialAttestationStatus.NotSupported;
        keyAttestationCanBeRetrievedLater = false;
        Debug.WriteLine("Key created, but key attestation not supported");
    }

    Guid deviceId = Helpers.GetDeviceId();
    //Update the Pasport details with the information we have just gotten above.
    //UpdatePassportDetails(userId, deviceId, publicKey.ToArray(), keyAttestationResult);
}
Möglicherweise haben Sie in der GetKeyAttestationAsync-Methode bemerkt, dass Sie gerade die letzte Zeile auskommentiert haben. Diese letzte Zeile ist eine von Ihnen erstellte neue Methode, die alle Windows Hello Informationen an den AuthService sendet. In der realen Welt müssten Sie diese an einen echten Server mit einer Web-API senden.
using System.Runtime.InteropServices.WindowsRuntime;

public static bool UpdatePassportDetails(Guid userId, Guid deviceId, byte[] publicKey, KeyCredentialAttestationResult keyAttestationResult)
{
    //In the real world you would use an API to add Passport signing info to server for the signed in _account.
    //For this tutorial we do not implement a WebAPI for our server and simply mock the server locally
    //The CreatePassportKey method handles adding the Windows Hello account locally to the device using the KeyCredential Manager

    //Using the userId the existing account should be found and updated.
    AuthService.AuthService.Instance.PassportUpdateDetails(userId, deviceId, publicKey, keyAttestationResult);
    return true;
}
Heben Sie die Auskommentierung der letzten Zeile in der GetKeyAttestationAsync-Methode auf, damit die Windows Hello Informationen an den AuthService gesendet werden.
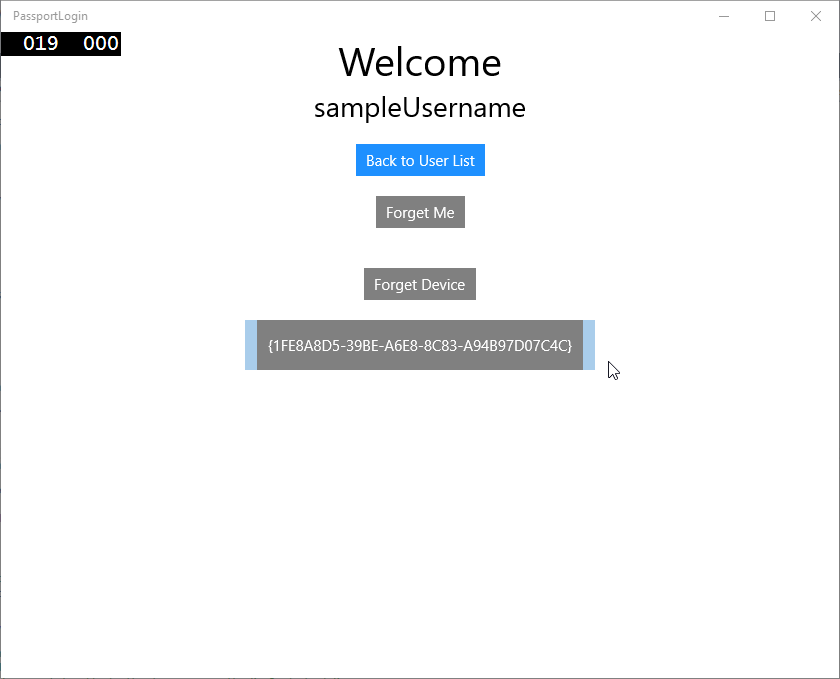
Erstellen Sie die Anwendung, und führen Sie sie aus, und melden Sie sich mit den Standardanmeldeinformationen wie zuvor an. Auf dem Willkommensbildschirm sehen Sie jetzt, dass das Geräte-ID angezeigt wird. Wenn Sie sich auf einem anderen Gerät angemeldet haben, wird dieses hier ebenfalls angezeigt (bei einem in der Cloud gehosteten Authentifizierungsdienst). Für diese praktische Übung wird die tatsächliche Geräte-ID angezeigt. Bei einer echten Implementierung sollten Sie einen Anzeigenamen anzeigen, den eine Person verstehen und verwenden kann, um die einzelnen Geräte zu ermitteln.
-
- Zum Abschluss dieser praktischen Übung benötigen Sie eine Anforderung und Abfrage für Benutzer, wenn sie auf der Benutzerauswahlseite eine Auswahl treffen und sich erneut anmelden. AuthService besitzt zwei Methoden, die Sie erstellt haben, um eine Abfrage anzufordern. Eine davon verwendet eine signierte Abfrage. Erstellen Sie in „MicrosoftPassportHelper.cs“ die neue Methode „RequestSignAsync“. Dies fordert eine Abfrage von AuthService an, signiert diese Abfrage lokal mithilfe einer Passport-API und sendet die signierte Abfrage an AuthService. In dieser praktischen Übung empfängt AuthService die signierte Abfrage und gibt „true“ zurück. In einer tatsächlichen Implementierung müssten Sie einen Überprüfungsmechanismus implementieren, um festzustellen, ob die Abfrage vom richtigen Benutzer auf dem richtigen Gerät signiert wurde. Fügen Sie die unten angegebene Methode zu „MicrosoftPassportHelper.cs“ hinzu.
private static async Task<bool> RequestSignAsync(Guid userId, KeyCredentialRetrievalResult openKeyResult) { // Calling userKey.RequestSignAsync() prompts the uses to enter the PIN or use Biometrics (Windows Hello). // The app would use the private key from the user account to sign the sign-in request (challenge) // The client would then send it back to the server and await the servers response. IBuffer challengeMessage = AuthService.AuthService.Instance.PassportRequestChallenge(); KeyCredential userKey = openKeyResult.Credential; KeyCredentialOperationResult signResult = await userKey.RequestSignAsync(challengeMessage); if (signResult.Status == KeyCredentialStatus.Success) { // If the challenge from the server is signed successfully // send the signed challenge back to the server and await the servers response return AuthService.AuthService.Instance.SendServerSignedChallenge( userId, Helpers.GetDeviceId(), signResult.Result.ToArray()); } else if (signResult.Status == KeyCredentialStatus.UserCanceled) { // User cancelled the Windows Hello PIN entry. } else if (signResult.Status == KeyCredentialStatus.NotFound) { // Must recreate Windows Hello key } else if (signResult.Status == KeyCredentialStatus.SecurityDeviceLocked) { // Can't use Windows Hello right now, remember that hardware failed and suggest restart } else if (signResult.Status == KeyCredentialStatus.UnknownError) { // Can't use Windows Hello right now, try again later } return false; } -
- Rufen Sie in der MicrosoftPassportHelper-Klasse die RequestSignAsync-Methode aus der GetPassportAuthenticationMessageAsync-Methode auf.
public static async Task<bool> GetPassportAuthenticationMessageAsync(UserAccount account)
{
    KeyCredentialRetrievalResult openKeyResult = await KeyCredentialManager.OpenAsync(account.Username);
    // Calling OpenAsync will allow the user access to what is available in the app and will not require user credentials again.
    // If you wanted to force the user to sign in again you can use the following:
    // var consentResult = await Windows.Security.Credentials.UI.UserConsentVerifier.RequestVerificationAsync(account.Username);
    // This will ask for the either the password of the currently signed in Microsoft Account or the PIN used for Windows Hello.

    if (openKeyResult.Status == KeyCredentialStatus.Success)
    {
        //If OpenAsync has succeeded, the next thing to think about is whether the client application requires access to backend services.
        //If it does here you would Request a challenge from the Server. The client would sign this challenge and the server
        //would check the signed challenge. If it is correct it would allow the user access to the backend.
        //You would likely make a new method called RequestSignAsync to handle all this
        //for example, RequestSignAsync(openKeyResult);
        //Refer to the second Windows Hello sample for information on how to do this.

        return await RequestSignAsync(account.UserId, openKeyResult);
    }
    else if (openKeyResult.Status == KeyCredentialStatus.NotFound)
    {
        //If the _account is not found at this stage. It could be one of two errors.
        //1. Windows Hello has been disabled
        //2. Windows Hello has been disabled and re-enabled cause the Windows Hello Key to change.
        //Calling CreatePassportKey and passing through the account will attempt to replace the existing Windows Hello Key for that account.
        //If the error really is that Windows Hello is disabled then the CreatePassportKey method will output that error.
        if (await CreatePassportKeyAsync(account.UserId, account.Username))
        {
            //If the Passport Key was again successfully created, Windows Hello has just been reset.
            //Now that the Passport Key has been reset for the _account retry sign in.
            return await GetPassportAuthenticationMessageAsync(account);
        }
    }

    // Can't use Windows Hello right now, try again later
    return false;
}
In dieser Übung haben Sie die clientseitige Anwendung für die Verwendung von AuthService aktualisiert. Dadurch können Sie auf die Account-Klasse und die AccountHelper-Klasse verzichten. Löschen Sie die Account-Klasse, den Ordner „Models“ und die AccountHelper-Klasse im Ordner „Utils“. Sie müssen alle Verweise auf den Models-Namespace in der gesamten Anwendung entfernen, bevor die Projektmappe erfolgreich erstellt wird.
Erstellen Sie die Anwendung, führen Sie sie aus, und nutzen Sie Windows Hello mit dem Pseudodienst und der Datenbank.
In diesem praktischen Lab haben Sie gelernt, wie Sie die Windows Hello-APIs verwenden, um die Notwendigkeit von Kennwörtern zu ersetzen, wenn Sie die Authentifizierung von einem Windows 10 oder Windows 11 Computer verwenden. Wenn Sie bedenken, wie viel Energie von Personen verbraucht wird, die Kennwörter verwalten und verlorene Kennwörter in vorhandenen Systemen unterstützen, sollten Sie den Vorteil der Umstellung auf dieses neue Windows Hello-Authentifizierungssystem sehen.
Wir haben Ihnen in Form einer Übung die Details bereitgestellt, wie Sie die Authentifizierung dienst- und serverseitig implementieren. Es wird erwartet, dass die meisten von Ihnen über vorhandene Systeme verfügen, die migriert werden müssen, um mit Windows Hello zu arbeiten, und die Details der einzelnen Systeme unterscheiden sich.
Zugehörige Themen
Feedback
Bald verfügbar: Im Laufe des Jahres 2024 werden wir GitHub-Issues stufenweise als Feedbackmechanismus für Inhalte abbauen und durch ein neues Feedbacksystem ersetzen. Weitere Informationen finden Sie unter https://aka.ms/ContentUserFeedback.
Feedback senden und anzeigen für