Dialogfelder in Xamarin.Mac
Wenn Sie mit C# und .NET in einer Xamarin.Mac-Anwendung arbeiten, haben Sie Zugriff auf dieselben Dialogfelder und modale Windows- und Modal-Windows-Anwendungen, die ein Entwickler ausführt Objective-C und Xcode ausführt. Da Xamarin.Mac direkt in Xcode integriert ist, können Sie den Schnittstellen-Generator von Xcode verwenden, um Ihr modales Windows zu erstellen und zu Standard (oder optional direkt im C#-Code zu erstellen).
Ein Dialogfeld wird als Reaktion auf eine Benutzeraktion angezeigt und bietet in der Regel Möglichkeiten, wie Benutzer die Aktion ausführen können. Ein Dialogfeld erfordert eine Antwort des Benutzers, bevor es geschlossen werden kann.
Windows kann in einem Moduslosen Zustand verwendet werden (z. B. ein Text-Editor, der mehrere Dokumente gleichzeitig geöffnet haben kann) oder modal (z. B. ein Dialogfeld "Exportieren", das geschlossen werden muss, bevor die Anwendung fortgesetzt werden kann).

In diesem Artikel befassen wir uns mit den Grundlagen der Arbeit mit Dialogen und modalen Windows in einer Xamarin.Mac-Anwendung. Es wird dringend empfohlen, dass Sie zuerst den Artikel "Hello, Mac " durcharbeiten, insbesondere die Abschnitte "Einführung in Xcode" und "Interface Builder " und "Outlets" und "Actions ", da es sich um wichtige Konzepte und Techniken handelt, die wir in diesem Artikel verwenden werden.
Möglicherweise möchten Sie sich auch die Verfügbarmachen von C#-Klassen /-Methoden imObjective-CAbschnitt des Xamarin.Mac Internals-Dokuments ansehen, und es werden die befehle Export erläutert, die Register zum Verketten Ihrer C#-Klassen mit Objective-C Objekten und UI-Elementen verwendet werden.
Einführung in Dialogfelder
Ein Dialogfeld wird als Reaktion auf eine Benutzeraktion (z. B. speichern eine Datei) angezeigt und bietet Benutzern die Möglichkeit, diese Aktion abzuschließen. Ein Dialogfeld erfordert eine Antwort des Benutzers, bevor es geschlossen werden kann.
Laut Apple gibt es drei Möglichkeiten, einen Dialog zu präsentieren:
- Dokument modal – Ein Modales Dokumentdialogfeld verhindert, dass der Benutzer etwas anderes innerhalb eines bestimmten Dokuments ausführt, bis es geschlossen wird.
- App Modal – Ein Modales Dialogfeld für Apps verhindert, dass der Benutzer mit der Anwendung interagiert, bis er geschlossen wird.
- Modusloses Dialogfeld "Moduslos " ermöglicht Benutzern das Ändern von Einstellungen im Dialogfeld, während sie weiterhin mit dem Dokumentfenster interagieren.
Modales Fenster
Jeder Standard NSWindow kann als angepasstes Dialogfeld verwendet werden, indem er modal angezeigt wird:

Modale Dokumentdialogblätter
Ein Blatt ist ein modales Dialogfeld, das einem bestimmten Dokumentfenster zugeordnet ist und verhindert, dass Benutzer mit dem Fenster interagieren, bis sie das Dialogfeld schließen. Ein Blatt wird an das Fenster angefügt, aus dem es entsteht, und es kann jeweils nur ein Blatt für ein Fenster geöffnet werden.

Einstellungen für Windows
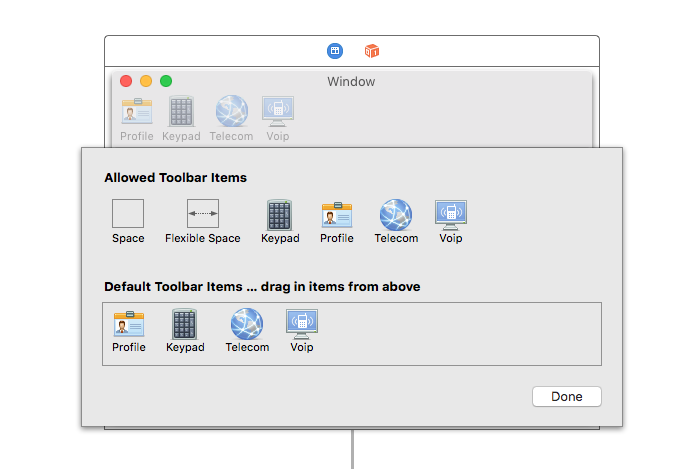
Ein Einstellungsfenster ist ein modusloses Dialogfeld, das die Einstellungen der Anwendung enthält, die der Benutzer selten ändert. Einstellungen in Windows enthalten häufig eine Symbolleiste, mit der der Benutzer zwischen verschiedenen Einstellungsgruppen wechseln kann:

Dialogfeld öffnen
Das Dialogfeld "Öffnen" bietet Benutzern eine konsistente Möglichkeit, ein Element in einer Anwendung zu suchen und zu öffnen:
Dialogfeld "Drucken und Seite einrichten"
macOS bietet standardmäßige Dialogfelder zum Drucken und Einrichten von Seiten, die Ihre Anwendung anzeigen kann, sodass Benutzer in jeder anwendung, die sie verwenden, eine konsistente Druckerfahrung haben können.
Das Dialogfeld "Drucken" kann als frei unverankertes Dialogfeld angezeigt werden:

Oder es kann als Blatt angezeigt werden:

Das Dialogfeld "Seite einrichten" kann als frei unverankertes Dialogfeld angezeigt werden:

Oder es kann als Blatt angezeigt werden:

Dialogfelder speichern
Das Dialogfeld "Speichern" bietet Benutzern eine konsistente Möglichkeit, ein Element in einer Anwendung zu speichern. Das Dialogfeld "Speichern" weist zwei Zustände auf: Minimal (auch als reduziert bezeichnet):

Und der erweiterte Zustand:

Das Dialogfeld "Minimales Speichern" kann auch als Blatt angezeigt werden:

Wie kann das Dialogfeld "Erweitertes Speichern" angezeigt werden:

Weitere Informationen finden Sie im Abschnitt "Dialogs " der Richtlinien für die Benutzeroberfläche von Apple OS X
Hinzufügen eines modalen Fensters zu einem Projekt
Neben dem Standard Dokumentfenster muss möglicherweise eine Xamarin.Mac-Anwendung dem Benutzer andere Fenstertypen anzeigen, z. B. Einstellungen oder Inspektorbereiche.
Gehen Sie wie folgt vor, um ein neues Fenster hinzuzufügen:
Öffnen Sie im Projektmappen-Explorer die
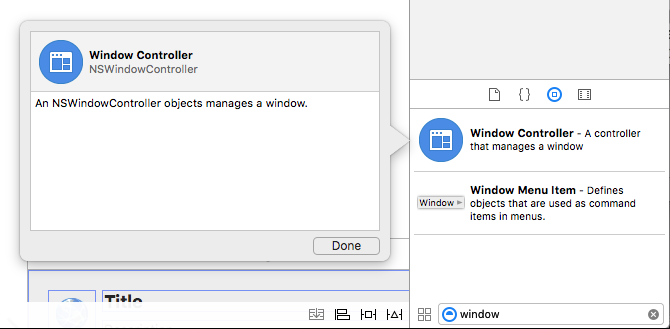
Main.storyboardDatei zum Bearbeiten im Schnittstellen-Generator von Xcode.Ziehen Sie einen neuen Ansichtscontroller in die Entwurfsoberfläche:
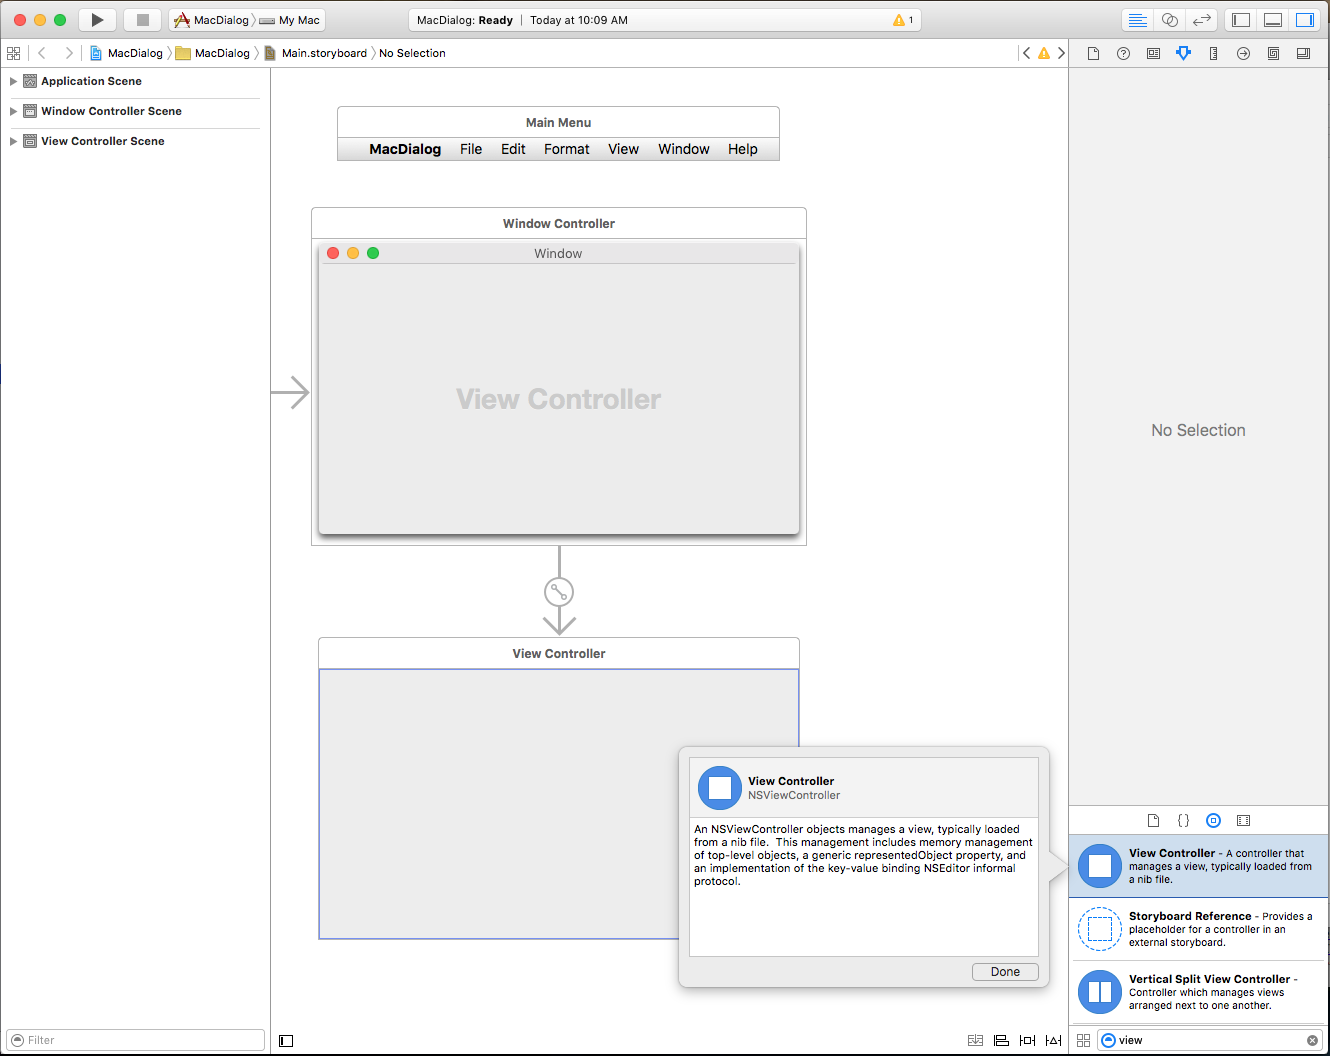
Geben Sie im Identitätsinspektor den Namen der Klasse
CustomDialogControllerein:
Wechseln Sie zurück zu Visual Studio für Mac, lassen Sie die Synchronisierung mit Xcode zu, und erstellen Sie die
CustomDialogController.hDatei.Kehren Sie zu Xcode zurück, und entwerfen Sie Ihre Schnittstelle:
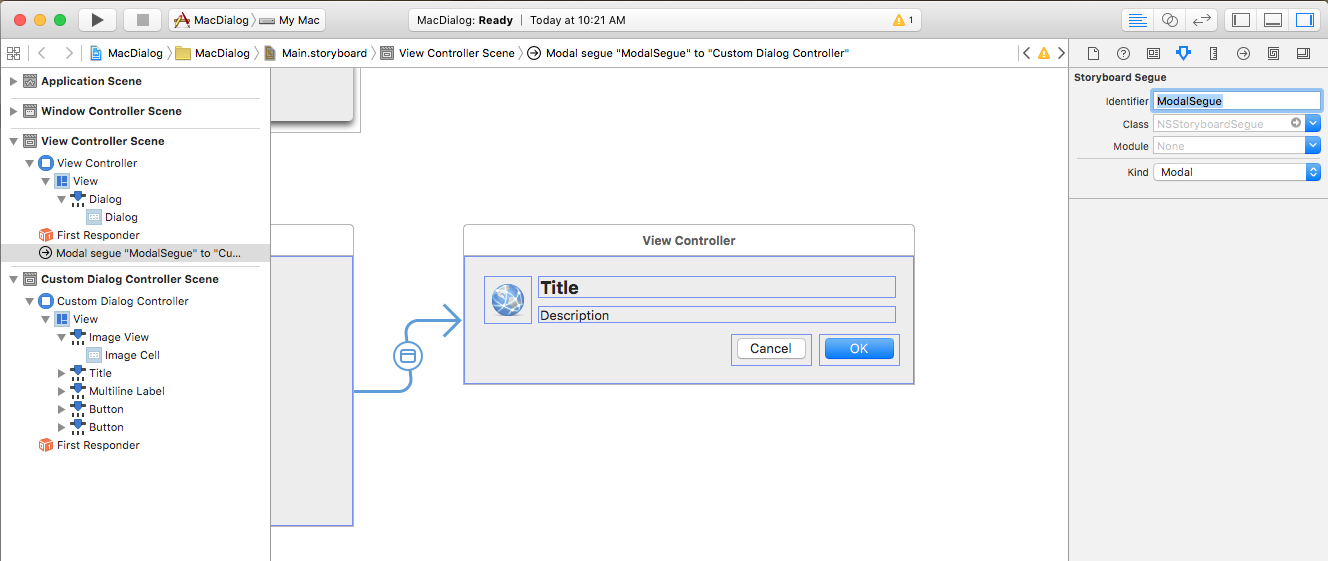
Erstellen Sie einen modalen Segue aus dem Hauptfenster Ihrer App auf den neuen Ansichtscontroller, indem Sie das Steuerelement aus dem UI-Element ziehen, mit dem das Dialogfeld in das Dialogfeld geöffnet wird. Zuweisen des Bezeichners
ModalSegue:
Verkabeln Sie alle Aktionen und Verkaufsstellen:

Speichern Sie Ihre Änderungen, und kehren Sie zu Visual Studio für Mac zurück, um mit Xcode zu synchronisieren.


Stellen Sie sicher, dass die CustomDialogController.cs Datei wie folgt aussieht:
using System;
using Foundation;
using AppKit;

namespace MacDialog
{
    public partial class CustomDialogController : NSViewController
    {
        #region Private Variables
        private string _dialogTitle = "Title";
        private string _dialogDescription = "Description";
        private NSViewController _presentor;
        #endregion

        #region Computed Properties
        public string DialogTitle {
            get { return _dialogTitle; }
            set { _dialogTitle = value; }
        }

        public string DialogDescription {
            get { return _dialogDescription; }
            set { _dialogDescription = value; }
        }

        public NSViewController Presentor {
            get { return _presentor; }
            set { _presentor = value; }
        }
        #endregion

        #region Constructors
        public CustomDialogController (IntPtr handle) : base (handle)
        {
        }
        #endregion

        #region Override Methods
        public override void ViewWillAppear ()
        {
            base.ViewWillAppear ();

            // Set initial title and description
            Title.StringValue = DialogTitle;
            Description.StringValue = DialogDescription;
        }
        #endregion

        #region Private Methods
        private void CloseDialog() {
            Presentor.DismissViewController (this);
        }
        #endregion

        #region Custom Actions
        partial void AcceptDialog (Foundation.NSObject sender) {
            RaiseDialogAccepted();
            CloseDialog();
        }

        partial void CancelDialog (Foundation.NSObject sender) {
            RaiseDialogCanceled();
            CloseDialog();
        }
        #endregion

        #region Events
        public EventHandler DialogAccepted;

        internal void RaiseDialogAccepted() {
            if (this.DialogAccepted != null)
                this.DialogAccepted (this, EventArgs.Empty);
        }

        public EventHandler DialogCanceled;

        internal void RaiseDialogCanceled() {
            if (this.DialogCanceled != null)
                this.DialogCanceled (this, EventArgs.Empty);
        }
        #endregion
    }
}
Dieser Code macht einige Eigenschaften verfügbar, um den Titel und die Beschreibung des Dialogfelds und einige Ereignisse festzulegen, um auf das Dialogfeld zu reagieren, das abgebrochen oder akzeptiert wird.
Bearbeiten Sie als Nächstes die ViewController.cs Datei, überschreiben Sie die PrepareForSegue Methode, und stellen Sie sicher, dass sie wie folgt aussieht:
public override void PrepareForSegue (NSStoryboardSegue segue, NSObject sender)
{
    base.PrepareForSegue (segue, sender);

    // Take action based on the segue name
    switch (segue.Identifier) {
    case "ModalSegue":
        var dialog = segue.DestinationController as CustomDialogController;
        dialog.DialogTitle = "MacDialog";
        dialog.DialogDescription = "This is a sample dialog.";
        dialog.DialogAccepted += (s, e) => {
            Console.WriteLine ("Dialog accepted");
            DismissViewController (dialog);
        };
        dialog.Presentor = this;
        break;
    }
}
Dieser Code initialisiert die Segue, die wir im Schnittstellen-Generator von Xcode für unser Dialogfeld definiert haben, und richtet den Titel und die Beschreibung ein. Außerdem wird die Auswahl behandelt, die der Benutzer im Dialogfeld vorgibt.
Wir können unsere Anwendung ausführen und das benutzerdefinierte Dialogfeld anzeigen:

Weitere Informationen zur Verwendung von Fenstern in einer Xamarin.Mac-Anwendung finden Sie in unserer Dokumentation zum Arbeiten mit Windows .
Erstellen eines benutzerdefinierten Blatts
Ein Blatt ist ein modales Dialogfeld, das einem bestimmten Dokumentfenster zugeordnet ist und verhindert, dass Benutzer mit dem Fenster interagieren, bis sie das Dialogfeld schließen. Ein Blatt wird an das Fenster angefügt, aus dem es entsteht, und es kann jeweils nur ein Blatt für ein Fenster geöffnet werden.
Gehen Sie wie folgt vor, um ein benutzerdefiniertes Blatt in Xamarin.Mac zu erstellen:
Öffnen Sie im Projektmappen-Explorer die
Main.storyboardDatei zum Bearbeiten im Schnittstellen-Generator von Xcode.Ziehen Sie einen neuen Ansichtscontroller in die Entwurfsoberfläche:
Entwerfen Sie Ihre Benutzeroberfläche:
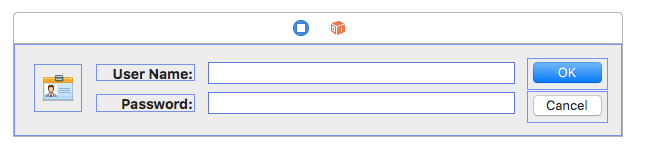
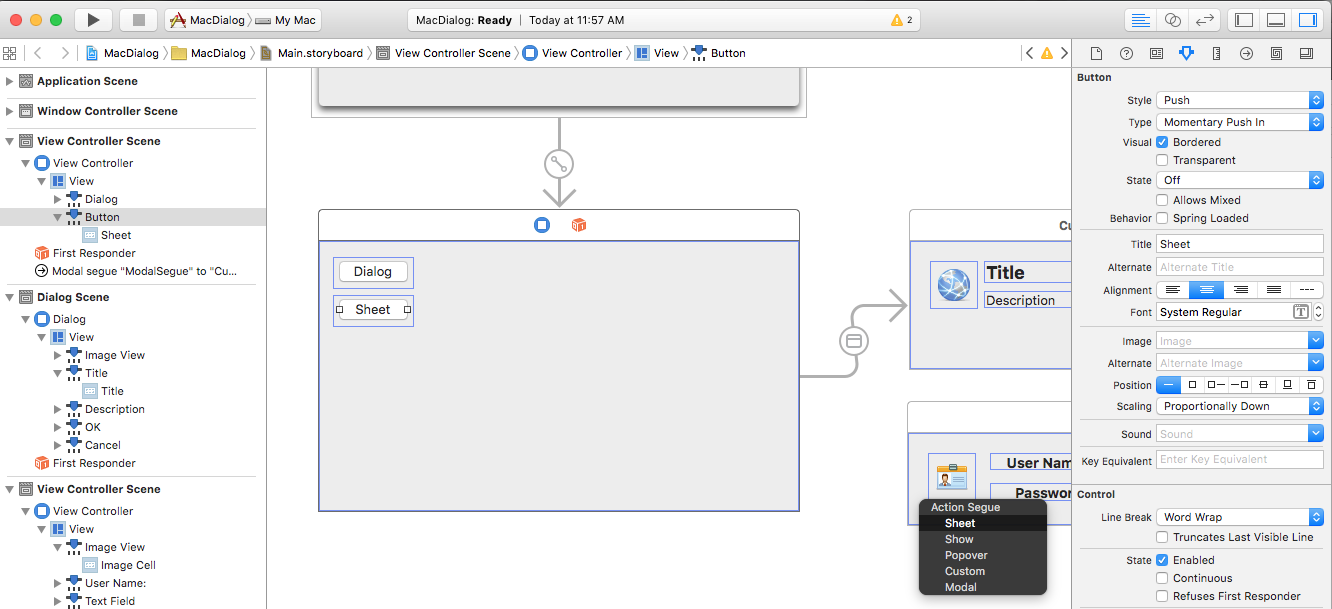
Erstellen Sie einen Blattsegue aus Ihrem Hauptfenster auf den neuen Ansichtscontroller:
Benennen Sie im Identitätsinspektor die Klasse
SheetViewControllerdes Ansichtscontrollers:
Definieren Sie alle erforderlichen Verkaufsstellen und Aktionen:

Speichern Sie Ihre Änderungen, und kehren Sie zum synchronisierenden Visual Studio für Mac zurück.


Bearbeiten Sie als Nächstes die SheetViewController.cs Datei, und stellen Sie sicher, dass sie wie folgt aussieht:
using System;
using Foundation;
using AppKit;

namespace MacDialog
{
    public partial class SheetViewController : NSViewController
    {
        #region Private Variables
        private string _userName = "";
        private string _password = "";
        private NSViewController _presentor;
        #endregion

        #region Computed Properties
        public string UserName {
            get { return _userName; }
            set { _userName = value; }
        }

        public string Password {
            get { return _password;}
            set { _password = value;}
        }

        public NSViewController Presentor {
            get { return _presentor; }
            set { _presentor = value; }
        }
        #endregion

        #region Constructors
        public SheetViewController (IntPtr handle) : base (handle)
        {
        }
        #endregion

        #region Override Methods
        public override void ViewWillAppear ()
        {
            base.ViewWillAppear ();

            // Set initial values
            NameField.StringValue = UserName;
            PasswordField.StringValue = Password;

            // Wireup events
            NameField.Changed += (sender, e) => {
                UserName = NameField.StringValue;
            };
            PasswordField.Changed += (sender, e) => {
                Password = PasswordField.StringValue;
            };
        }
        #endregion

        #region Private Methods
        private void CloseSheet() {
            Presentor.DismissViewController (this);
        }
        #endregion

        #region Custom Actions
        partial void AcceptSheet (Foundation.NSObject sender) {
            RaiseSheetAccepted();
            CloseSheet();
        }

        partial void CancelSheet (Foundation.NSObject sender) {
            RaiseSheetCanceled();
            CloseSheet();
        }
        #endregion

        #region Events
        public EventHandler SheetAccepted;

        internal void RaiseSheetAccepted() {
            if (this.SheetAccepted != null)
                this.SheetAccepted (this, EventArgs.Empty);
        }

        public EventHandler SheetCanceled;

        internal void RaiseSheetCanceled() {
            if (this.SheetCanceled != null)
                this.SheetCanceled (this, EventArgs.Empty);
        }
        #endregion
    }
}
Bearbeiten Sie als Nächstes die ViewController.cs Datei, bearbeiten Sie die PrepareForSegue Methode, und lassen Sie sie wie folgt aussehen:
public override void PrepareForSegue (NSStoryboardSegue segue, NSObject sender)
{
    base.PrepareForSegue (segue, sender);

    // Take action based on the segue name
    switch (segue.Identifier) {
    case "ModalSegue":
        var dialog = segue.DestinationController as CustomDialogController;
        dialog.DialogTitle = "MacDialog";
        dialog.DialogDescription = "This is a sample dialog.";
        dialog.DialogAccepted += (s, e) => {
            Console.WriteLine ("Dialog accepted");
            DismissViewController (dialog);
        };
        dialog.Presentor = this;
        break;
    case "SheetSegue":
        var sheet = segue.DestinationController as SheetViewController;
        sheet.SheetAccepted += (s, e) => {
            Console.WriteLine ("User Name: {0} Password: {1}", sheet.UserName, sheet.Password);
        };
        sheet.Presentor = this;
        break;
    }
}
Wenn wir unsere Anwendung ausführen und das Blatt öffnen, wird sie an das Fenster angefügt:
Dialogfeld "Einstellungen erstellen"
Bevor wir die Einstellungsansicht im Schnittstellen-Generator gestalten, müssen wir einen benutzerdefinierten Segue-Typ hinzufügen, um das Wechseln der Einstellungen zu behandeln. Fügen Sie Ihrem Projekt eine neue Klasse hinzu, und rufen Sie sie ReplaceViewSequeauf. Bearbeiten Sie den Kurs, und stellen Sie sicher, dass er wie folgt aussieht:
using System;
using AppKit;
using Foundation;

namespace MacWindows
{
    [Register("ReplaceViewSeque")]
    public class ReplaceViewSeque : NSStoryboardSegue
    {
        #region Constructors
        public ReplaceViewSeque() {

        }

        public ReplaceViewSeque (string identifier, NSObject sourceController, NSObject destinationController) : base(identifier,sourceController,destinationController) {

        }

        public ReplaceViewSeque (IntPtr handle) : base(handle) {
        }

        public ReplaceViewSeque (NSObjectFlag x) : base(x) {
        }
        #endregion

        #region Override Methods
        public override void Perform ()
        {
            // Cast the source and destination controllers
            var source = SourceController as NSViewController;
            var destination = DestinationController as NSViewController;

            // Is there a source?
            if (source == null) {
                // No, get the current key window
                var window = NSApplication.SharedApplication.KeyWindow;

                // Swap the controllers
                window.ContentViewController = destination;

                // Release memory
                window.ContentViewController?.RemoveFromParentViewController ();
            } else {
                // Swap the controllers
                source.View.Window.ContentViewController = destination;

                // Release memory
                source.RemoveFromParentViewController ();
            }

        }
        #endregion

    }

}
Mit dem erstellten benutzerdefinierten Segue können wir ein neues Fenster im Benutzeroberflächen-Generator von Xcode hinzufügen, um unsere Einstellungen zu verarbeiten.
Gehen Sie wie folgt vor, um ein neues Fenster hinzuzufügen:
Öffnen Sie im Projektmappen-Explorer die
Main.storyboardDatei zum Bearbeiten im Schnittstellen-Generator von Xcode.Ziehen Sie einen neuen Fenstercontroller in die Entwurfsoberfläche:
Ordnen Sie das Fenster im Menüleisten-Designer an:
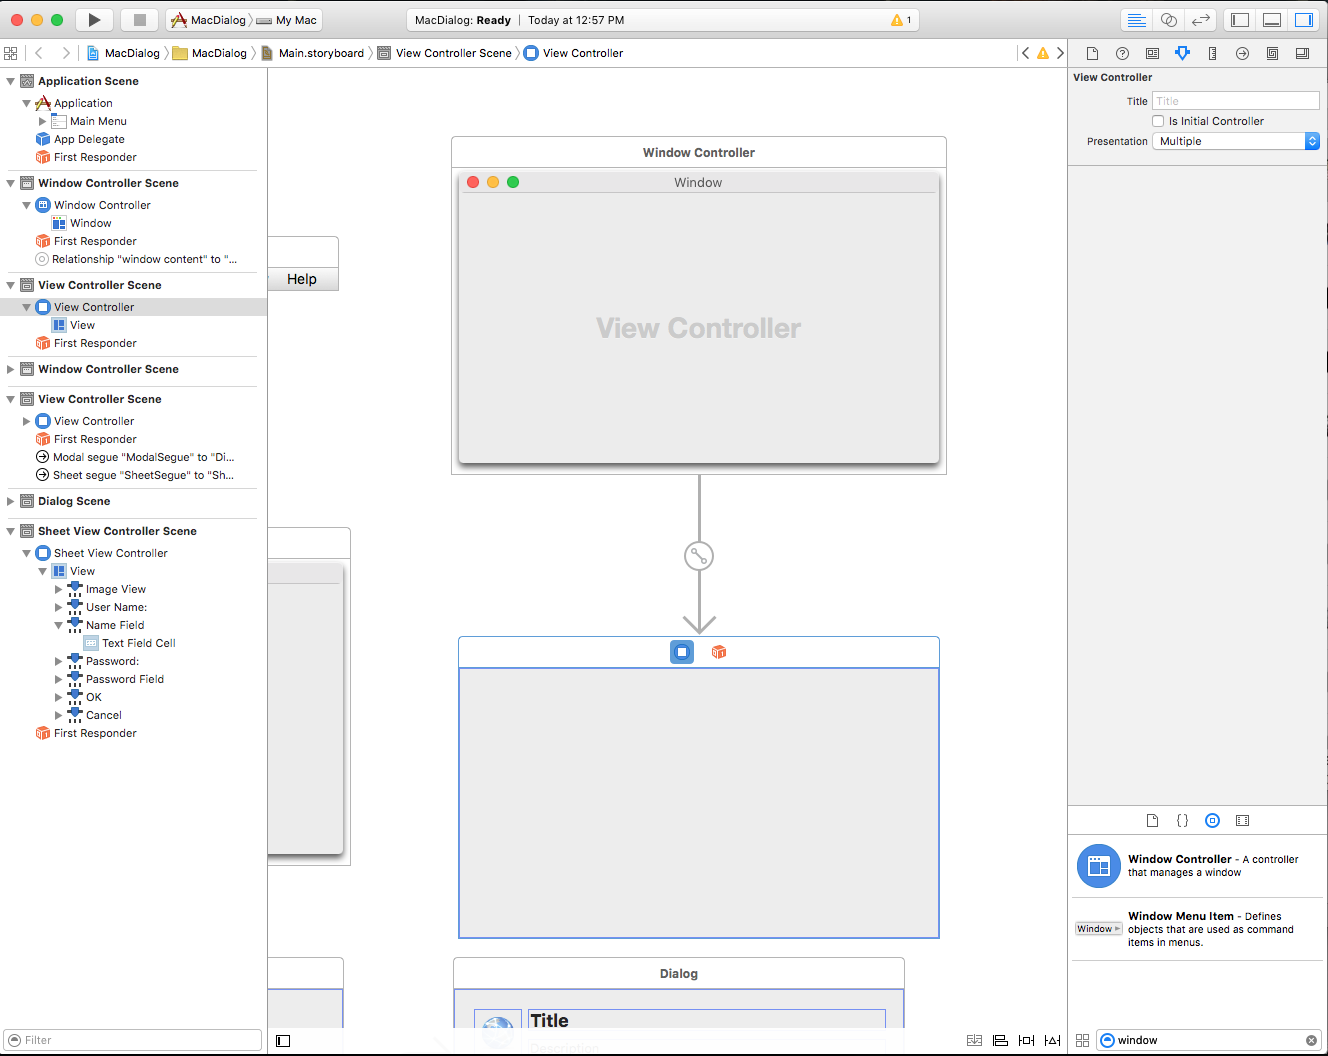
Erstellen Sie Kopien des angefügten Ansichtscontrollers, da in Ihrer Einstellungsansicht Registerkarten vorhanden sind:

Ziehen Sie einen neuen Symbolleistencontroller aus der Bibliothek:
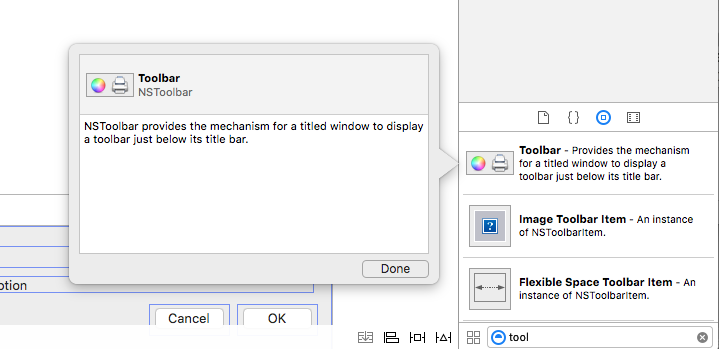
Und legen Sie es im Fenster auf der Entwurfsoberfläche ab:
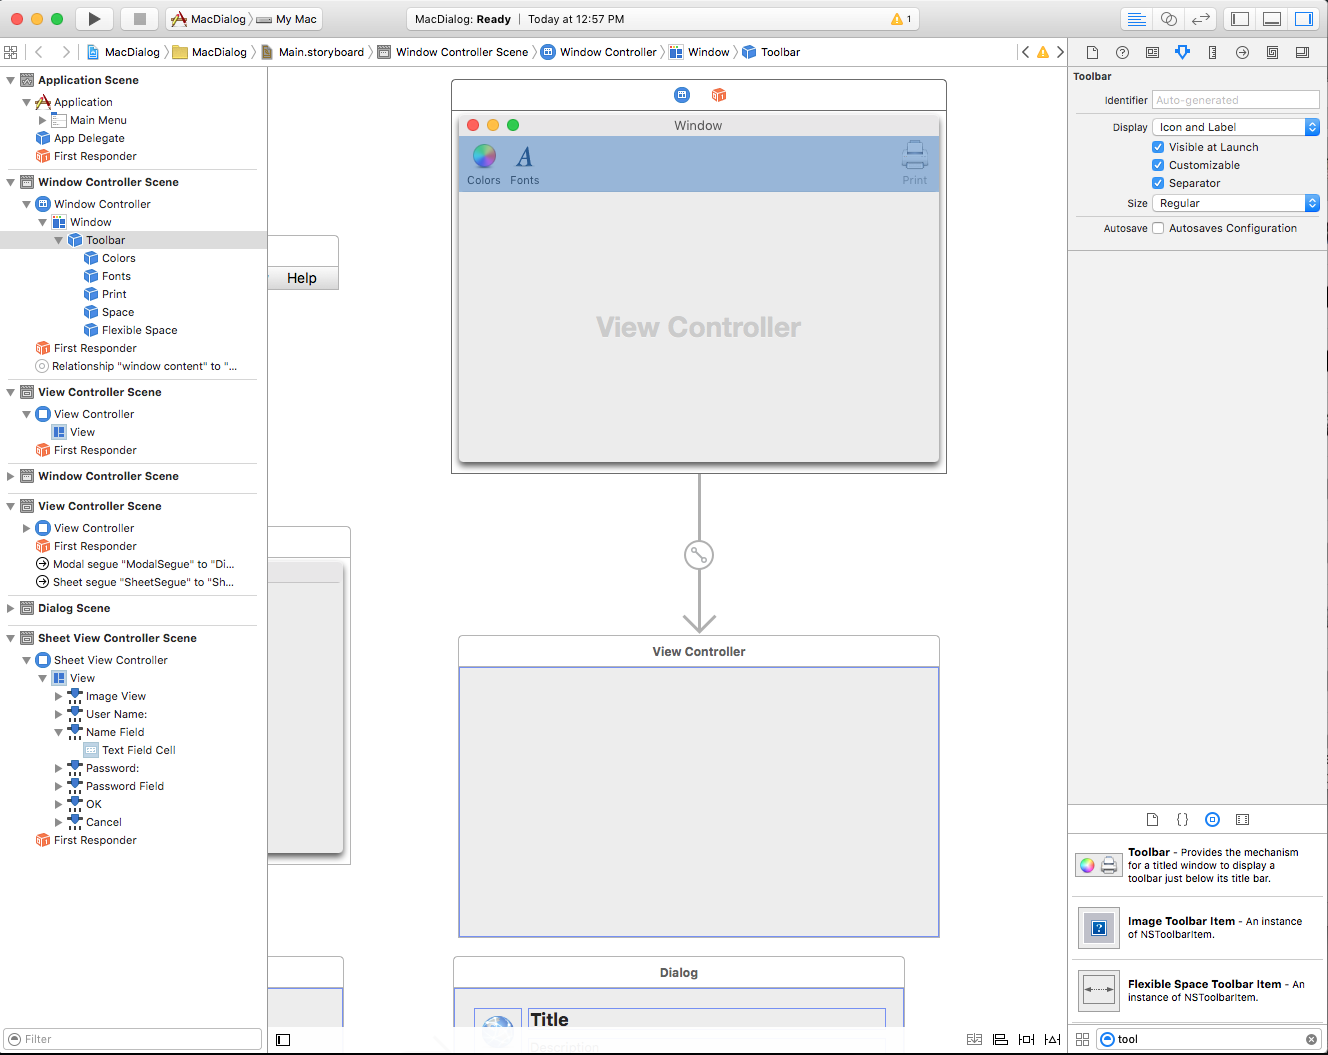
Layout des Designs der Symbolleiste:
Ctrl-Click und drag from each Toolbar Button to the Views you created above. Wählen Sie einen benutzerdefinierten Segue-Typ aus:
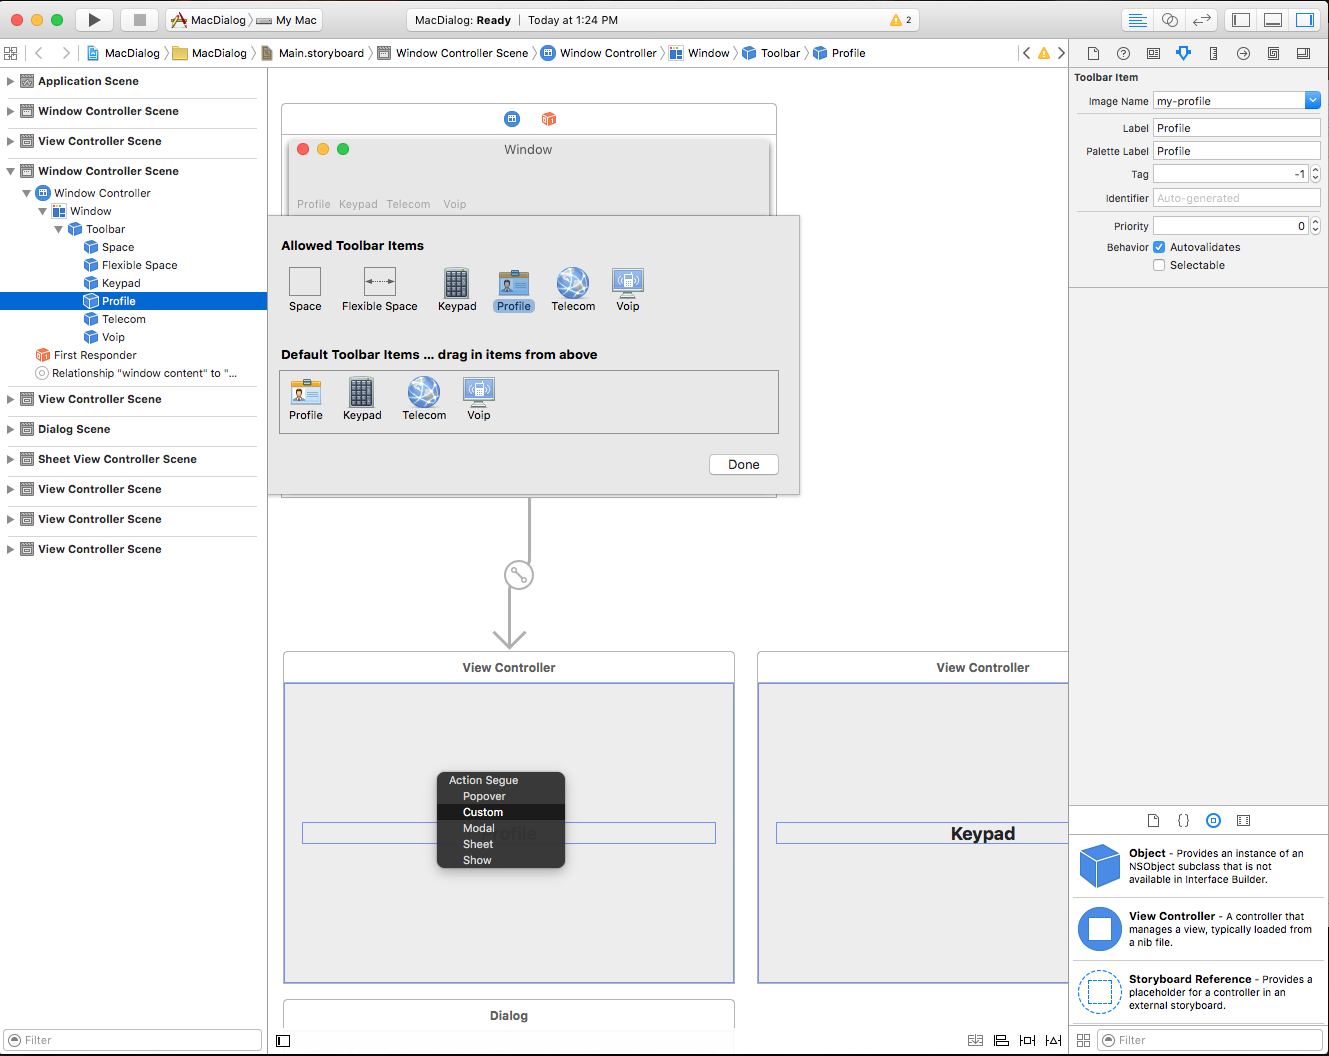
Wählen Sie den neuen Segue aus, und legen Sie die Klasse auf :
ReplaceViewSegue
Wählen Sie im Menüleisten-Designer auf der Entwurfsoberfläche im Anwendungsmenü "Einstellungen" die Option "Einstellungen" aus. Klicken Sie mit gedrückter Ctrl-Taste, und ziehen Sie ihn in das Einstellungsfenster, um eine Show segue zu erstellen:

Speichern Sie Ihre Änderungen, und kehren Sie zum synchronisierenden Visual Studio für Mac zurück.


Wenn wir den Code ausführen und im Anwendungsmenü die Einstellungenauswählen, wird das Fenster angezeigt:

Weitere Informationen zum Arbeiten mit Windows und Symbolleisten finden Sie in der Dokumentation zu Windows und Symbolleisten .
Speichern und Laden von Einstellungen
In einer typischen macOS-App werden diese Änderungen automatisch gespeichert, wenn der Benutzer Änderungen an den Benutzereinstellungen der App vor nimmt. Die einfachste Möglichkeit, dies in einer Xamarin.Mac-App zu verarbeiten, besteht darin, eine einzelne Klasse zu erstellen, um alle Einstellungen des Benutzers zu verwalten und es systemweit freizugeben.
Fügen Sie zunächst dem Projekt eine neue AppPreferences Klasse hinzu, und erben Sie von NSObject. Die Einstellungen werden so konzipiert, dass Datenbindung und Key-Value-Coding verwendet werden, wodurch der Prozess der Erstellung und Standard Bindung der Präferenzformen wesentlich einfacher wird. Da die Einstellungen aus einer kleinen Menge einfacher Datentypen bestehen, verwenden Sie die integrierten NSUserDefaults Datentypen, um Werte zu speichern und abzurufen.
Bearbeiten Sie die AppPreferences.cs Datei, und stellen Sie sicher, dass sie wie folgt aussieht:
using System;
using Foundation;
using AppKit;

namespace SourceWriter
{
    [Register("AppPreferences")]
    public class AppPreferences : NSObject
    {
        #region Computed Properties
        [Export("DefaultLanguage")]
        public int DefaultLanguage {
            get {
                var value = LoadInt ("DefaultLanguage", 0);
                return value;
            }
            set {
                WillChangeValue ("DefaultLanguage");
                SaveInt ("DefaultLanguage", value, true);
                DidChangeValue ("DefaultLanguage");
            }
        }

        [Export("SmartLinks")]
        public bool SmartLinks {
            get { return LoadBool ("SmartLinks", true); }
            set {
                WillChangeValue ("SmartLinks");
                SaveBool ("SmartLinks", value, true);
                DidChangeValue ("SmartLinks");
            }
        }

        // Define any other required user preferences in the same fashion
        ...

        [Export("EditorBackgroundColor")]
        public NSColor EditorBackgroundColor {
            get { return LoadColor("EditorBackgroundColor", NSColor.White); }
            set {
                WillChangeValue ("EditorBackgroundColor");
                SaveColor ("EditorBackgroundColor", value, true);
                DidChangeValue ("EditorBackgroundColor");
            }
        }
        #endregion

        #region Constructors
        public AppPreferences ()
        {
        }
        #endregion

        #region Public Methods
        public int LoadInt(string key, int defaultValue) {
            // Attempt to read int
            var number = NSUserDefaults.StandardUserDefaults.IntForKey(key);

            // Take action based on value
            if (number == null) {
                return defaultValue;
            } else {
                return (int)number;
            }
        }

        public void SaveInt(string key, int value, bool sync) {
            NSUserDefaults.StandardUserDefaults.SetInt(value, key);
            if (sync) NSUserDefaults.StandardUserDefaults.Synchronize ();
        }

        public bool LoadBool(string key, bool defaultValue) {
            // Attempt to read int
            var value = NSUserDefaults.StandardUserDefaults.BoolForKey(key);

            // Take action based on value
            if (value == null) {
                return defaultValue;
            } else {
                return value;
            }
        }

        public void SaveBool(string key, bool value, bool sync) {
            NSUserDefaults.StandardUserDefaults.SetBool(value, key);
            if (sync) NSUserDefaults.StandardUserDefaults.Synchronize ();
        }

        public string NSColorToHexString(NSColor color, bool withAlpha) {
            //Break color into pieces
            nfloat red=0, green=0, blue=0, alpha=0;
            color.GetRgba (out red, out green, out blue, out alpha);

            // Adjust to byte
            alpha *= 255;
            red *= 255;
            green *= 255;
            blue *= 255;

            //With the alpha value?
            if (withAlpha) {
                return String.Format ("#{0:X2}{1:X2}{2:X2}{3:X2}", (int)alpha, (int)red, (int)green, (int)blue);
            } else {
                return String.Format ("#{0:X2}{1:X2}{2:X2}", (int)red, (int)green, (int)blue);
            }
        }

        public NSColor NSColorFromHexString (string hexValue)
        {
            var colorString = hexValue.Replace ("#", "");
            float red, green, blue, alpha;

            // Convert color based on length
            switch (colorString.Length) {
            case 3 : // #RGB
                red = Convert.ToInt32(string.Format("{0}{0}", colorString.Substring(0, 1)), 16) / 255f;
                green = Convert.ToInt32(string.Format("{0}{0}", colorString.Substring(1, 1)), 16) / 255f;
                blue = Convert.ToInt32(string.Format("{0}{0}", colorString.Substring(2, 1)), 16) / 255f;
                return NSColor.FromRgba(red, green, blue, 1.0f);
            case 6 : // #RRGGBB
                red = Convert.ToInt32(colorString.Substring(0, 2), 16) / 255f;
                green = Convert.ToInt32(colorString.Substring(2, 2), 16) / 255f;
                blue = Convert.ToInt32(colorString.Substring(4, 2), 16) / 255f;
                return NSColor.FromRgba(red, green, blue, 1.0f);
            case 8 : // #AARRGGBB
                alpha = Convert.ToInt32(colorString.Substring(0, 2), 16) / 255f;
                red = Convert.ToInt32(colorString.Substring(2, 2), 16) / 255f;
                green = Convert.ToInt32(colorString.Substring(4, 2), 16) / 255f;
                blue = Convert.ToInt32(colorString.Substring(6, 2), 16) / 255f;
                return NSColor.FromRgba(red, green, blue, alpha);
            default :
                throw new ArgumentOutOfRangeException(string.Format("Invalid color value '{0}'. It should be a hex value of the form #RBG, #RRGGBB or #AARRGGBB", hexValue));
            }
        }

        public NSColor LoadColor(string key, NSColor defaultValue) {

            // Attempt to read color
            var hex = NSUserDefaults.StandardUserDefaults.StringForKey(key);

            // Take action based on value
            if (hex == null) {
                return defaultValue;
            } else {
                return NSColorFromHexString (hex);
            }
        }

        public void SaveColor(string key, NSColor color, bool sync) {
            // Save to default
            NSUserDefaults.StandardUserDefaults.SetString(NSColorToHexString(color,true), key);
            if (sync) NSUserDefaults.StandardUserDefaults.Synchronize ();
        }
        #endregion
    }
}
Diese Klasse enthält einige Hilfsroutinen wie SaveInt, , LoadInt, SaveColor, LoadColorusw. zum Vereinfachen der Arbeit NSUserDefaults . Da NSUserDefaults es keine integrierte Möglichkeit zum Verarbeiten NSColorsgibt, werden die NSColorToHexString Farben und NSColorFromHexString Methoden verwendet, um Farben in webbasierte Hexzeichenfolgen (#RRGGBBAA wo AA die Alphatransparenz) zu konvertieren, die einfach gespeichert und abgerufen werden können.
Erstellen Sie in der AppDelegate.cs Datei eine Instanz des AppPreferences-Objekts , das app-weit verwendet wird:
using AppKit;
using Foundation;
using System.IO;
using System;

namespace SourceWriter
{
    [Register ("AppDelegate")]
    public class AppDelegate : NSApplicationDelegate
    {
        #region Computed Properties
        public int NewWindowNumber { get; set;} = -1;

        public AppPreferences Preferences { get; set; } = new AppPreferences();
        #endregion

        #region Constructors
        public AppDelegate ()
        {
        }
        #endregion

        ...
Verkabelungseinstellungen mit Einstellungsansichten
Verbinden Sie als Nächstes die Einstellungsklasse mit UI-Elementen im oben erstellten Einstellungsfenster und Ansichten. Wählen Sie im Schnittstellen-Generator einen Einstellungsansichtscontroller aus, und wechseln Sie zum Identitätsinspektor, erstellen Sie eine benutzerdefinierte Klasse für den Controller:

Wechseln Sie zurück zu Visual Studio für Mac, um Ihre Änderungen zu synchronisieren und die neu erstellte Klasse zur Bearbeitung zu öffnen. Sorgen Sie dafür, dass die Klasse wie folgt aussieht:
using System;
using Foundation;
using AppKit;

namespace SourceWriter
{
    public partial class EditorPrefsController : NSViewController
    {
        #region Application Access
        public static AppDelegate App {
            get { return (AppDelegate)NSApplication.SharedApplication.Delegate; }
        }
        #endregion

        #region Computed Properties
        [Export("Preferences")]
        public AppPreferences Preferences {
            get { return App.Preferences; }
        }
        #endregion

        #region Constructors
        public EditorPrefsController (IntPtr handle) : base (handle)
        {
        }
        #endregion
    }
}
Beachten Sie, dass diese Klasse hier zwei Dinge erledigt hat: Zunächst gibt es eine HilfseigenschaftApp, um den Zugriff auf AppDelegate zu vereinfachen. Zweitens macht die Preferences Eigenschaft die globale AppPreferences-Klasse für die Datenbindung mit allen UI-Steuerelementen verfügbar, die in dieser Ansicht platziert werden.
Doppelklicken Sie als Nächstes auf die Storyboarddatei, um sie im Schnittstellen-Generator erneut zu öffnen (und die oben vorgenommenen Änderungen anzuzeigen). Ziehen Sie alle UI-Steuerelemente, die zum Erstellen der Einstellungsschnittstelle in die Ansicht erforderlich sind. Wechseln Sie für jedes Steuerelement zum Bindungsinspektor , und binden Sie an die einzelnen Eigenschaften der AppPreference-Klasse :

Wiederholen Sie die vorstehenden Schritte für alle erforderlichen Panels (Ansichtscontroller) und Einstellungseigenschaften.
Anwenden von Einstellungsänderungen auf alle geöffneten Windows-Einstellungen
Wie oben erwähnt, werden diese Änderungen in einer typischen macOS-App, wenn der Benutzer Änderungen an den Benutzereinstellungen der App vor nimmt, automatisch gespeichert und auf alle Fenster angewendet, die der Benutzer möglicherweise in der Anwendung geöffnet hat.
Die sorgfältige Planung und Das Entwerfen der Einstellungen und Fenster Ihrer App ermöglicht es diesem Prozess, reibungslos und transparent für den Endbenutzer mit einer minimalen Codierung zu erfolgen.
Fügen Sie für jedes Fenster, das App-Einstellungen verwendet, die folgende Hilfseigenschaft zum Inhaltsansichtscontroller hinzu, um den Zugriff auf unsere AppDelegate zu vereinfachen:
#region Application Access
public static AppDelegate App {
    get { return (AppDelegate)NSApplication.SharedApplication.Delegate; }
}
#endregion
Fügen Sie als Nächstes eine Klasse hinzu, um den Inhalt oder das Verhalten basierend auf den Einstellungen des Benutzers zu konfigurieren:
public void ConfigureEditor() {

    // General Preferences
    TextEditor.AutomaticLinkDetectionEnabled = App.Preferences.SmartLinks;
    TextEditor.AutomaticQuoteSubstitutionEnabled = App.Preferences.SmartQuotes;
    ...

}
Sie müssen die Konfigurationsmethode aufrufen, wenn das Fenster zum ersten Mal geöffnet wird, um sicherzustellen, dass es den Einstellungen des Benutzers entspricht:
public override void ViewDidLoad ()
{
    base.ViewDidLoad ();

    // Configure editor from user preferences
    ConfigureEditor ();
    ...
}
Bearbeiten Sie als Nächstes die AppDelegate.cs Datei, und fügen Sie die folgende Methode hinzu, um alle Einstellungsänderungen auf alle geöffneten Fenster anzuwenden:
public void UpdateWindowPreferences() {

    // Process all open windows
    for(int n=0; n<NSApplication.SharedApplication.Windows.Length; ++n) {
        var content = NSApplication.SharedApplication.Windows[n].ContentViewController as ViewController;
        if (content != null ) {
            // Reformat all text
            content.ConfigureEditor ();
        }
    }

}
Fügen Sie als Nächstes dem Projekt eine PreferenceWindowDelegate Klasse hinzu, und sehen Sie wie folgt aus:
using System;
using AppKit;
using System.IO;
using Foundation;

namespace SourceWriter
{
    public class PreferenceWindowDelegate : NSWindowDelegate
    {
        #region Application Access
        public static AppDelegate App {
            get { return (AppDelegate)NSApplication.SharedApplication.Delegate; }
        }
        #endregion

        #region Computed Properties
        public NSWindow Window { get; set;}
        #endregion

        #region constructors
        public PreferenceWindowDelegate (NSWindow window)
        {
            // Initialize
            this.Window = window;

        }
        #endregion

        #region Override Methods
        public override bool WindowShouldClose (Foundation.NSObject sender)
        {

            // Apply any changes to open windows
            App.UpdateWindowPreferences();

            return true;
        }
        #endregion
    }
}
Dadurch werden alle Einstellungsänderungen an alle geöffneten Windows gesendet, wenn das Einstellungsfenster geschlossen wird.
Bearbeiten Sie schließlich den Einstellungsfenstercontroller, und fügen Sie die oben erstellte Stellvertretung hinzu:
using System;
using Foundation;
using AppKit;

namespace SourceWriter
{
    public partial class PreferenceWindowController : NSWindowController
    {
        #region Constructors
        public PreferenceWindowController (IntPtr handle) : base (handle)
        {
        }
        #endregion

        #region Override Methods
        public override void WindowDidLoad ()
        {
            base.WindowDidLoad ();

            // Initialize
            Window.Delegate = new PreferenceWindowDelegate(Window);
            Toolbar.SelectedItemIdentifier = "General";
        }
        #endregion
    }
}
Wenn der Benutzer die Einstellungen der App bearbeitet und das Einstellungsfenster schließt, werden alle änderungen auf alle geöffneten Windows angewendet:

Das Dialogfeld "Öffnen"
Das Dialogfeld "Öffnen" bietet Benutzern eine konsistente Möglichkeit, ein Element in einer Anwendung zu suchen und zu öffnen. Verwenden Sie den folgenden Code, um ein Dialogfeld in einer Xamarin.Mac-Anwendung anzuzeigen:
var dlg = NSOpenPanel.OpenPanel;
dlg.CanChooseFiles = true;
dlg.CanChooseDirectories = false;
dlg.AllowedFileTypes = new string[] { "txt", "html", "md", "css" };

if (dlg.RunModal () == 1) {
    // Nab the first file
    var url = dlg.Urls [0];

    if (url != null) {
        var path = url.Path;

        // Create a new window to hold the text
        var newWindowController = new MainWindowController ();
        newWindowController.Window.MakeKeyAndOrderFront (this);

        // Load the text into the window
        var window = newWindowController.Window as MainWindow;
        window.Text = File.ReadAllText(path);
        window.SetTitleWithRepresentedFilename (Path.GetFileName(path));
        window.RepresentedUrl = url;

    }
}
Im obigen Code öffnen wir ein neues Dokumentfenster, um den Inhalt der Datei anzuzeigen. Sie müssen diesen Code durch Funktionen ersetzen, die von Ihrer Anwendung benötigt werden.
Die folgenden Eigenschaften sind verfügbar, wenn Sie mit einer NSOpenPanel:
- CanChooseFiles – Wenn
trueder Benutzer Dateien auswählen kann. - CanChooseDirectories – Wenn
trueder Benutzer Verzeichnisse auswählen kann. - AllowsMultipleSelection – Wenn
trueder Benutzer mehrere Dateien gleichzeitig auswählen kann. - ResolveAliases – Wenn
trueSie den Namen auswählen und alias auswählen, wird sie in den Pfad der ursprünglichen Datei aufgelöst. - AllowedFileTypes – Ist ein Zeichenfolgenarray von Dateitypen, das der Benutzer als Erweiterung oder UTI auswählen kann. Der Standardwert ist
null, wodurch jede Datei geöffnet werden kann.
Die RunModal () Methode zeigt das Dialogfeld "Öffnen" an und ermöglicht es dem Benutzer, Dateien oder Verzeichnisse (wie durch die Eigenschaften angegeben) auszuwählen und zurückzugeben 1 , wenn der Benutzer auf die Schaltfläche "Öffnen " klickt.
Das Dialogfeld "Öffnen" gibt die ausgewählten Dateien oder Verzeichnisse des Benutzers als Array von URLs in der URL Eigenschaft zurück.
Wenn wir das Programm ausführen und das Element "Öffnen..." im Menü "Datei " auswählen, wird Folgendes angezeigt:
Dialogfeld "Drucken und Seite einrichten"
macOS bietet standardmäßige Dialogfelder zum Drucken und Einrichten von Seiten, die Ihre Anwendung anzeigen kann, sodass Benutzer in jeder anwendung, die sie verwenden, eine konsistente Druckerfahrung haben können.
Der folgende Code zeigt das Standardmäßige Druckdialogfeld an:
public bool ShowPrintAsSheet { get; set;} = true;
...

[Export ("showPrinter:")]
void ShowDocument (NSObject sender) {
    var dlg = new NSPrintPanel();

    // Display the print dialog as dialog box
    if (ShowPrintAsSheet) {
        dlg.BeginSheet(new NSPrintInfo(),this,this,null,new IntPtr());
    } else {
        if (dlg.RunModalWithPrintInfo(new NSPrintInfo()) == 1) {
            var alert = new NSAlert () {
                AlertStyle = NSAlertStyle.Critical,
                InformativeText = "We need to print the document here...",
                MessageText = "Print Document",
            };
            alert.RunModal ();
        }
    }
}
Wenn die ShowPrintAsSheet Eigenschaft auf " false, führen Sie die Anwendung aus, und zeigen Sie das Druckdialogfeld an:
Wenn Sie die ShowPrintAsSheet Eigenschaft auf " true, führen Sie die Anwendung aus, und zeigen Sie das Druckdialogfeld an:
Der folgende Code zeigt das Dialogfeld "Seitenlayout" an:
[Export ("showLayout:")]
void ShowLayout (NSObject sender) {
    var dlg = new NSPageLayout();

    // Display the print dialog as dialog box
    if (ShowPrintAsSheet) {
        dlg.BeginSheet (new NSPrintInfo (), this);
    } else {
        if (dlg.RunModal () == 1) {
            var alert = new NSAlert () {
                AlertStyle = NSAlertStyle.Critical,
                InformativeText = "We need to print the document here...",
                MessageText = "Print Document",
            };
            alert.RunModal ();
        }
    }
}
Wenn wir die ShowPrintAsSheet Eigenschaft auf " false, führen Sie die Anwendung aus, und zeigen Sie das Drucklayoutdialogfeld an:
Wenn sie die ShowPrintAsSheet Eigenschaft auf " true, führen Sie die Anwendung aus, und zeigen Sie das Dialogfeld "Drucklayout" an, wird Folgendes angezeigt:
Weitere Informationen zum Arbeiten mit den Dialogfeldern "Drucken" und "Seite einrichten" finden Sie in der NSPrintPanel- und NSPageLayout-Dokumentation von Apple.
Das Dialogfeld "Speichern"
Das Dialogfeld "Speichern" bietet Benutzern eine konsistente Möglichkeit, ein Element in einer Anwendung zu speichern.
Der folgende Code zeigt das standardmäßige Dialogfeld "Speichern" an:
public bool ShowSaveAsSheet { get; set;} = true;
...

[Export("saveDocumentAs:")]
void ShowSaveAs (NSObject sender)
{
    var dlg = new NSSavePanel ();
    dlg.Title = "Save Text File";
    dlg.AllowedFileTypes = new string[] { "txt", "html", "md", "css" };

    if (ShowSaveAsSheet) {
        dlg.BeginSheet(mainWindowController.Window,(result) => {
            var alert = new NSAlert () {
                AlertStyle = NSAlertStyle.Critical,
                InformativeText = "We need to save the document here...",
                MessageText = "Save Document",
            };
            alert.RunModal ();
        });
    } else {
        if (dlg.RunModal () == 1) {
            var alert = new NSAlert () {
                AlertStyle = NSAlertStyle.Critical,
                InformativeText = "We need to save the document here...",
                MessageText = "Save Document",
            };
            alert.RunModal ();
        }
    }

}
Die AllowedFileTypes Eigenschaft ist ein Zeichenfolgenarray von Dateitypen, das der Benutzer auswählen kann, um die Datei zu speichern. Der Dateityp kann entweder als Erweiterung oder UTI angegeben werden. Der Standardwert ist null, wodurch jeder Dateityp verwendet werden kann.
Wenn wir die ShowSaveAsSheet Eigenschaft auf "false, führen Sie die Anwendung aus, und wählen Sie im Menü "Datei" die Option "Speichern unter" aus, wird Folgendes angezeigt:
Der Benutzer kann das Dialogfeld erweitern:
Wenn wir die ShowSaveAsSheet Eigenschaft auf "true, führen Sie die Anwendung aus, und wählen Sie im Menü "Datei" die Option "Speichern unter" aus, wird Folgendes angezeigt:
Der Benutzer kann das Dialogfeld erweitern:
Weitere Informationen zum Arbeiten mit dem Dialogfeld "Speichern" finden Sie in der NSSavePanel-Dokumentation von Apple.
Zusammenfassung
Dieser Artikel hat einen detaillierten Blick auf die Arbeit mit Modal Windows, Sheets und den Standardsystemdialogfeldern in einer Xamarin.Mac-Anwendung gemacht. Wir haben die verschiedenen Typen und Verwendungsmöglichkeiten von Modal Windows, Sheets und Dialogen gesehen, wie Sie modale Windows und Blätter im Benutzeroberflächen-Generator von Xcode erstellen und Standard enthalten, und wie Sie mit Modal Windows, Sheets und Dialogen im C#-Code arbeiten.