Quickstart: Create a GitHub workflow to publish an app
In this quickstart, you will learn how to create a GitHub workflow to publish your .NET app from source code. Automatically publishing your .NET app from GitHub to a destination is referred to as a continuous deployment (CD). There are many possible destinations to publish an application, in this quickstart you'll publish to Azure.
Prerequisites
- A GitHub account.
- A .NET source code repository.
- An Azure account with an active subscription. Create an account for free.
- An ASP.NET Core web app.
- An Azure App Service resource.
Add publish profile
To publish the app to Azure, open the Azure portal for the App Service instance of the application. In the resource Overview, select Get publish profile and save the *.PublishSetting file locally.
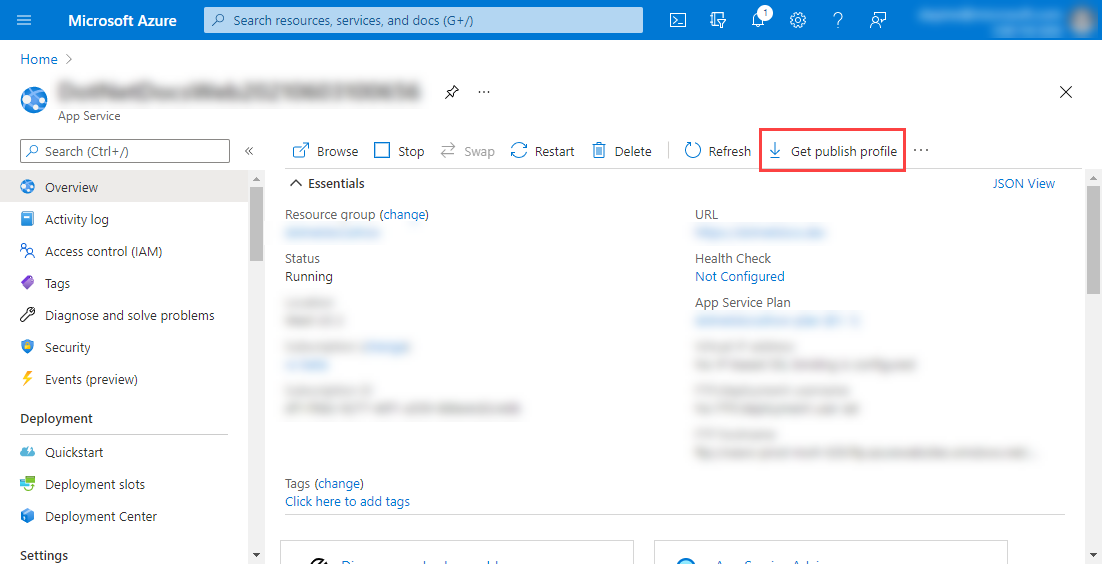
Warning
The publish profile contains sensitive information, such as credentials for accessing your Azure App Service resource. This information should always be treated very carefully.
In the GitHub repository, navigate to Settings and select Secrets from the left navigation menu. Select New repository secret, to add a new secret.
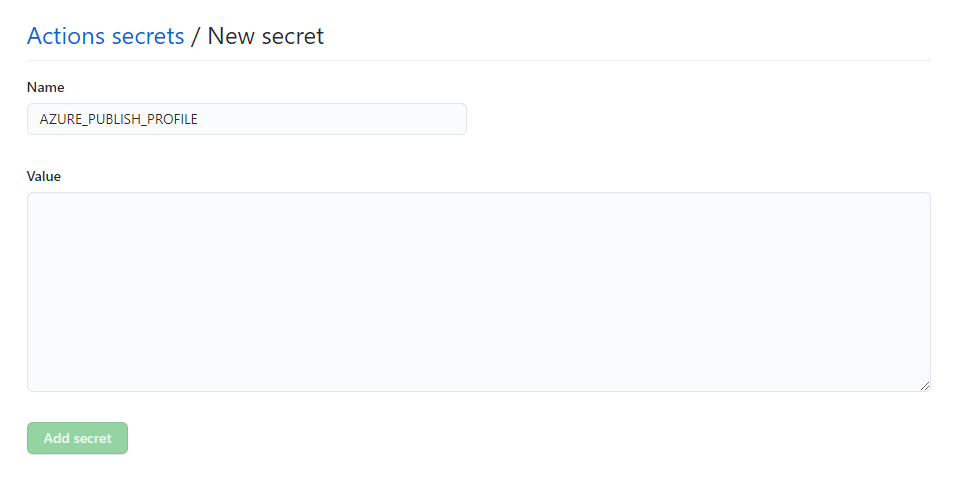
Enter AZURE_PUBLISH_PROFILE as the Name, and paste the XML content from the publish profile into the Value text area. Select Add secret. For more information, see Encrypted secrets.
Create a workflow file
In the GitHub repository, add a new YAML file to the .github/workflows directory. Choose a meaningful file name, something that will clearly indicate what the workflow is intended to do. For more information, see Workflow file.
Important
GitHub requires that workflow composition files to be placed within the .github/workflows directory.
Workflow files typically define a composition of one or more GitHub Action via the jobs.<job_id>/steps[*]. For more information, see, Workflow syntax for GitHub Actions.
Create a new file named publish-app.yml, copy and paste the following YML contents into it:
name: publish

on:
  push:
    branches: [ production ]

env:
  AZURE_WEBAPP_NAME: DotNetWeb
  AZURE_WEBAPP_PACKAGE_PATH: '.' # Set this to the path to your web app project, defaults to the repository root:
  DOTNET_VERSION: '6.0.401' # The .NET SDK version to use

jobs:
  publish:

    runs-on: ubuntu-latest

    steps:
    - uses: actions/checkout@v3
    - name: Setup .NET Core
      uses: actions/setup-dotnet@v3
      with:
        dotnet-version: ${{ env.DOTNET_VERSION }}

    - name: Install dependencies
      run: dotnet restore

    - name: Build
      run: |
        cd DotNet.WebApp
        dotnet build --configuration Release --no-restore
        dotnet publish -c Release -o ../dotnet-webapp -r linux-x64 --self-contained true /p:UseAppHost=true
    - name: Test
      run: |
        cd DotNet.WebApp.Tests
        dotnet test --no-restore --verbosity normal

    - uses: azure/webapps-deploy@v2
      name: Deploy
      with:
        app-name: ${{ env.AZURE_WEBAPP_NAME }}
        publish-profile: ${{ secrets.AZURE_PUBLISH_PROFILE }}
        package: '${{ env.AZURE_WEBAPP_PACKAGE_PATH }}/dotnet-webapp'
In the preceding workflow composition:
The
name: publishdefines the name, "publish" will appear in workflow status badges.name: publishThe
onnode signifies the events that trigger the workflow:on: push: branches: [ production ]- Triggered when a
pushoccurs on theproductionbranch.
- Triggered when a
The
envnode defines named environment variables (env var).env: AZURE_WEBAPP_NAME: DotNetWeb AZURE_WEBAPP_PACKAGE_PATH: '.' # Set this to the path to your web app project, defaults to the repository root: DOTNET_VERSION: '6.0.401' # The .NET SDK version to use- The environment variable
AZURE_WEBAPP_NAMEis assigned the valueDotNetWeb. - The environment variable
AZURE_WEBAPP_PACKAGE_PATHis assigned the value'.'. - The environment variable
DOTNET_VERSIONis assigned the value'6.0.401'. The environment variable is later referenced to specify thedotnet-versionof theactions/setup-dotnet@v3GitHub Action.
- The environment variable
The
jobsnode builds out the steps for the workflow to take.jobs: publish: runs-on: ubuntu-latest steps: - uses: actions/checkout@v3 - name: Setup .NET Core uses: actions/setup-dotnet@v3 with: dotnet-version: ${{ env.DOTNET_VERSION }} - name: Install dependencies run: dotnet restore - name: Build run: | cd DotNet.WebApp dotnet build --configuration Release --no-restore dotnet publish -c Release -o ../dotnet-webapp -r linux-x64 --self-contained true /p:UseAppHost=true - name: Test run: | cd DotNet.WebApp.Tests dotnet test --no-restore --verbosity normal - uses: azure/webapps-deploy@v2 name: Deploy with: app-name: ${{ env.AZURE_WEBAPP_NAME }} publish-profile: ${{ secrets.AZURE_PUBLISH_PROFILE }} package: '${{ env.AZURE_WEBAPP_PACKAGE_PATH }}/dotnet-webapp'- There is a single job, named
publishthat will run on the latest version of Ubuntu. - The
actions/setup-dotnet@v3GitHub Action is used to set up the .NET SDK with the specified version from theDOTNET_VERSIONenvironment variable. - The
dotnet restorecommand is called. - The
dotnet buildcommand is called. - The
dotnet publishcommand is called. - The
dotnet testcommand is called. - The
azure/webapps-deploy@v2GitHub Action deploys the app with the givenpublish-profileandpackage.- The
publish-profileis assigned from theAZURE_PUBLISH_PROFILErepository secret.
- The
- There is a single job, named
Create a workflow status badge
It's common nomenclature for GitHub repositories to have a README.md file at the root of the repository directory. Likewise, it's nice to report the latest status for various workflows. All workflows can generate a status badge, which are visually appealing within the README.md file. To add the workflow status badge:
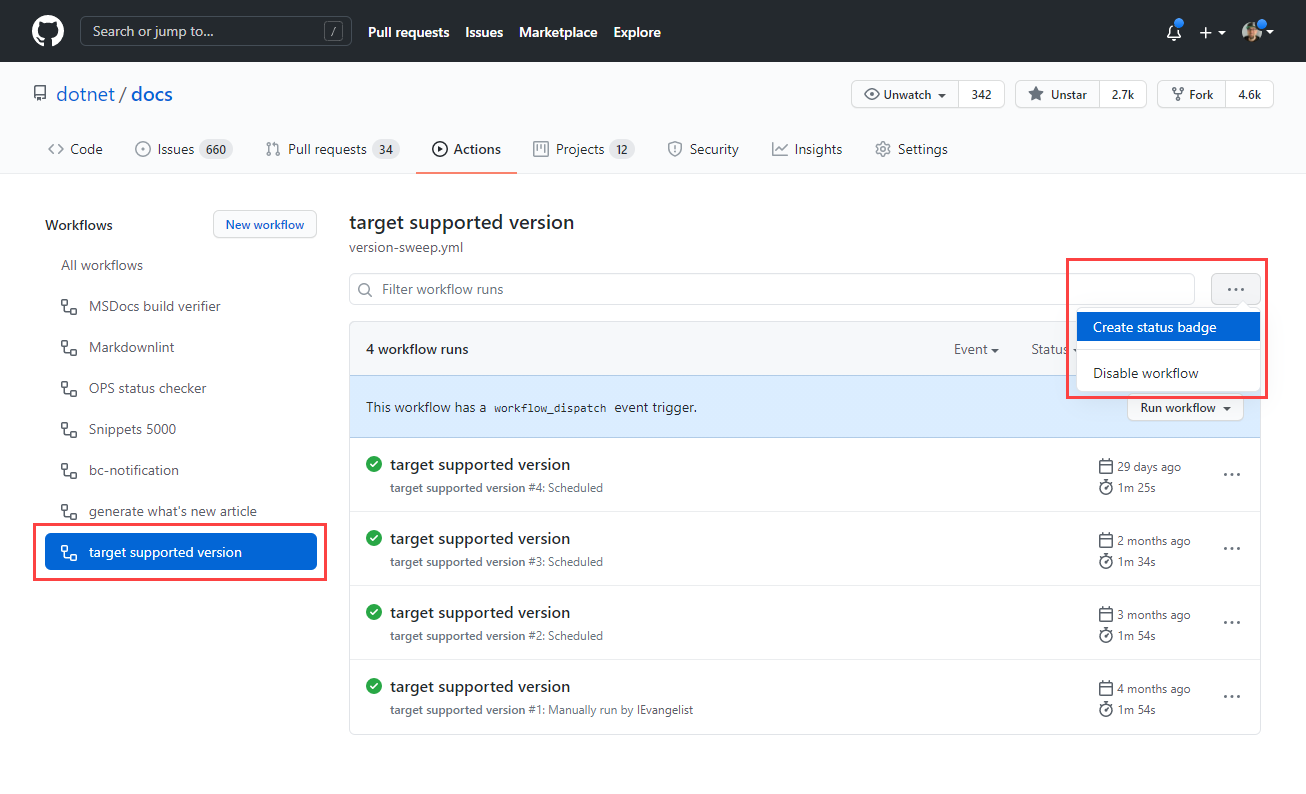
From the GitHub repository select the Actions navigation option.
All repository workflows are displayed on the left-side, select the desired workflow and the ellipsis (...) button.
- The ellipsis (...) button expands the menu options for the selected workflow.
Select the Create status badge menu option.
Select the Copy status badge Markdown button.
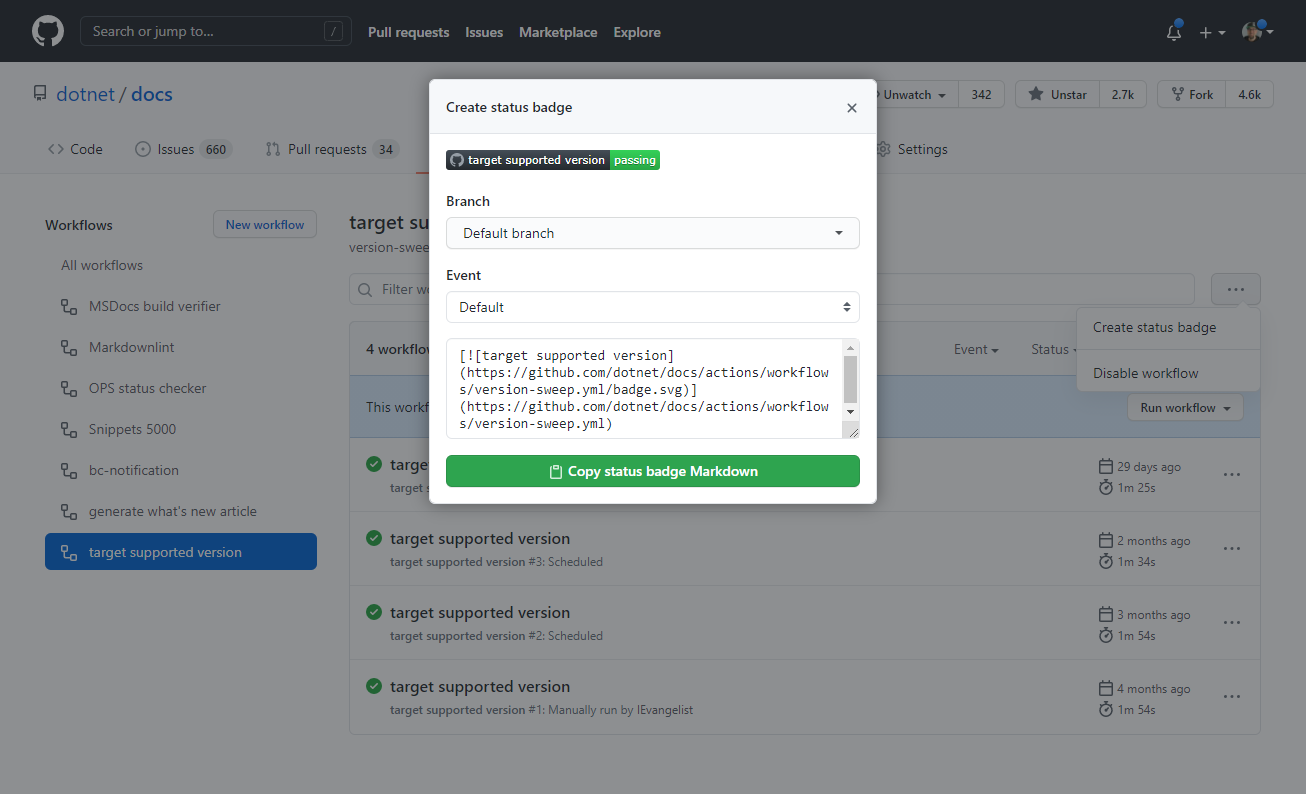
Paste the Markdown into the README.md file, save the file, commit and push the changes.
For more, see Adding a workflow status badge.
Example publish workflow status badge
| Passing | Failing | No status |
|---|---|---|
|
|
|
|
See also
Next steps
Feedback
Coming soon: Throughout 2024 we will be phasing out GitHub Issues as the feedback mechanism for content and replacing it with a new feedback system. For more information see: https://aka.ms/ContentUserFeedback.
Submit and view feedback for