Create and activate assignment rules
Assignment rules automatically route new leads, opportunities, and insights to the right sellers or sales teams. Create an assignment rule for lead, opportunity, and seller insights records by defining conditions, such as the segment, sellers, and distribution. After a rule is activated, any record that satisfies the conditions that are defined for the rule is automatically assigned to a seller. Sales managers spend less time and effort in manual assignment, leads, opportunities, and insights don't go overlooked, and assignments are balanced among your salespeople.
A rule considers only the records that are created or updated after it's activated. When a lead, opportunity, or seller insight record is created, assignment rules are applied in the order they're listed, starting from the top. If the record satisfies the conditions that are defined for a rule, that rule is applied to the record and no following rules are considered. By default, rules are listed in the order they were created, with the most recently created one at the bottom. However, you can change the order of your assignment rules at any time.
Watch this brief video to learn more about assignment rules in sales accelerator:
Segments and assignment rules are part of the work assignment feature. Work assignment is available in sales accelerator version 9.1.23074.10021 and is rolling out in phases in different regions. Learn more about work assignment.
License and role requirements
| Requirement type | You must have |
|---|---|
| License | Dynamics 365 Sales Premium, Dynamics 365 Sales Enterprise, or Microsoft Relationship Sales |
| Security roles | System Administrator, Sequence Manager, or Sales Manager |
Prerequisites
Before you start creating assignment rules, make sure you've identified the security roles that can be automatically assigned records.
Create an assignment rule
Sign in to your Dynamics 365 Sales Hub app.
In the lower-left corner of the page, select Change area > Sales Insights settings.
Under Sales accelerator, select Work assignment.
Select a Record type, and then select Add assignment rule.

In section 1, Rule name, enter a meaningful Name for the rule.
In section 2, Eligible record type for this rule, select the segment the rule applies to.
By default, the rule runs on all records of this type. If an appropriate segment doesn't exist, select + New segment and create it.
Add conditions to filter the records
You can add up to 10 conditions, including conditions in groups and related entities. If you need more, contact Microsoft Support.
Select + Add conditions.
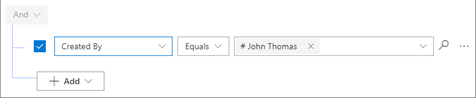
Select + Add, and then use the following options to build the conditions of the rule:
Add row: Add a condition. Select an attribute, an operator, and a value; for example, Created by Equals John Thomas.
Add group: Add a group of conditions to filter records using multiple attributes that are combined by And or Or. If you select And, records must meet all the conditions in the group. If you select Or, records can meet any condition in the group.
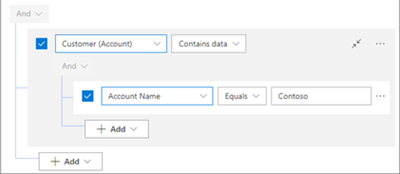
Add related entity: Add a condition that's based on the attributes of related tables. Select an attribute in the Related Entity list, then select Contains data or Does not contain data, and then define the condition.
To impose a time limit on assigning a seller to the records the rule applies to, select Consider record type created in the last. Then, select the number of hours a record can remain unassigned after it's created.
If no seller is available to take the record within that time, the record is marked overdue. The status reason is set to Seller not assigned as record is older than the set timeframe.
Select sellers or a sales team to assign
In section 3, Assign these record type to sellers or a team, select one of the following options in the list:
Any seller: Assign records to any seller who is available and has the capacity.
Sellers with matching attributes: Assign the records to sellers who satisfy the conditions you set using either information about them in Dynamics 365 or seller attributes that you define for assignment rules.
For example, to assign the records to sellers who are based in Seattle, select Use existing fields from seller records in Dynamics 365, and then select + Add > Add row. Enter the condition as City (attribute) Equals (condition) Seattle (value).
You can have up to five conditions. Only one row can be defined as a related entity condition. If you need more, contact Microsoft Support.
Specific sellers: Assign records to the sellers you select. The sellers must have a security role that grants them permissions to be assigned by a rule.
Teams with matching attributes: Assign records to teams that satisfy the conditions that are defined in the condition builder. You can have a maximum of five conditions, and only one row can be defined under a related entity condition. Recommendations for adding conditions to assignment rules..
Specific teams: Assign records to the sales team that you select. Any member of the team can pick up the records. The teams must be defined in your organization and have a security role that grants them permissions to be assigned by a rule.
Queues with matching attributes: Assign records to queues that satisfy the conditions that are defined in the condition builder. You can have a maximum of five conditions, and only one row can be defined under a related entity condition. Recommendations for adding conditions to assignment rules..
Specific queue: Assign records to a specific queue that you select. Any member in the queue can pick up the record. The queue must be enabled and defined in your organization. Learn more about how to enable queue for an entity..
Select how records should be distributed
If you assign the records to a sales team, this section isn't shown because the rule doesn't distribute them to individual sellers. Instead, the team members effectively distribute the records among themselves.
Note
The Distribute record type by section is available only for seller-related assignments.
In section 4, Distribute record type by, select how the rule should distribute the records to your sellers. Learn more about record distribution in assignment rules.
- Round robin: The records are distributed evenly in turn to sellers who are qualified to receive them based on the conditions of the assignment rule.
- Load balancing: Leads are distributed to sellers based on their workload, so that all sellers are equally busy.
(Optional) To consider the seller's work schedule when records are assigned, select Assign if seller is available within. Then, select the number of hours that a record can wait to be assigned, up to 120 hours.
If you set a time limit on how long records can remain unassigned, the rule first checks to make sure the record is still within that time. Then it considers seller availability.
The rule first considers sellers who are available to work on the records. If sellers don't set their work availability, the rule considers them always available.
If no seller is available—perhaps because of a day off or the time is outside working hours—the rule considers sellers who will be available within the number of hours you selected in step 2.
If no seller is available within that time, the record is left unassigned and marked overdue.
(Optional) To consider a seller's workload, select Assign record type based on seller capacity.
Select Save to create and activate the rule.
Assignment rules run in the order they're listed. By default, they're listed in ascending order by creation date, with the newest rule at the bottom.
Recommendations for adding conditions to assignment rules
We limit the number of conditions you can add to your assignment rules to help the rules run faster and more efficiently. Here are some suggestions for when you need more conditions than the limit allows.
Dynamic attributes in condition builder: When creating conditions in the condition builder, you can utilize dynamic attributes to minimize the number of conditions required for a specific attribute. For example, if you wish to assign leads from the United States to sellers from the same country, and likewise for India, Japan, and Brazil, you would need to create four separate conditions for this. However, by using dynamic attributes, you can consolidate this into a single condition as follows: Country > Equals > Lead.Country, where, if a lead's country matches the country of the seller, it will automatically be assigned to the corresponding seller from that country. For more information, see Route leads with dynamic assignment rules
Split conditions between assignment rules and segments. Move some conditions to the segment. For example, if you have 15 conditions in the Eligible record type for this rule section, move five of them to the associated segment.
Create rollup attributes: Use rollup attributes to avoid performance issues when you add conditions that involve related tables. Rollup attributes are calculated fields that aggregate values from related records. For example, you can create a rollup attribute that counts the number of contacts that are associated with a lead. Learn how to define rollup attributes.
Avoid duplicate conditions. Don't include attributes that are already included in the segment. For example, if you have a segment that has the condition City (attribute) Equals (condition) Seattle (value), avoid using the same City attribute in the assignment rule.
Use the expression builder only: Always use the expression builder to define or update the rules. Don't update them through Dataverse, the underlying data platform of Dynamics 365. It might cause unexpected behavior that affects the records that are related to the assignment rules.
Can't find the options in your app?
There are three possibilities:
- You don't have the necessary license or role.
- Your administrator hasn't turned on the feature.
- Your organization is using a custom app. Check with your administrator for exact steps. The steps described in this article are specific to the out-of-the-box Sales Hub and Sales Professional apps.
See also
Feedback
Coming soon: Throughout 2024 we will be phasing out GitHub Issues as the feedback mechanism for content and replacing it with a new feedback system. For more information see: https://aka.ms/ContentUserFeedback.
Submit and view feedback for