Create a site in Azure Operator Service Manager
In this how-to guide, you learn how to create a site. A site refers to a specific location, which can be either a single Azure region (a data center location within the Azure cloud) or an on-premises facility, associated with the instantiation and management of network services.
Prerequisites
- Ensure you can sign in to the Azure portal using an account with access to the active subscription.
- It's important to receive guidance from the designer regarding the specific NFVIs (Network Function Virtualization Infrastructure) to incorporate into your site.
Create site
Sign into the Azure portal.
Search for Sites then select Create.
On the Basics tab, enter the Subscription, Resource group, Name and Region. You can accept the default values for the remaining settings.


Note
The site must be in the same region as the prerequisite resources.
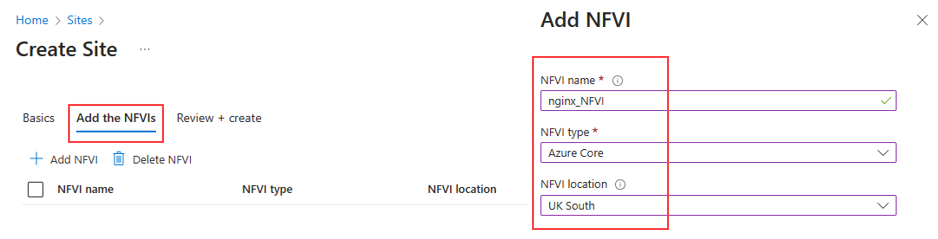
Add Network Function Virtualization Infrastructure (NFVI)
Use the information in the table to add the Network Function Virtualization Infrastructure (NFVIs).
| Setting | Value |
|---|---|
| NFVI Name | Enter the name specified by the designer in NSDV |
| NFVI Type | Azure Core, Azure Operator Distributed Services or Unknown. This NFVI type value must match the NFVI type specified by the designer in the NSDV. |
| NFVI Location | The Azure region for the site. |
Add the Network Function Virtualization Infrastructure (NFVIs) you wish to deploy your network service on by selecting the Add the NFVIs tab, then Add NFVI once field information is input.
Note
Consult the documentation from your NSD Designer or directly contact them to obtain the list of NFVIs.
Select Review + create and then Create.

Next steps
Feedback
Coming soon: Throughout 2024 we will be phasing out GitHub Issues as the feedback mechanism for content and replacing it with a new feedback system. For more information see: https://aka.ms/ContentUserFeedback.
Submit and view feedback for