Troubleshooting device to NDES server communication for SCEP certificate profiles in Microsoft Intune
Use the following information to determine if a device that received and processed an Intune Simple Certificate Enrollment Protocol (SCEP) certificate profile can successfully contact Network Device Enrollment Service (NDES) to present a challenge. On the device, a private key is generated and the certificate signing request (CSR) and challenge are passed from the device to the NDES server. To contact the NDES server, the device uses the URI from the SCEP certificate profile.
This article references Step 2 of the SCEP communication flow overview.
Review IIS logs for a connection from the device
Internet Information Services (IIS) log files include the same type of entries for all platforms.
On the NDES server, open the most recent IIS log file found in the following folder: %SystemDrive%\inetpub\logs\logfiles\w3svc1
Search the log for entries similar to the following examples. Both examples contain a status 200, which appears near the end:
fe80::f53d:89b8:c3e8:5fec%13 GET /certsrv/mscep/mscep.dll/pkiclient.exe operation=GetCACaps&message=default 80 - fe80::f53d:89b8:c3e8:5fec%13 Mozilla/4.0+(compatible;+Win32;+NDES+client) - 200 0 0 186 0.And
fe80::f53d:89b8:c3e8:5fec%13 GET /certsrv/mscep/mscep.dll/pkiclient.exe operation=GetCACert&message=default 80 - fe80::f53d:89b8:c3e8:5fec%13 Mozilla/4.0+(compatible;+Win32;+NDES+client) - 200 0 0 3567 0When the device contacts IIS, an HTTP GET request for mscep.dll is logged.
Review the status code near the end of this request:
Status code of 200: This status indicates the connection with the NDES server is successful.
Status code of 500: The IIS_IUSRS group might lack correct permissions. See Troubleshoot status code 500, later in this article.
If the status code isn't 200 or 500:
See Test and troubleshoot the SCEP server URL later in this article to help validate the configuration.
See The HTTP status code in IIS 7 and later versions for information about less common error codes.
If the connection request isn't logged at all, the contact from the device might be blocked on the network between the device and the NDES server.
Review device logs for connections to NDES
Android devices
Review the devices OMADM log. Look for entries that resemble the following examples, which are logged when the device connects to NDES:
2018-02-27T05:16:08.2500000  VERB  Event  com.microsoft.omadm.platforms.android.certmgr.CertificateEnrollmentManager  18327    10  There are 1 requests
2018-02-27T05:16:08.2500000  VERB  Event  com.microsoft.omadm.platforms.android.certmgr.CertificateEnrollmentManager  18327    10  Trying to enroll certificate request: ModelName=AC_51bad41f-3854-4eb5-a2f2-0f7a94034ee8%2FLogicalName_39907e78_e61b_4730_b9fa_d44a53e4111c;Hash=1677525787
2018-02-27T05:16:09.5530000  VERB  Event  org.jscep.transport.UrlConnectionGetTransport  18327    10  Sending GetCACaps(ca) to https://<server>.msappproxy.net/certsrv/mscep/mscep.dll?operation=GetCACaps&message=ca
2018-02-27T05:16:14.6440000  VERB  Event  org.jscep.transport.UrlConnectionGetTransport  18327    10  Received '200 OK' when sending GetCACaps(ca) to https://<server>.msappproxy.net/certsrv/mscep/mscep.dll?operation=GetCACaps&message=ca
2018-02-27T05:16:21.8220000  VERB  Event  org.jscep.message.PkiMessageEncoder  18327     10 Encoding message: org.jscep.message.PkcsReq@2b06f45f[messageData=org.<server>.pkcs.PKCS10CertificationRequest@699b3cd,messageType=PKCS_REQ,senderNonce=Nonce [D447AE9955E624A56A09D64E2B3AE76E],transId=251E592A777C82996C7CF96F3AAADCF996FC31FF]
2018-02-27T05:16:21.8790000  VERB  Event  org.jscep.message.PkiMessageEncoder  18327     10  Signing pkiMessage using key belonging to [dn=CN=<uesrname>; serial=1]
2018-02-27T05:16:21.9580000  VERB  Event  org.jscep.transaction.EnrollmentTransaction  18327     10  Sending org.<server>.cms.CMSSignedData@ad57775
Key entries include the following sample text strings:
- There are 1 requests
- Received '200 OK' when sending GetCACaps(ca) to
https://<server>.msappproxy.net/certsrv/mscep/mscep.dll?operation=GetCACaps&message=ca - Signing pkiMessage using key belonging to [dn=CN=<username>; serial=1]
The connection is also logged by IIS in the %SystemDrive%\inetpub\logs\LogFiles\W3SVC1\ folder of the NDES server. Below is an example:
fe80::f53d:89b8:c3e8:5fec%13 GET /certsrv/mscep/mscep.dll operation=GetCACert&message=ca 443 -
fe80::f53d:89b8:c3e8:5fec%13 Dalvik/2.1.0+(Linux;+U;+Android+5.0;+P01M+Build/LRX21V) - 200 0 0 3909 0
fe80::f53d:89b8:c3e8:5fec%13 GET /certsrv/mscep/mscep.dll operation=GetCACaps&message=ca 443 -
fe80::f53d:89b8:c3e8:5fec%13 Dalvik/2.1.0+(Linux;+U;+Android+5.0;+P01M+Build/LRX21V) - 200 0 0 421
iOS/iPadOS devices
Review the devices debug log. Look for entries that resemble the following examples, which are logged when the device connects to NDES:
debug    18:30:53.691033 -0500    profiled    Performing synchronous URL request: https://<server>-contoso.msappproxy.net/certsrv/mscep/mscep.dll?operation=GetCACert&message=SCEP%20Authority\
debug    18:30:54.640644 -0500    profiled    Performing synchronous URL request: https://<server>-contoso.msappproxy.net/certsrv/mscep/mscep.dll?operation=GetCACaps&message=SCEP%20Authority\
default    18:30:55.483977 -0500    profiled    Attempting to retrieve issued certificate...\
debug    18:30:55.487798 -0500    profiled    Sending CSR via GET.\
debug    18:30:55.487908 -0500    profiled    Performing synchronous URL request: https://<server>-contoso.msappproxy.net/certsrv/mscep/mscep.dll?operation=PKIOperation&message=MIAGCSqGSIb3DQEHAqCAMIACAQExDzANBglghkgBZQMEAgMFADCABgkqhkiG9w0BBwGggCSABIIZfzCABgkqhkiG9w0BBwOggDCAAgEAMYIBgjCCAX4CAQAwZjBPMRUwEwYKCZImiZPyLGQBGRYFbG9jYWwxHDAaBgoJkiaJk/IsZAEZFgxmb3VydGhjb2ZmZWUxGDAWBgNVBAMTD0ZvdXJ0aENvZmZlZSBDQQITaAAAAAmaneVjEPlcTwAAAAAACTANBgkqhkiG9w0BAQEFAASCAQCqfsOYpuBToerQLkw/tl4tH9E+97TBTjGQN9NCjSgb78fF6edY0pNDU+PH4RB356wv3rfZi5IiNrVu5Od4k6uK4w0582ZM2n8NJFRY7KWSNHsmTIWlo/Vcr4laAtq5rw+CygaYcefptcaamkjdLj07e/Uk4KsetGo7ztPVjSEFwfRIfKv474dLDmPqp0ZwEWRQGZwmPoqFMbX3g85CJT8khPaqFW05yGDTPSX9YpuEE0Bmtht9EwOpOZe6O7sd77IhfFZVmHmwy5mIYN7K6mpx/4Cb5zcNmY3wmTBlKEkDQpZDRf5PpVQ3bmQ3we9XxeK1S4UsAXHVdYGD+bg/bCafMIAGCSqGSIb3DQEHATAUBggqhkiG9w0DBwQI5D5J2lwZS5OggASCF6jSG9iZA/EJ93fEvZYLV0v7GVo3JAsR11O7DlmkIqvkAg5iC6DQvXO1j88T/MS3wV+rqUbEhktr8Xyf4sAAPI4M6HMfVENCJTStJw1PzaGwUJHEasq39793nw4k268UV5XHXvzZoF3Os2OxUHSfHECOj
Key entries include the following sample text strings:
- operation=GetCACert
- Attempting to retrieve issued certificate
- Sending CSR via GET
- operation=PKIOperation
Windows devices
On a Windows device that is making a connection to NDES, you can view the devices Windows Event Viewer and look for indications of a successful connection. Connections are logged as an event ID 36 in the devices DeviceManagement-Enterprise-Diagnostics-Provide > Admin log.
To open the log:
On the device, run eventvwr.msc to open Windows Event Viewer.
Expand Applications and Services Logs > Microsoft > Windows > DeviceManagement-Enterprise-Diagnostic-Provider > Admin.
Look for Event 36, which resembles the following example, with the key line of SCEP: Certificate request generated successfully:
Event ID:      36
Task Category: None
Level:         Information
Keywords:
User:          <UserSid>
Computer:      <Computer Name>
Description:
SCEP: Certificate request generated successfully. Enhanced Key Usage: (1.3.6.1.5.5.7.3.2), NDES URL: (https://<server>/certsrv/mscep/mscep.dll/pkiclient.exe), Container Name: (), KSP Setting: (0x2), Store Location: (0x1).
Troubleshoot status code 500
Connections that resemble the following example, with a status code of 500, indicate the Impersonate a client after authentication user right isn't assigned to the IIS_IUSRS group on the NDES server. The status value of 500 appears at the end:
2017-08-08 20:22:16 IP_address GET /certsrv/mscep/mscep.dll operation=GetCACert&message=SCEP%20Authority 443 - 10.5.14.22 profiled/1.0+CFNetwork/811.5.4+Darwin/16.6.0 - 500 0 1346 31
Complete the following steps to fix this issue:
- On the NDES server, run secpol.msc to open the Local Security Policy.
- Expand Local Policies, and then select User Rights Assignment.
- Double-click Impersonate a client after authentication in the right pane.
- Select Add User or Group…, enter IIS_IUSRS in the Enter the object names to select box, and then select OK.
- Select OK.
- Restart the computer, and then try the connection from the device again.
Test and troubleshoot the SCEP server URL
Use the following steps to test the URL that is specified in the SCEP certificate profile.
In Intune, edit your SCEP certificate profile and copy the Server URL. The URL should resemble
https://contoso.com/certsrv/mscep/mscep.dll.Open a web browser, and then browse to that SCEP server URL. The result should be: HTTP Error 403.0 – Forbidden. This result indicates the URL is functioning correctly.
If you don't receive that error, select the link that resembles the error you see to view issue-specific guidance:
General NDES message
When you browse to the SCEP server URL, you receive the following Network Device Enrollment Service message:
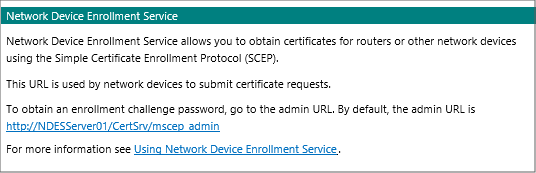
Cause: This problem is usually an issue with the Microsoft Intune Connector installation.
Mscep.dll is an ISAPI extension that intercepts incoming request and displays the HTTP 403 error if it's installed correctly.
Solution: Examine the SetupMsi.log file to determine whether Microsoft Intune Connector is successfully installed. In the following example, Installation completed successfully and Installation success or error status: 0 indicate a successful installation:
MSI (c) (28:54) [16:13:11:905]: Product: Microsoft Intune Connector -- Installation completed successfully.
MSI (c) (28:54) [16:13:11:999]: Windows Installer installed the product. Product Name: Microsoft Intune Connector. Product Version: 6.1711.4.0. Product Language: 1033. Manufacturer: Microsoft Corporation. Installation success or error status: 0.
If the installation fails, remove the Microsoft Intune Connector and then reinstall it. If the installation was successful and you continue to receive the General NDES message, run the iisreset command to restart IIS.
HTTP Error 503
When you browse to the SCEP server URL, you receive the following error:
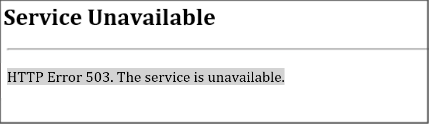
This issue is usually because the SCEP application pool in IIS isn't started. On the NDES server, open IIS Manager and go to Application Pools. Locate the SCEP application pool and confirm it's started.
If the SCEP application pool isn't started, check the application event log on the server:
On the device, run eventvwr.msc to open Event Viewer and go to Windows Logs > Application.
Look for an event that is similar to the following example, which means that the application pool crashes when a request is received:
Log Name:      Application
Source:        Application Error
Event ID:      1000
Task Category: Application Crashing Events
Level:         Error
Keywords:      Classic
Description: Faulting application name: w3wp.exe, version: 8.5.9600.16384, time stamp: 0x5215df96
Faulting module name: ntdll.dll, version: 6.3.9600.18821, time stamp: 0x59ba86db
Exception code: 0xc0000005
Common causes for an application pool crash
Cause 1: There are intermediate CA certificates (not self-signed) in the NDES server's Trusted Root Certification Authorities certificate store.
Solution: Remove intermediate certificates from the Trusted Root Certification Authorities certificate store, and then restart the NDES server.
To identify all intermediate certificates in the Trusted Root Certification Authorities certificate store, run the following PowerShell cmdlet:
Get-Childitem -Path cert:\LocalMachine\root -Recurse | Where-Object {$_.Issuer -ne $_.Subject}A certificate that has the same Issued to and Issued by values, is a root certificate. Otherwise, it's an intermediate certificate.
After removing certificates and restarting the server, run the PowerShell cmdlet again to confirm there are no intermediate certificates. If there are, check whether a Group Policy pushes the intermediate certificates to the NDES server. If so, exclude the NDES server from the Group Policy and remove the intermediate certificates again.
Cause 2: The URLs in the Certificate Revocation List (CRL) are blocked or unreachable for the certificates that are used by the Intune Certificate Connector.
Solution: Enable additional logging to collect more information:
- Open Event Viewer, select View, make sure that Show Analytic and Debug Logs option is checked.
- Go to Applications and Services Logs > Microsoft > Windows > CAPI2 > Operational, right-click Operational, then select Enable Log.
- After CAPI2 logging is enabled, reproduce the problem, and examine the event log to troubleshoot the issue.
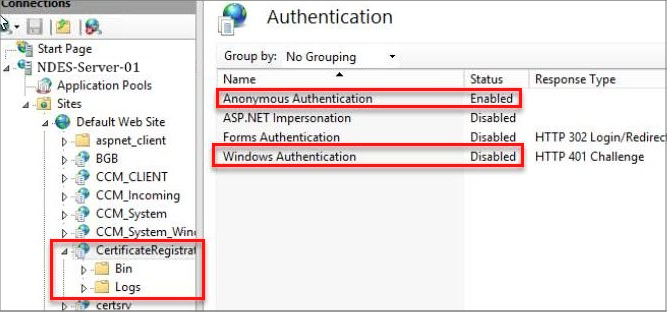
Cause 3: IIS permission on CertificateRegistrationSvc has Windows Authentication enabled.
Solution: Enable Anonymous Authentication and disable Windows Authentication, and then restart the NDES server.
Cause 4: The NDESPolicy module certificate has expired.
The CAPI2 log (see Cause 2's solution) will show errors relating to the certificate referenced by
HKEY_LOCAL_MACHINE\SOFTWARE\Microsoft\Cryptography\MSCEP\Modules\NDESPolicy\NDESCertThumbprintbeing outside of the certificate's validity period.Solution: Renew the certificate and reinstall the connector.
Use
certlm.mscto open the local computer certificate store, expand Personal, and then select Certificates.In the list of certificates, find an expired certificate that satisfies the following conditions:
- The value of Intended Purposes is Client Authentication.
- The value of Issued To or Common Name matches the NDES server name.
Note
The Client Authentication extended key usage (EKU) is required. Without this EKU, CertificateRegistrationSvc will return an HTTP 403 response to NDESPlugin requests. This response will be logged in the IIS logs.
Double-click the certificate. In the Certificate dialog box, select the Details tab, locate the Thumbprint field, and then verify the value matches the value of the
HKEY_LOCAL_MACHINE\SOFTWARE\Microsoft\Cryptography\MSCEP\Modules\NDESPolicy\NDESCertThumbprintregistry subkey.Select OK to close the Certificate dialog box.
Right-click the certificate, select All Tasks, then select Request Certificate with New Key or Renew Certificate with New Key.
In the Certificate Enrollment page, select Next, select the correct SSL template, and then select More information is required to enroll for this certificate. Click here to configure settings.
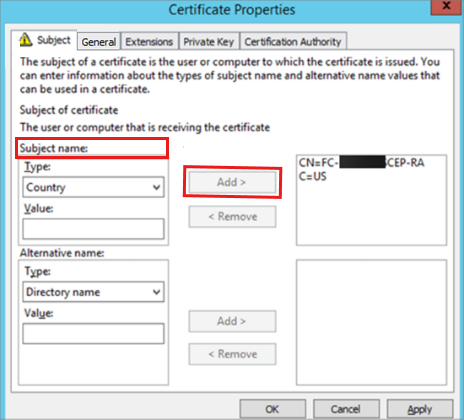
In the Certificate Properties dialog box, select the Subject tab, and then perform the following steps:
- Under Subject name, in the Type drop-down box, select Common Name. In the Value box, enter the fully qualified domain name (FQDN) of the NDES server. Then select Add.
- Under Alternative name, in the Type drop-down box, select DNS. In the Value box, enter the FQDN of the NDES server. Then select Add.
- Select OK to close the Certificate Properties dialog box.
Select Enroll, wait until the enrollment finishes successfully, and then select Finish.
Reinstall the Intune Certificate Connector to link it to the newly created certificate. For more information, see Install the Certificate Connector for Microsoft Intune.
After you close the Certificate Connector UI, restart the Intune Connector Service and the World Wide Web Publishing Service.
GatewayTimeout
When you browse to the SCEP server URL, you receive the following error:

Cause: The Microsoft Entra application proxy Connector service isn't started.
Solution: Run services.msc, and then make sure that the Microsoft Entra application proxy Connector service is running and Startup Type is set to Automatic.
HTTP 414 Request-URI Too Long
When you browse to the SCEP server URL, you receive the following error: HTTP 414 Request-URI Too Long
Cause: IIS request filtering isn't configured to support the long URLs (queries) that the NDES service receives. This support is configured when you configure the NDES service for use with your infrastructure for SCEP.
Solution: Configure support for long URLs.
On the NDES server, open IIS manager, select Default Web Site > Request Filtering > Edit Feature Setting to open the Edit Request Filtering Settings page.
Configure the following settings:
- Maximum URL length (Bytes) = 65534
- Maximum query string (Bytes) = 65534
Select OK to save this configuration and close IIS manager.
Validate this configuration by locating the following registry key to confirm that it has the indicated values:
HKEY_LOCAL_MACHINE\SYSTEM\CurrentControlSet\Services\HTTP\Parameters
The following values are set as DWORD entries:
- Name: MaxFieldLength, with a decimal value of 65534
- Name: MaxRequestBytes, with a decimal value of 65534
Restart the NDES server.
This page can't be displayed
You have Microsoft Entra application proxy configured. When you browse to the SCEP server URL, you receive the following error:
This page can't be displayed
Cause: This issue occurs when the SCEP external URL is incorrect in the Application Proxy configuration. An example of this URL is
https://contoso.com/certsrv/mscep/mscep.dll.Solution: Use the default domain of yourtenant.msappproxy.net for the SCEP external URL in the Application Proxy configuration.
500 - Internal server error
When you browse to the SCEP server URL, you receive the following error:
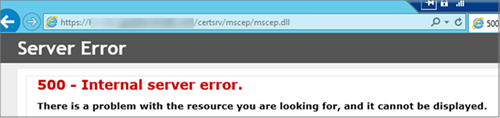
Cause 1: The NDES service account is locked or its password is expired.
Solution: Unlock the account or reset the password.
Cause 2: The MSCEP-RA certificates are expired.
Solution: If the MSCEP-RA certificates are expired, reinstall the NDES role or request new CEP Encryption and Exchange Enrollment Agent (Offline request) certificates.
To request new certificates, follow these steps:
On the Certificate Authority (CA) or issuing CA, open the Certificate Templates MMC. Make sure that the logged in user and the NDES server have Read and Enroll permissions to the CEP Encryption and Exchange Enrollment Agent (Offline request) certificate templates.
Check the expired certificates on the NDES server, copy the Subject information from the certificate.
Open the Certificates MMC for Computer account.
Expand Personal, right-click Certificates, then select All Tasks > Request New Certificate.
On the Request Certificate page, select CEP Encryption, then select More information is required to enroll for this certificate. Click here to configure settings.
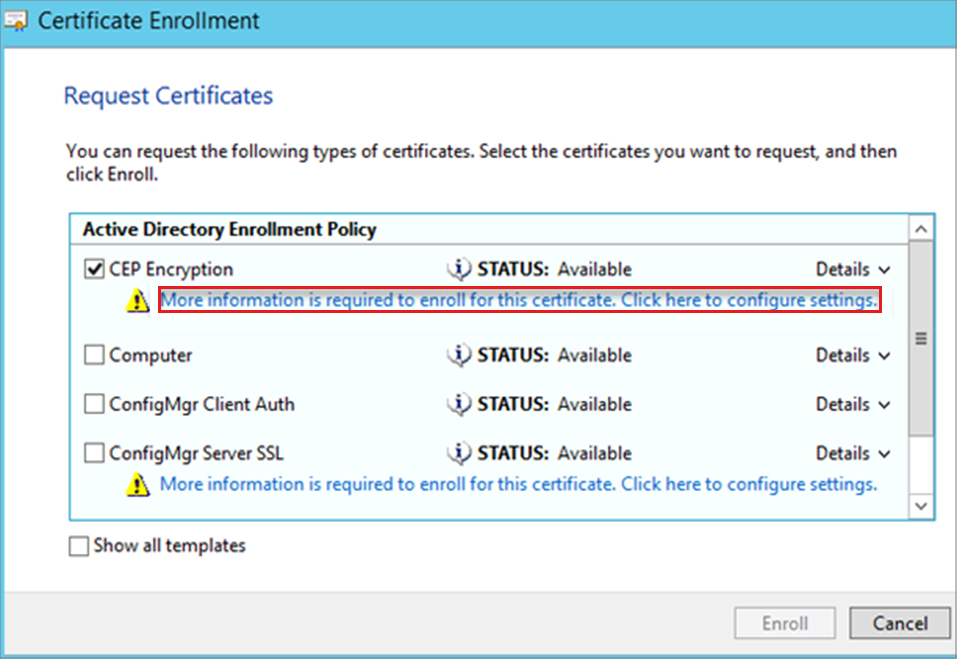
In Certificate Properties, select the Subject tab, fill the Subject name with the information that you collected during step 2, select Add, then select OK.
Complete the certificate enrollment.
Open the Certificates MMC for My user account.
When you enroll for the Exchange Enrollment Agent (Offline request) certificate, it must be done in the user context. Because the Subject Type of this certificate template is set to User.
Expand Personal, right-click Certificates, then select All Tasks > Request New Certificate.
On the Request Certificate page, select Exchange Enrollment Agent (Offline request), then select More information is required to enroll for this certificate. Click here to configure settings.
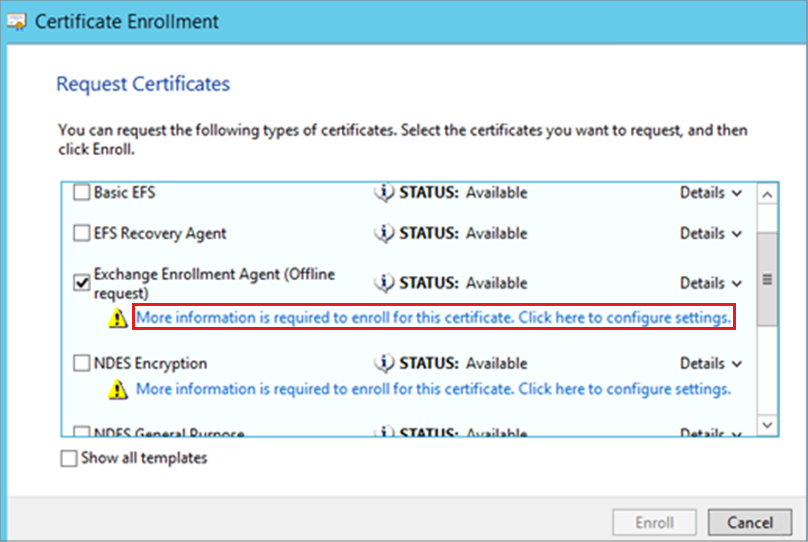
In Certificate Properties, select the Subject tab, fill the Subject name with the information that you collected during step 2, select Add.
Select the Private Key tab, select Make private key exportable, then select OK.

Complete the certificate enrollment.
Export the Exchange Enrollment Agent (Offline request) certificate from the current user certificate store. In the Certificate Export Wizard, select Yes, export the private key.
Import the certificate to the local machine certificate store.
In the Certificates MMC, do the following action for each of the new certificates:
Right-click the certificate, select All Tasks > Manage Private Keys, add Read permission to the NDES service account.
Run the iisreset command to restart IIS.
Next steps
If the device successfully reaches the NDES server to present the certificate request, the next step is to review the Intune Certificate Connectors policy module.
Feedback
Coming soon: Throughout 2024 we will be phasing out GitHub Issues as the feedback mechanism for content and replacing it with a new feedback system. For more information see: https://aka.ms/ContentUserFeedback.
Submit and view feedback for