Django Hello World web app on a Windows Server VM
Important
Classic VMs will be retired on March 1, 2023.
If you use IaaS resources from ASM, please complete your migration by March 1, 2023. We encourage you to make the switch sooner to take advantage of the many feature enhancements in Azure Resource Manager.
For more information, see Migrate your IaaS resources to Azure Resource Manager by March 1, 2023.
Note
Azure has two different deployment models for creating and working with resources: Azure Resource Manager and the classic deployment model. This article describes the classic deployment model. We recommend that most new deployments use the Resource Manager model.
Starting November 15, 2017, virtual machines will be available only in the Azure portal.
This tutorial shows you how to host a Django-based website in Windows Server in Azure Virtual Machines. In the tutorial, we assume no prior experience with Azure. When you finish the tutorial, you can have a Django-based application up and running in the cloud.
Learn how to:
- Set up an Azure virtual machine to host Django. Although this tutorial explains how to do this for Windows Server, you can do the same for a Linux VM hosted in Azure.
- Create a new Django application in Windows.
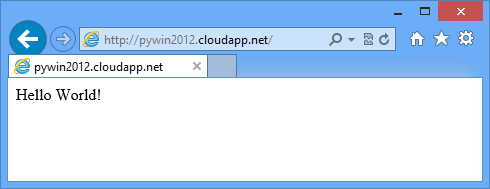
The tutorial shows you how to build a basic Hello World web application. The application is hosted in an Azure virtual machine.
The following screenshot shows the completed application:
Note
To complete this tutorial, you need an Azure account. You can activate your MSDN subscriber benefits or sign up for a free trial in Azure.
Create and set up an Azure virtual machine to host Django
To create an Azure virtual machine with the Windows Server 2012 R2 Datacenter distribution, see Create a virtual machine running Windows in the Azure portal.
Set Azure to direct port 80 traffic from the web to port 80 on the virtual machine:
- In the Azure portal, go to the dashboard and select your newly created virtual machine.
- Click Endpoints, and then click Add.
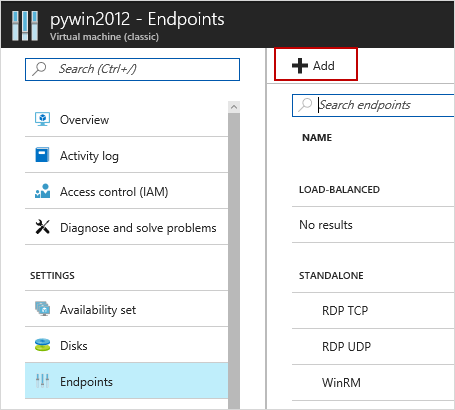
- On the Add endpoint page, for Name, enter HTTP. Set the public and private TCP ports to 80.

- Click OK.
In the dashboard, select your VM. To use Remote Desktop Protocol (RDP) to remotely sign in to the newly created Azure virtual machine, click Connect.
Important
The following instructions assume that you signed in to the virtual machine correctly. They also assume that you are issuing commands in the virtual machine and not on your local computer.
Install Python, Django, and WFastCGI
Note
To download by using Internet Explorer, you might have to configure Internet Explorer Enhanced Security Configuration settings. To do this, click Start > Administrative Tools > Server Manager > Local Server. Click IE Enhanced Security Configuration, and then select Off.
Install the latest versions of Python 2.7 or Python 3.4 from python.org.
Install the wfastcgi and django packages using pip.
For Python 2.7, use the following command:
 c:\python27\scripts\pip install wfastcgi
 c:\python27\scripts\pip install django
For Python 3.4, use the following command:
 c:\python34\scripts\pip install wfastcgi
 c:\python34\scripts\pip install django
Install IIS with FastCGI
Install Internet Information Services (IIS) with FastCGI support. This might take several minutes to execute.
start /wait %windir%\System32\PkgMgr.exe /iu:IIS-WebServerRole;IIS-WebServer;IIS-CommonHttpFeatures;IIS-StaticContent;IIS-DefaultDocument;IIS-DirectoryBrowsing;IIS-HttpErrors;IIS-HealthAndDiagnostics;IIS-HttpLogging;IIS-LoggingLibraries;IIS-RequestMonitor;IIS-Security;IIS-RequestFiltering;IIS-HttpCompressionStatic;IIS-WebServerManagementTools;IIS-ManagementConsole;WAS-WindowsActivationService;WAS-ProcessModel;WAS-NetFxEnvironment;WAS-ConfigurationAPI;IIS-CGI
Create a new Django application
In C:\inetpub\wwwroot, to create a new Django project, enter the following command:
For Python 2.7, use the following command:
C:\Python27\Scripts\django-admin.exe startproject helloworldFor Python 3.4, use the following command:
C:\Python34\Scripts\django-admin.exe startproject helloworld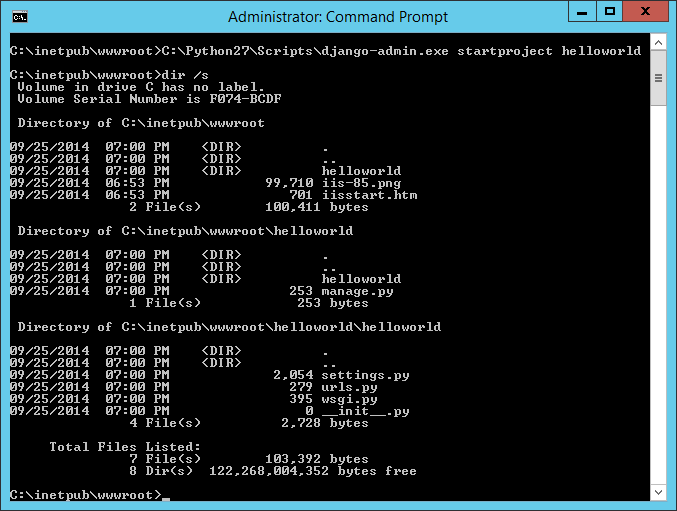
The
django-admincommand generates a basic structure for Django-based websites:helloworld\manage.pyhelps you start hosting and stop hosting your Django-based website.helloworld\helloworld\settings.pyhas Django settings for your application.helloworld\helloworld\urls.pyhas the mapping code between each URL and its view.
In the C:\inetpub\wwwroot\helloworld\helloworld directory, create a new file named views.py. This file has the view that renders the "hello world" page. In your code editor, enter the following commands:
from django.http import HttpResponse
def home(request):
    html = "<html><body>Hello World!</body></html>"
    return HttpResponse(html)
Replace the contents of the urls.py file with the following commands:
from django.conf.urls import patterns, url
urlpatterns = patterns('',
    url(r'^$', 'helloworld.views.home', name='home'),
)
Set up IIS
In the global applicationhost.config file, unlock the handlers section. This allows your web.config file to use the Python handler. Add this command:
%windir%\system32\inetsrv\appcmd unlock config -section:system.webServer/handlersActivate WFastCGI. This adds an application to the global applicationhost.config file, which refers to your Python interpreter executable and the wfastcgi.py script.
In Python 2.7:
C:\python27\scripts\wfastcgi-enableIn Python 3.4:
C:\python34\scripts\wfastcgi-enableIn C:\inetpub\wwwroot\helloworld, create a web.config file. The value of the
scriptProcessorattribute should match the output from the preceding step. For more information about the wfastcgi setting, see pypi wfastcgi.In Python 2.7:
 <configuration>
   <appSettings>
     <add key="WSGI_HANDLER" value="django.core.handlers.wsgi.WSGIHandler()" />
     <add key="PYTHONPATH" value="C:\inetpub\wwwroot\helloworld" />
     <add key="DJANGO_SETTINGS_MODULE" value="helloworld.settings" />
   </appSettings>
   <system.webServer>
     <handlers>
         <add name="Python FastCGI" path="*" verb="*" modules="FastCgiModule" scriptProcessor="C:\Python27\python.exe|C:\Python27\Lib\site-packages\wfastcgi.pyc" resourceType="Unspecified" />
     </handlers>
   </system.webServer>
 </configuration>
In Python 3.4:
 <configuration>
   <appSettings>
     <add key="WSGI_HANDLER" value="django.core.handlers.wsgi.WSGIHandler()" />
     <add key="PYTHONPATH" value="C:\inetpub\wwwroot\helloworld" />
     <add key="DJANGO_SETTINGS_MODULE" value="helloworld.settings" />
   </appSettings>
   <system.webServer>
     <handlers>
         <add name="Python FastCGI" path="*" verb="*" modules="FastCgiModule" scriptProcessor="C:\Python34\python.exe|C:\Python34\Lib\site-packages\wfastcgi.py" resourceType="Unspecified" />
     </handlers>
   </system.webServer>
 </configuration>
Update the location of the IIS default website to point to the Django project folder:
%windir%\system32\inetsrv\appcmd set vdir "Default Web Site/" -physicalPath:"C:\inetpub\wwwroot\helloworld"Load the webpage in your browser.
Shut down your Azure virtual machine
When you're done with this tutorial, we recommend that you shut down or remove the Azure VM you created for the tutorial. This frees up resources for other tutorials, and you can avoid incurring Azure usage charges.