Create and manage personal views on a grid page
In model-driven apps, views define the data that's displayed in tabular form on a grid page. System views are views that are created by your administrator and shared with you. You typically can't modify them. However, you can create and manage personal views. Personal views are available to you only unless you share them.
A view consists of the following elements:
- The columns to display
- Default sorting options
- Filters to show rows that match specific criteria, if needed
Important
To ensure proper functionality of all views, it is recommended to create all views with the Vew designer in ther maker portal or the Edit filters panel in the view page. Custom views imported from solutions may include invalid fetchXML and may not be supported.
For more information, see Understand model-driven app views.
Select columns in the column editor
Select Edit columns to remove, reorder, or add columns to get a clearer view of your data.
Select Apply to see your changes on the grid page.
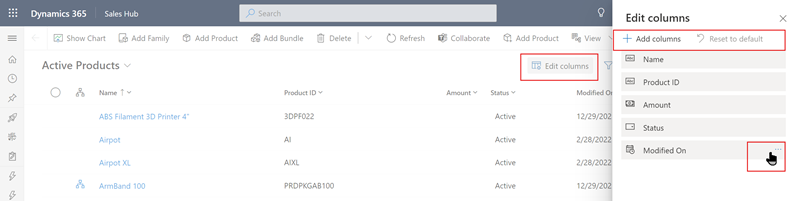
The following actions are available in the column editor:
To remove a column, hover over the column name, select …, and then select Remove.
To change the order of the columns, select …, and then select Move up or Move down. Or, drag the column to the desired position in the list.
To add columns to the view, select Add columns, and then do one or more of the following:
Select a column from the default set of system columns in the table.
Select Default, then select All or Custom, and then select from the set of columns in the table.
Type a column name in the Search box to find a specific column, and then select it.
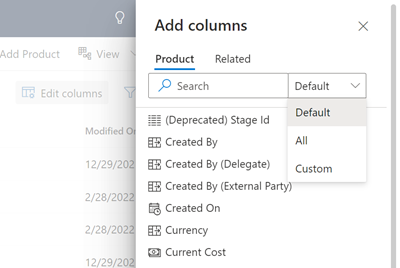
To add columns from other tables, select the Related tab. Expand the table that contains the column you want to add, and then select the column. When you're done adding columns, select Close.

To undo changes to the view's columns at any time, select Reset to default.
Select filter conditions in the filter editor
Use the filter editor to view or change the query that underlies the data in the current view.

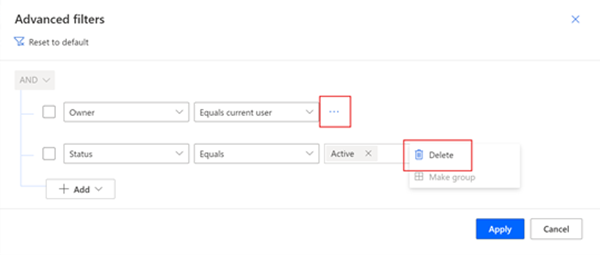
Edit or delete a condition
To change a condition, select the column, operator, or value and edit as needed.
To remove a condition, select More commands (…) next to the row, and then select Delete.
Add conditions
- To add one or more conditions, select Add.
- When you're finished editing the view filters, select Apply to see your changes on the grid page.
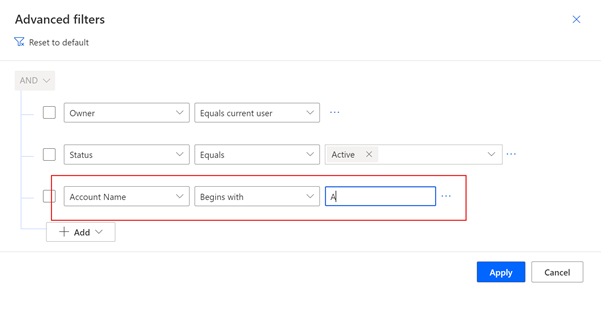
The following options are available when you add conditions in the filter editor:
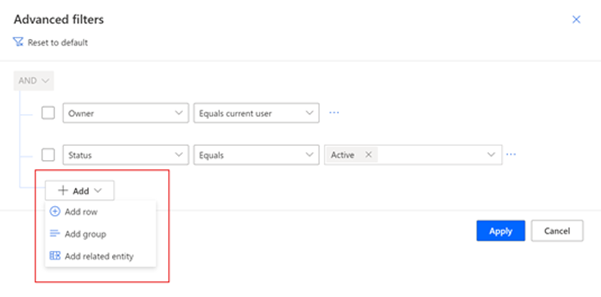
To add a condition, select Add row, and then select a column, an operator, and a value.
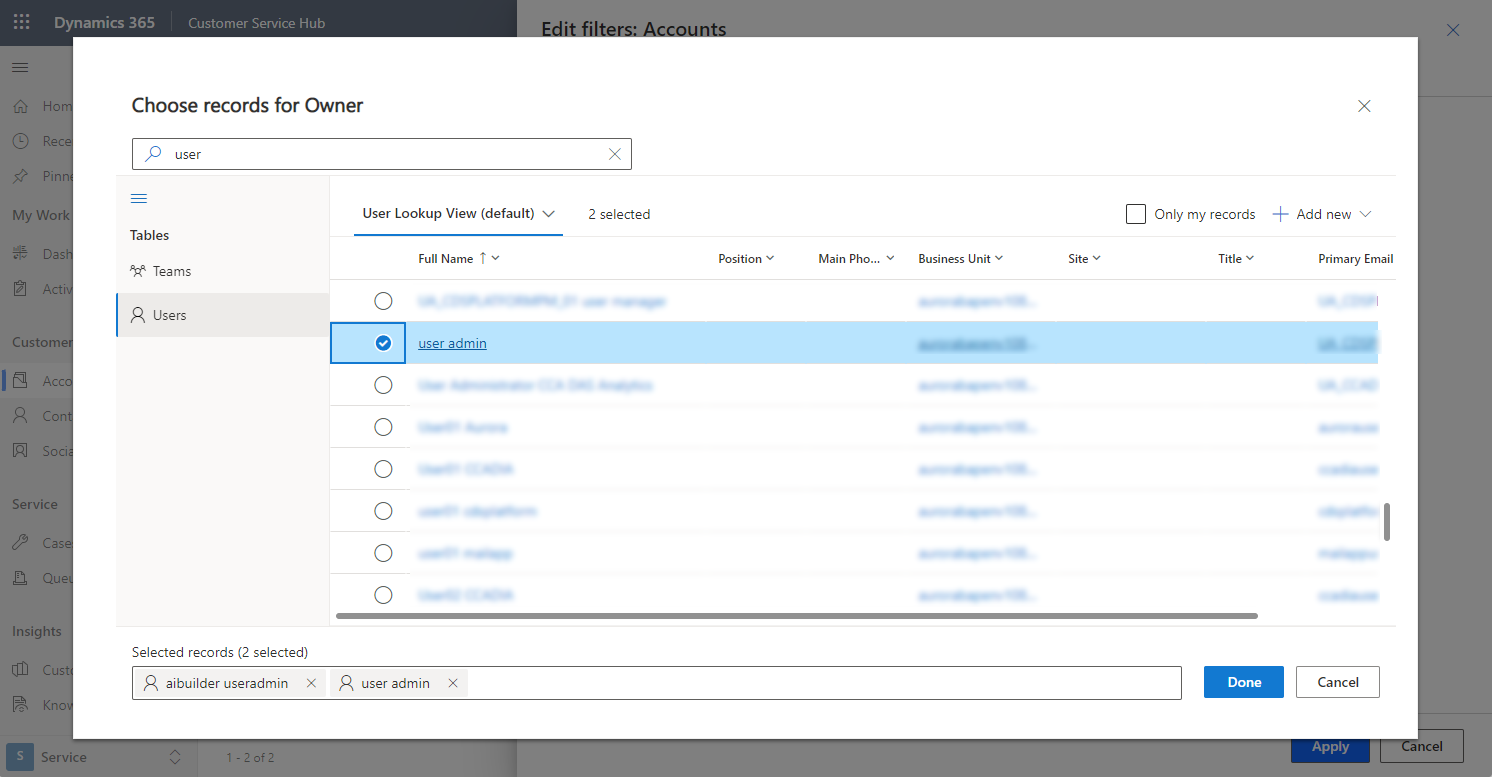
If you're adding a condition to a column with lookups, you can look up the record in the Value field. In the lookup drop-down menu, you can choose Advanced lookup to see more fields and search for records within a specific view.

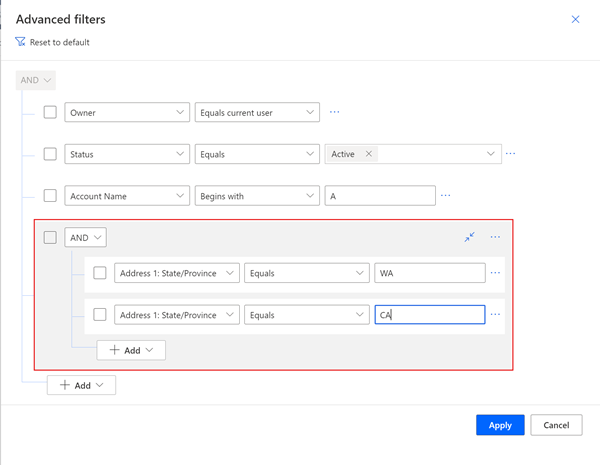
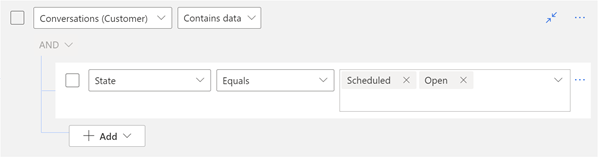
To add a group of conditions, select Add group. You can create multiple subconditions and group them using AND and OR operators to create an expression.
To add a single condition to a group, select the condition checkbox, then select …, and then select Make group.
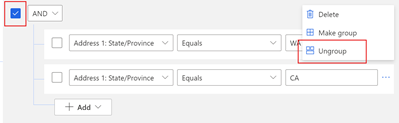
To separate a group of conditions, select the group's checkbox, then select …, and then select Ungroup.
To add a condition based on a column in a related table, select Add related entity, and then select a table. Contains data is the only conditional operator that can be used with a related table in a view filter. Then, select a column in the related table, an operator, and a value.
To undo changes to the view filter at any time, select Reset to default.
Tip
If you have the security privilege Enable Download Fetch XML, found under Miscellaneous Privileges section of the Customization tab within the security role definition page, you can download the FetchXML expression for a view. Contact your administrator if you need this capability.
Sort the data
Select a column heading, and then select how the view should sort data in the column. You can sort on one column at a time.
Sorting options depend on the type of data. Alphanumeric columns can be sorted in A to Z (ascending) or Z to A (descending) order. Date columns can be sorted in older to newer (ascending) or newer to older (descending) order. An arrow to the right of the column name indicates the view is sorted on that column. The direction the arrow is pointing indicates whether the column is sorted in ascending or descending order.
Edit column width
If your administrator has turned on modern advanced find, you can drag the vertical column separator bar to change the minimum width of a column. When you change the width of a column, as asterisk appears besige the view name to indicate that you edited the view and haven't saved it. See Save your edits to as a new view to learn more about different options to save a view.
Tip
Since the column width edits change the minimum width of the column, you may see column widths getting adjusted after the view is saved, to fill the available horizontal screen space.
Save your view
An asterisk beside the view name indicates you edited the view and haven't saved it. If you switch to another view or leave the page, the view will revert to its original definition. To keep your changes and add the new view to the list of views available to you, be sure to save it.
Save your edits as a new view
To keep the original view, save your edited version as a new view with a different name. If you made changes to a view you don't have Write permission to, whether it's a system view or a personal view, then you can only save it as a new view.
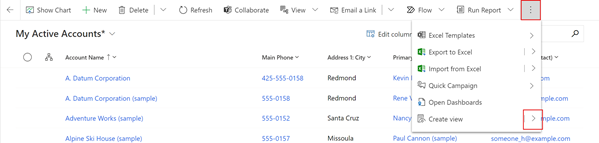
On the command bar, select More commands (⁝) > Create view > Save as new view.
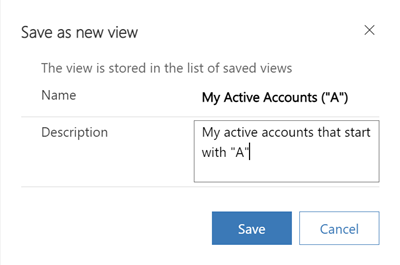
Enter a new name for the view, and a description if you like, and then select Save.
Note
If you want to keep the original view, be sure to give your edited view a different name. If you don't, your changes will overwrite the existing view without confirmation, even though you selected to save it as a new view.
Change the definition of an existing view
If you don't want to keep the original view, you can replace it with your edited version. You'll need Write permission to the view to overwrite the original definition with your changes.
On the command bar, select More commands (⁝) > Create view > Save changes to current view.

Save changes to views in modern advanced find
If your administrator has turned on modern advanced find, you can create and manage views directly from the view selector.

Change the default view
The default view for a table is indicated by the Default label in the view selector. Your administrator sets a default view for each table in your app. However, you can set a different view as your personal default.
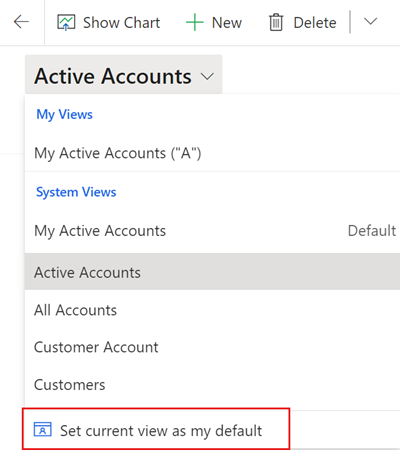
In the following example, the administrator set the view My Active Accounts as the default for the Accounts table. To change your default view to Active Accounts:
In the view selector, select Active Accounts to apply the view to the grid page.
Open the view selector again and select Set current view as my default.
To change your personal default view back to the view that was set by your administrator, select Reset default view in the view selector.
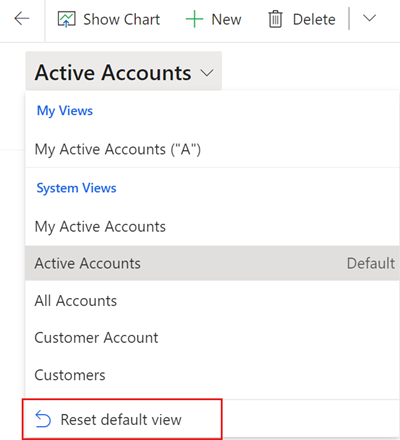
Note
If you don't see Reset default view, it means the current default view for the table is the one set by the administrator.
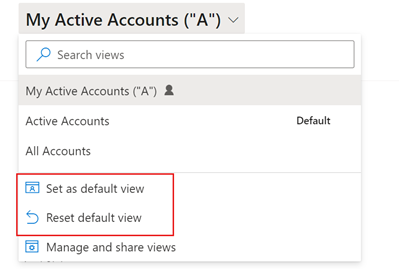
Change the default view in modern advanced find
If your administrator has turned on modern advanced find, you can change and reset the default view directly from the view selector.
Manage and share personal views
If your administrator has turn on modern advanced find, you can share, hide, rename, and delete views.
In the view selector, select Manage and share views.
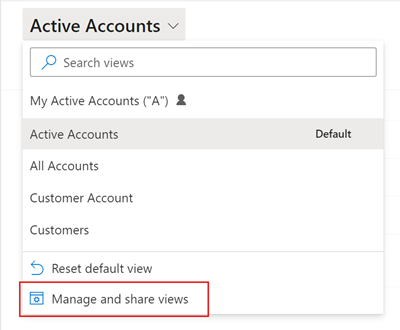
Select View commands (…) and then choose your option.

Change the order of views in the view selector
By default, the view selector lists views in two groups, personal views and system views, each ordered alphabetically. You can change the sort order within groups, or remove the grouping entirely and order the entire list alphabetically.
In the view selector, select Manage and share views.
Change the view selector sort order, and then select Apply.
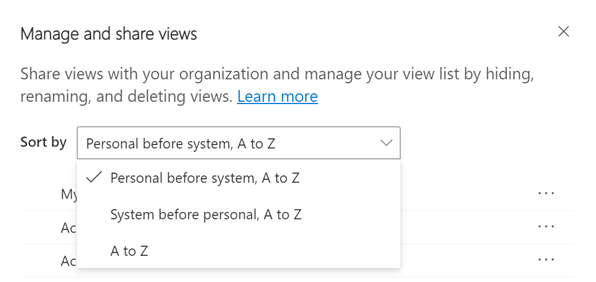
The following sorting options are available:
Personal before system, A to Z: This is the default. Both groups are ordered alphabetically. Personal views appear above system views.
System before personal, A to Z: Both groups are ordered alphabetically. System views appear above personal views.
A to Z: The grouping is removed. All views (system and personal) are presented in alphabetical order.
Note
If your administrator has turned on the modern advanced find experience, the list of views isn't divided. To easily tell which kind of view you're looking at, personal views have a user icon
 . You can also hover over the information icon
  to see the view type.
Hide views
You can hide views in the view selector to personalize the list and reduce clutter. You should keep some things in mind:
- When you hide a view, it's hidden from that table's views in all model-driven apps on all devices.
- If the view is shared with you and other team members, hiding it only hides the view for you. It's not hidden for everyone else who has access to the view.
- You can hide your personal views by default. You can hide system views only if the administrator has allowed it.
- You can't hide a table's default view. If you want to hide the default view, set another view as the default first.
- You can't set a hidden view as the default view for a table.
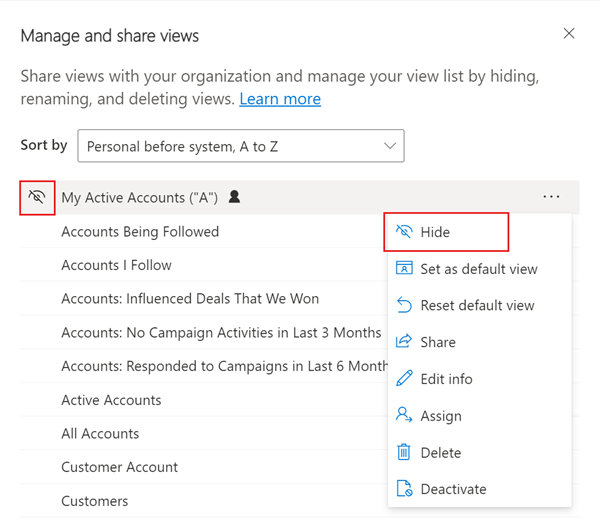
To hide a view:
In the view selector, select Manage and share views.
Hover over the view and select Hide. Or, select View commands (…) to the right of the view, and then select Hide.
Select Apply.
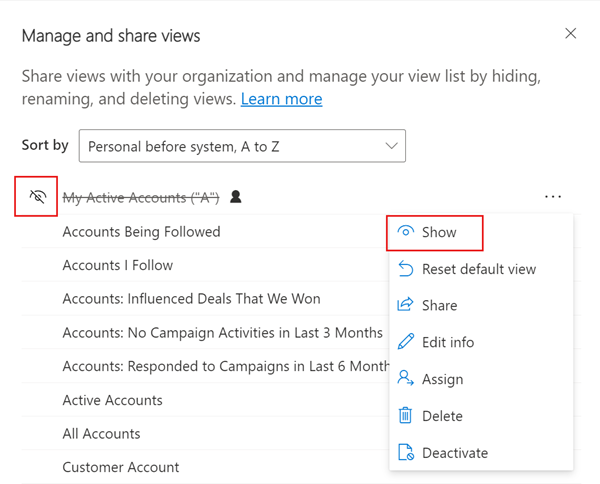
To restore a hidden view:
In the view selector, select Manage and share views.
Hover over the view and select Show. Or, select View commands (…) to the right of the view, and then select Show.
Select Apply.
Other view management tasks
- Set as default: Makes a view the default view for that table across all model-driven apps in the environment. This option doesn't appear on a hidden view or on a view that's already the default.
- Reset default: Changes the default view of a table back to what the administrator set, across all model-driven apps in the environment.
- Share: Shares the view with other members of your organization. This option appears only on personal views that you have Share permission to. For more information, see Share rows with a user or team.
- Edit info: Change the view name and description. This option appears only on personal views that you have Write permission to.
- Assign: Assigns ownership of the view to another user or team in your organization. This option appears only on personal views that you own.
- Delete: Deletes the view. If you delete a personal view, the view is deleted for everyone who has access to it. This option appears only on personal views you have Delete permission to.
- Deactivate/Activate: Deactivates or activates the view. If you deactivate or activate a personal view, the view becomes inactive or active for everyone who has access to it. This option appears only on personal views you have Write permission to.
- Download Fetch XML: Download the FetchXML expression for the view. This capability is enabled by an administrator with the security privilege Enable Download Fetch XML, found under Miscellaneous Privileges section of the Customization tab within the security role definition page.
Feedback
Coming soon: Throughout 2024 we will be phasing out GitHub Issues as the feedback mechanism for content and replacing it with a new feedback system. For more information see: https://aka.ms/ContentUserFeedback.
Submit and view feedback for