Manage device groups in Device Update for IoT Hub
Device Update for IoT Hub allows deploying an update to a group of IoT devices. This step is optional when deploying updates to your managed devices. You can deploy updates to your devices using the default group that is created for you. Alternatively, you can assign a user-defined tag to your devices, and they'll be automatically grouped based on the tag and the device compatibility properties.
Note
If you would like to deploy to a default group instead of a user-created group, continue to How to deploy an update.
Prerequisites
- Access to an IoT Hub with Device Update for IoT Hub enabled. We recommend that you use an S1 (Standard) tier or above for your IoT Hub.
- An IoT device (or simulator) provisioned for Device Update within IoT Hub.
- Install and start the Device Update agent on your IoT device either as a module- or device-level identity.
- An imported update for the provisioned device.
Supported browsers:
- Microsoft Edge
- Google Chrome

Add a tag to your devices
To create a device group, the first step is to add a tag to the target set of devices in IoT Hub. Tags can only be successfully added to your device after it has been connected to Device Update.
Device Update tags use the format in the following example:
"etag": "",
"deviceId": "",
"deviceEtag": "",
"version": <version>,
"tags": {
   "ADUGroup": "<CustomTagValue>"
}
For more information and examples of twin JSON syntax, see Understand and use device twins or Understand and use module twins.
The following sections describe different ways to add and update tags.
Add tags with SDKs
You can update the device or module twin with the appropriate tag using RegistryManager after enrolling the device with Device Update. For more information, see the following articles:
Add tags to the device twin if your Device Update agent is provisioned with device identity, or to the corresponding module twin if the Device Update agent is provisioned with a module identity.
Add tags using jobs
You can schedule a job on multiple devices to add or update a Device Update tag. For examples of job operations, see Schedule jobs on multiple devices. You can update either device twins or module twins using jobs, depending on whether the Device Update agent is provisioned with a device or module identity.
For more information, see Schedule and broadcast jobs.
Note
This action counts against your IoT Hub messages quota. We recommend only changing up to 50,000 device or module twin tags at a time, otherwise you may need to buy more IoT Hub units if you exceed your daily IoT Hub message quota. For more information, see Quotas and throttling.
Add tags by updating twins
Tags can also be added or updated directly in device or module twins.
In the Azure portal, navigate to your IoT hub.
From Devices or IoT Edge on the left navigation pane, find your IoT device. Either navigate to the device twin or the Device Update module and then its module twin, depending on whether the Device Update agent is provisioned with a device or module identity.
In the twin details, delete any existing Device Update tag value by setting them to null.
Add a new Device Update tag value as shown below.
    "tags": {
            "ADUGroup": "<CustomTagValue>"
            }
Limitations
- You can add any value to your tag except for
Uncategorizedand$default, which are reserved values. - Tag value can't exceed 200 characters.
- Tag value can contain alphanumeric characters and the following special characters:
. - _ ~. - Tag and group names are case-sensitive.
- A device can only have one tag with the name ADUGroup. Any additions of a tag with that name will override the existing value for tag name ADUGroup.
- One device can only belong to one group.
View device groups
Groups are automatically created based on the tags assigned as well as the compatibility properties of the devices. One group can have multiple subgroups with different device classes.
In the Azure portal, navigate to the IoT hub that you previously connected to your Device Update instance.
Select the Updates option under Device Management from the left-hand navigation bar.
Select the Groups and Deployments tab.
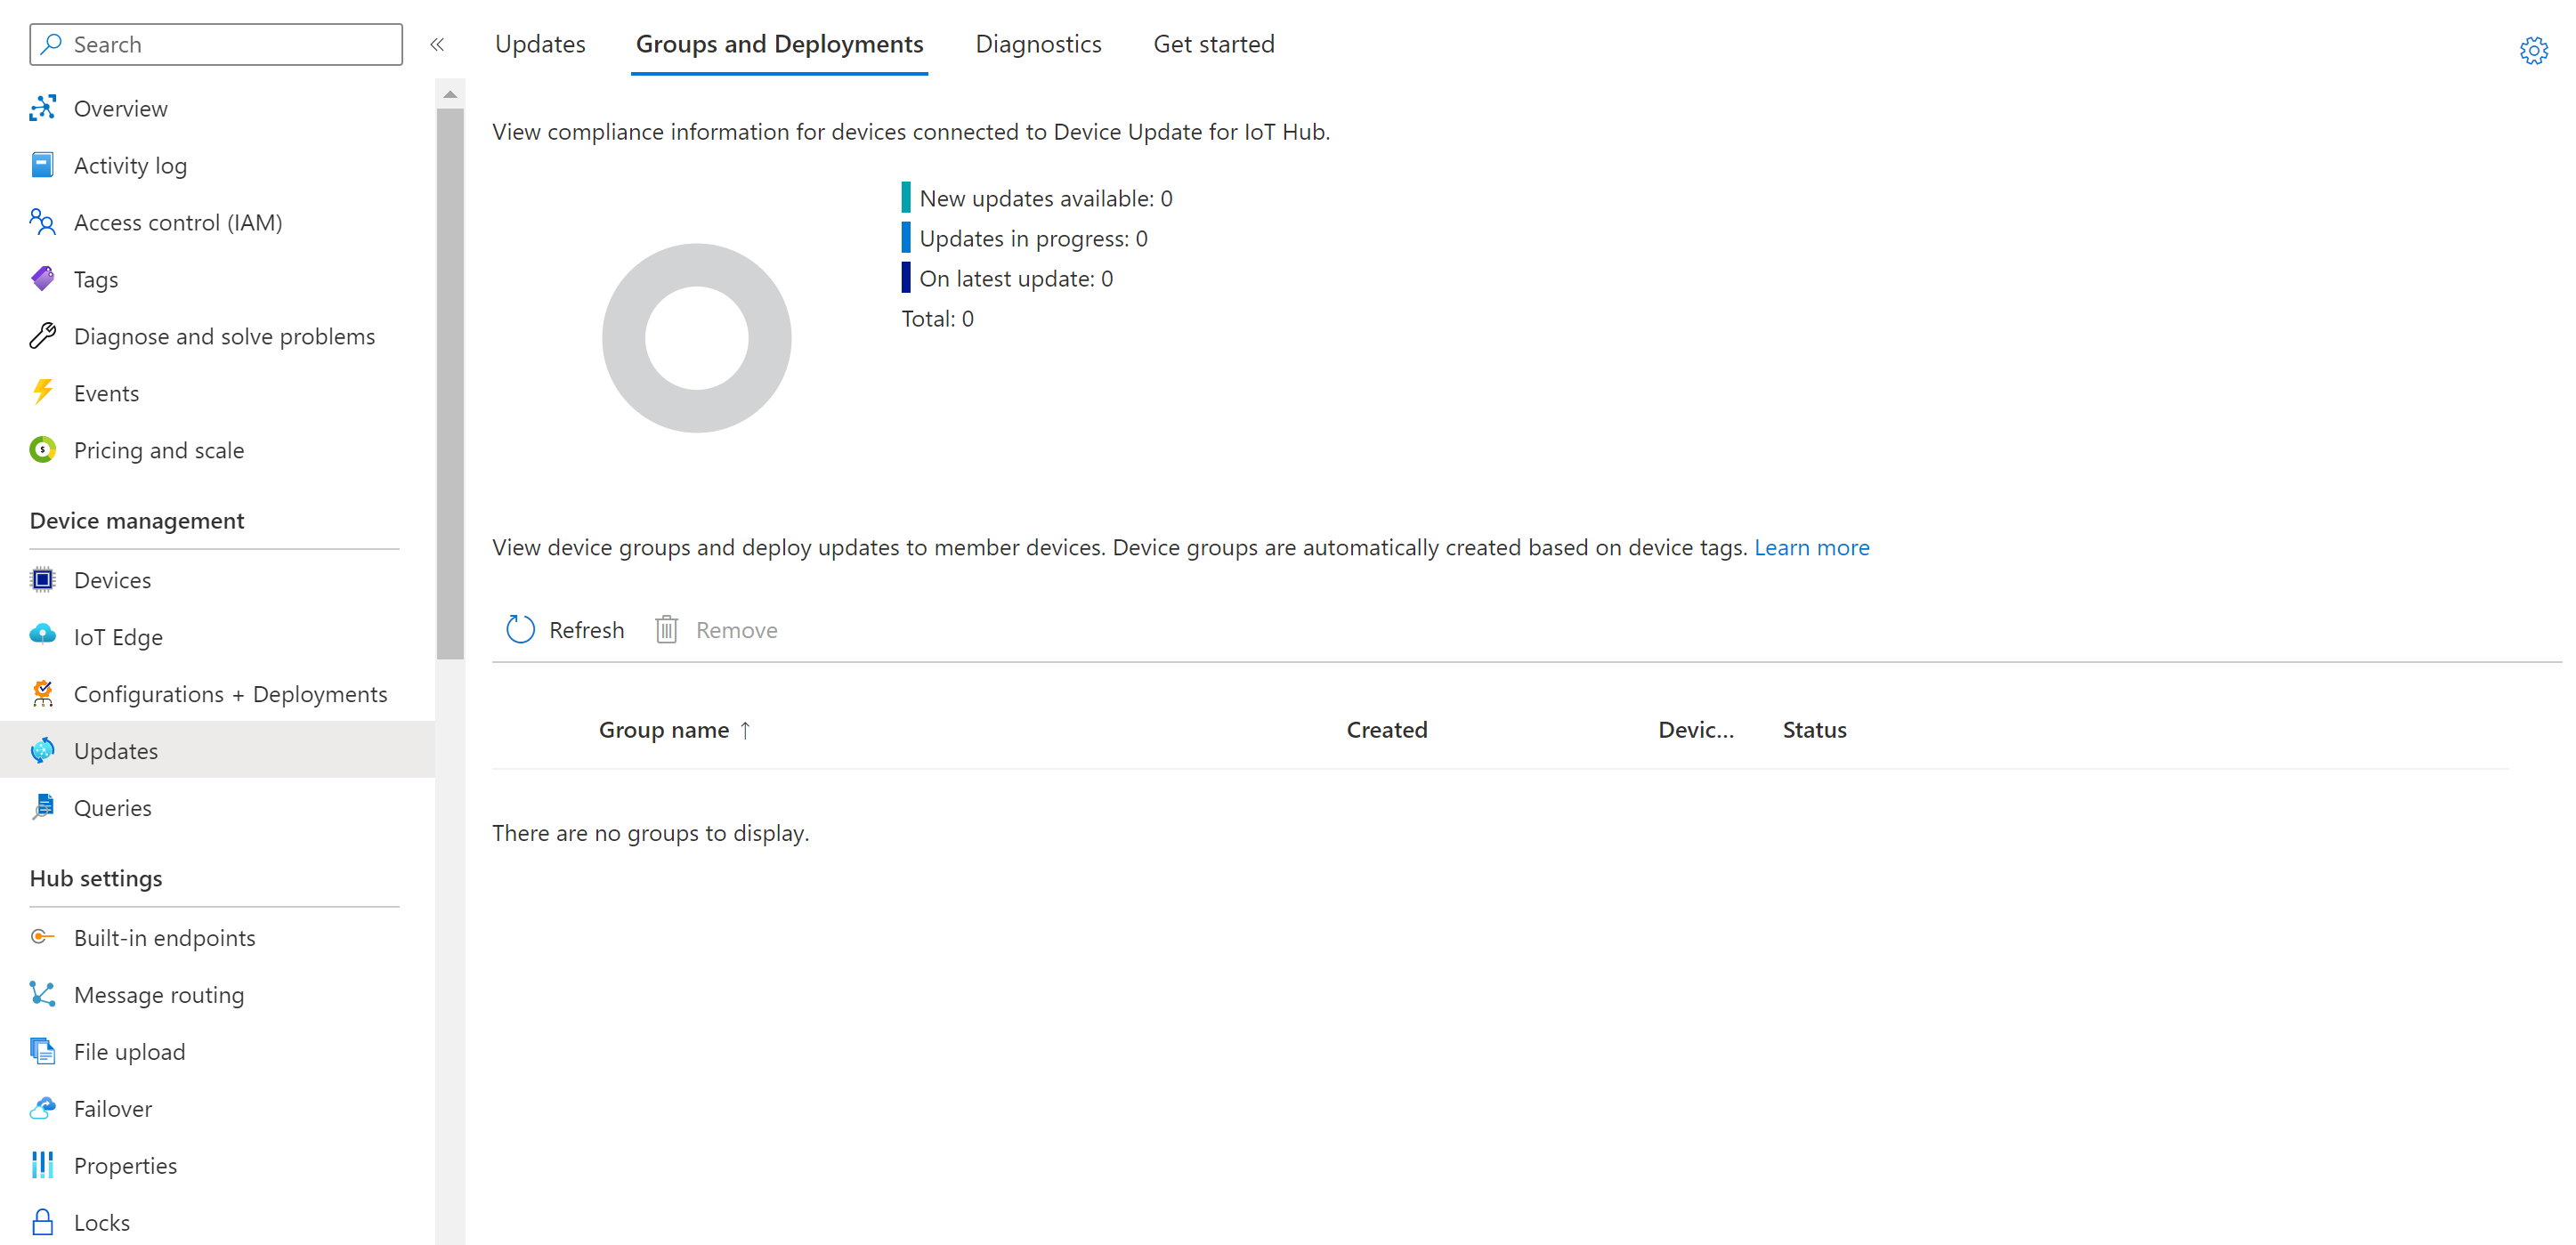
Once a group is created, you'll see that the compliance chart and group list are updated. The Device Update compliance chart shows the count of devices in various states of compliance: On latest update, New updates available, and Updates in progress. For more information, see Device Update compliance.

You should see existing groups and any available updates for the devices in those groups in the group list. If there are devices that don't meet the device class requirements of the group, they'll show up in a corresponding invalid group. You can deploy the best available update to a group from this view by selecting the Deploy button next to the group.


View device details for a group
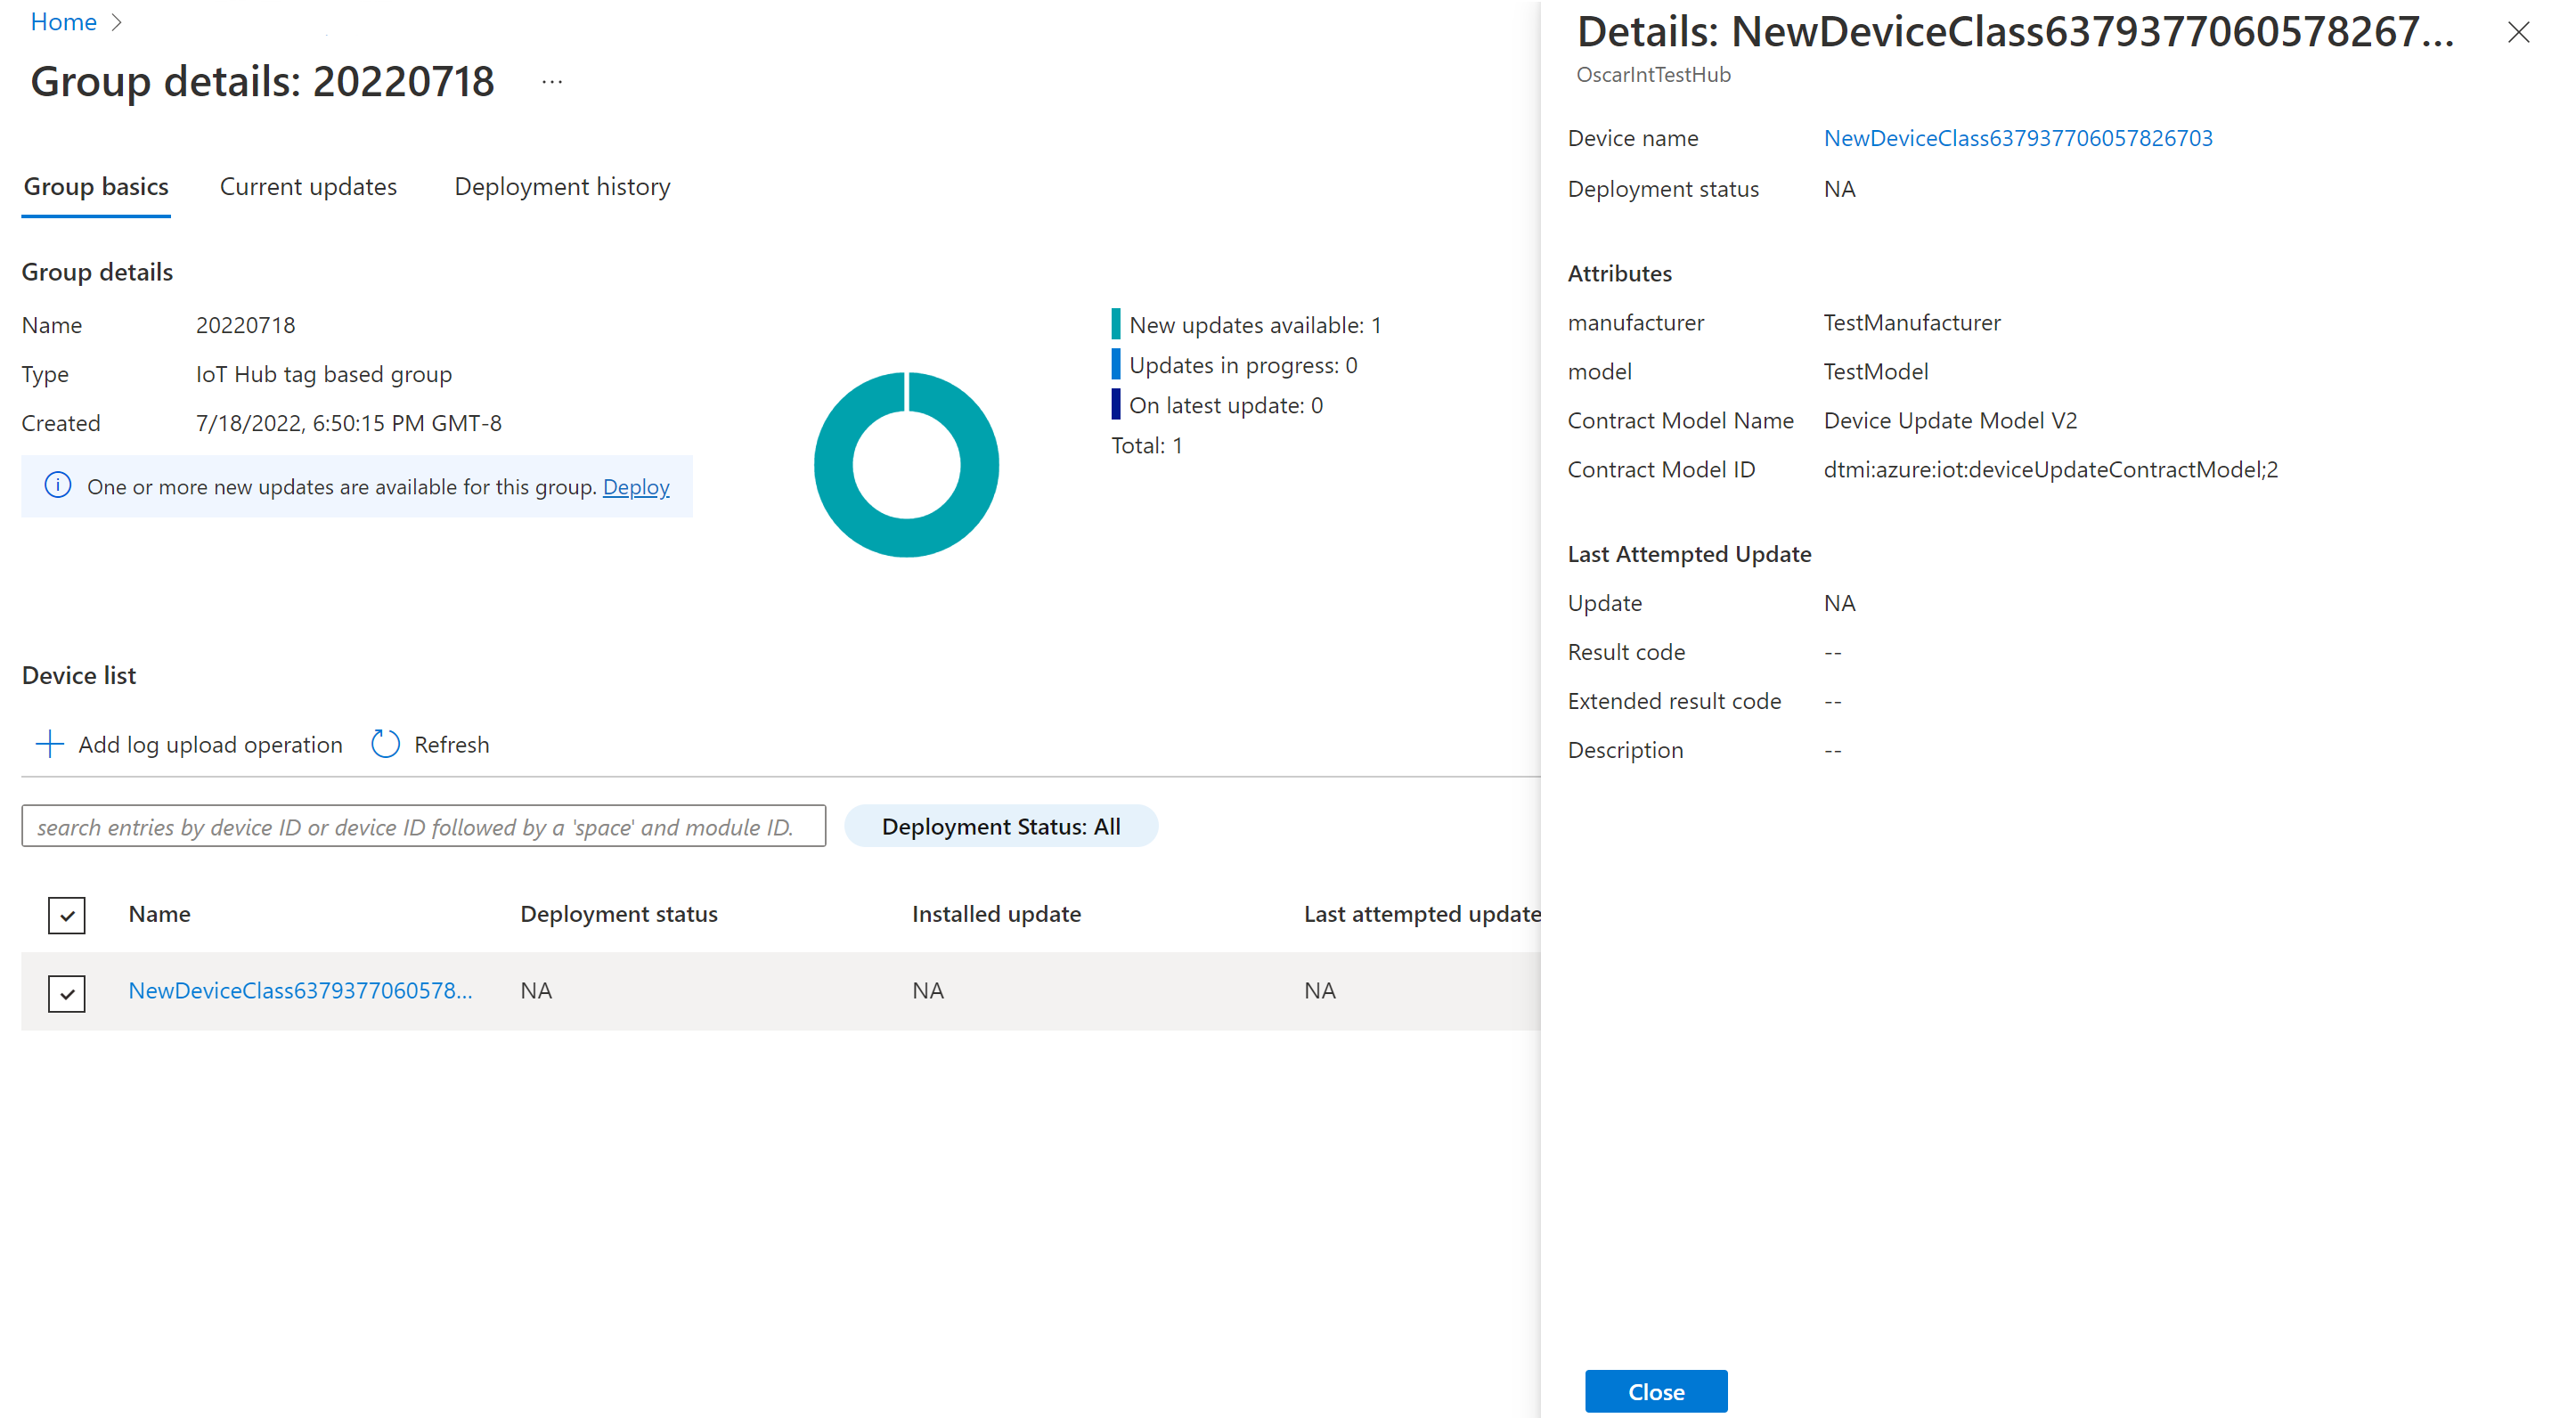
From the Groups and Deployments tab, select the name of the group that you want to view.
On the group details page you can see a list of devices that are part of the group along with their device update properties. In this view, you can also see the update compliance information for all devices that are members of the group. The compliance chart shows the count of devices in various states of compliance.

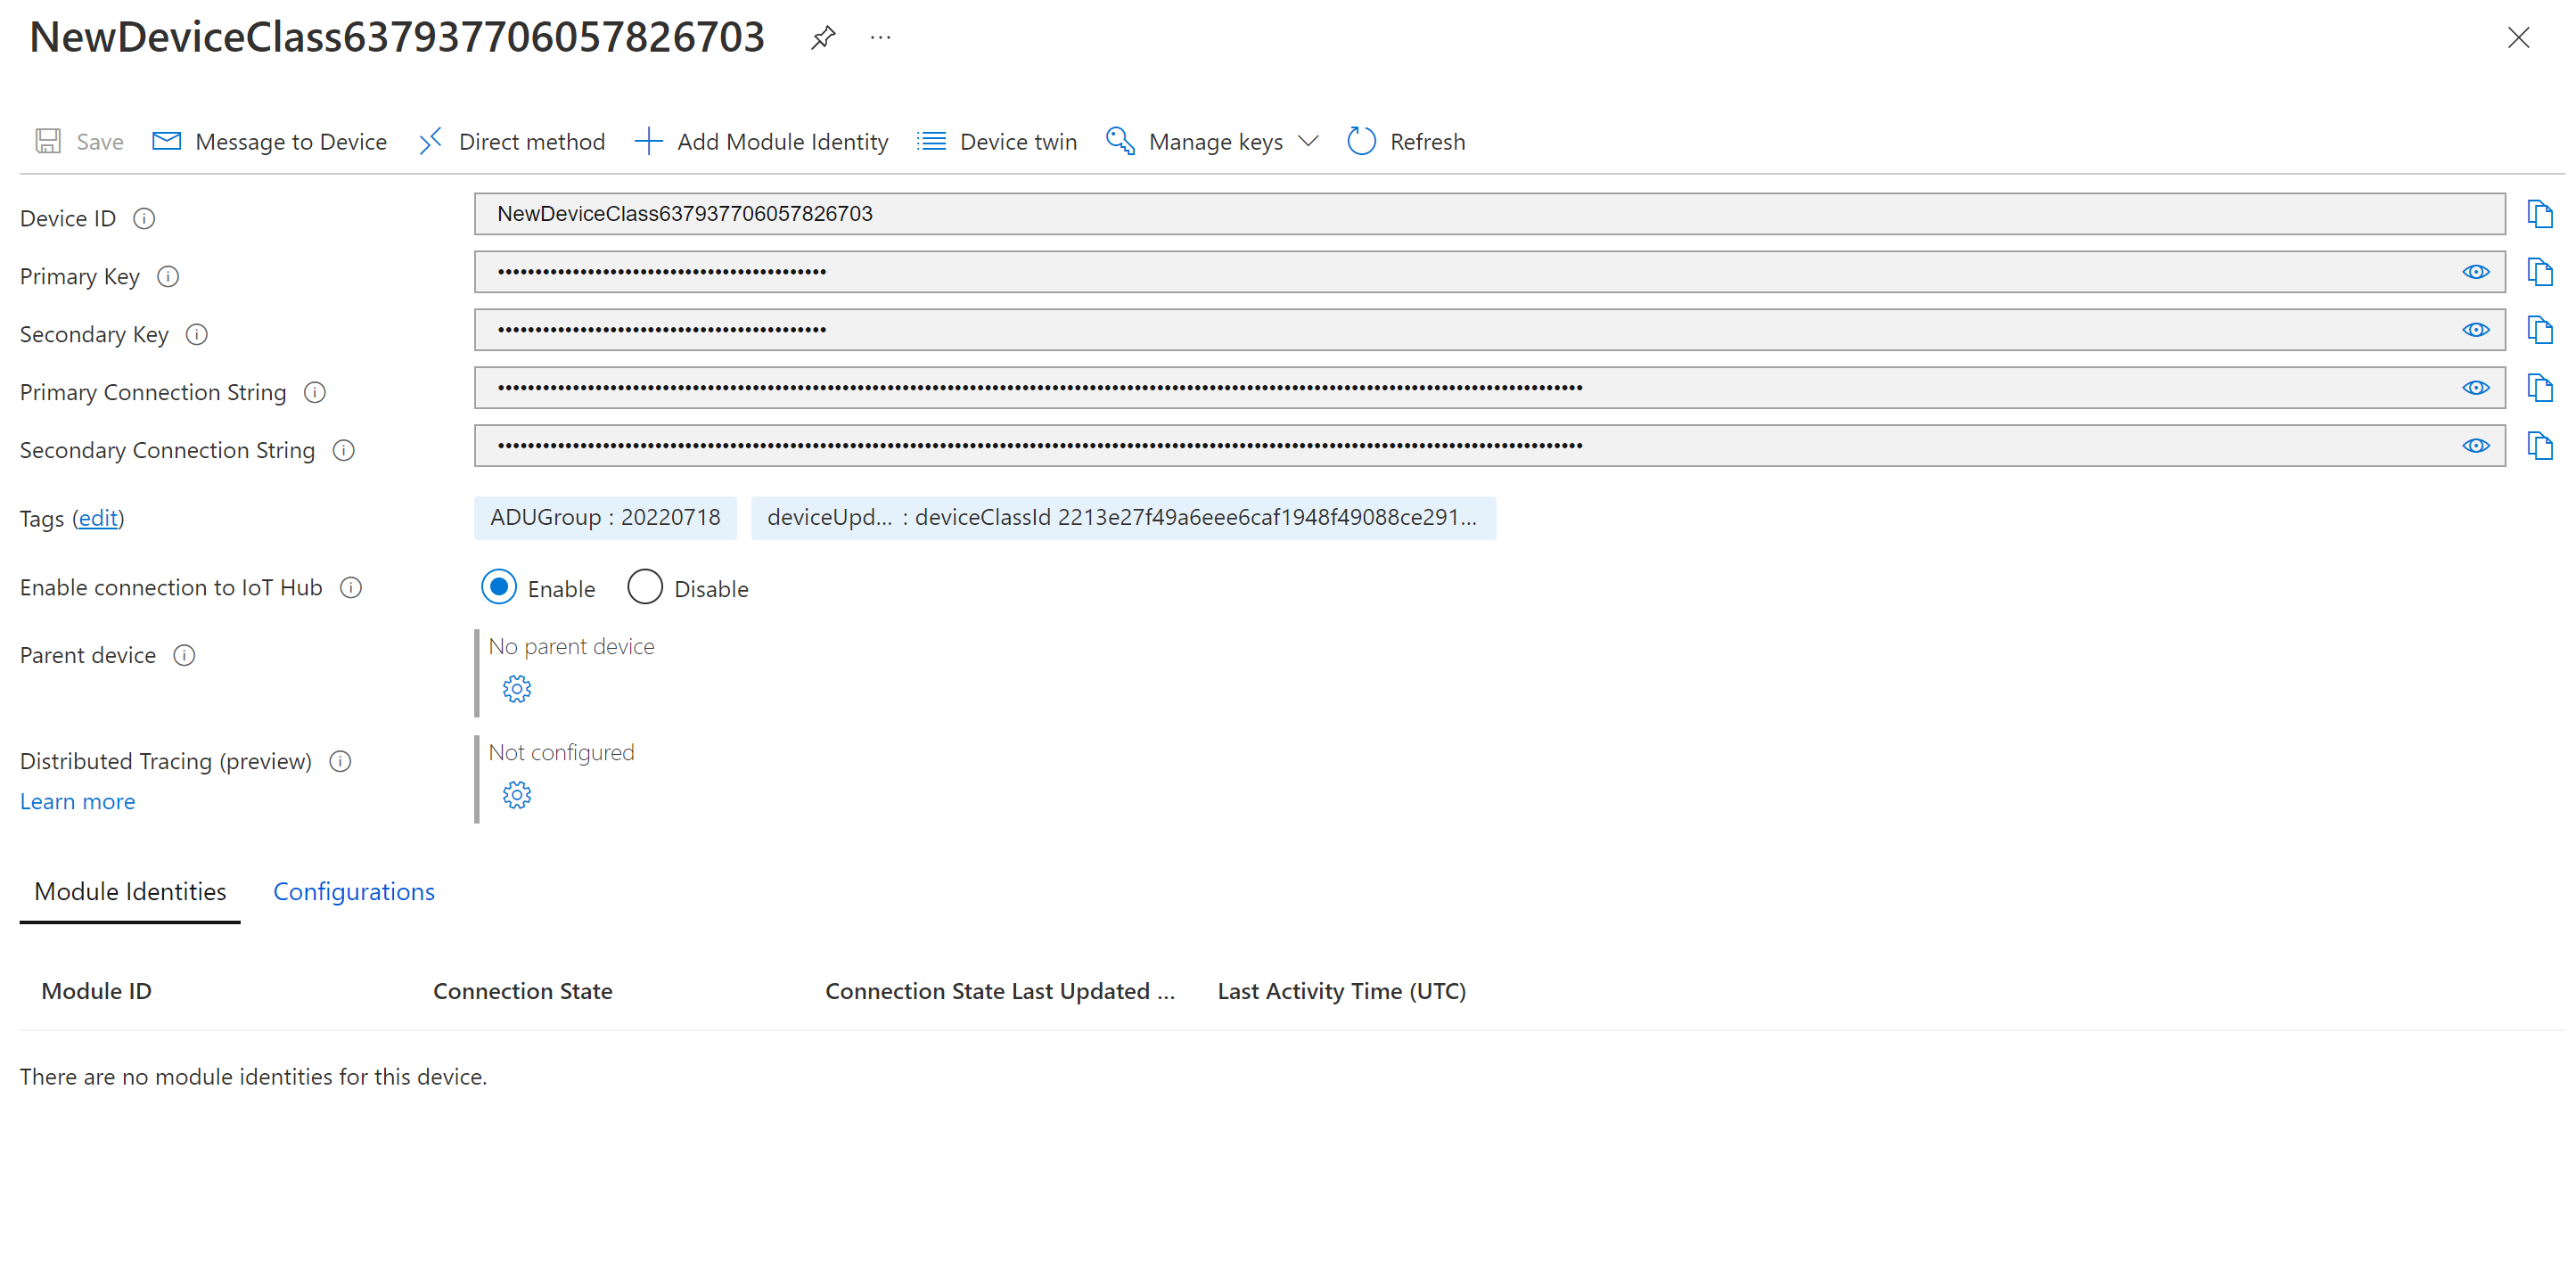
You can also select an individual device within a group to be redirected to the device details page in IoT Hub.


Removing a device from a device group
To remove a device from a device group, the ADUGroup tag value must be changed to "null".
    "tags": {
            "ADUGroup": "null"
            }
This will delete the ADUGroup tag from the device twin and remove the device from its device group.
Deleting device groups
While device groups are automatically created, groups, device classes and deployments are not automatically cleaned up so as to retain them for historical records or other user needs. Device groups can be deleted through Azure portal by individually selecting and deleting the desired groups, or by calling the DELETE API on the group. Learn more
If a device is ever connected again for this group after the group is deleted, while the group will be automatically re-created there will be no associated device or deployment history.
To be deleted, a group must meet the following requirements:
- The group must have NO member devices. This means that no device provisioned in the Device Update instance should have a ADUGroup tag with a value matching the selected group's name.
- The group must NOT be a default group.
- The group must have NO active or canceled deployments associated with it.
Note
If you are still unable to delete a group after meeting the above requirements, then validate whether you have any Unhealthy devices that are tagged as part of the group. Unhealthy devices are devices that cannot receive a deployment, and as a result don't show up directly in the list of member devices within a group. You can validate whether you have any unhealthy devices by going to "Find missing devices" within the Diagnostics tab in the Device Update Portal experience. In case you have Unhealthy devices that are tagged as part of the group, you will need to modify the tag value or delete the device entirely before attempting to delete your group.
Next Steps
Learn more about device groups
Learn more about Device Update compliance
Feedback
Coming soon: Throughout 2024 we will be phasing out GitHub Issues as the feedback mechanism for content and replacing it with a new feedback system. For more information see: https://aka.ms/ContentUserFeedback.
Submit and view feedback for