Create alerts (preview)
Applies to: ✔️ Windows VMs ✔️ Linux VMs ✔️ On-premises environment ✔️ Azure Arc-enabled servers.
This article provides steps to enable Alerts (preview) with Azure Update Manager to address events as captured in updates data.
Azure Update Manager is a unified service that allows you to manage and govern updates for all your Windows and Linux virtual machines across your deployments in Azure, on-premises, and on the other cloud platforms from a single dashboard. It's designed as a standalone Azure service to provide SaaS experience to manage hybrid environments in Azure.
Logs created from patching operations such as update assessments and installations are stored by Azure Update Manager in Azure Resource Graph (ARG). You can view up to last seven days of assessment data, and up to last 30 days of update installation results.
Note
This feature isn't available in Azure US Government and Azure China operated by 21 Vianet.
Prerequisite
Alert rule based on ARG query requires a managed identity with reader role assigned for the targeted resources.
Enable alerts (Preview) with Azure Update Manager
To enable alerts (Preview) with Azure Update Manager through Azure portal, follow these steps:
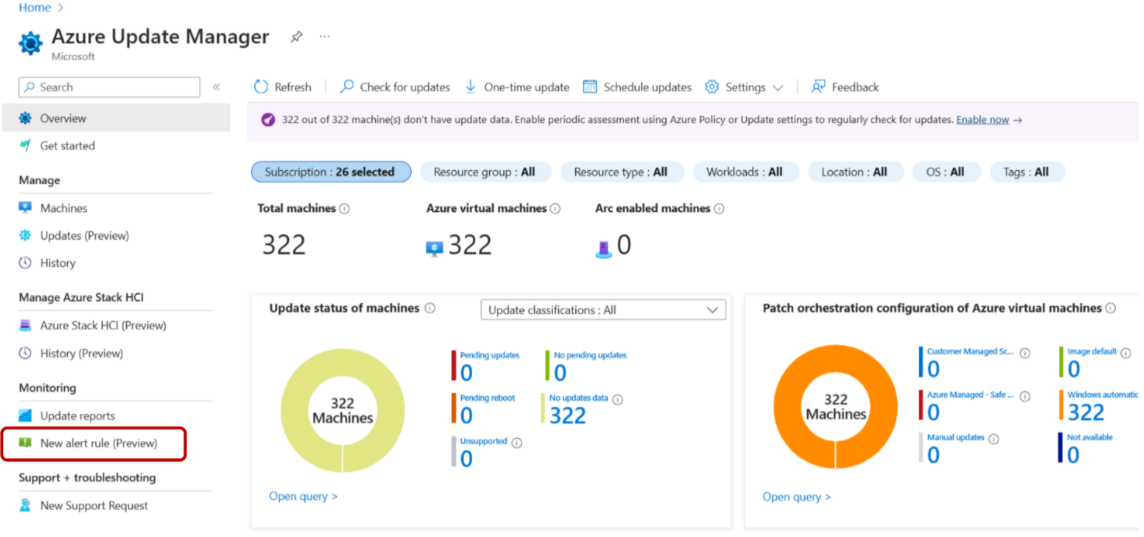
Sign in to the Azure portal and go to Azure Update Manager.
Under Monitoring, select New alerts rule (Preview) to create a new alert rule.
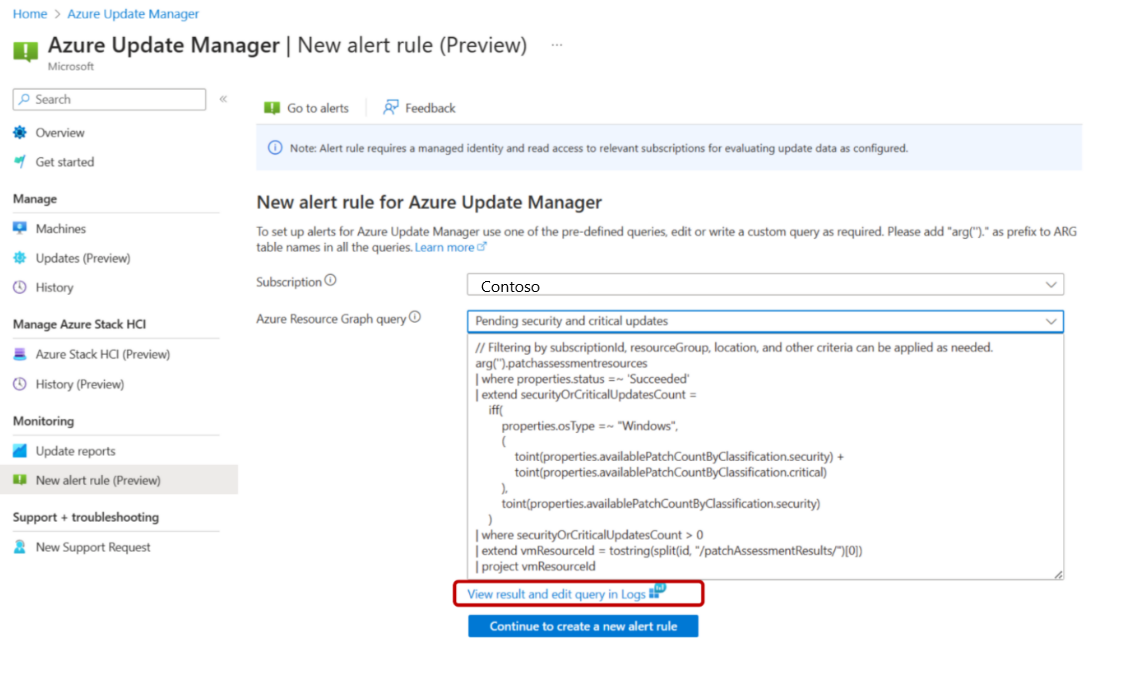
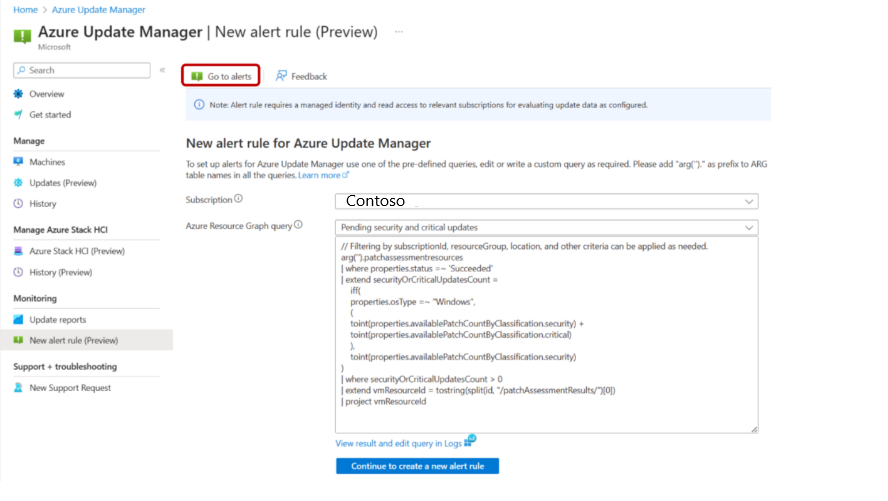
On Azure Update Manager | New alerts rule (Preview) page, provide the following details:
Select a Subscription from the dropdown that will be the scope of the alert rule.
From the Azure Resource Group query dropdown, select a predefined alerting query option.
You can select Custom query option to edit or write a custom query.

Select View result and edit query in Logs to run a selected alerting query option or to edit a query.
Select Run to run the query to enable Continue Editing Alert.
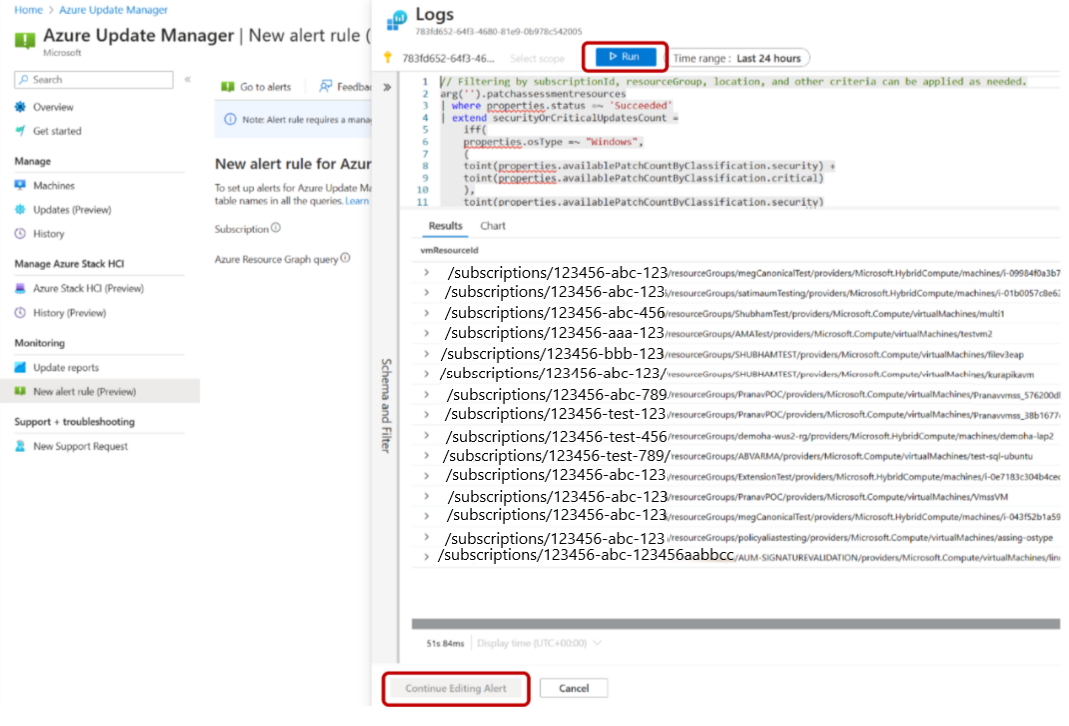
If you don't want to run a selected query or edit a query, select Continue to create a new alert rule to move to the alert rule create flow where you can set up the advanced alert rule configuration.
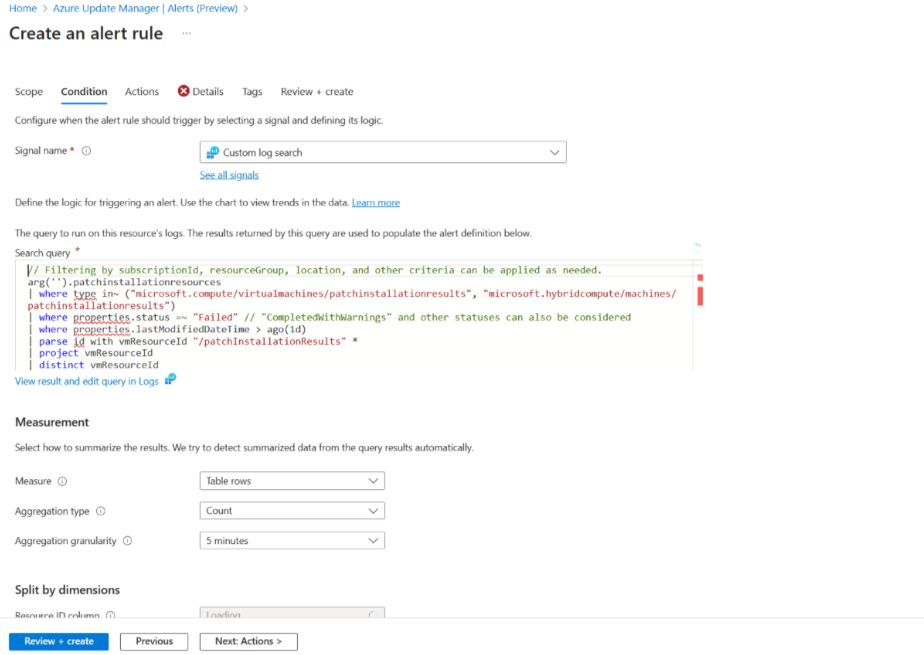
Select Review + create to create alert. For more information, see Create Azure Monitor alert rules.
- To identify alerts & alert rules created for Azure Update Manager, provide unique Alert rule name in the Details tab.
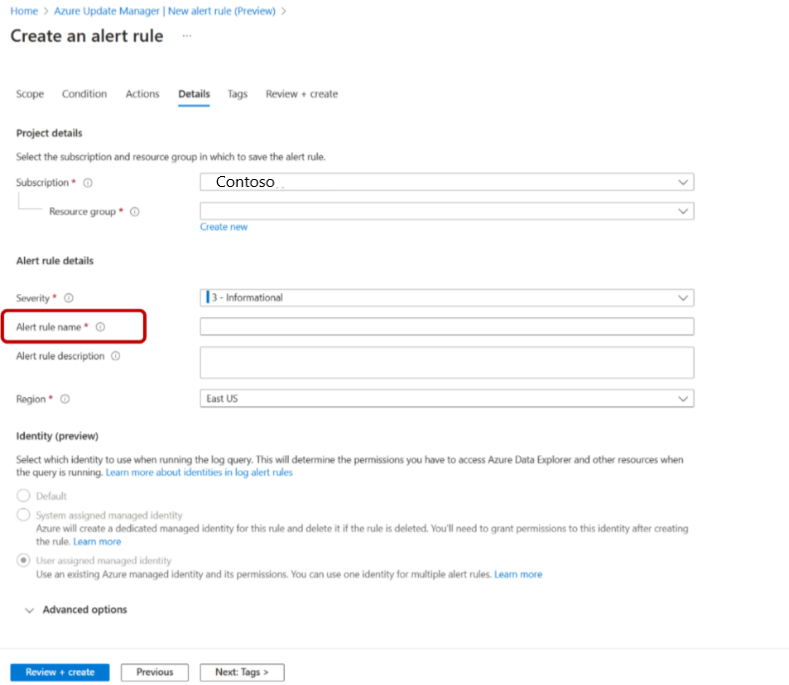
- To identify alerts & alert rules created for Azure Update Manager, provide unique Alert rule name in the Details tab.


View alerts
To view the alerts, follow these steps:
Sign in to the Azure portal and go to Azure Update Manager.
Under Monitoring, select New alerts rule (Preview).
Select Go to alerts.
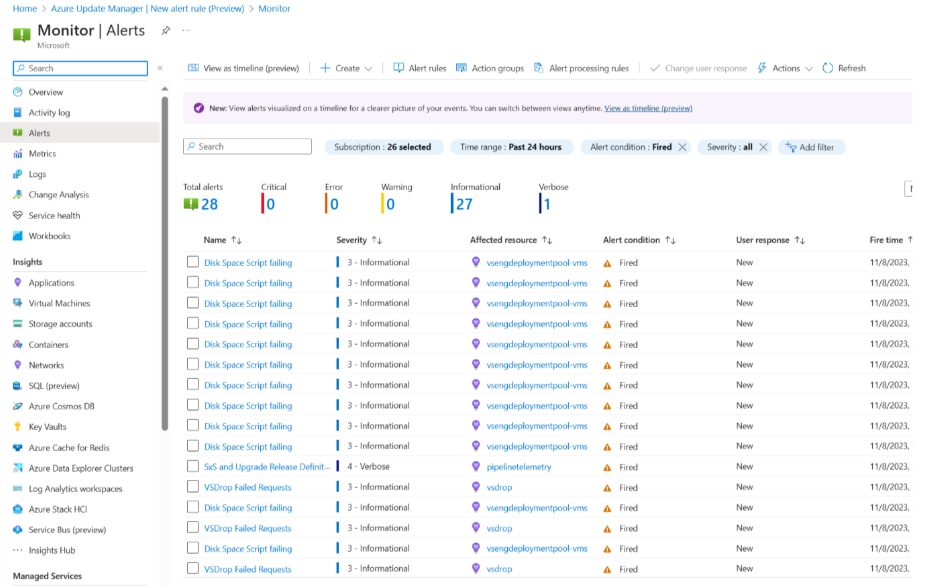
In the Monitor | Alerts page, you can view all the alerts.


Note
- Azure Resource Graph query used for alerts can return at maximum of 1000 rows.
- By default, Azure Resource Graph query will return response as per the access provided via the users managed identity and user need to filter out by subscriptions, resource groups and other criteria as per the requirement.
Next steps
Feedback
Coming soon: Throughout 2024 we will be phasing out GitHub Issues as the feedback mechanism for content and replacing it with a new feedback system. For more information see: https://aka.ms/ContentUserFeedback.
Submit and view feedback for