Choose your migration approach
In an earlier phase of the project, you performed a full discovery and assessment of your current environment. You identified the inventory of servers and services that are in scope for the migration and the dependencies between them. You have received guidance and support from the IT and business teams working with the individual services and your leadership team has approved the migration.
Your first task is to confirm the migration approach and tools that will meet your company’s business goal to rehost their existing infrastructure in Azure.
In this unit, you’ll compare Azure Migrate and Azure Site Recovery as options for migrating server workloads to Azure. You’ll also review agentless and agent-based migration options and pick the appropriate approach for your business scenario.
Identify migration tools and services
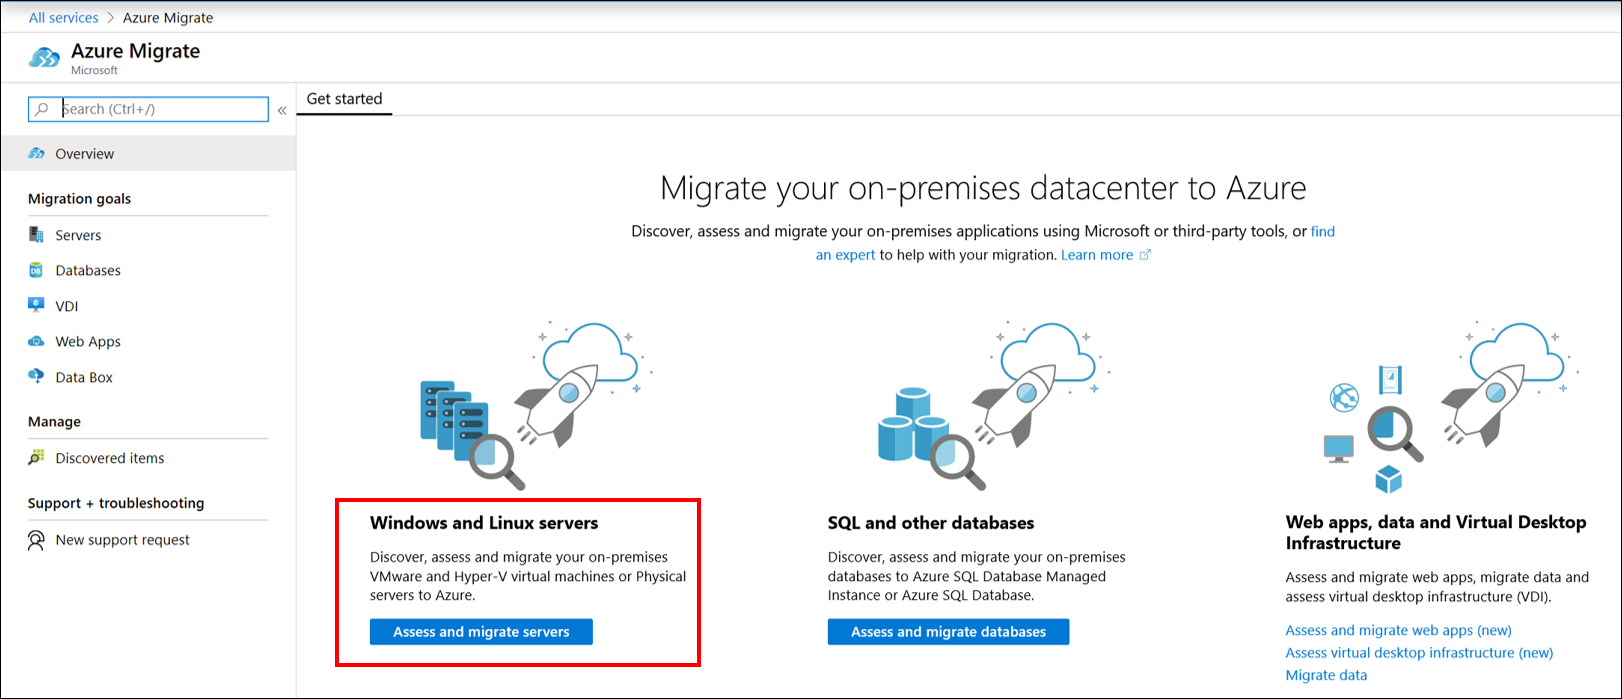
Several tools and services are available in Azure to help you migrate your resources to Azure. Many of these tools are consolidated in the Azure Migrate service which acts as a hub for migration tools, letting you centralize the different migration tasks in one place.
The choice of tool depends on the type of workload you plan to migrate. For database workloads, a tool like Azure Database Migration Service (Azure DMS) helps you manage the whole process of moving database workloads to Azure.
Plan a migration pilot
As part of your strategy, you plan to run an initial pilot by migrating a subset of the company’s corporate applications that are not considered business-critical. These applications currently run in the datacenter as Windows Server and Linux workloads hosted on Hyper-V. Subsequent phases of the migration will include workloads running on VMware.
In this unit, you’ll learn how Azure Migrate can help you accomplish the pilot migration. You could also use Azure Site Recovery to move VMs from on-premises to Azure. By comparing both options, you’ll understand which approach better meets your business scenario.
Azure Migrate
Azure Migrate provides an integrated hub of tools to assess and migrate on-premises infrastructure, applications, and data to Azure. Assume you have already used Azure Migrate to assess your environment. You can perform the migration using the Azure Migrate: Server Migration tool from the same Azure Migrate project. Within Azure Migrate there are native assessment and migration tools, available at no additional cost.
In this module, you'll focus on using the tools to assess and migrate workloads.
ISV tools
No single migration scenario is identical. Some migration projects can present unique challenges that require an extended migration solution apart from Azure’s native tools. Azure Migrate integrates with other Azure services, tools and independent software vendor (ISV) offerings through the same single unified portal interface. ISV offerings provide alternative options if your organization has specific challenges in a migration project, and you can access those options directly from Azure Migrate.
Migration or disaster recovery
While, you could also use Azure Site Recovery to migrate your workloads into Azure, Azure Migrate is designed and optimized for migration. The Azure Migrate hub centralizes all the tools and support required for different workloads, including physical and virtual servers, databases, and applications.
Azure Migrate lets you discover your resources and provides an assessment report that includes monthly cost estimates (compute and storage), and Azure VM readiness and performance-based right sizing.
Azure Site Recovery
Migrating your on-premises and public cloud workloads to the cloud is a specific business decision. Azure Site Recovery was designed as a service to be used for disaster recovery for on-premises and Azure VMs. It can replicate workloads automatically from a primary site to a secondary site if there’s an outage. By providing access to Azure as a secondary site, you can avoid the cost of building or leasing and maintaining another datacenter. VMs failover either from on-premises to Azure or from one Azure region to another. However, if you use Azure Site Recovery to migrate workloads to Azure, you cannot failback as a migration is a one-time operation.
Despite sharing some similarities in the data replication process, Azure Migrate and Azure Site Recovery serve different purposes. In this module, you’ll focus on using Azure Migrate to meet your company’s business need and migrate your workloads.
Compare agentless versus agent-based migration
When planning your migration, you’ll first decide between an agent-based or agentless migration approach. An agent-based approach involves installing a lightweight agent on each machine you want to replicate for migration. The agent coordinates replication data from each machine and prepares it to send to Azure. With agent-based replication, you don’t need to power down systems during migration, ensuring a continuous operating cycle.
Agent-based migration comes with a cost of managing and keeping agents up-to-date. Agentless migration provides a cheaper solution and avoids the management overhead. However, it requires systems to be offline during migration. Generally, if a system is business-critical, you should use an agent-based option. For non-critical or remote systems, short offline periods present no great problem, and you can use agentless migration.
Migrate using agentless
As you consider your choice of migration tool, keep in mind the initial goal of the pilot to migrate Hyper-V-based VMs to Azure. The Azure Migrate Server Migration tool provides agentless replication for on-premises Hyper-V VMs, using a migration workflow that's optimized for Hyper-V. You install a software agent only on Hyper-V hosts or cluster nodes. You don’t need to install anything on individual Hyper-V VMs.
The pilot requires you to migrate non-critical workloads running on Hyper-V to Azure. Therefore, you’ll use an agentless migration with Azure Migrate.
Assess VMware workloads
For subsequent phases of the migration, you’ll want to consider an agent-based approach as a significant number of the company’s business-critical workloads run on VMware.
Using an agent-based option also lets you obtain details about how your VMware workloads are related to each other and the dependencies between VMs. The agents will collect that data and you can then use Azure’s dependency visualization feature to understand those dependencies. Your stakeholders want to ensure the success of the entire migration and agent-based dependency visualization will give you a higher confidence level when you assess your more business-critical workloads.