Exercise - Remove header information
Companies that publish web APIs often need to carefully control the HTTP headers that their APIs return, preferably without rewriting the API source code.
The government has decided to share census data with its agencies through RESTful APIs. The critical requirements are that the data is shared securely and can be easily amended to facilitate quick integration. As lead developer, you need to create an API gateway. You use the gateway to publish a RESTful Census API that exposes an OpenAPI endpoint using modern security standards.
Here, you will:
- Publish a RESTful Census API.
- Deploy an API Management gateway.
- Expose the Census API through the gateway endpoint.
- Remove a header from the response.
Important
You need your own Azure subscription to run this exercise, and you might incur charges. If you don't already have an Azure subscription, create a free account before you begin.
Deploy the Census web API
You've developed a .NET Core app that returns sensitive census information. The app includes Swashbuckle to generate OpenAPI documentation.
To save time, let's start by running a script to host our RESTful API in Azure. The script performs the following steps:
- It creates an Azure App Service plan in the free tier.
- It creates a web API within an Azure App Service, which is configured for Git deployment from a local repo.
- It sets account-level deployment credentials for our app.
- It configures Git locally.
- It deploys our web API to our App Service instance.
Sign in to the Azure portal.
In the Azure taskbar, select the Cloud Shell icon to open Azure Cloud Shell.
To clone the repo that contains the source for our app, run the following
git clonecommand in Cloud Shell:git clone https://github.com/MicrosoftDocs/mslearn-protect-apis-on-api-management.gitTo navigate into the repo folder locally, run the following command:
cd mslearn-protect-apis-on-api-managementAs its name suggests, setup.sh is the script you run to create our test API. This script generates a public web app that exposes an OpenAPI interface:
bash setup.shThe script takes about a minute to run. When the script finishes, it displays two URLs that you can use to test the app deployment. Observe that during deployment, all dependencies needed for our app to run are automatically installed on the remote App Service.
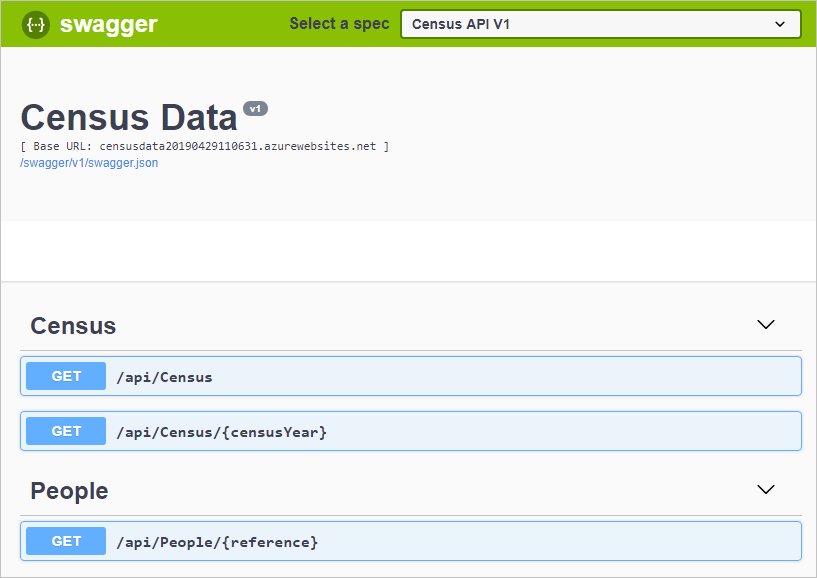
To test that our app deployed correctly, copy and paste the first URL from Cloud Shell output into your browser. The browser should display the Swagger UI for our app and declare the following RESTful endpoints:
- api/census, which returns a census and associated people
- api/census/{censusYear}, which returns a census and associated people for the specified year
- api/people/{reference}, which returns detailed information about a specific person
Finally, copy the last URL from Cloud Shell output. This URL is the swagger JSON URL, which you need later in this exercise.
Deploy an API gateway
The next step in this exercise is to create an API gateway in the Azure portal. In the next section, you'll use this gateway to publish your API:
Sign in to the Azure portal .
On the Azure portal menu or from the Home page, select Create a resource. The Create a resource pane appears.
In the left menu pane, select Integration, and then enter API Management in the Search services and marketplace search box. Select the API Management card in the results, and select Create to open the Create API Management service pane.
On the Basics tab, enter the following values for each setting.
Setting Value Project details Subscription Select your subscription Resource group Select a new or existing resource group. A resource group is a logical container that holds related resources for an Azure solution. Instance details Region Select an available region. Resource name Enter apim-CensusData<random number>, replacingrandom numberwith your own series of numbers to ensure that the name is globally unique.Organization name Enter Government-Census. The name of your organization for use in the developer portal and email notifications. (The developer portal and notifications aren't available in all service tiers.)Administrator email The email address to receive all system notifications. Pricing tier Pricing tier Select Consumption (99.95% SLA)from the dropdown list.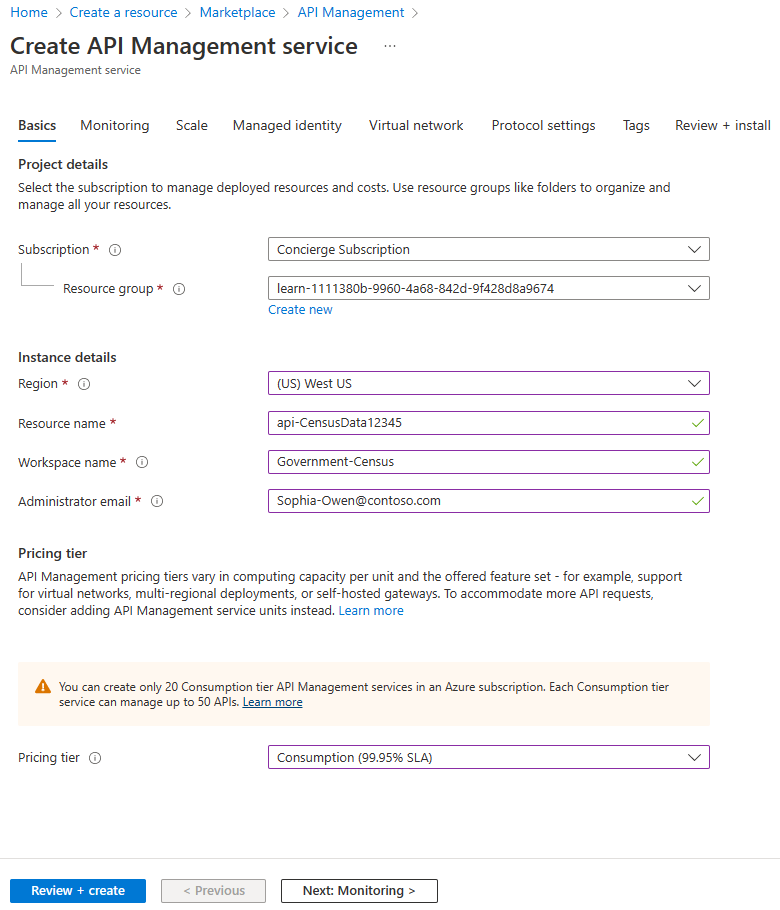
Note
The Consumption tier provides fast deployment for testing and has a pay-for-use pricing model. The overall API management experience is similar to the other pricing tiers.
Select Review + create. After validation passes, select Create. Deployment may take several minutes. When the deployment has completed, you'll see the API Management instance listed in the Azure resources. Select Go to resource to view the pane for your API Management service.
Import the API
Now, import the Census API into the API Management gateway:
In the left menu pane of your API Management instance, under APIs, selects APIs, and then + Add API.
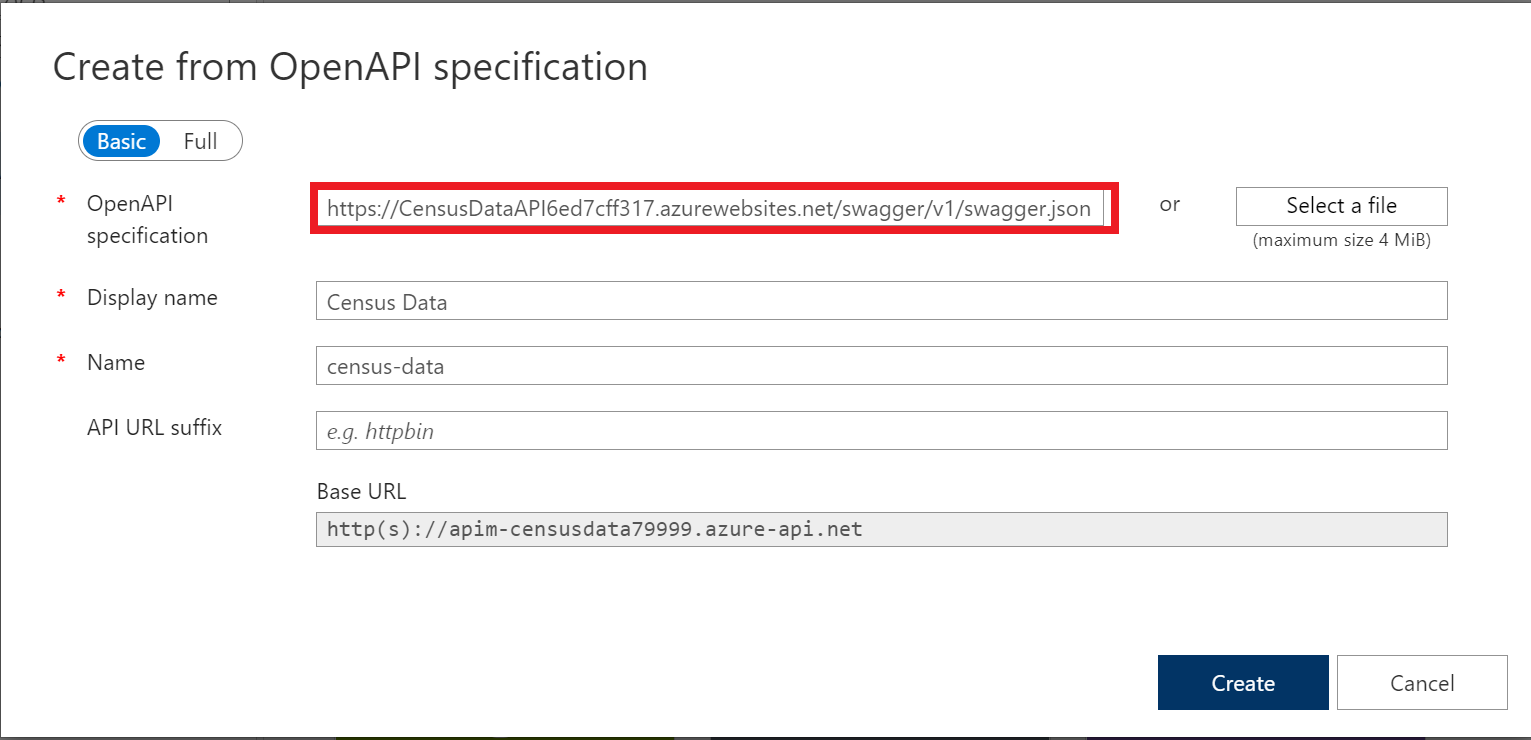
Under Create from definition, select OpenAPI. The Create from OpenAPI specification dialog box appears.
In the OpenAPI specification field, paste the swagger JSON URL that you saved earlier in the exercise.
Note
You will notice that, when you tab out of the box, some of the other fields are populated for you. This is because you have used OpenAPI which specifies most of the required connection details.
Leave the other settings at their defaults, and then select Create.
Test the API
Let's see what data is returned in from the API by default:
In the Azure portal menu or from the Home page, select All Resources, and then select your API Management instance.
In the left menu pane, Under APIs, select APIs, and in the middle pane, select Census Data.
In the top menu bar, select the Test tab, and then select the GetLatestCensus operation.
Select Send.
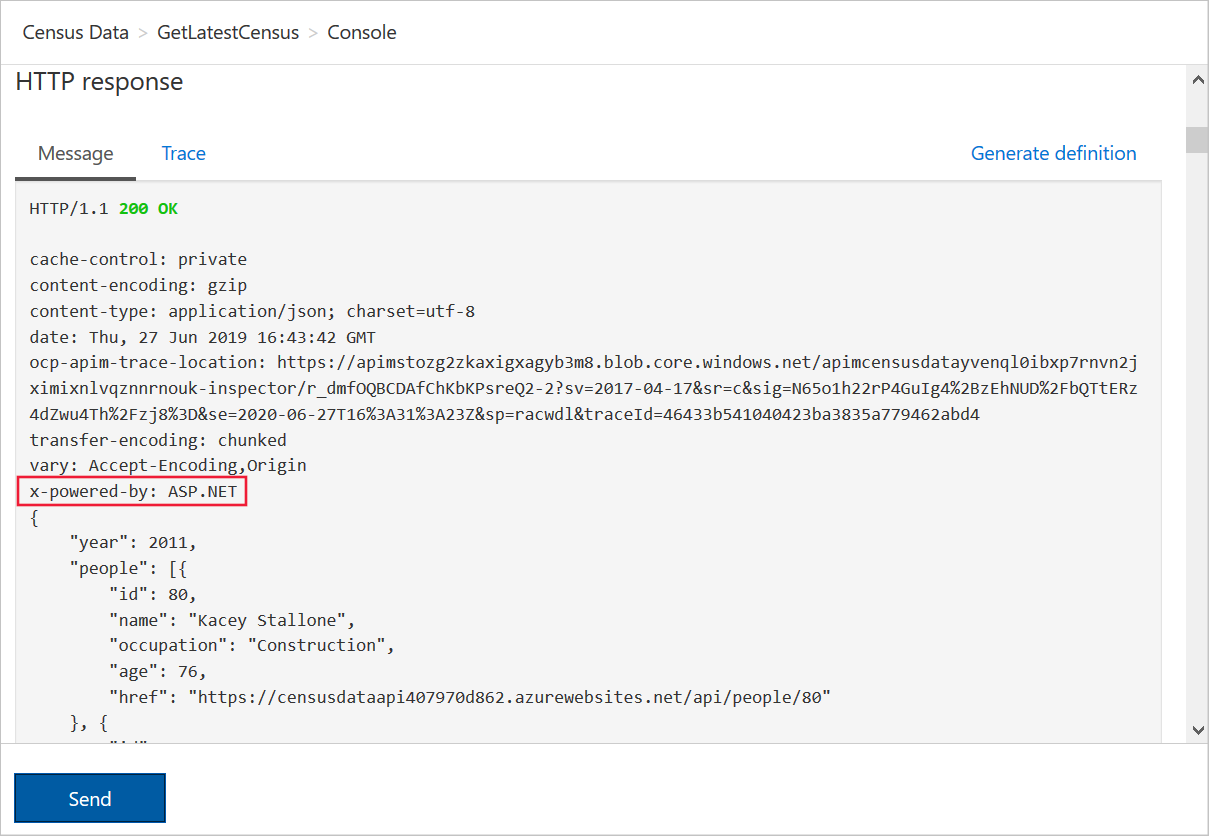
Notice that x-powered-by appears in the response, and shows that the framework is ASP.NET.
Remove headers
Now we add a policy to remove the x-powered-by header from responses sent by the API:
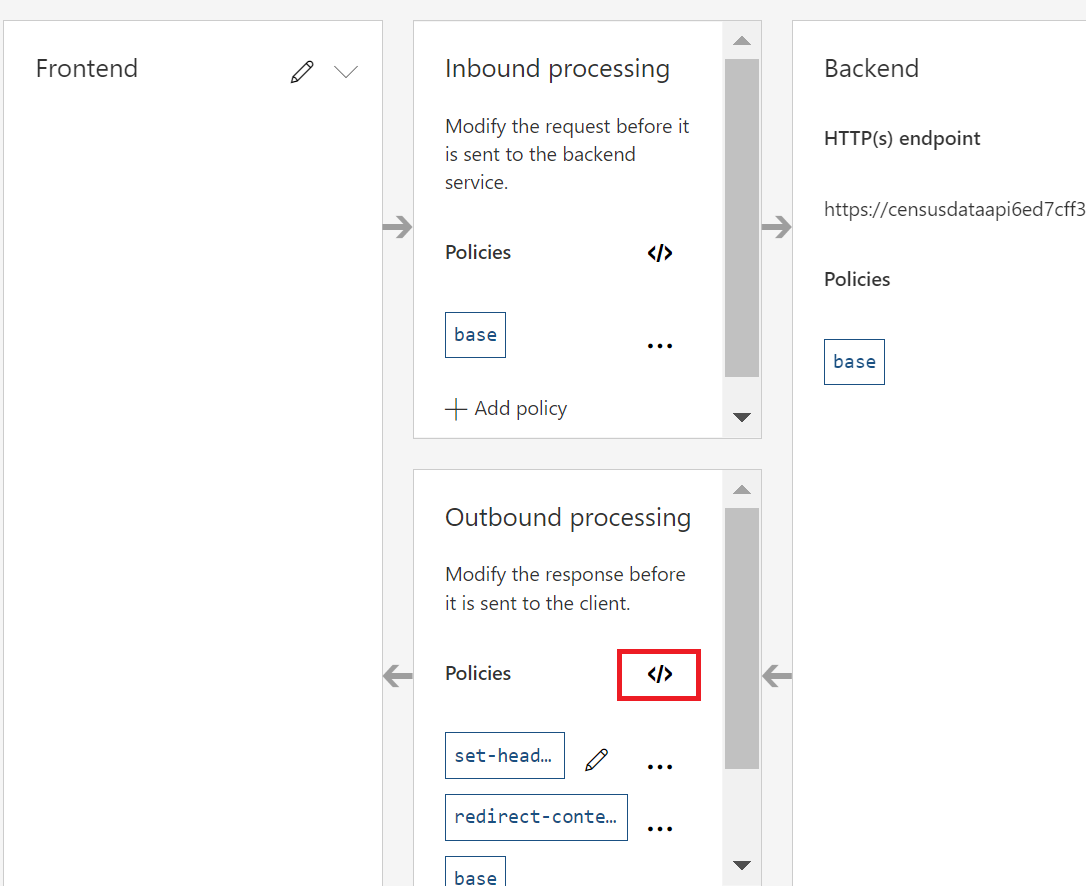
Select Census Data again, and in the top menu bar, select the Design tab.
Select All operations, and in the Outbound processing section, select the </> icon. The policy XML editor appears.
Replace the default
<outbound>tag with this code:<outbound> <set-header name="x-powered-by" exists-action="delete" /> <base /> </outbound>Select Save.
Test the removal of headers
You should now be able to run a test to demonstrate that the headers are removed:
Select Census Data again, and in the top menu bar, select the Test tab.
Select the GetLatestCensus operation, and then select Send.

The x-powered-by header shouldn't be in the HTTP response.