Manage user access to Education Insights
This document provides the steps required to manage user access to Education Insights in Microsoft Teams.
You need to provide permissions for education leaders, district leaders, school principals, head teachers, counselors, heads of learning areas, program directors, social workers, and psychologists. Educators are automatically given permission when they own a class team.
To provide organization-level Insights, you must import data from the Student Information System (SIS) so that Insights has the hierarchical structure of the educational system mapped correctly.
Note
Only Global Administrator can manage user access to Insights.
Tip
We recommend that you enable Insights for all your education leaders so that they have the data to understand each school, and the ability to quickly identify problems and provide support to their educators. Even if you're running a pilot, it may still be helpful to keep Insights enabled for all education leaders, but only target communications to the pilot group of users.
Manage permissions
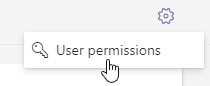
- Open the Insights app, click Settings, and select User permissions
Note
When you provide permission for an organizational level, the user can see all the org units below it.
Only provide permission to those education leaders that need them and only to the organizational units they are responsible for. If you are unsure whether user permission for a specific organization is required, consult your institution's privacy subject matter experts, such as legal or HR personnel.
Important
After assigning permissions for the first time, users will be able to view the data within the app only if at least two users have accessed the app. This requirement helps to ensure that the time zone for the data is configured correctly and the data is displayed accurately for all users. If users are experiencing issues accessing the data after permissions have been granted, check if at least two users have accessed the app.
Role-based permissions
If you use SDS V2.1 file format or SDS V2 file format, you can import all roles and the full hierarchy of schools within the education system. This complete mapping enables you to assign permissions to roles.
Note
When a user is assigned a role, they automatically receive the correct permissions to see the data relevant to them.
If a user is no longer in a role, their permission for that role is automatically revoked (though they may still have individual permissions).
If required, click the Role-based permissions tab.
You'll see a list of the roles in your educational organization, the level in that hierarchy for each one, how many users are assigned that role, and the role's permission level.
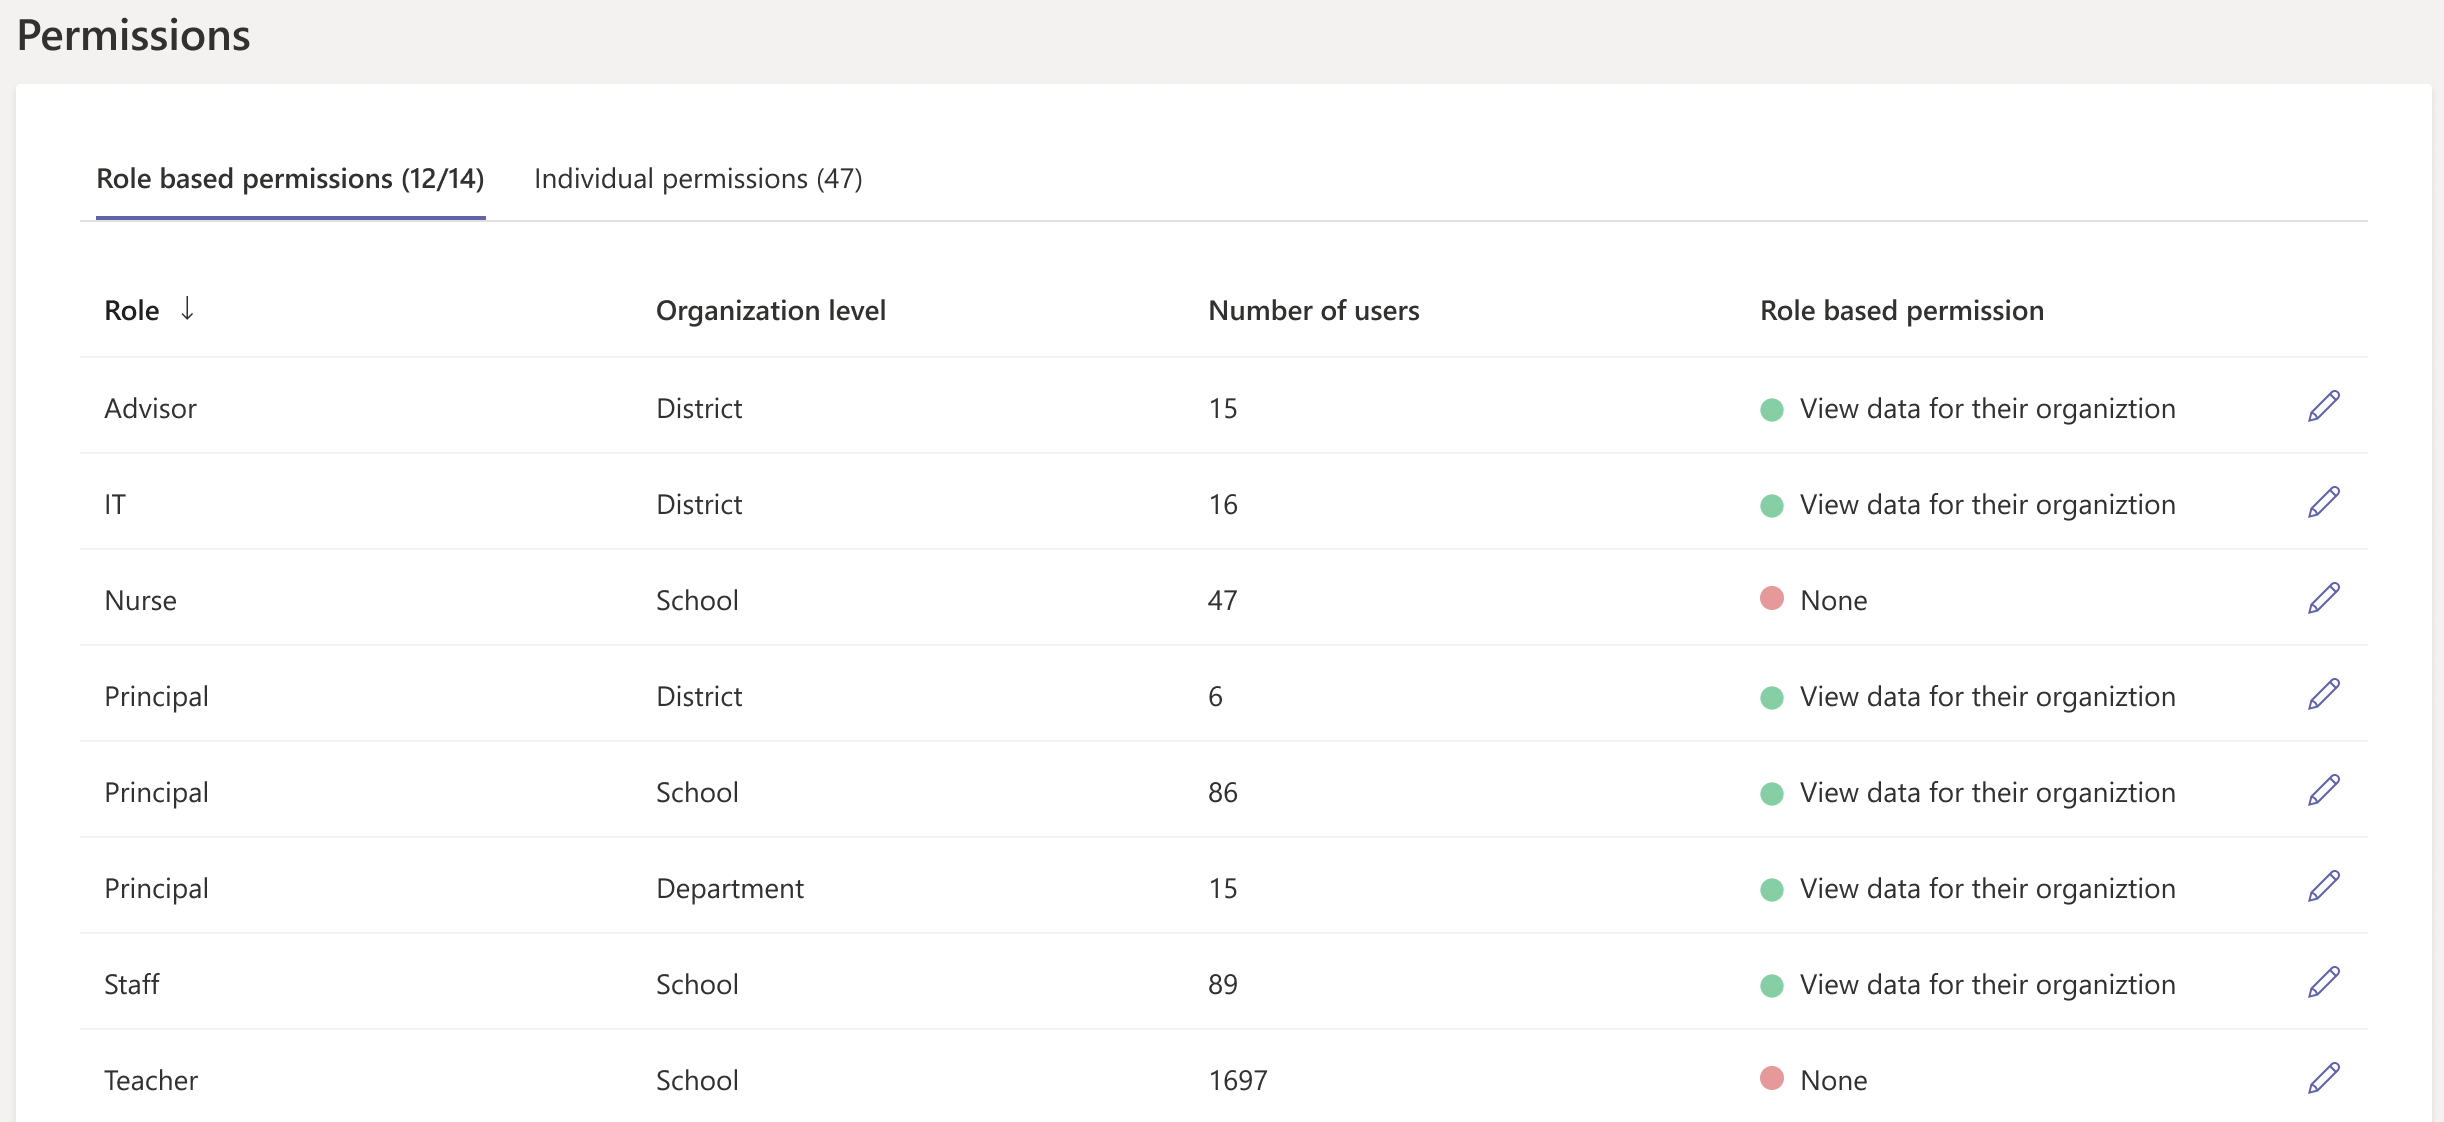
If there is a role at more than one org level, that role appears multiple times, once for each level. In the screenshot, we have principals at the school, district and department level, so there are three lines for 'principal'.
For each role, click the pencil icon to select the permission level. The default is the role has no permission to see Insights.
Select the permission level – View data for their organization or None.
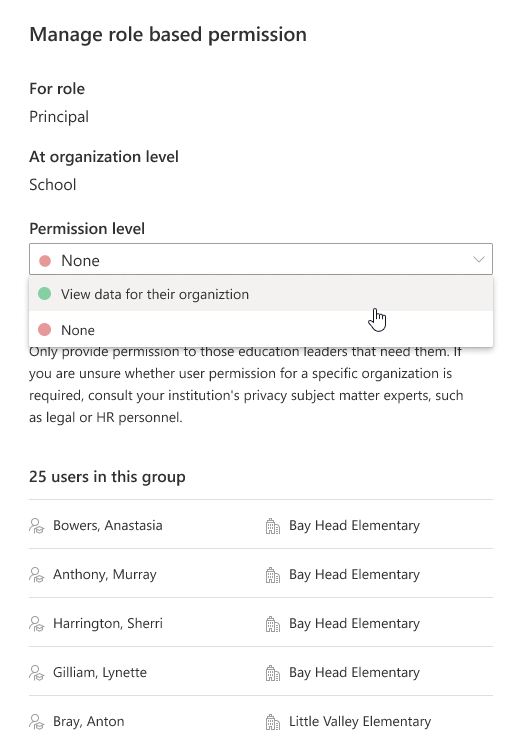
If you see a user on the list who needs a more nuanced permission level, adjust their role and / or organization in the imported data from your SIS and grant them individual permissions (if needed).
Click Save changes.
This permission level is now automatically assigned to any new user with this role and org level. The user will see the data for all org units at their level of the hierarchy and under it.
Individual permissions
Use individual permissions to adjust the permission for a user or to assign permissions for each user if you have not used SDS V2 to import SIS data for the organization.
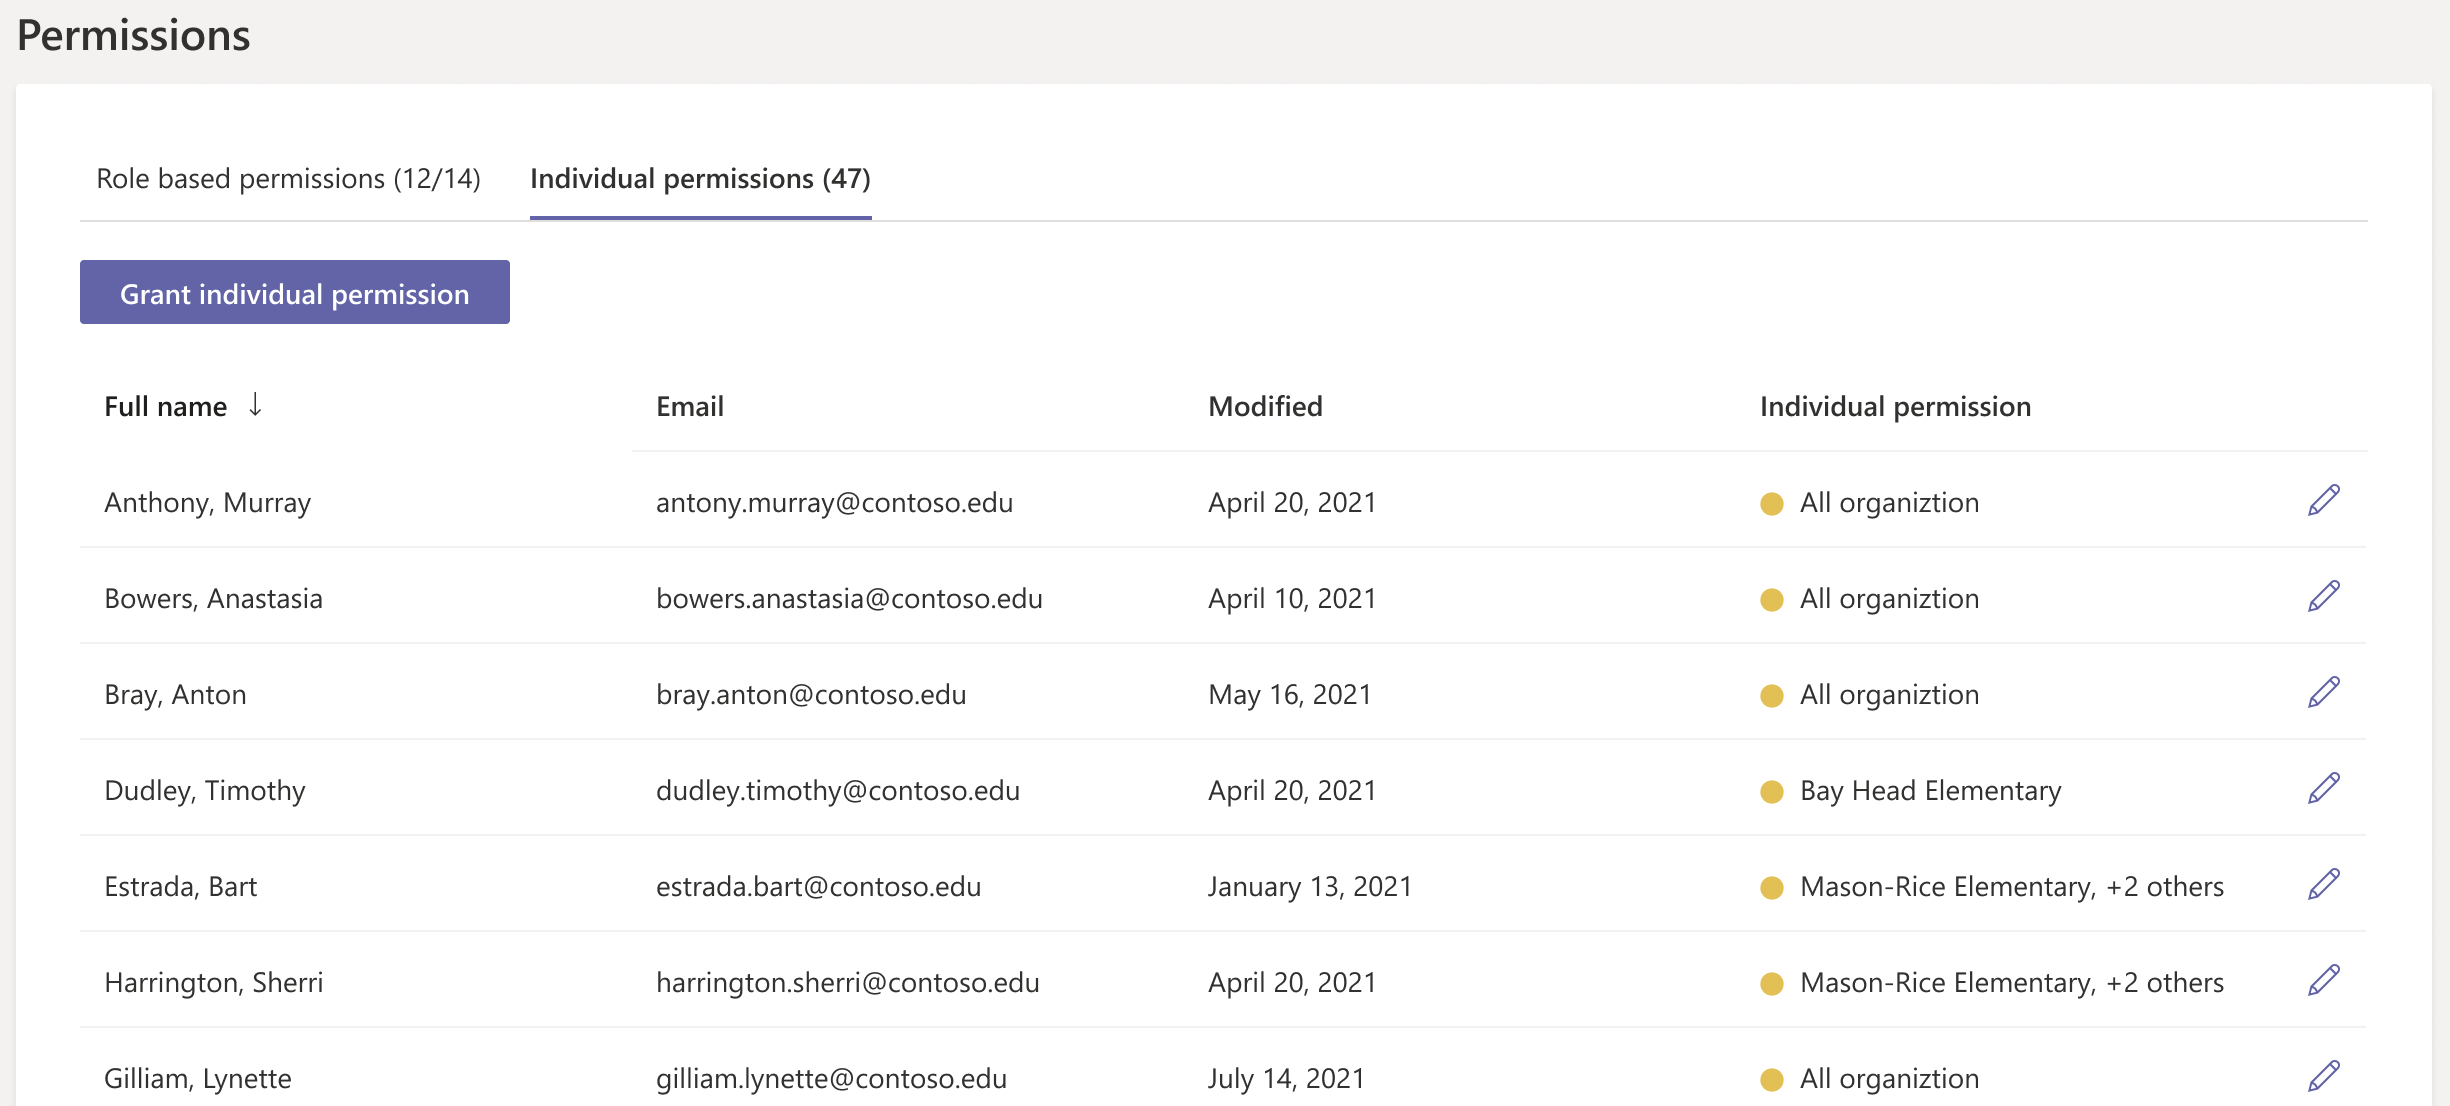
Click the Individual permissions tab.
You'll see the users in your educational organization granted individual permission.
Grant individual permission to a user
- Click Grant individual permission at the top left of the screen.
- Enter the username or email address of each user.
- Select the permission level:
- All means the user sees all the org units at all levels. This is very rarely used.
- Specific organization means the user sees the selected org unit, and all the org units below it. Start typing and select the org unit from the list.
- Click Grant permission to save.
Change the individual permission of a user
For the relevant user, click the pencil icon to select the individual permission level.
Select the permission level:
- All means the user sees all the org units at all levels. This is very rarely used.
- Specific organization means the user sees the selected org unit, and all the org units below it. Start typing and select the org unit from the list.
- None means that the user only sees the org units automatically assigned by their role (if any).
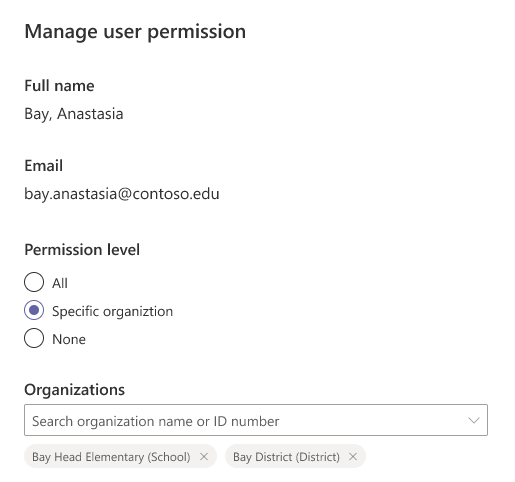
Click Save changes to save.
Feedback
Coming soon: Throughout 2024 we will be phasing out GitHub Issues as the feedback mechanism for content and replacing it with a new feedback system. For more information see: https://aka.ms/ContentUserFeedback.
Submit and view feedback for