Quickstart: Create an Azure Databricks workspace in your own Virtual Network
The default deployment of Azure Databricks creates a new virtual network that is managed by Databricks. This quickstart shows how to create an Azure Databricks workspace in your own virtual network instead. You also create an Apache Spark cluster within that workspace.
For more information about why you might choose to create an Azure Databricks workspace in your own virtual network, see Deploy Azure Databricks in your Azure Virtual Network (VNet Injection).
Prerequisites
If you don't have an Azure subscription, create a free account. This tutorial cannot be carried out using an Azure Free Trial Subscription. If you have a free account, go to your profile and change your subscription to pay-as-you-go. For more information, see Azure free account. Then, remove the spending limit, and request a quota increase for vCPUs in your region. When you create your Azure Databricks workspace, you can select the Trial (Premium - 14-Days Free DBUs) pricing tier to give the workspace access to free Premium Azure Databricks DBUs for 14 days.
You must be an Azure Contributor or Owner, or the Microsoft.ManagedIdentity resource provider must be registered in your subscription. For instructions, follow Register resource provider.
Sign in to the Azure portal
Sign in to the Azure portal.
Note
If you want to create an Azure Databricks workspace in the Azure Commercial Cloud that holds US Government compliance certifications like FedRAMP High, please reach out to your Microsoft or Databricks account team to gain access to this experience.
Create a virtual network
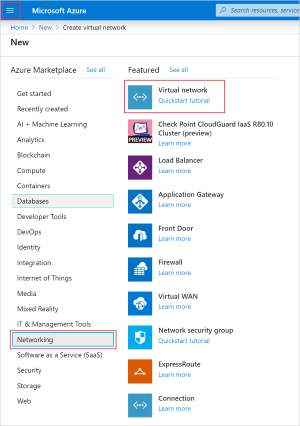
From the Azure portal menu, select Create a resource. Then select Networking > Virtual network.
Under Create virtual network, apply the following settings:
Setting Suggested value Description Subscription <Your subscription> Select the Azure subscription that you want to use. Resource group databricks-quickstart Select Create New and enter a new resource group name for your account. Name databricks-quickstart Select a name for your virtual network. Region <Select the region that is closest to your users> Select a geographic location where you can host your virtual network. Use the location that's closest to your users. 
Select Next: IP Addresses > and apply the following settings. Then select Review + create.
Setting Suggested value Description IPv4 address space 10.2.0.0/16 The virtual network's address range in CIDR notation. The CIDR range must be between /16 and /24 Subnet name default Select a name for the default subnet in your virtual network. Subnet Address range 10.2.0.0/24 The subnet's address range in CIDR notation. It must be contained by the address space of the virtual network. The address range of a subnet which is in use can't be edited. 
On the Review + create tab, select Create to deploy the virtual network. Once the deployment is complete, navigate to your virtual network and select Address space under Settings. In the box that says Add additional address range, insert
10.179.0.0/16and select Save.
Create an Azure Databricks workspace
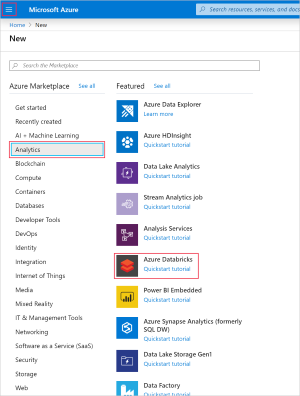
From the Azure portal menu, select Create a resource. Then select Analytics > Databricks.
Under Azure Databricks Service, apply the following settings:
Setting Suggested value Description Workspace name databricks-quickstart Select a name for your Azure Databricks workspace. Subscription <Your subscription> Select the Azure subscription that you want to use. Resource group databricks-quickstart Select the same resource group you used for the virtual network. Location <Select the region that is closest to your users> Choose the same location as your virtual network. Pricing Tier Choose between Standard or Premium. For more information on pricing tiers, see the Databricks pricing page. 
Once you've finished entering settings on the Basics page, select Next: Networking > and apply the following settings:
Setting Suggested value Description Deploy Azure Databricks workspace in your Virtual Network (VNet) Yes This setting allows you to deploy an Azure Databricks workspace in your virtual network. Virtual Network databricks-quickstart Select the virtual network you created in the previous section. Public Subnet Name public-subnet Use the default public subnet name. Public Subnet CIDR Range 10.179.64.0/18 Use a CIDR range up to and including /26. Private Subnet Name private-subnet Use the default private subnet name. Private Subnet CIDR Range 10.179.0.0/18 Use a CIDR range up to and including /26. 
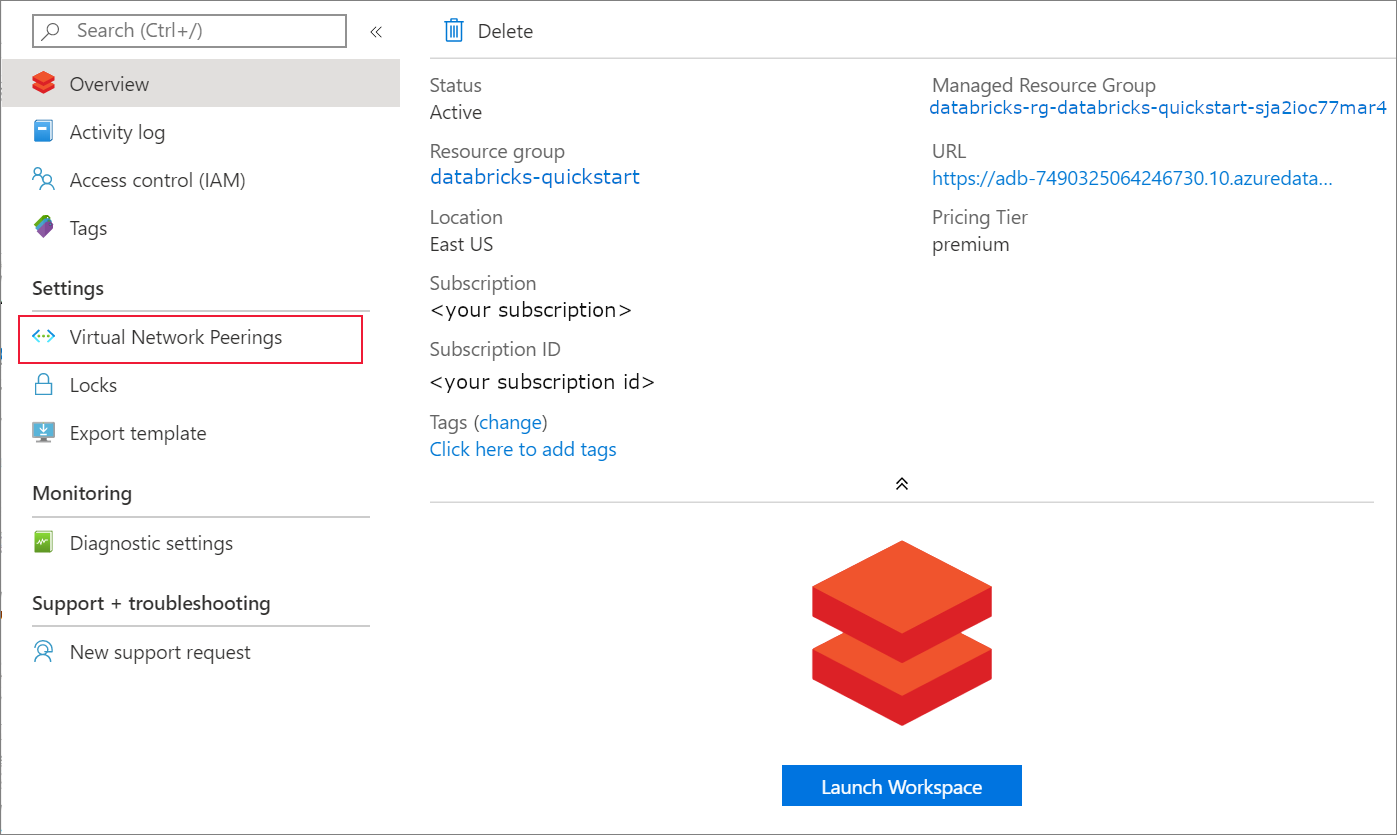
Once the deployment is complete, navigate to the Azure Databricks resource. Notice that virtual network peering is disabled. Also notice the resource group and managed resource group in the overview page.
The managed resource group is not modifiable, and it is not used to create virtual machines. You can only create virtual machines in the resource group you manage.

When a workspace deployment fails, the workspace is still created in a failed state. Delete the failed workspace and create a new workspace that resolves the deployment errors. When you delete the failed workspace, the managed resource group and any successfully deployed resources are also deleted.
Create a cluster
Note
To use a free account to create the Azure Databricks cluster, before creating the cluster, go to your profile and change your subscription to pay-as-you-go. For more information, see Azure free account.
Return to your Azure Databricks service and select Launch Workspace on the Overview page.
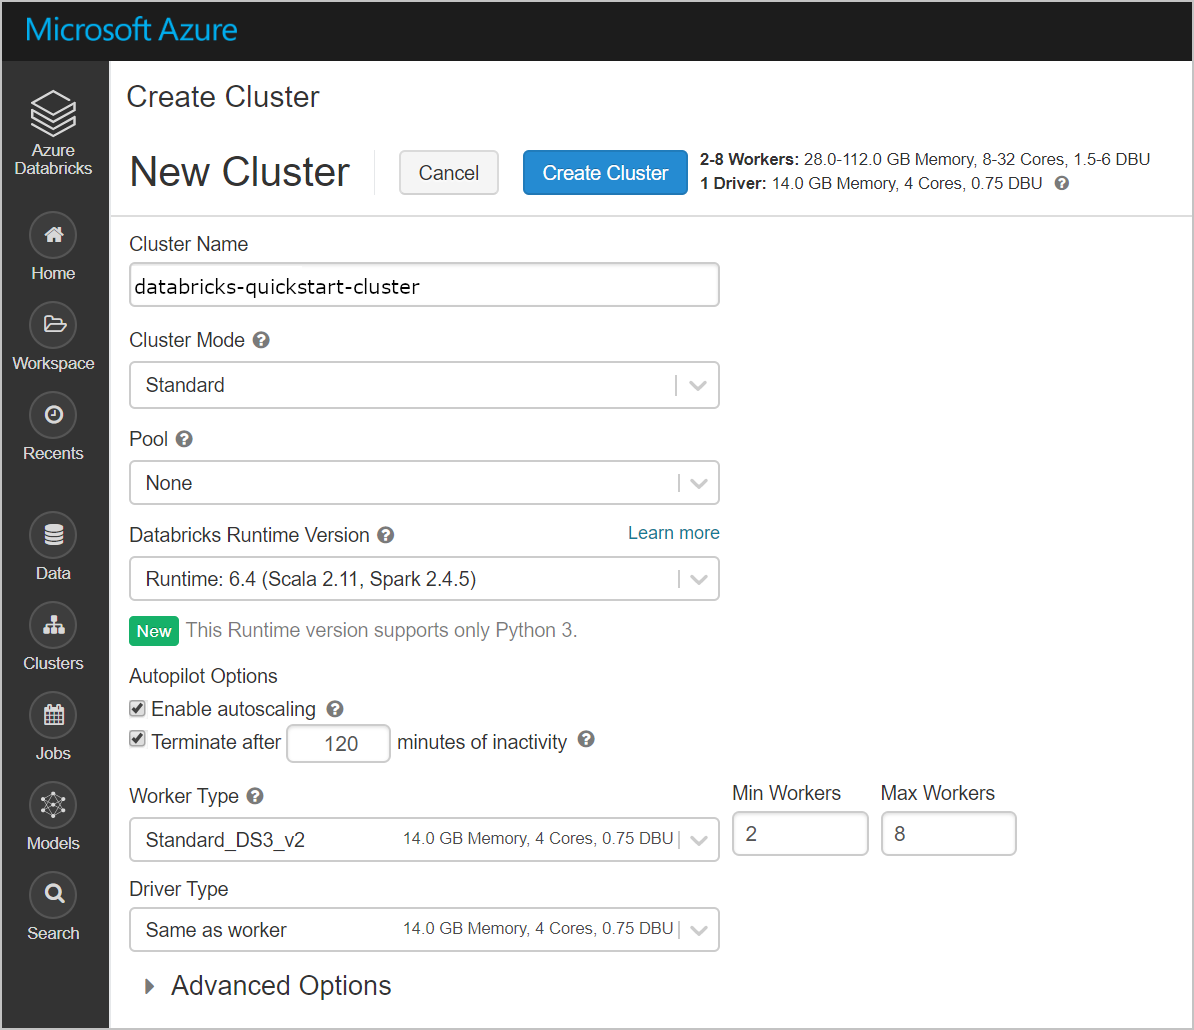
Select Clusters > + Create Cluster. Then create a cluster name, like databricks-quickstart-cluster, and accept the remaining default settings. Select Create Cluster.
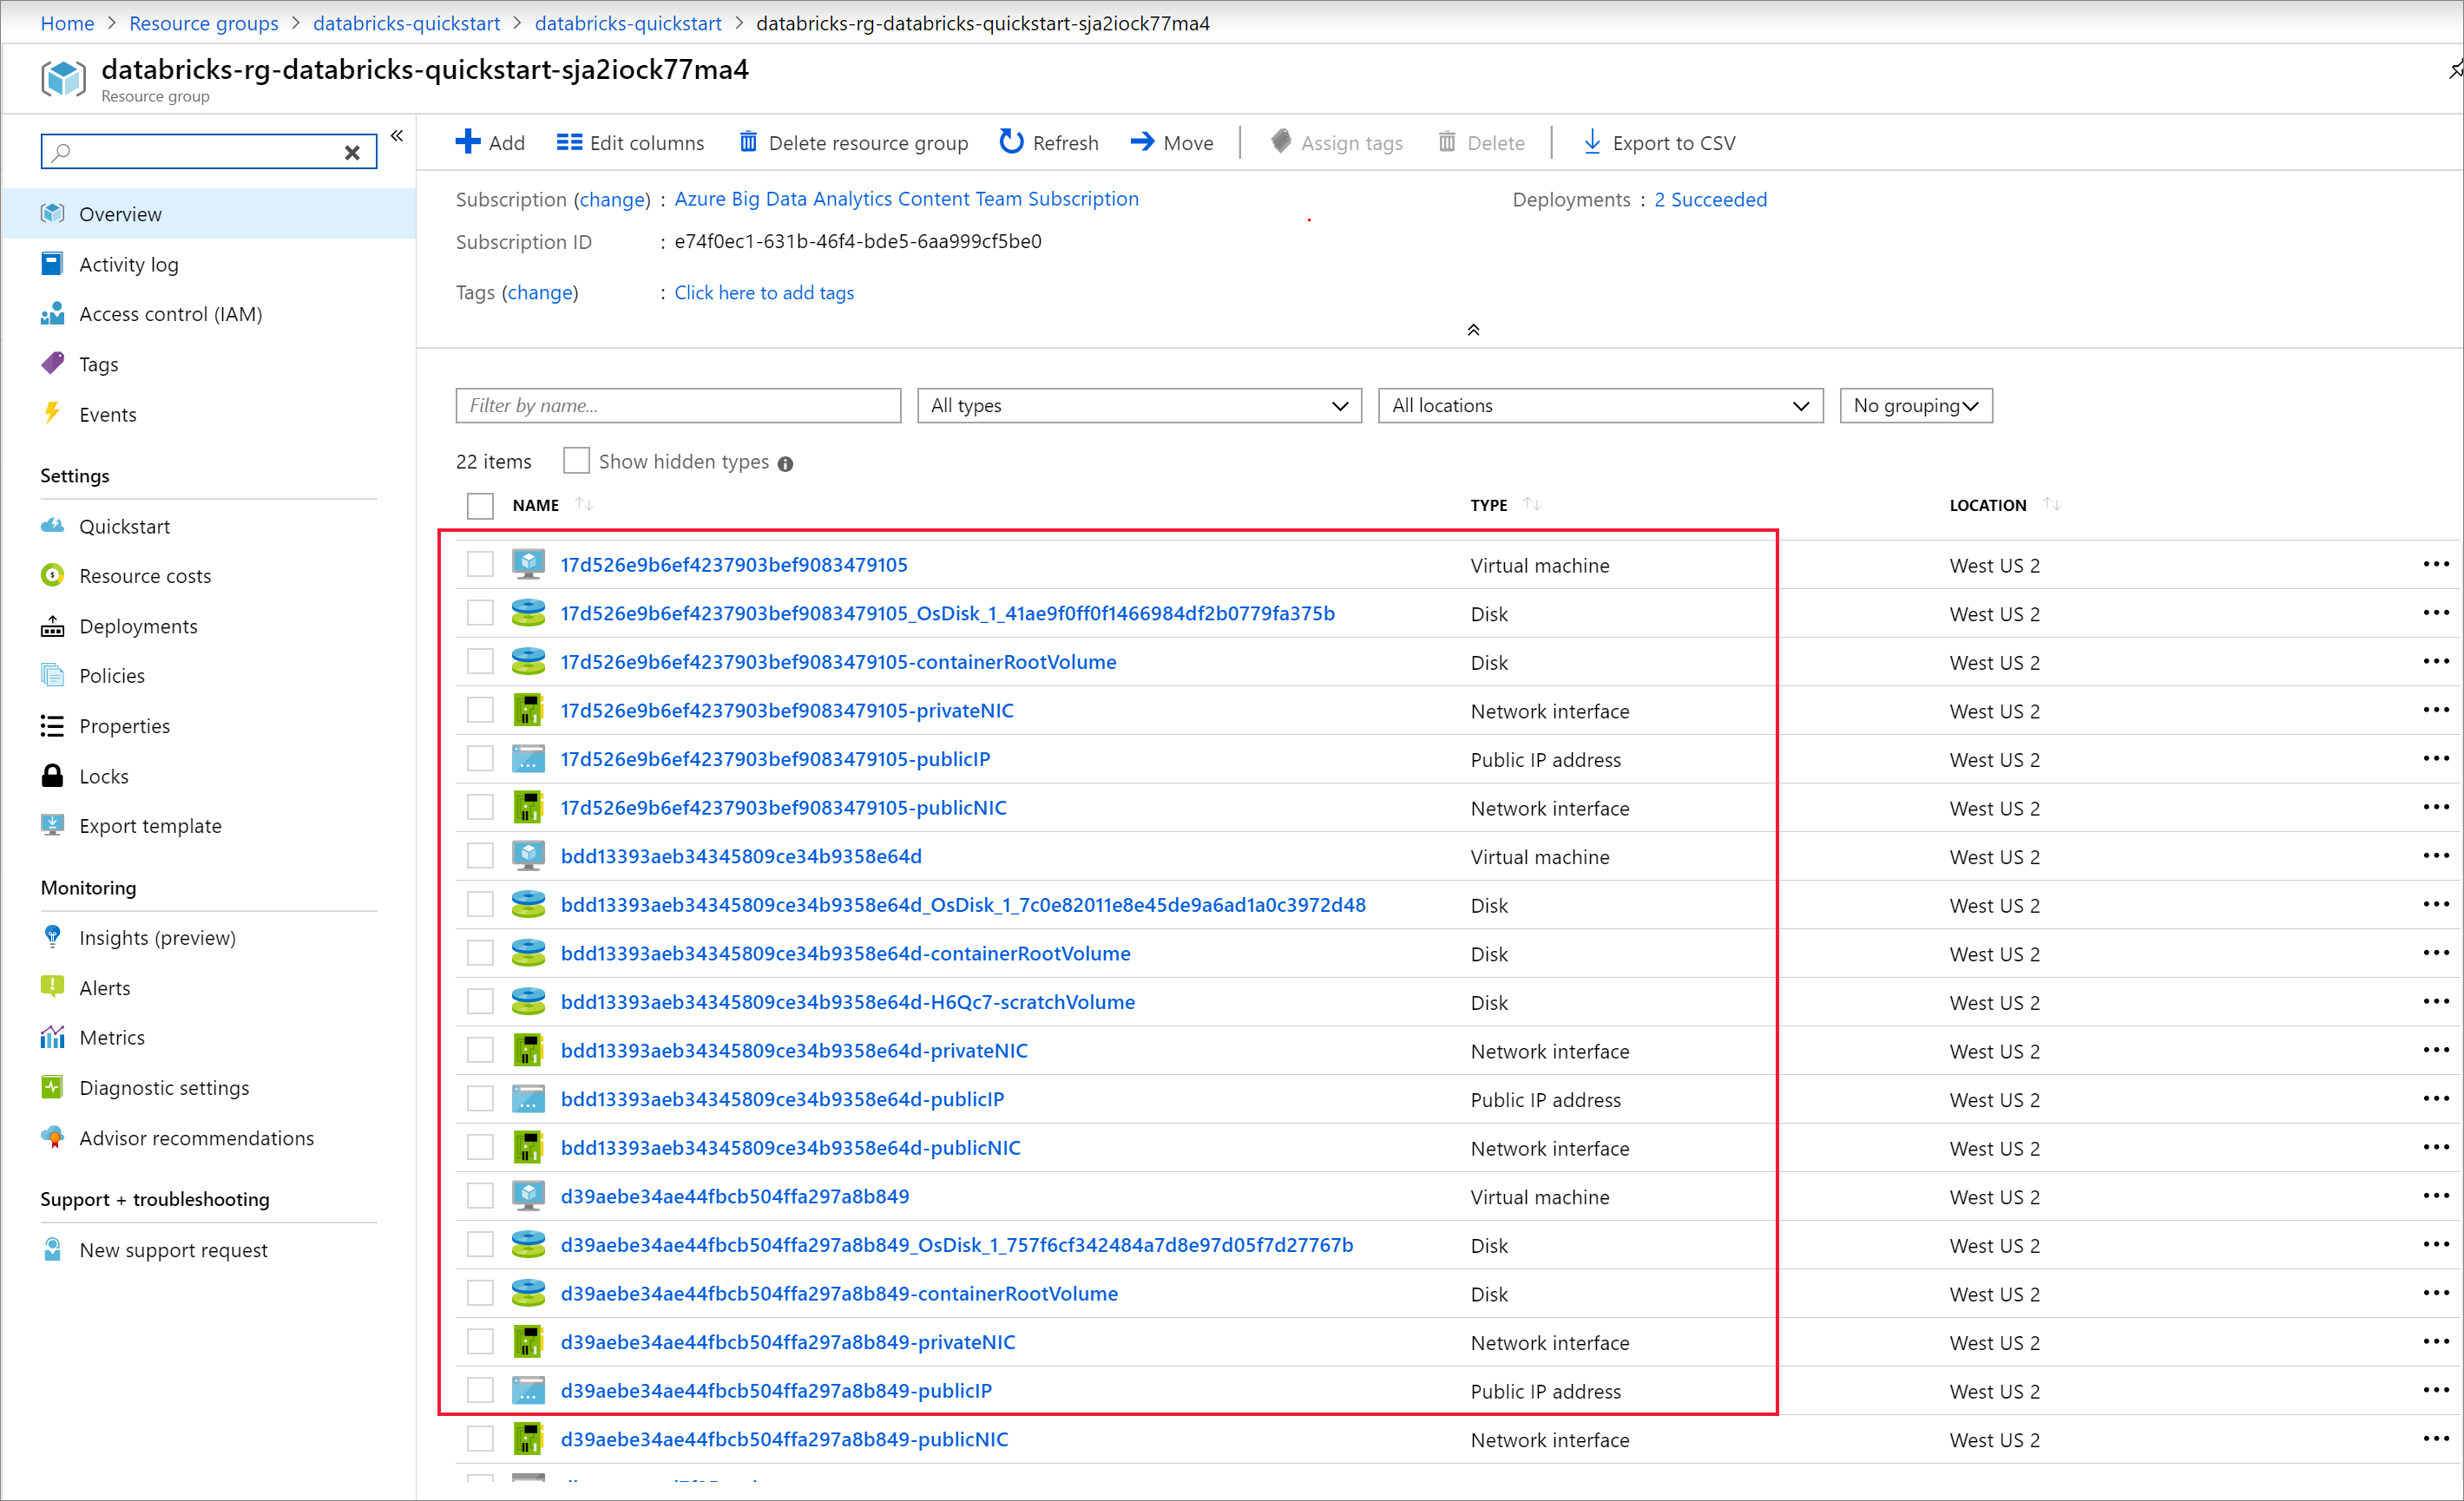
Once the cluster is running, return to the managed resource group in the Azure portal. Notice the new virtual machines, disks, IP Address, and network interfaces. A network interface is created in each of the public and private subnets with IP addresses.
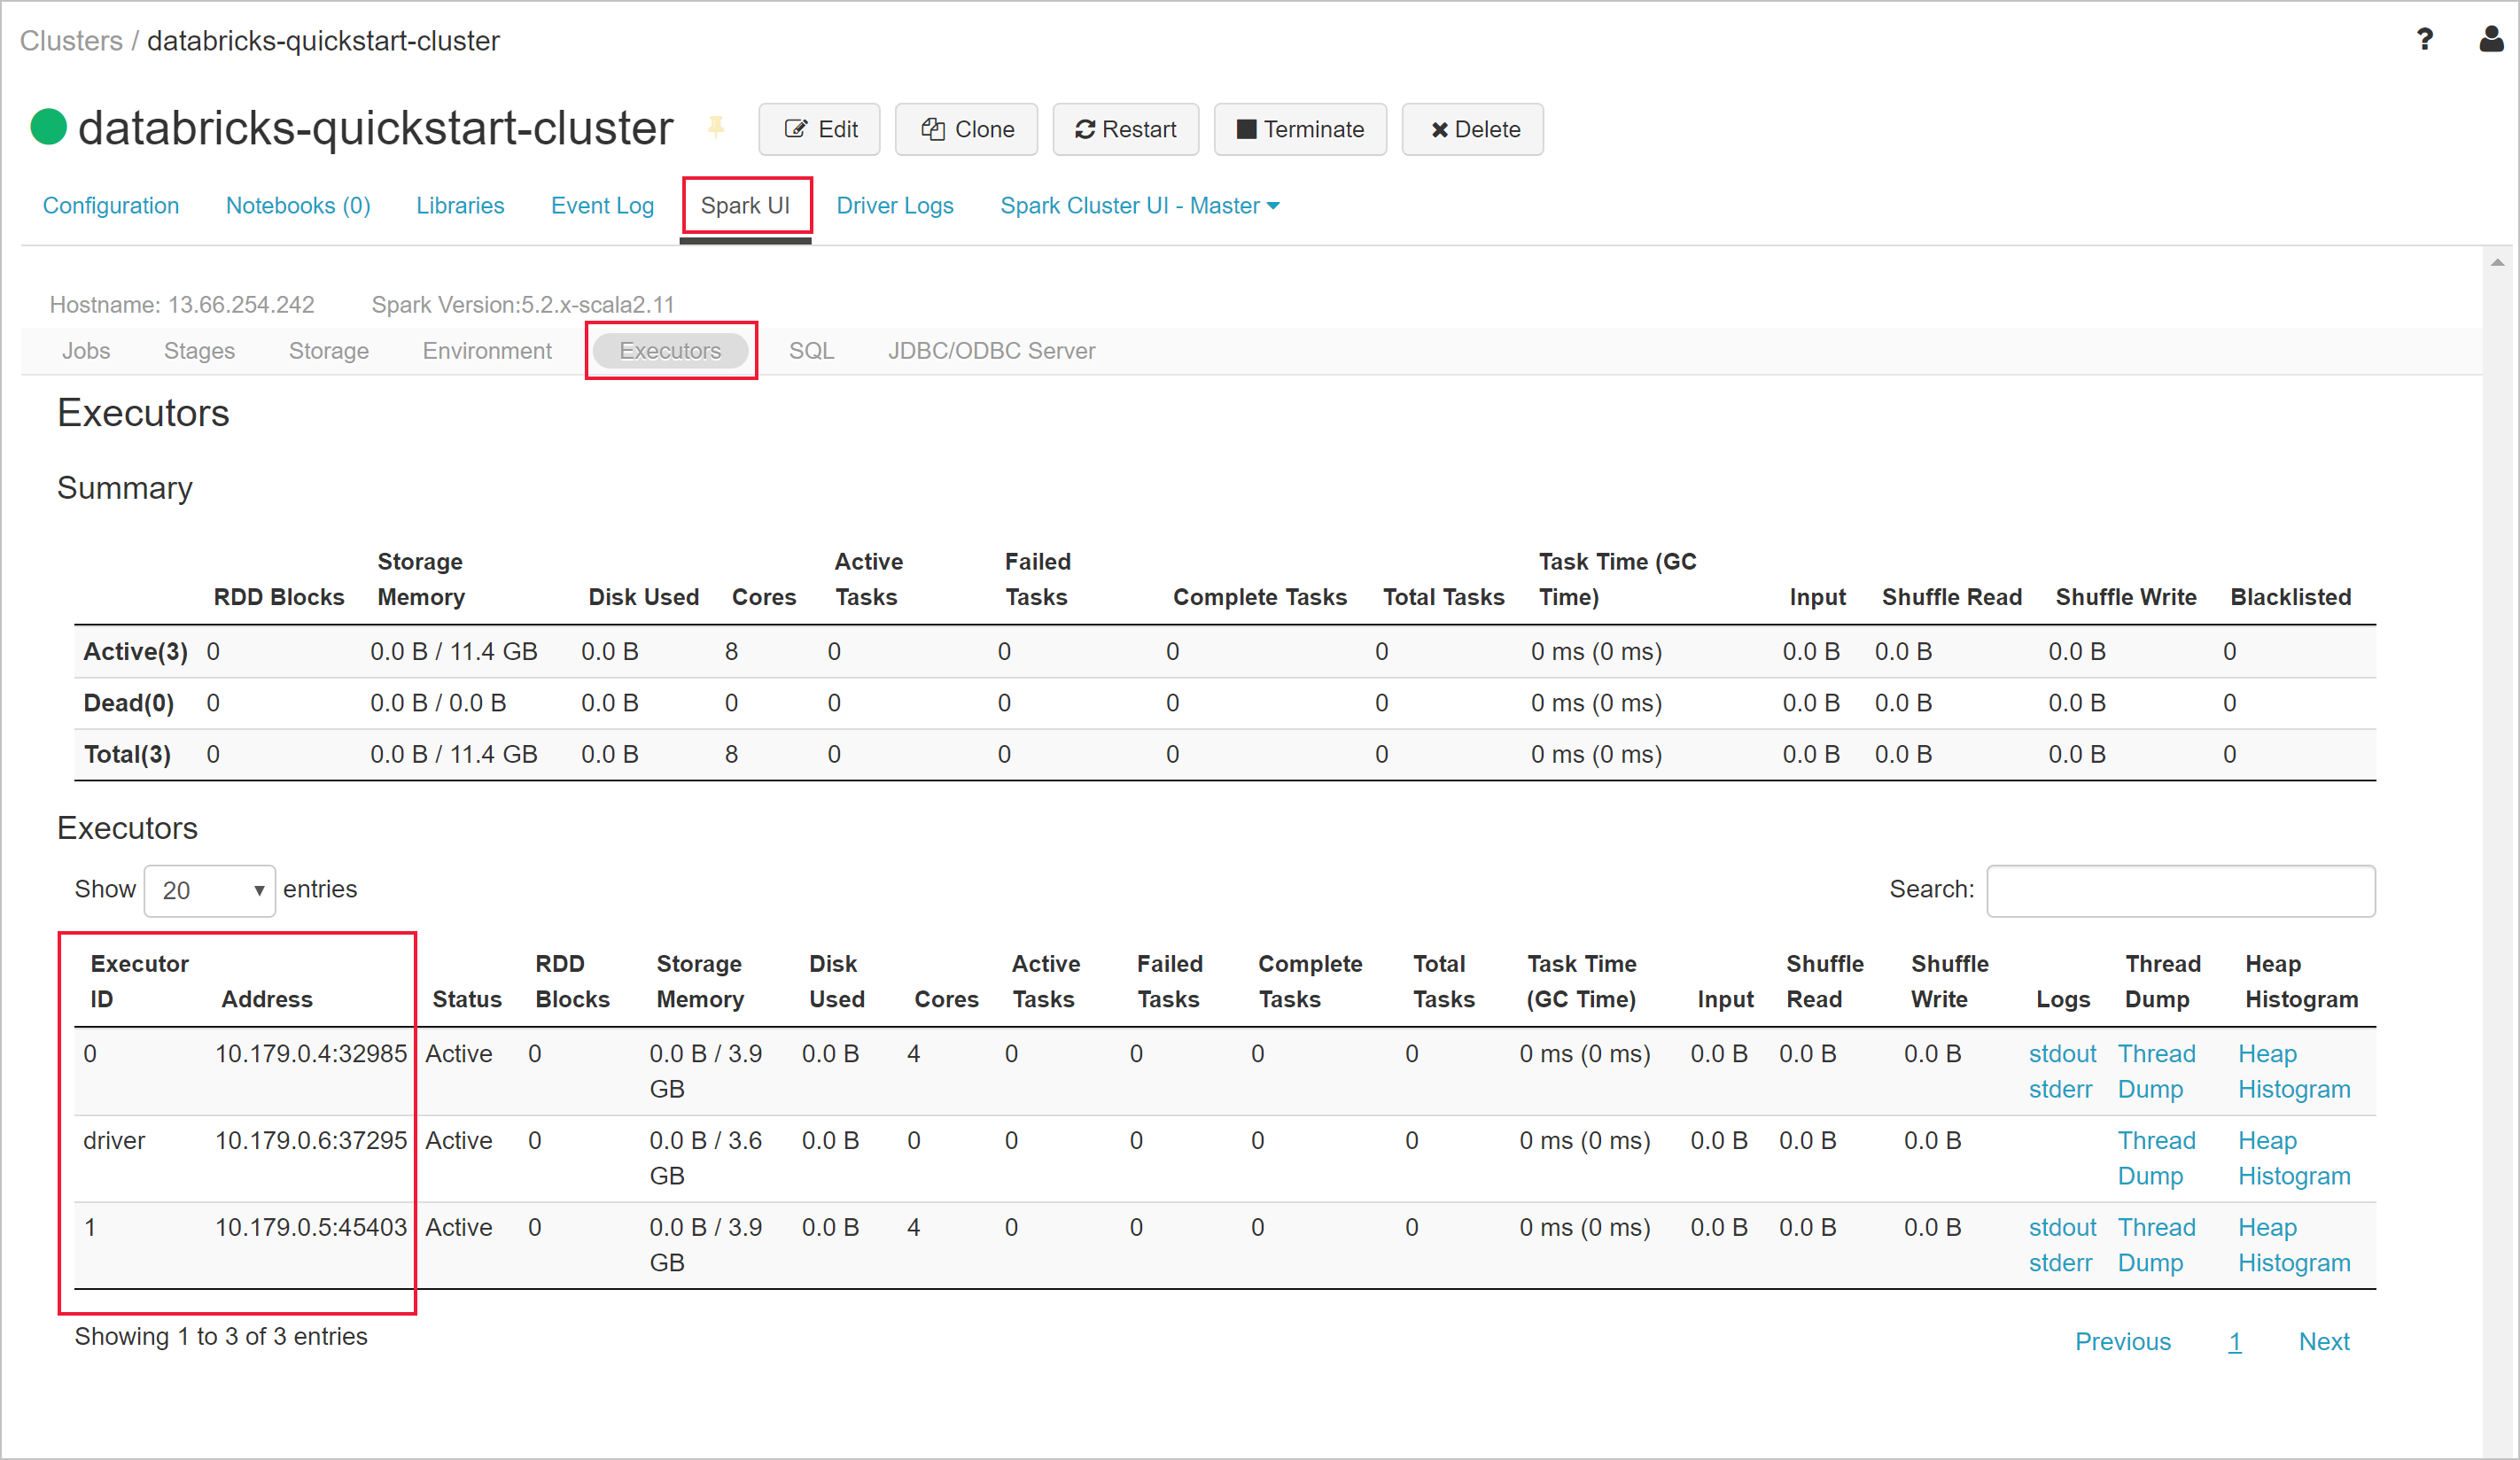
Return to your Azure Databricks workspace and select the cluster you created. Then navigate to the Executors tab on the Spark UI page. Notice that the addresses for the driver and the executors are in the private subnet range. In this example, the driver is 10.179.0.6 and executors are 10.179.0.4 and 10.179.0.5. Your IP addresses could be different.
Clean up resources
After you have finished the article, you can terminate the cluster. To do so, from the Azure Databricks workspace, from the left pane, select Clusters. For the cluster you want to terminate, move the cursor over the ellipsis under Actions column, and select the Terminate icon. This stops the cluster.
If you do not manually terminate the cluster it will automatically stop, provided you selected the Terminate after __ minutes of inactivity checkbox while creating the cluster. In such a case, the cluster automatically stops, if it has been inactive for the specified time.
If you do not wish to reuse the cluster, you can delete the resource group you created in the Azure portal.
Next steps
In this article, you created a Spark cluster in Azure Databricks that you deployed to a virtual network. Advance to the next article to learn how to query a SQL Server Linux Docker container in the virtual network using JDBC from an Azure Databricks notebook.
Feedback
Coming soon: Throughout 2024 we will be phasing out GitHub Issues as the feedback mechanism for content and replacing it with a new feedback system. For more information see: https://aka.ms/ContentUserFeedback.
Submit and view feedback for