Quickstart: Send events from private container registry to Event Grid
Azure Event Grid is a fully managed event routing service that provides uniform event consumption using a publish-subscribe model. In this quickstart, you use the Azure CLI to create a container registry, subscribe to registry events, then deploy a sample web application to receive the events. Finally, you trigger container image push and delete events and view the event payload in the sample application.
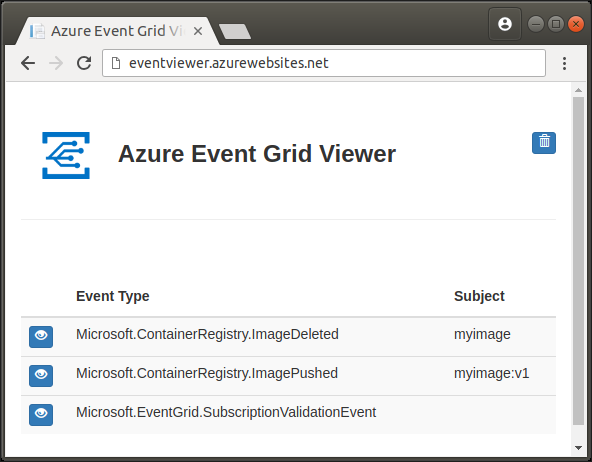
After you complete the steps in this article, events sent from your container registry to Event Grid appear in the sample web app:
If you don't have an Azure subscription, create an Azure free account before you begin.
Prerequisites
Use the Bash environment in Azure Cloud Shell. For more information, see Quickstart for Bash in Azure Cloud Shell.

If you prefer to run CLI reference commands locally, install the Azure CLI. If you're running on Windows or macOS, consider running Azure CLI in a Docker container. For more information, see How to run the Azure CLI in a Docker container.
If you're using a local installation, sign in to the Azure CLI by using the az login command. To finish the authentication process, follow the steps displayed in your terminal. For other sign-in options, see Sign in with the Azure CLI.
When you're prompted, install the Azure CLI extension on first use. For more information about extensions, see Use extensions with the Azure CLI.
Run az version to find the version and dependent libraries that are installed. To upgrade to the latest version, run az upgrade.
- The Azure CLI commands in this article are formatted for the Bash shell. If you're using a different shell like PowerShell or Command Prompt, you may need to adjust line continuation characters or variable assignment lines accordingly. This article uses variables to minimize the amount of command editing required.
Create a resource group
An Azure resource group is a logical container in which you deploy and manage your Azure resources. The following az group create command creates a resource group named myResourceGroup in the eastus region. If you want to use a different name for your resource group, set RESOURCE_GROUP_NAME to a different value.
RESOURCE_GROUP_NAME=myResourceGroup

az group create --name $RESOURCE_GROUP_NAME --location eastus
Create a container registry
Next, deploy a container registry into the resource group with the following commands. Before you run the az acr create command, set ACR_NAME to a name for your registry. The name must be unique within Azure, and is restricted to 5-50 alphanumeric characters.
ACR_NAME=<acrName>

az acr create --resource-group $RESOURCE_GROUP_NAME --name $ACR_NAME --sku Basic
Once the registry has been created, the Azure CLI returns output similar to the following:
{
  "adminUserEnabled": false,
  "creationDate": "2018-08-16T20:02:46.569509+00:00",
  "id": "/subscriptions/<Subscription ID>/resourceGroups/myResourceGroup/providers/Microsoft.ContainerRegistry/registries/myregistry",
  "location": "eastus",
  "loginServer": "myregistry.azurecr.io",
  "name": "myregistry",
  "provisioningState": "Succeeded",
  "resourceGroup": "myResourceGroup",
  "sku": {
    "name": "Basic",
    "tier": "Basic"
  },
  "status": null,
  "storageAccount": null,
  "tags": {},
  "type": "Microsoft.ContainerRegistry/registries"
}
Create an event endpoint
In this section, you use a Resource Manager template located in a GitHub repository to deploy a prebuilt sample web application to Azure App Service. Later, you subscribe to your registry's Event Grid events and specify this app as the endpoint to which the events are sent.
To deploy the sample app, set SITE_NAME to a unique name for your web app, and execute the following commands. The site name must be unique within Azure because it forms part of the fully qualified domain name (FQDN) of the web app. In a later section, you navigate to the app's FQDN in a web browser to view your registry's events.
SITE_NAME=<your-site-name>

az deployment group create \
    --resource-group $RESOURCE_GROUP_NAME \
    --template-uri "https://raw.githubusercontent.com/Azure-Samples/azure-event-grid-viewer/master/azuredeploy.json" \
    --parameters siteName=$SITE_NAME hostingPlanName=$SITE_NAME-plan
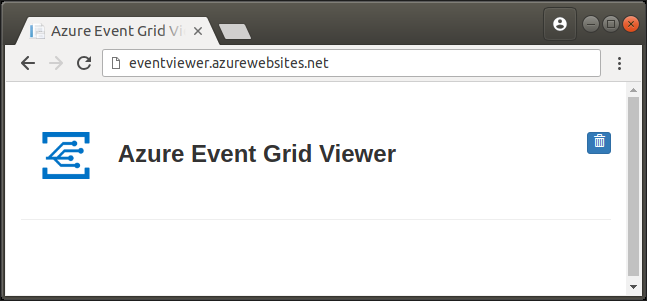
Once the deployment has succeeded (it might take a few minutes), open a browser and navigate to your web app to make sure it's running:
http://<your-site-name>.azurewebsites.net
You should see the sample app rendered with no event messages displayed:
Enable the Event Grid resource provider
If you haven't previously used Event Grid in your Azure subscription, you might need to register the Event Grid resource provider. Run the following command to register the provider:
az provider register --namespace Microsoft.EventGridIt might take a moment for the registration to finish. To check the status, run the following command:
az provider show --namespace Microsoft.EventGrid --query "registrationState"When
registrationStateisRegistered, you're ready to continue.
Subscribe to registry events
In Event Grid, you subscribe to a topic to tell it which events you want to track, and where to send them. The following az eventgrid event-subscription create command subscribes to the container registry you created, and specifies your web app's URL as the endpoint to which it should send events. The environment variables you populated in earlier sections are reused here, so no edits are required.
ACR_REGISTRY_ID=$(az acr show --name $ACR_NAME --query id --output tsv)
APP_ENDPOINT=https://$SITE_NAME.azurewebsites.net/api/updates

az eventgrid event-subscription create \
    --name event-sub-acr \
    --source-resource-id $ACR_REGISTRY_ID \
    --endpoint $APP_ENDPOINT
When the subscription is completed, you should see output similar to the following:
{
  "destination": {
    "endpointBaseUrl": "https://eventgridviewer.azurewebsites.net/api/updates",
    "endpointType": "WebHook",
    "endpointUrl": null
  },
  "filter": {
    "includedEventTypes": [
      "All"
    ],
    "isSubjectCaseSensitive": null,
    "subjectBeginsWith": "",
    "subjectEndsWith": ""
  },
  "id": "/subscriptions/<Subscription ID>/resourceGroups/myResourceGroup/providers/Microsoft.ContainerRegistry/registries/myregistry/providers/Microsoft.EventGrid/eventSubscriptions/event-sub-acr",
  "labels": null,
  "name": "event-sub-acr",
  "provisioningState": "Succeeded",
  "resourceGroup": "myResourceGroup",
  "topic": "/subscriptions/<Subscription ID>/resourceGroups/myresourcegroup/providers/microsoft.containerregistry/registries/myregistry",
  "type": "Microsoft.EventGrid/eventSubscriptions"
}
Trigger registry events
Now that the sample app is up and running and you've subscribed to your registry with Event Grid, you're ready to generate some events. In this section, you use ACR Tasks to build and push a container image to your registry. ACR Tasks is a feature of Azure Container Registry that allows you to build container images in the cloud, without needing the Docker Engine installed on your local machine.
Build and push image
Execute the following Azure CLI command to build a container image from the contents of a GitHub repository. By default, ACR Tasks automatically pushes a successfully built image to your registry, which generates the ImagePushed event.
Note
The Dockerfile used in the following example depends on a public base container image from Docker Hub. To improve reliability when using public content, import and manage the image in a private Azure container registry, and update your Dockerfile to use your privately managed base image. Learn more about working with public images.
az acr build --registry $ACR_NAME --image myimage:v1 -f Dockerfile https://github.com/Azure-Samples/acr-build-helloworld-node.git#main
You should see output similar to the following while ACR Tasks build and then pushes your image. The following sample output has been truncated for brevity.
Sending build context to ACR...
Queued a build with build ID: aa2
Waiting for build agent...
2018/08/16 22:19:38 Using acb_vol_27a2afa6-27dc-4ae4-9e52-6d6c8b7455b2 as the home volume
2018/08/16 22:19:38 Setting up Docker configuration...
2018/08/16 22:19:39 Successfully set up Docker configuration
2018/08/16 22:19:39 Logging in to registry: myregistry.azurecr.io
2018/08/16 22:19:55 Successfully logged in
Sending build context to Docker daemon  94.72kB
Step 1/5 : FROM node:9-alpine
...
To verify that the built image is in your registry, execute the following command to view the tags in the myimage repository:
az acr repository show-tags --name $ACR_NAME --repository myimage
The "v1" tag of the image you built should appear in the output, similar to the following:
[
  "v1"
]
Delete the image
Now, generate an ImageDeleted event by deleting the image with the az acr repository delete command:
az acr repository delete --name $ACR_NAME --image myimage:v1
You should see output similar to the following, asking for confirmation to delete the manifest and associated images:
This operation will delete the manifest 'sha256:f15fa9d0a69081ba93eee308b0e475a54fac9c682196721e294b2bc20ab23a1b' and all the following images: 'myimage:v1'.
Are you sure you want to continue? (y/n):
View registry events
You've now pushed an image to your registry and then deleted it. Navigate to your Event Grid Viewer web app, and you should see both ImageDeleted and ImagePushed events. You might also see a subscription validation event generated by executing the command in the Subscribe to registry events section.
The following screenshot shows the sample app with the three events, and the ImageDeleted event is expanded to show its details.
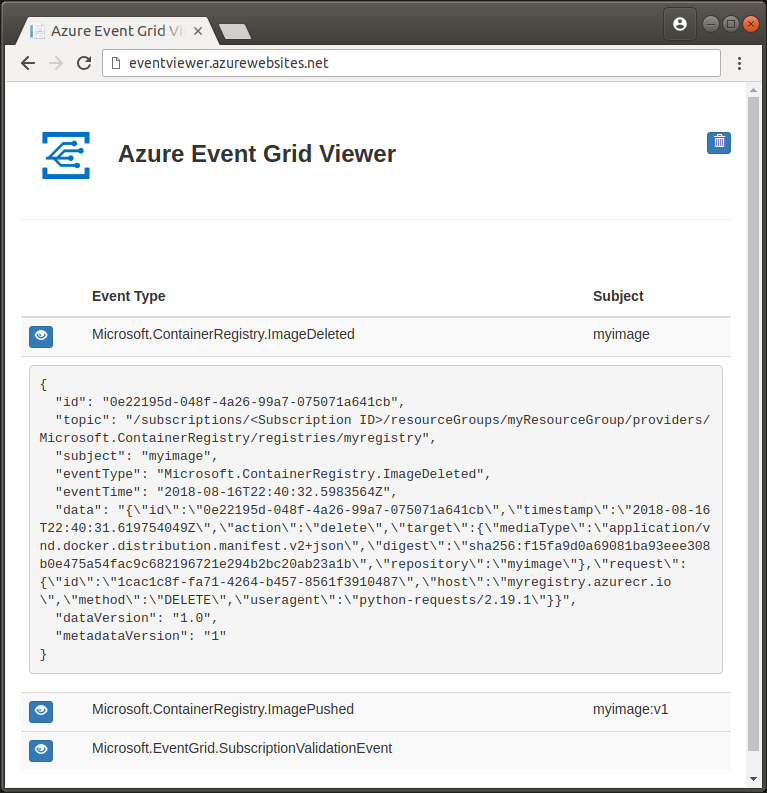
Congratulations! If you see the ImagePushed and ImageDeleted events, your registry is sending events to Event Grid, and Event Grid is forwarding those events to your web app endpoint.
Clean up resources
Once you're done with the resources you created in this quickstart, you can delete them all with the following Azure CLI command. When you delete a resource group, all of the resources it contains are permanently deleted.
WARNING: This operation is irreversible. Be sure you no longer need any of the resources in the group before running the command.
az group delete --name $RESOURCE_GROUP_NAME
Event Grid event schema
You can find the Azure Container Registry event message schema reference in the Event Grid documentation:
Azure Event Grid event schema for Container Registry
Next steps
In this quickstart, you deployed a container registry, built an image with ACR Tasks, deleted it, and have consumed your registry's events from Event Grid with a sample application. Next, move on to the ACR Tasks tutorial to learn more about building container images in the cloud, including automated builds on base image update:
Feedback
Coming soon: Throughout 2024 we will be phasing out GitHub Issues as the feedback mechanism for content and replacing it with a new feedback system. For more information see: https://aka.ms/ContentUserFeedback.
Submit and view feedback for