Send, receive, and batch process messages in Azure Logic Apps
Applies to: Azure Logic Apps (Consumption)
To send and process messages together in a specific way as groups, you can create a batching solution. This solution collects messages into a batch and waits until your specified criteria are met before releasing and processing the batched messages. Batching can reduce how often your logic app processes messages.
This how-to guide shows how to build a batching solution by creating two logic apps within the same Azure subscription, Azure region, and in this order:
The "batch receiver" logic app, which accepts and collects messages into a batch until your specified criteria is met for releasing and processing those messages. Make sure that you first create this batch receiver so that you can later select the batch destination when you create the batch sender.
One or more "batch sender" logic apps, which send the messages to the previously created batch receiver.
The batch sender can specify a unique key that partitions or divides the target batch into logical subsets, based on that key. For example, a customer number is a unique key. That way, the receiver app can collect all items with the same key and process them together.
Your batch receiver and batch sender need to share the same Azure subscription and Azure region. If they don't, you can't select the batch receiver when you create the batch sender because they're not visible to each other.
Prerequisites
An Azure account and subscription. If you don't have a subscription, you can start with a free Azure account. Or, sign up for a Pay-As-You-Go subscription.
An email account with any email provider supported by Azure Logic Apps
Important
If you want to use the Gmail connector, only G-Suite business accounts can use this connector without restriction in logic apps. If you have a Gmail consumer account, you can use this connector with only specific Google-approved services, or you can create a Google client app to use for authentication with your Gmail connector. For more information, see Data security and privacy policies for Google connectors in Azure Logic Apps.
Basic knowledge about logic app workflows
To use Visual Studio rather than the Azure portal, make sure that you set up Visual Studio for working with Logic Apps.
Limitations
You can only check the contents in a batch after release by comparing the released contents with the source.
You can release a batch early only by changing the release criteria in the batch receiver, which is described in this guide, while the trigger still has the batch. However, the trigger uses the updated release criteria for any unsent messages.
Create batch receiver
Before you can send messages to a batch, that batch must first exist as the destination where you send those messages. So first, you must create the "batch receiver" logic app, which starts with the Batch trigger. That way, when you create the "batch sender" logic app, you can select the batch receiver logic app. The batch receiver continues collecting messages until your specified criteria is met for releasing and processing those messages. While batch receivers don't need to know anything about batch senders, batch senders must know the destination where they send the messages.
In the Azure portal or Visual Studio, create a logic app with this name:
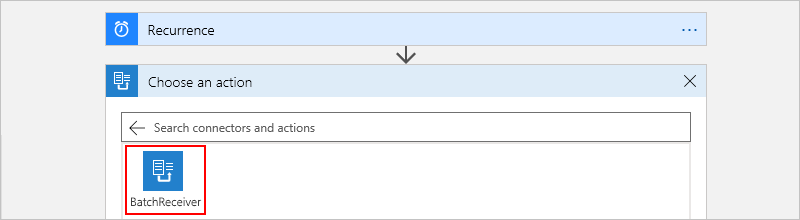
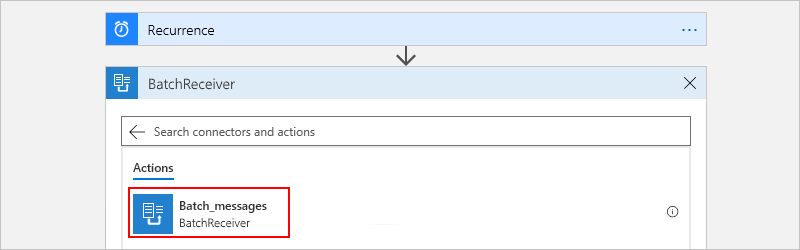
BatchReceiverIn the workflow designer, add the Batch trigger, which starts your logic app workflow. In the search box, enter
batch, and select this trigger: Batch messages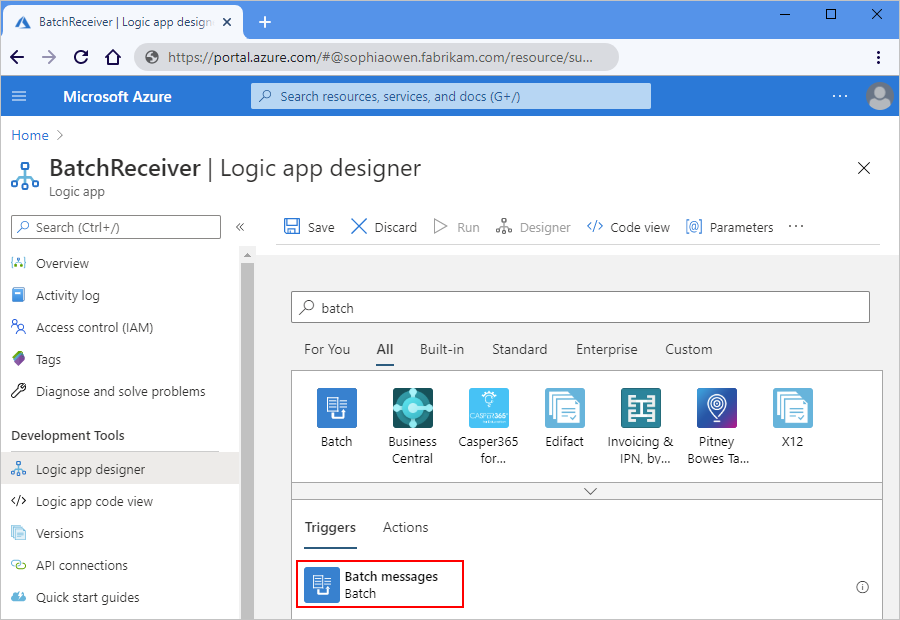
Set these properties for the batch receiver:
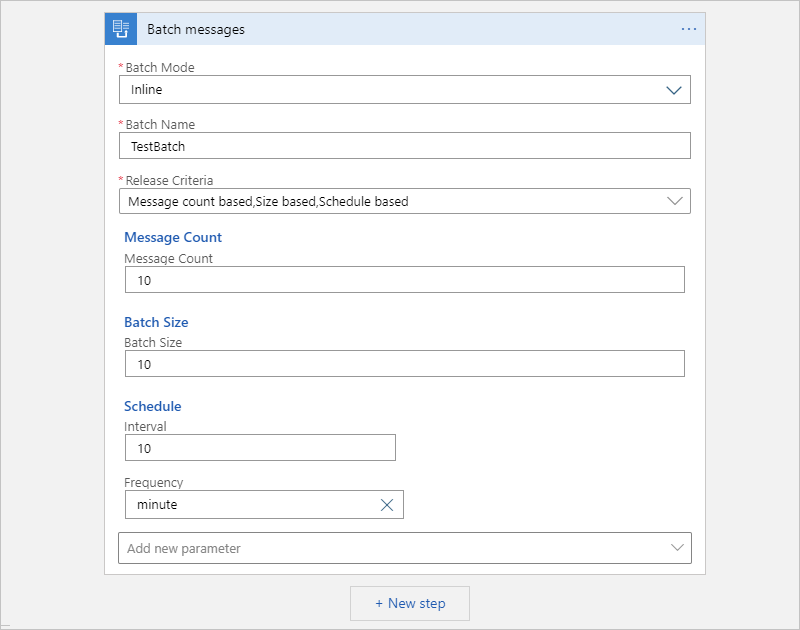
Property Description Batch Mode - Inline: For defining release criteria inside the batch trigger
- Integration Account: For defining multiple release criteria configurations through an integration account. With an integration account, you can maintain these configurations all in one place rather than in separate logic apps.Batch Name The name for your batch, which is "TestBatch" in this example, and applies only to Inline batch mode Release Criteria Applies only to Inline batch mode and selects the criteria to meet before processing each batch: - Message count based: Release the batch based on the number of messages collected by the batch.
- Size based: Release the batch based on the total size in bytes for all messages collected by that batch.
- Schedule: Release the batch based on a recurrence schedule, which specifies an interval and frequency. In the advanced options, you can also select a time zone and provide a start date and time.
- Select all: Use all the specified criteria.Message Count The number of messages to collect in the batch, for example, 10 messages. A batch's limit is 8,000 messages. Batch Size The total size in bytes to collect in the batch, for example, 10 MB. A batch's size limit is 80 MB. Schedule The interval and frequency between batch releases, for example, 10 minutes. The minimum recurrence is 60 seconds or 1 minute. Fractional minutes are effectively rounded up to 1 minute. To specify a time zone or a start date and time, open the Add new parameter list, and select the corresponding properties. Note
If you change the release criteria while the trigger still has batched but unsent messages, the trigger uses the updated release criteria for handling the unsent messages.
This example shows all the criteria, but for your own testing, try just one criterion:
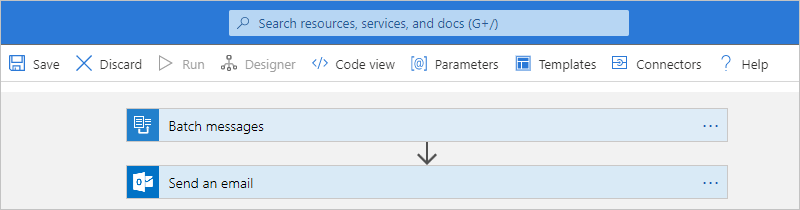
Now add one or more actions that process each batch.
For this example, add an action that sends an email when the batch trigger fires. The trigger runs and sends an email when the batch either has 10 messages, reaches 10 MB, or after 10 minutes pass.
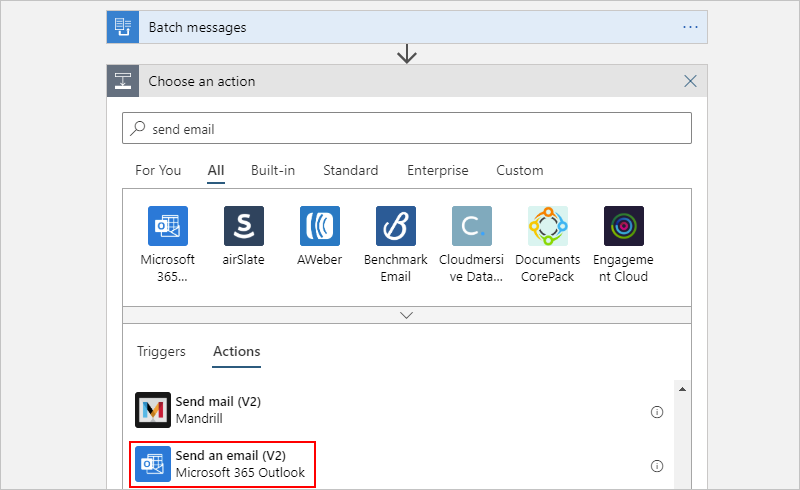
Under the batch trigger, select New step.
In the search box, enter
send emailas your filter. Based on your email provider, select an email connector.For example, if you have a work or school account, such as @fabrikam.com or @fabrikam.onmicrosoft.com, select the Microsoft 365 Outlook connector. If you have a personal account, such as @outlook.com or @hotmail.com, select the Outlook.com connector. This example uses the Microsoft 365 Outlook connector.
Select the "send an email" action for your provider, for example:
If prompted, sign in to your email account.
Set the properties for the action you added.
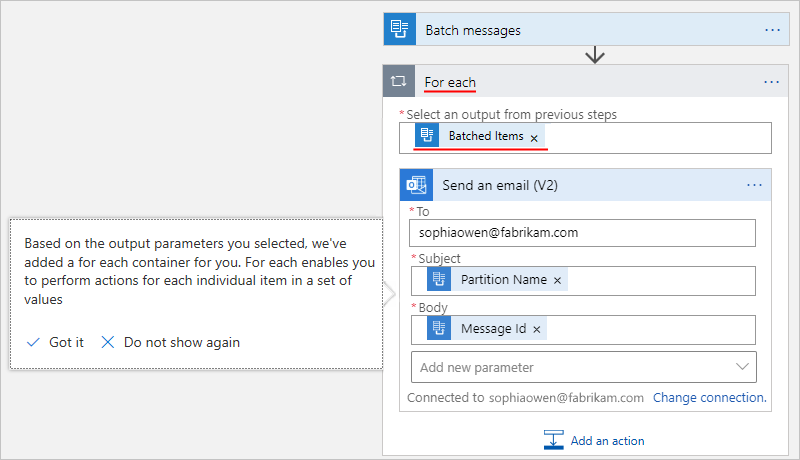
In the To box, enter the recipient's email address. For testing purposes, you can use your own email address.
In the Subject box, when the dynamic content list appears, select the Partition Name field.
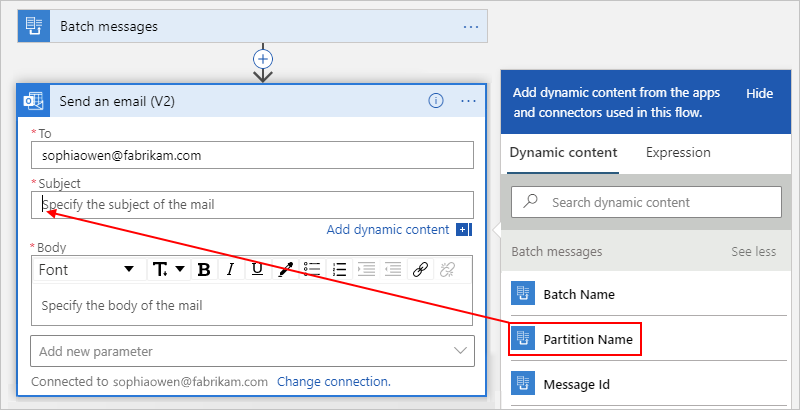
Later, in the batch sender, you can specify a unique partition key that divides the target batch into logical subsets where you can send messages. Each set has a unique number that's generated by the batch sender logic app. This capability lets you use a single batch with multiple subsets and define each subset with the name that you provide.
Important
A partition has a limit of 5,000 messages or 80 MB. If either condition is met, Logic Apps might release the batch, even when your defined release condition isn't met.
In the Body box, when the dynamic content list appears, select the Message Id field.
The workflow designer automatically adds a For each loop around the send email action because that action treats the output from the previous action as a collection, rather than a batch.
Save your logic app. You've now created a batch receiver.
Important
If you're using Visual Studio, before you continue to the next section, make sure that you first deploy your batch receiver logic app to Azure. Otherwise, you can't select the batch receiver when you create the batch sender.
Create batch sender
Now create one or more batch sender logic apps that send messages to the batch receiver logic app. In each batch sender, you specify the batch receiver and batch name, message content, and any other settings. You can optionally provide a unique partition key to divide the batch into logical subsets for collecting messages with that key.
Make sure that you previously created and deployed your batch receiver so when you create your batch sender, you can select the existing batch receiver as the destination batch. While batch receivers don't need to know anything about batch senders, batch senders must know where to send messages.
Make sure that your batch receiver and batch sender share the same Azure region and Azure subscription. If they don't, you can't select the batch receiver when you create the batch sender because they're not visible to each other.
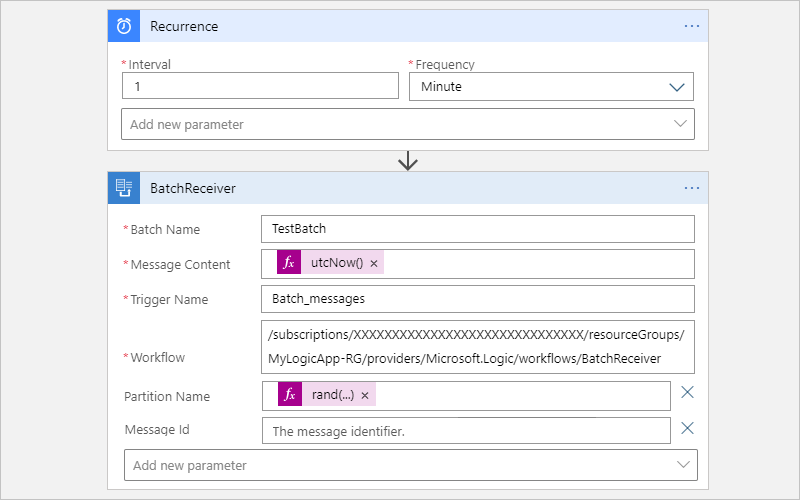
Create another logic app with this name:
BatchSenderIn the search box, enter
recurrenceas your filter. From the triggers list, select this trigger: Recurrence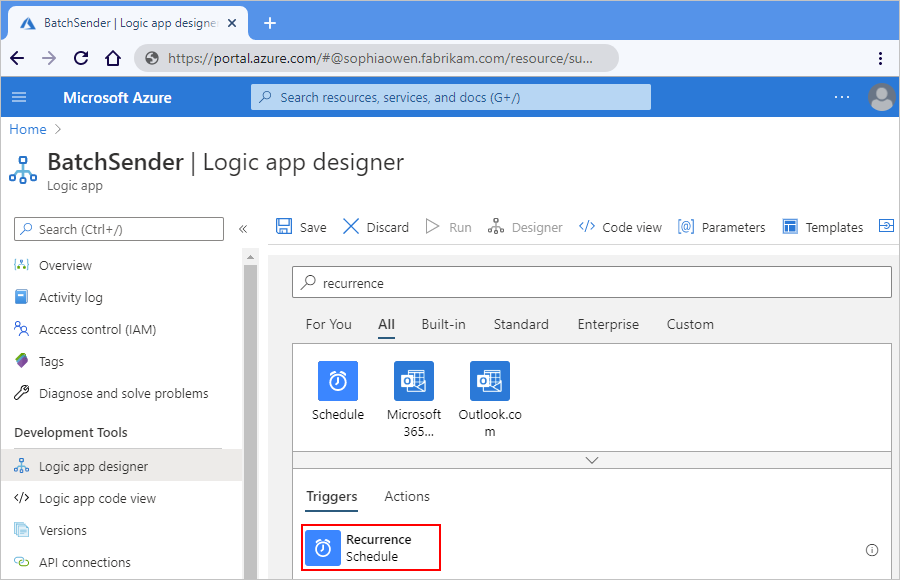
Set the interval and frequency to run the sender logic app every minute.

Add a new action for sending messages to a batch.
Under the Recurrence trigger, select New step.
In the search box, enter
batchas your filter, and select this action: Choose a Logic Apps workflow with batch trigger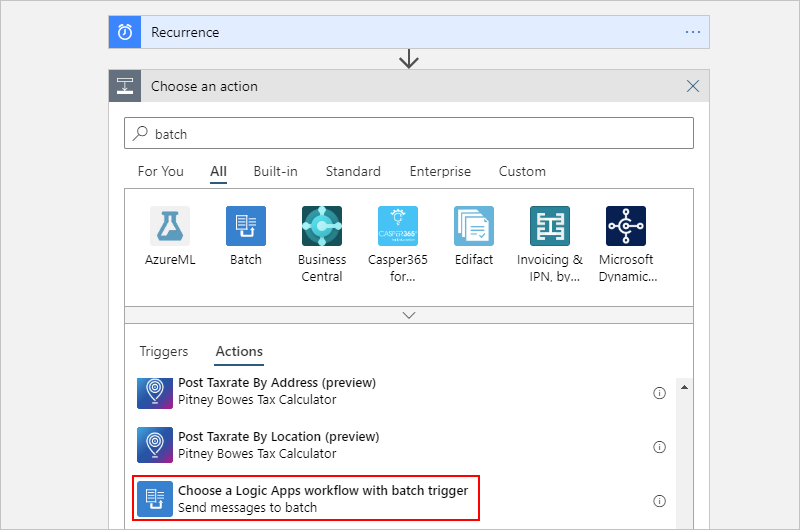
A list appears and shows only those logic apps that have batch triggers and exist in the same Azure region and Azure subscription as your batch sender logic app.
From the logic apps list, select the batch receiver logic app that you previously created.
Important
If you're using Visual Studio, and you don't see any batch receivers to select, check that you previously created and deployed your batch receiver to Azure. If you haven't, learn how to deploy your batch receiver logic app to Azure.
From the actions list, select this action: Batch_messages - <your-logic-app-name>
Set the batch sender's properties:
Property Description Batch Name The batch name defined by the receiver logic app, which is TestBatchin this exampleImportant: The batch name gets validated at runtime and must match the name specified by the receiver logic app. Changing the batch name causes the batch sender to fail.
Message Content The content for the message you want to send Note
The Trigger Name and Workflow property values are automatically populated from your selected logic app.
For this example, add this expression, which inserts the current date and time into the message content that you send to the batch:
Click inside the Message Content box.
When the dynamic content list appears, select Expression.
Enter the expression
utcnow(), and select OK.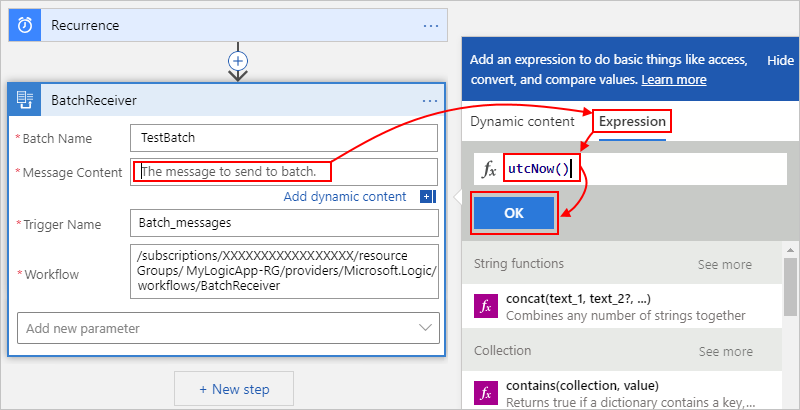
Now set up a partition for the batch. In the
BatchReceiveraction, open the Add new parameter list, and select these properties:Property Description Partition Name An optional unique partition key to use for dividing the target batch into logical subsets and collect messages based on that key Message Id An optional message identifier that is a generated globally unique identifier (GUID) when empty For this example, in the Partition Name box, add an expression that generates a random number between one and five. Leave the Message Id box empty.
Click inside the Partition Name box so that the dynamic content list appears.
In the dynamic content list, select Expression.
Enter the expression
rand(1,6), and then select OK.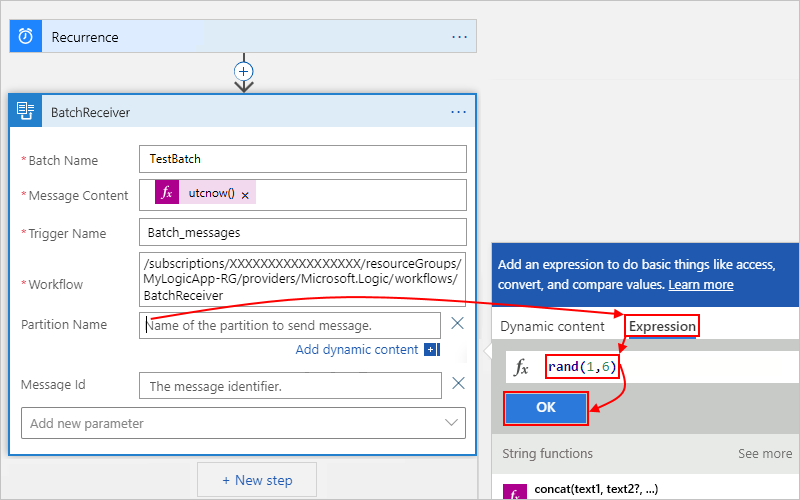
This rand function generates a number between one and five. So, you're dividing this batch into five numbered partitions, which this expression dynamically sets.
Save your logic app. Your sender logic app now looks similar to this example:
Test your logic apps
To test your batching solution, leave your logic apps running for a few minutes. Soon, you start getting emails in groups of five, all with the same partition key.
Your batch sender logic app runs every minute and generates a random number between one and five. The batch sender uses this random number as the partition key for the target batch where you send the messages. Each time the batch has five items with the same partition key, your batch receiver logic app fires and sends mail for each message.
Important
When you're done testing, make sure that you disable the BatchSender logic app to stop sending messages and avoid overloading your inbox.
Next steps
Feedback
Coming soon: Throughout 2024 we will be phasing out GitHub Issues as the feedback mechanism for content and replacing it with a new feedback system. For more information see: https://aka.ms/ContentUserFeedback.
Submit and view feedback for