Tutorial: Create resources you need to get started
In this tutorial, you'll create the resources you need to start working with Azure Machine Learning.
- A workspace. To use Azure Machine Learning, you'll first need a workspace. The workspace is the central place to view and manage all the artifacts and resources you create.
- A compute instance. A compute instance is a pre-configured cloud-computing resource that you can use to train, automate, manage, and track machine learning models. A compute instance is the quickest way to start using the Azure Machine Learning SDKs and CLIs. You'll use it to run Jupyter notebooks and Python scripts in the rest of the tutorials.
In this tutorial, you'll create your resources in Azure Machine Learning studio.
Other ways to create a workspace are via the Azure portal or SDK, the CLI, Azure PowerShell, or the Visual Studio Code extension.
For other ways to create a compute instance, see Create a compute instance.
This video shows you how to create a workspace and compute instance in Azure Machine Learning studio. The steps are also described in the sections below.
Prerequisites
- An Azure account with an active subscription. Create an account for free.
Create the workspace
The workspace is the top-level resource for your machine learning activities, providing a centralized place to view and manage the artifacts you create when you use Azure Machine Learning.
If you already have a workspace, skip this section and continue to Create a compute instance.
If you don't yet have a workspace, create one now:
Sign in to Azure Machine Learning studio
Select Create workspace
Provide the following information to configure your new workspace:
Field Description Workspace name Enter a unique name that identifies your workspace. Names must be unique across the resource group. Use a name that's easy to recall and to differentiate from workspaces created by others. The workspace name is case-insensitive. Subscription Select the Azure subscription that you want to use. Resource group Use an existing resource group in your subscription or enter a name to create a new resource group. A resource group holds related resources for an Azure solution. You need contributor or owner role to use an existing resource group. For more information about access, see Manage access to an Azure Machine Learning workspace. Region Select the Azure region closest to your users and the data resources to create your workspace. Select Create to create the workspace
Note
This creates a workspace along with all required resources. If you would like to reuse resources, such as Storage Account, Azure Container Registry, Azure KeyVault, or Application Insights, use the Azure portal instead.
Create a compute instance
You'll use the compute instance to run Jupyter notebooks and Python scripts in the rest of the tutorials. If you don't yet have a compute instance, create one now:
On the left navigation, select Notebooks.
Select Create compute in the middle of the page.
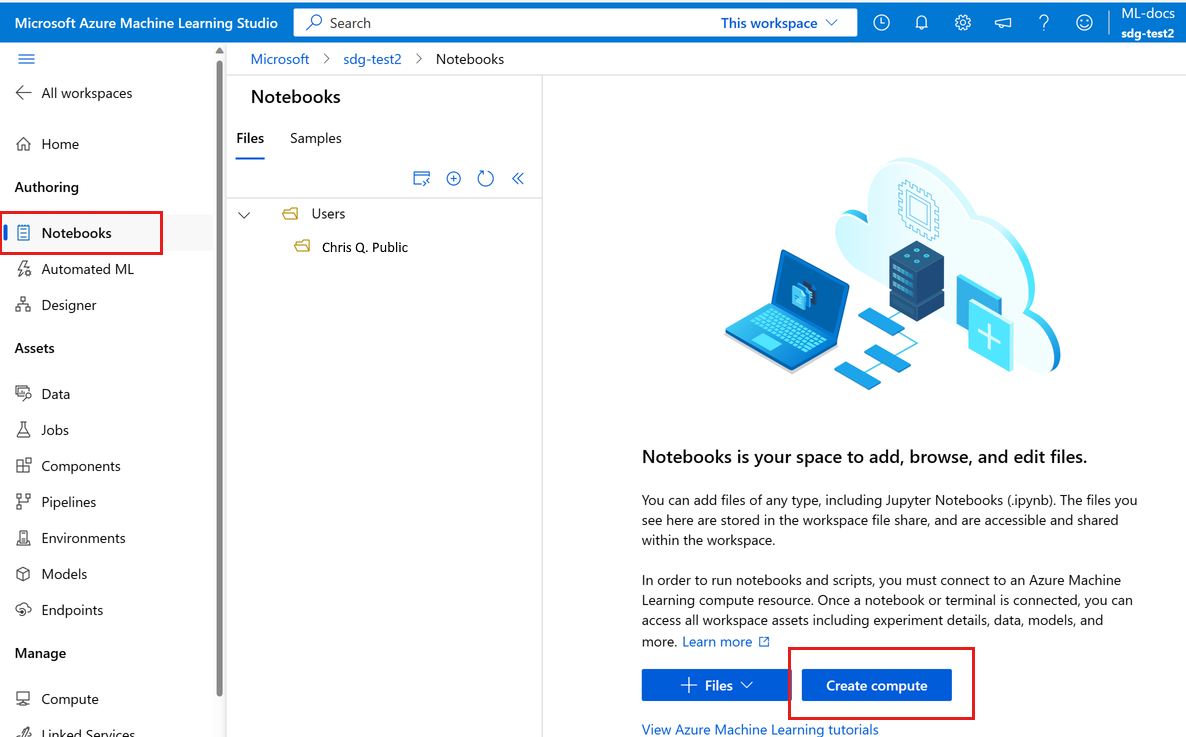
Tip
You'll only see this option if you don't yet have a compute instance in your workspace.
Supply a name. Keep all the defaults on the first page.
Keep the default values for the rest of the page.
Select Create.
Quick tour of the studio
The studio is your web portal for Azure Machine Learning. This portal combines no-code and code-first experiences for an inclusive data science platform.
Review the parts of the studio on the left-hand navigation bar:
The Authoring section of the studio contains multiple ways to get started in creating machine learning models. You can:
- Notebooks section allows you to create Jupyter Notebooks, copy sample notebooks, and run notebooks and Python scripts.
- Automated ML steps you through creating a machine learning model without writing code.
- Designer gives you a drag-and-drop way to build models using prebuilt components.
The Assets section of the studio helps you keep track of the assets you create as you run your jobs. If you have a new workspace, there's nothing in any of these sections yet.
The Manage section of the studio lets you create and manage compute and external services you link to your workspace. It's also where you can create and manage a Data labeling project.

Learn from sample notebooks
Use the sample notebooks available in studio to help you learn about how to train and deploy models. They're referenced in many of the other articles and tutorials.
- On the left navigation, select Notebooks.
- At the top, select Samples.
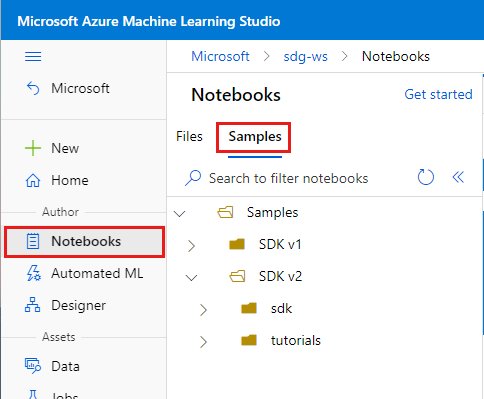
- Use notebooks in the SDK v2 folder for examples that show the current version of the SDK, v2.
- These notebooks are read-only, and are updated periodically.
- When you open a notebook, select the Clone this notebook button at the top to add your copy of the notebook and any associated files into your own files. A new folder with the notebook is created for you in the Files section.
Create a new notebook
When you clone a notebook from Samples, a copy is added to your files and you can start running or modifying it. Many of the tutorials mirror these sample notebooks.
But you could also create a new, empty notebook, then copy/paste code from a tutorial into the notebook. To do so:
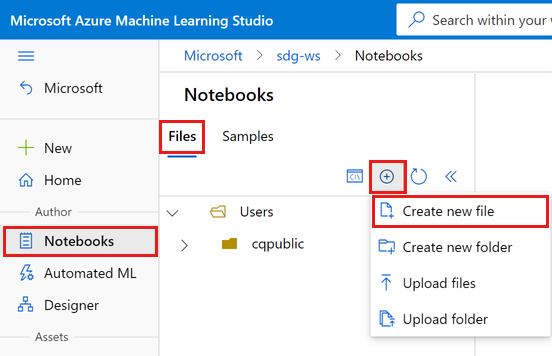
Still in the Notebooks section, select Files to go back to your files,
Select + to add files.
Select Create new file.
Clean up resources
If you plan to continue now to other tutorials, skip to Next step.
Stop compute instance
If you're not going to use it now, stop the compute instance:
- In the studio, on the left menu, select Compute.
- In the top tabs, select Compute instances
- Select the compute instance in the list.
- On the top toolbar, select Stop.
Delete all resources
Important
The resources that you created can be used as prerequisites to other Azure Machine Learning tutorials and how-to articles.
If you don't plan to use any of the resources that you created, delete them so you don't incur any charges:
In the Azure portal, select Resource groups on the far left.
From the list, select the resource group that you created.
Select Delete resource group.
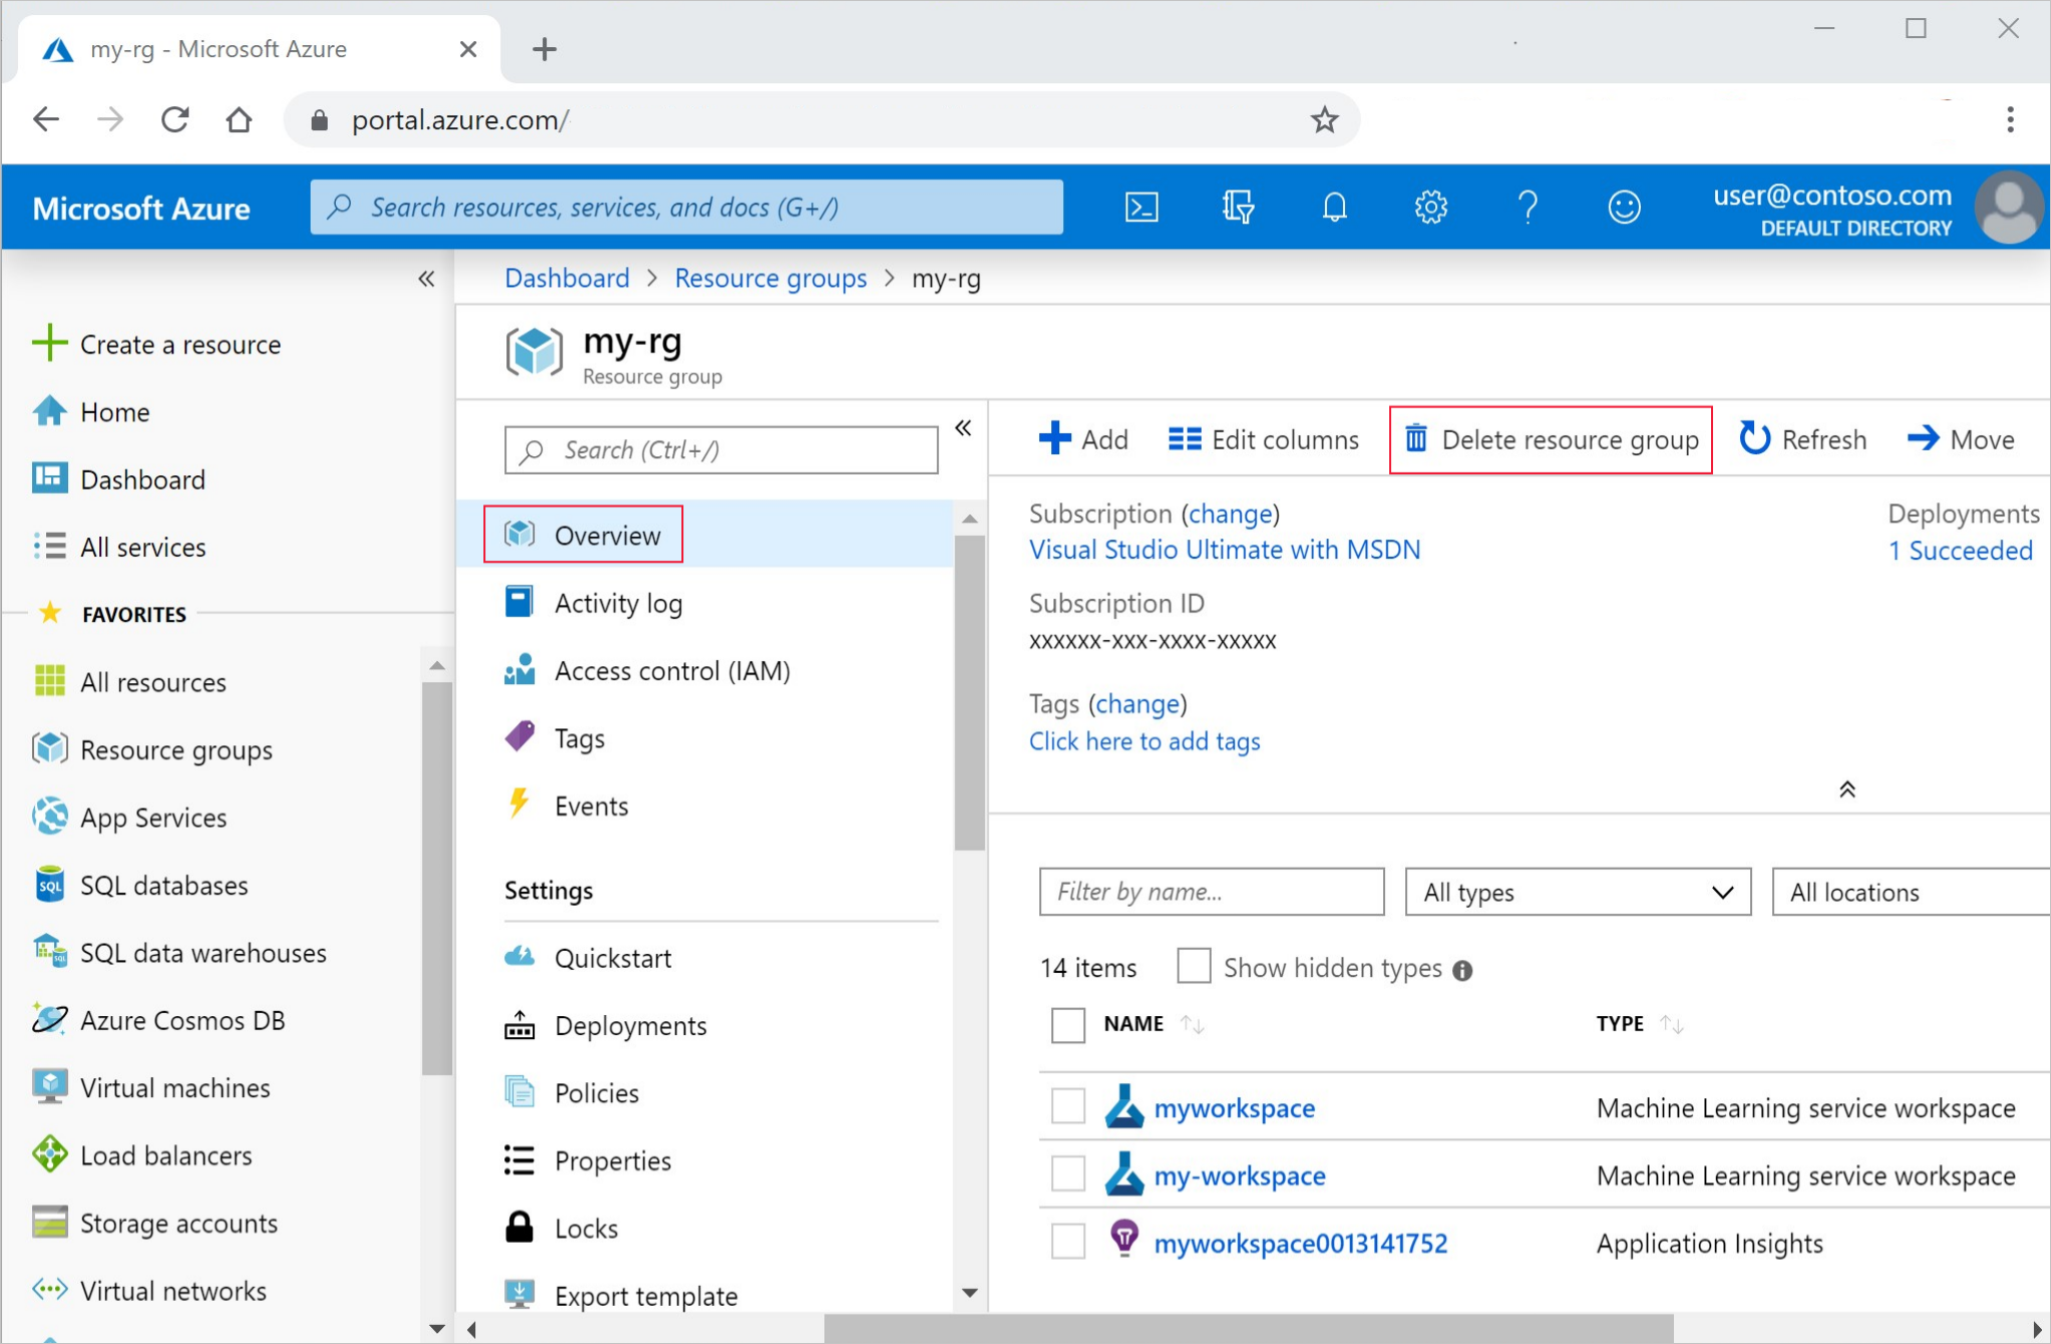
Enter the resource group name. Then select Delete.
Next step
You now have an Azure Machine Learning workspace, which contains a compute instance to use for your development environment.
Continue on to learn how to use the compute instance to run notebooks and scripts in the Azure Machine Learning cloud.
Use your compute instance with the following tutorials to train and deploy a model.
| Tutorial | Description |
|---|---|
| Upload, access, and explore your data in Azure Machine Learning | Store large data in the cloud and retrieve it from notebooks and scripts |
| Model development on a cloud workstation | Start prototyping and developing machine learning models |
| Train a model in Azure Machine Learning | Dive in to the details of training a model |
| Deploy a model as an online endpoint | Dive in to the details of deploying a model |
| Create production machine learning pipelines | Split a complete machine learning task into a multistep workflow. |
Want to jump right in? Browse code samples.
Feedback
Coming soon: Throughout 2024 we will be phasing out GitHub Issues as the feedback mechanism for content and replacing it with a new feedback system. For more information see: https://aka.ms/ContentUserFeedback.
Submit and view feedback for