Self-service access workflows for hybrid data estates
Important
This feature is currently in preview. The Supplemental Terms of Use for Microsoft Azure Previews include additional legal terms that apply to Azure features that are in beta, in preview, or otherwise not yet released into general availability.
You can use workflows to automate some business processes through Microsoft Purview. Self-service access workflows allow you to create a process for your users to request access to datasets they've discovered in Microsoft Purview.
Let's say your team has a new data analyst who will do some business reporting. You add that data analyst to your department's collection in Microsoft Purview. From there, they can browse through the data assets and read descriptions about the data that your department has available.
The data analyst notices that one of the Azure Data Lake Storage Gen2 accounts seems to have the exact data that they need to get started. Because a self-service access workflow has been set up for that resource, they can request access to that Azure Data Lake Storage account from within Microsoft Purview.

You can create these workflows for any of your resources across your data estate to automate the access request process. Workflows are assigned at the collection level, so they automate business processes along the same organizational lines as your permissions.
This guide shows you how to create and manage self-service access workflows in Microsoft Purview.
Note
To create or edit a workflow, you need the workflow admin role in Microsoft Purview. You can also contact the workflow admin in your collection, or reach out to your collection administrator, for permissions.
Create and enable the self-service access workflow
Sign in to the Microsoft Purview governance portal and select the management center. Three new icons appear in the table of contents.
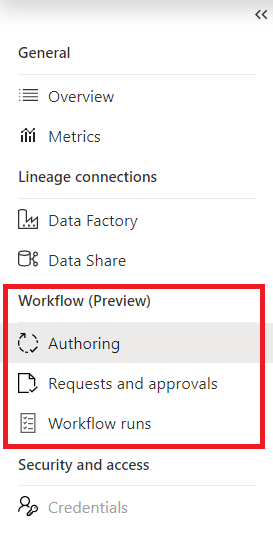
To create new workflows, select Authoring. This step takes you to the workflow authoring experience.
Note
If the Authoring tab is unavailable, you don't have the permissions to author workflows. You need the workflow admin role.
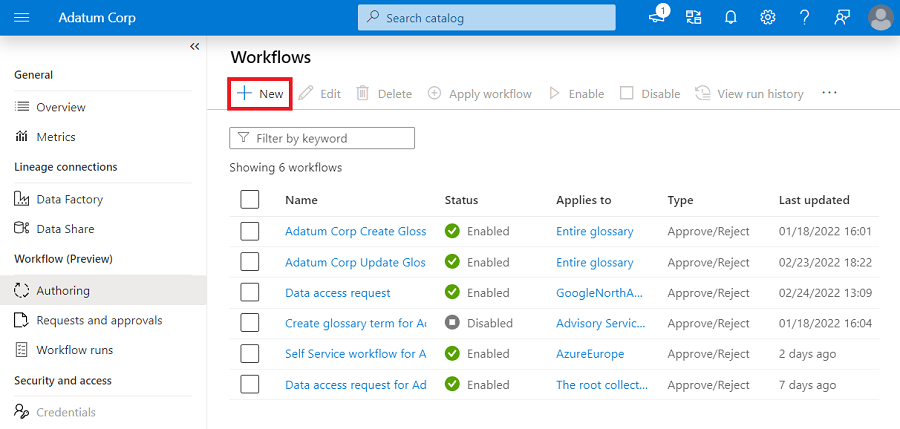
To create a new self-service workflow, select the +New button.
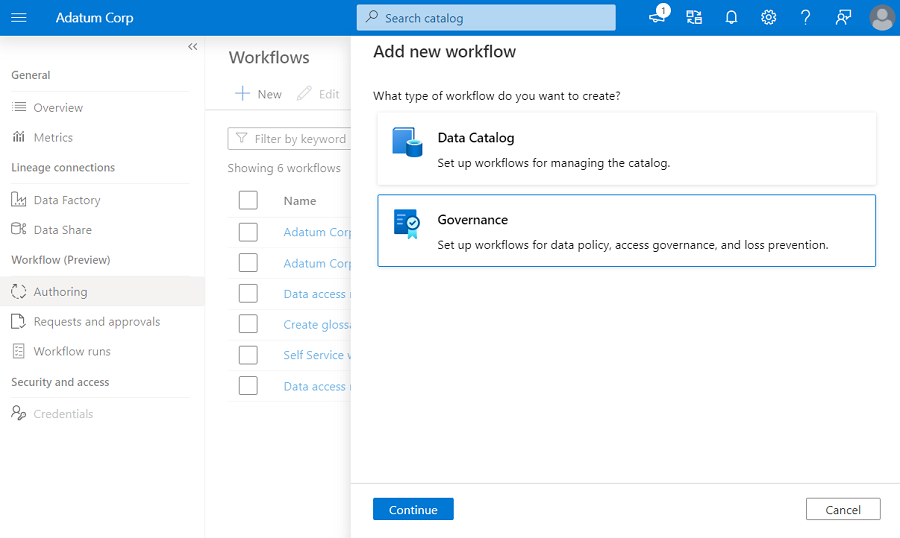
You're presented with categories of workflows that you can create in Microsoft Purview. To create an access request workflow, select Governance, and then select Continue.
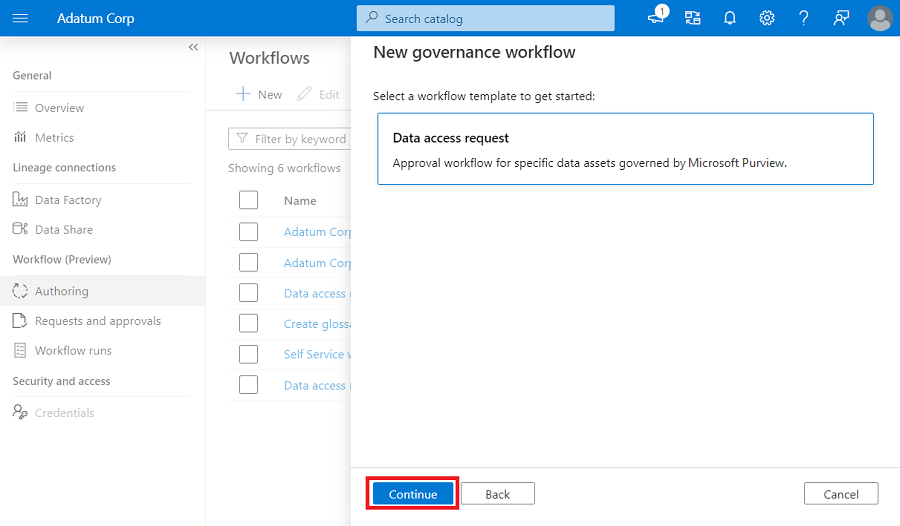
The next screen shows all the templates that Microsoft Purview provides to create a self-service data access workflow. Select the Data access request template, and then select Continue.
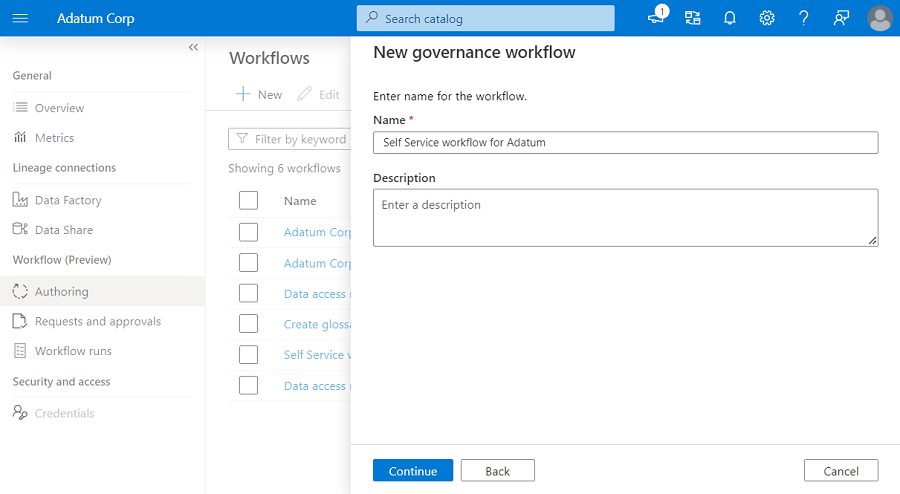
Enter a workflow name, optionally add a description, and then select Continue.
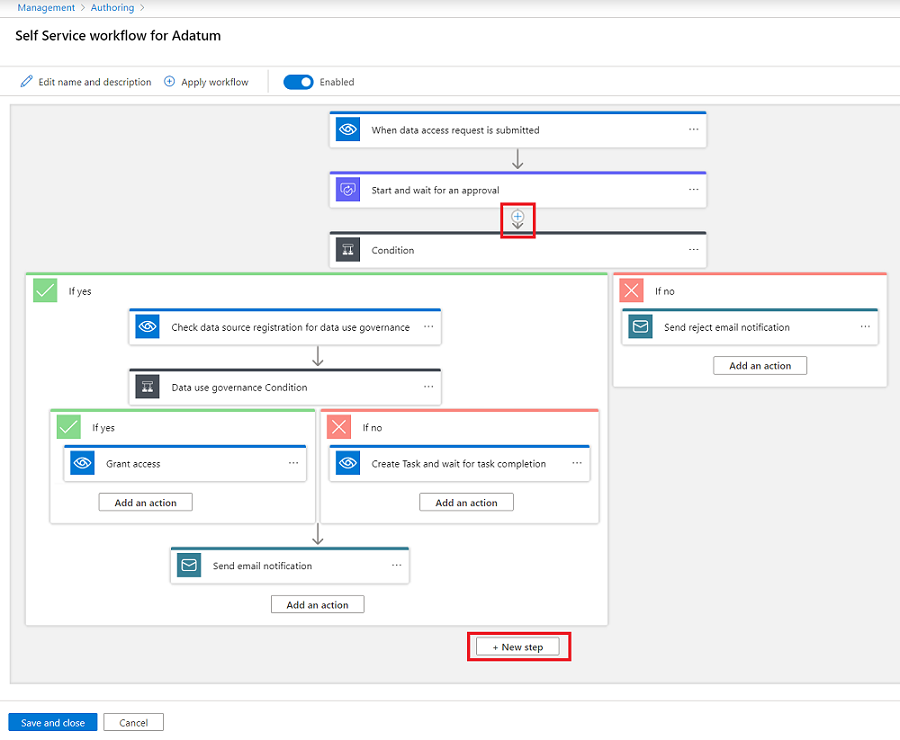
You're presented with a canvas where the selected template is loaded by default.

The template has the following steps:
- Trigger when a data access request is made.
- Get an approval connector that specifies a user or group that will be contacted to approve the request.
Assign data owners as approvers. Using the dynamic variable Asset.Owner as approvers in the approval connector will send approval requests to the data owners on the entity.
Note
Using the Asset.Owner variable might result in errors if an entity doesn't have a data owner.
If the condition to check approval status is approved, take the following steps:
- If a data source is registered for data policy enforcement with the policy:
- Create a self-service policy.
- Send email to the requestor that confirms access.
- If a data source isn't registered with the policy:
- Use a connector to assign a task to a user or a Microsoft Entra group to manually provide access to the requestor.
- Send an email to requestor to explain that access is provided after the task is marked as complete.
If the condition to check approval status is rejected, send an email to the requestor to say that the data access request is denied.
- If a data source is registered for data policy enforcement with the policy:
You can use the default template as it is by populating two fields:
- Add an approver's email address or Microsoft Entra group in the Start and wait for an approval connector.
- Add a user's email address or Microsoft Entra group in the Create task and wait for task completion connector to denote who is responsible for manually providing access if the source isn't registered with the policy.

Note
Configure the workflow to create self-service policies only for sources that the Microsoft Purview policy supports. To see what the policy supports, check the documentation about data owner policies.
If the Microsoft Purview policy doesn't support your source, use the Create task and wait for task completion connector to assign tasks to users or groups that can provide access.
You can also modify the template by adding more connectors to suit your organizational needs.
After you define a workflow, you need to bind the workflow to a collection hierarchy path. The binding (or scoping) implies that this workflow is triggered only for data access requests in that collection.
To bind a workflow or to apply a scope to a workflow, select Apply workflow. Select the scope that you want to associate with this workflow, and then select OK.

Note
The Microsoft Purview workflow engine will always resolve to the closest workflow that the collection hierarchy path is associated with. If the workflow engine doesn't find a direct binding, it will look for the workflow that's associated with the closest parent in the collection tree.
Make sure that the Enable toggle is on. The workflow should be enabled by default.
Select Save and close to create and enable the workflow.
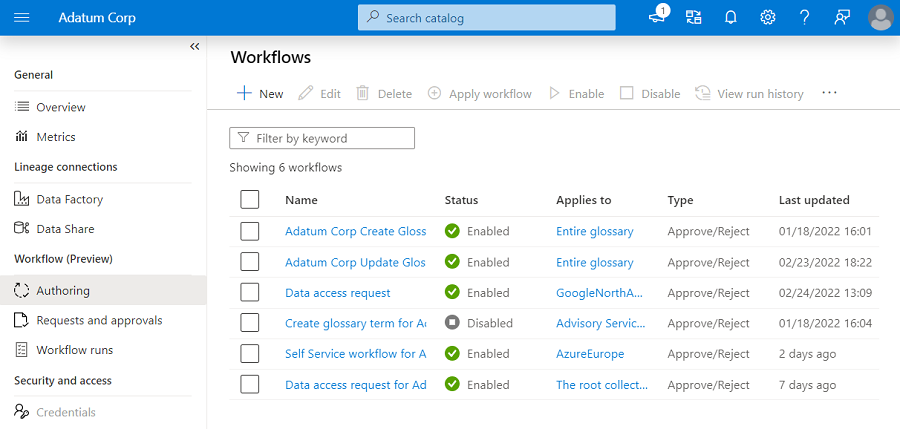
Your new workflow now appears in the list of workflows.


Edit an existing workflow
To modify an existing workflow, select the workflow, and then select the Edit button. You're presented with the canvas that contains the workflow definition. Modify the workflow, and then select Save to commit the changes.

Disable a workflow
To disable a workflow, select the workflow, and then select Disable.

Another way is to select the workflow, select Edit, turn off the Enable toggle in the workflow canvas, and then select Save and close.
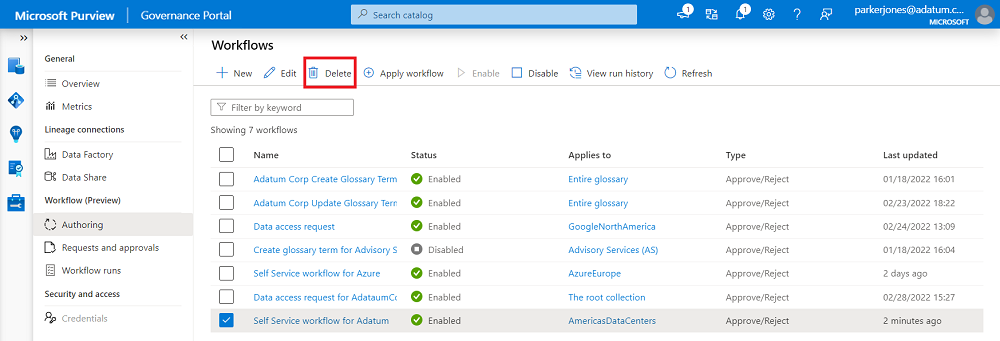
Delete a workflow
To delete a workflow, select the workflow, and then select Delete.
Next steps
For more information about workflows, see these articles:
Feedback
Coming soon: Throughout 2024 we will be phasing out GitHub Issues as the feedback mechanism for content and replacing it with a new feedback system. For more information see: https://aka.ms/ContentUserFeedback.
Submit and view feedback for