Tutorial: Create an Apache Spark application with IntelliJ using a Synapse workspace
This tutorial shows you how to use the Azure Toolkit for IntelliJ plug-in to develop Apache Spark applications, which are written in Scala, and then submit them to a serverless Apache Spark pool directly from the IntelliJ integrated development environment (IDE). You can use the plug-in in a few ways:
- Develop and submit a Scala Spark application on a Spark pool.
- Access your Spark pools resources.
- Develop and run a Scala Spark application locally.
In this tutorial, you learn how to:
- Use the Azure Toolkit for IntelliJ plug-in
- Develop Apache Spark applications
- Submit application to Spark pools
Prerequisites
Azure toolkit plugin 3.27.0-2019.2 – Install from IntelliJ Plugin repository
Scala Plugin – Install from IntelliJ Plugin repository.
The following prerequisite is only for Windows users:
While you're running the local Spark Scala application on a Windows computer, you might get an exception, as explained in SPARK-2356. The exception occurs because WinUtils.exe is missing on Windows. To resolve this error, download the WinUtils executable to a location such as C:\WinUtils\bin. Then, add the environment variable HADOOP_HOME, and set the value of the variable to C:\WinUtils.
Create a Spark Scala application for a Spark pool
Start IntelliJ IDEA, and select Create New Project to open the New Project window.
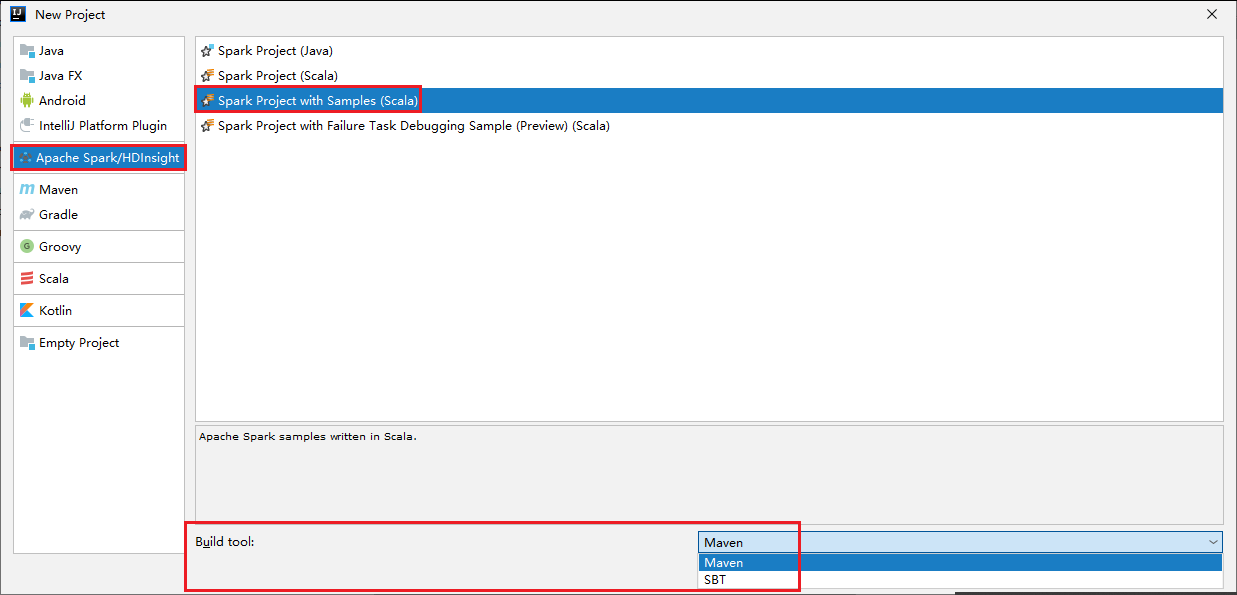
Select Apache Spark/HDInsight from the left pane.
Select Spark Project with Samples(Scala) from the main window.
From the Build tool drop-down list, select one of the following types:
- Maven for Scala project-creation wizard support.
- SBT for managing the dependencies and building for the Scala project.
Select Next.
In the New Project window, provide the following information:
Property Description Project name Enter a name. This tutorial uses myApp.Project location Enter the wanted location to save your project. Project SDK It might be blank on your first use of IDEA. Select New... and navigate to your JDK. Spark Version The creation wizard integrates the proper version for Spark SDK and Scala SDK. Here you can choose the Spark version you need. 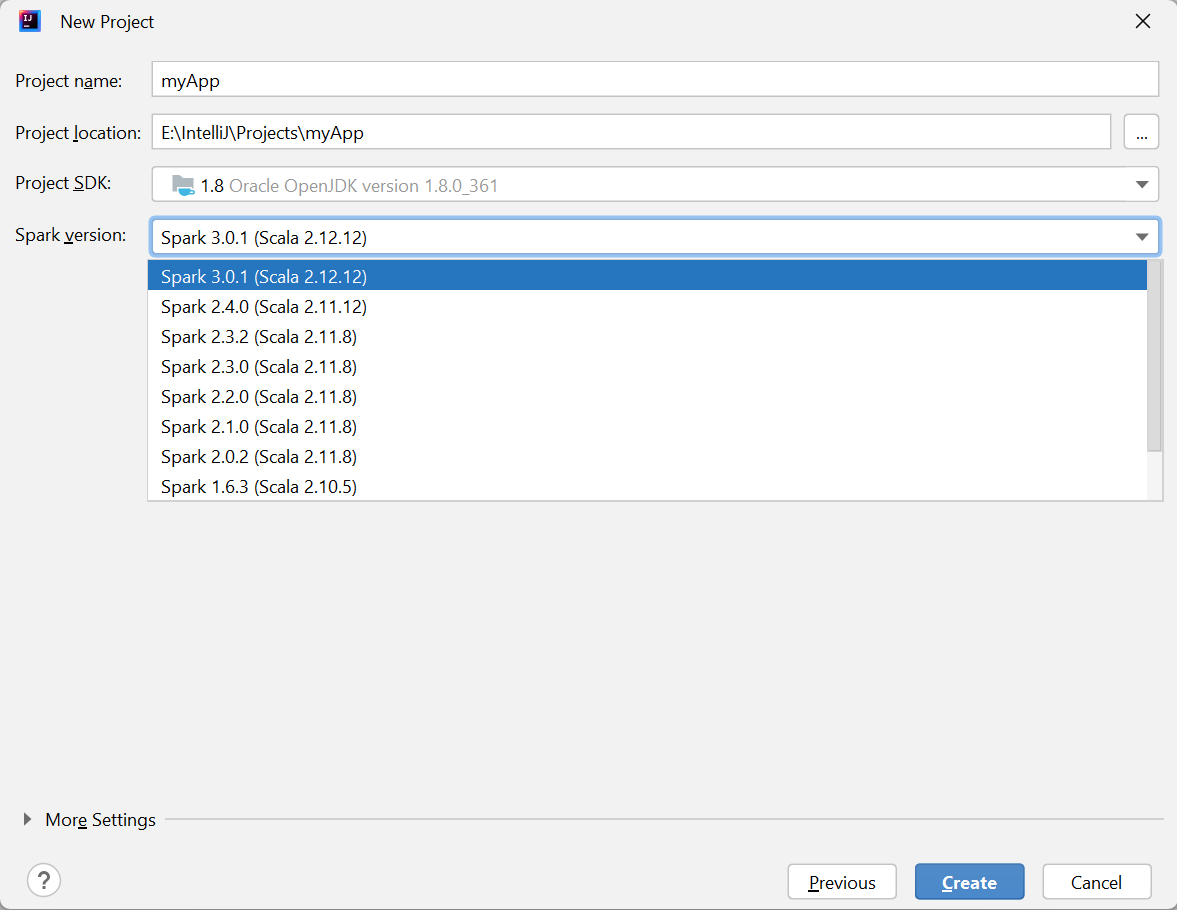
Select Finish. It may take a few minutes before the project becomes available.
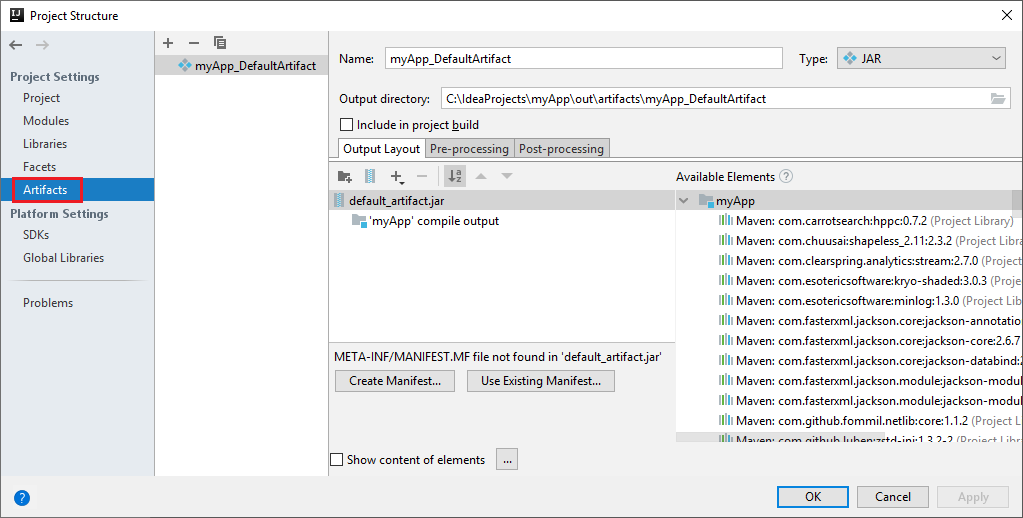
The Spark project automatically creates an artifact for you. To view the artifact, do the following operating:
a. From the menu bar, navigate to File > Project Structure....
b. From the Project Structure window, select Artifacts.
c. Select Cancel after viewing the artifact.
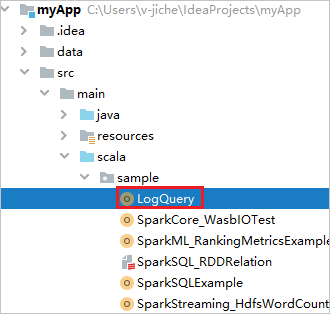
Find LogQuery from myApp > src > main > scala> sample> LogQuery. This tutorial uses LogQuery to run.
Connect to your Spark pools
Sign in to Azure subscription to connect to your Spark pools.
Sign in to your Azure subscription
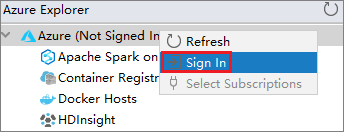
From the menu bar, navigate to View > Tool Windows > Azure Explorer.

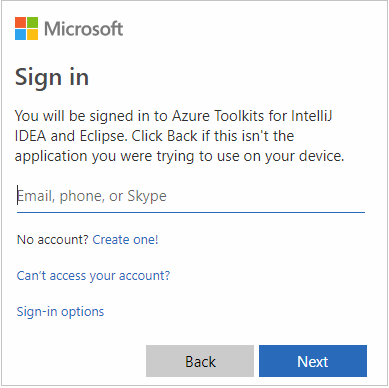
From Azure Explorer, right-click the Azure node, and then select Sign In.
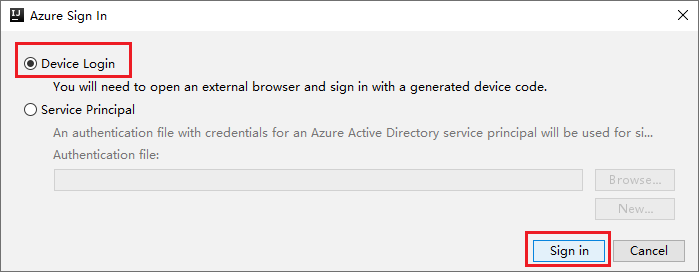
In the Azure Sign In dialog box, choose Device Login, and then select Sign in.
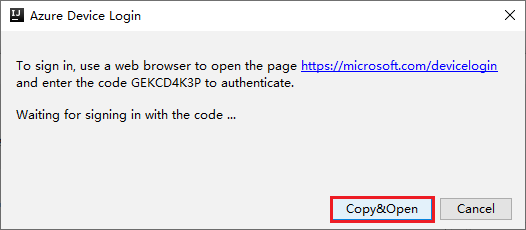
In the Azure Device Login dialog box, select Copy&Open.
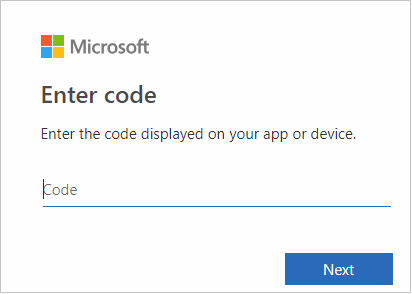
In the browser interface, paste the code, and then select Next.
Enter your Azure credentials, and then close the browser.
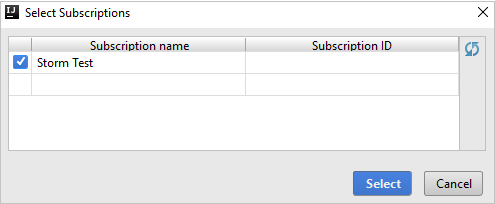
After you're signed in, the Select Subscriptions dialog box lists all the Azure subscriptions that are associated with the credentials. Select your subscription and then select Select.
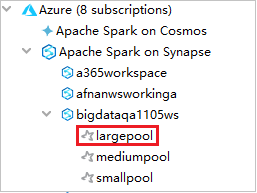
From Azure Explorer, expand Apache Spark on Synapse to view the Workspaces that are in your subscriptions.
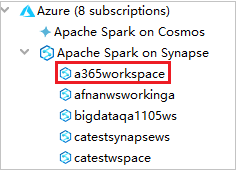
To view the Spark pools, you can further expand a workspace.
Remote Run a Spark Scala application on a Spark pool
After creating a Scala application, you can remotely run it.
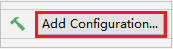
Open Run/Debug Configurations window by selecting the icon.
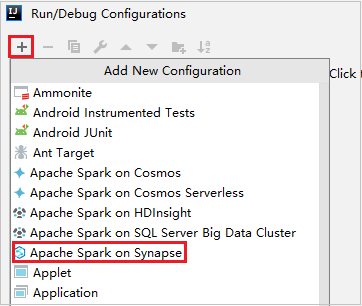
In the Run/Debug Configurations dialog window, select +, then select Apache Spark on Synapse.
In the Run/Debug Configurations window, provide the following values, and then select OK:
Property Value Spark pools Select the Spark pools on which you want to run your application. Select an Artifact to submit Leave default setting. Main class name The default value is the main class from the selected file. You can change the class by selecting the ellipsis(...) and choosing another class. Job configurations You can change the default key and values. For more information, see Apache Livy REST API. Command-line arguments You can enter arguments separated by space for the main class if needed. Referenced Jars and Referenced Files You can enter the paths for the referenced Jars and files if any. You can also browse files in the Azure virtual file system, which currently only supports ADLS Gen2 cluster. For more information: Apache Spark Configuration and How to upload resources to cluster. Job Upload Storage Expand to reveal additional options. Storage Type Select Use Azure Blob to upload or Use cluster default storage account to upload from the drop-down list. Storage Account Enter your storage account. Storage Key Enter your storage key. Storage Container Select your storage container from the drop-down list once Storage Account and Storage Key has been entered. 
Select SparkJobRun icon to submit your project to the selected Spark pool. The Remote Spark Job in Cluster tab displays the job execution progress at the bottom. You can stop the application by selecting the red button.


Local Run/Debug Apache Spark applications
You can follow the instructions below to set up your local run and local debug for your Apache Spark job.
Scenario 1: Do local run
Open the Run/Debug Configurations dialog, select the plus sign (+). Then select the Apache Spark on Synapse option. Enter information for Name, Main class name to save.
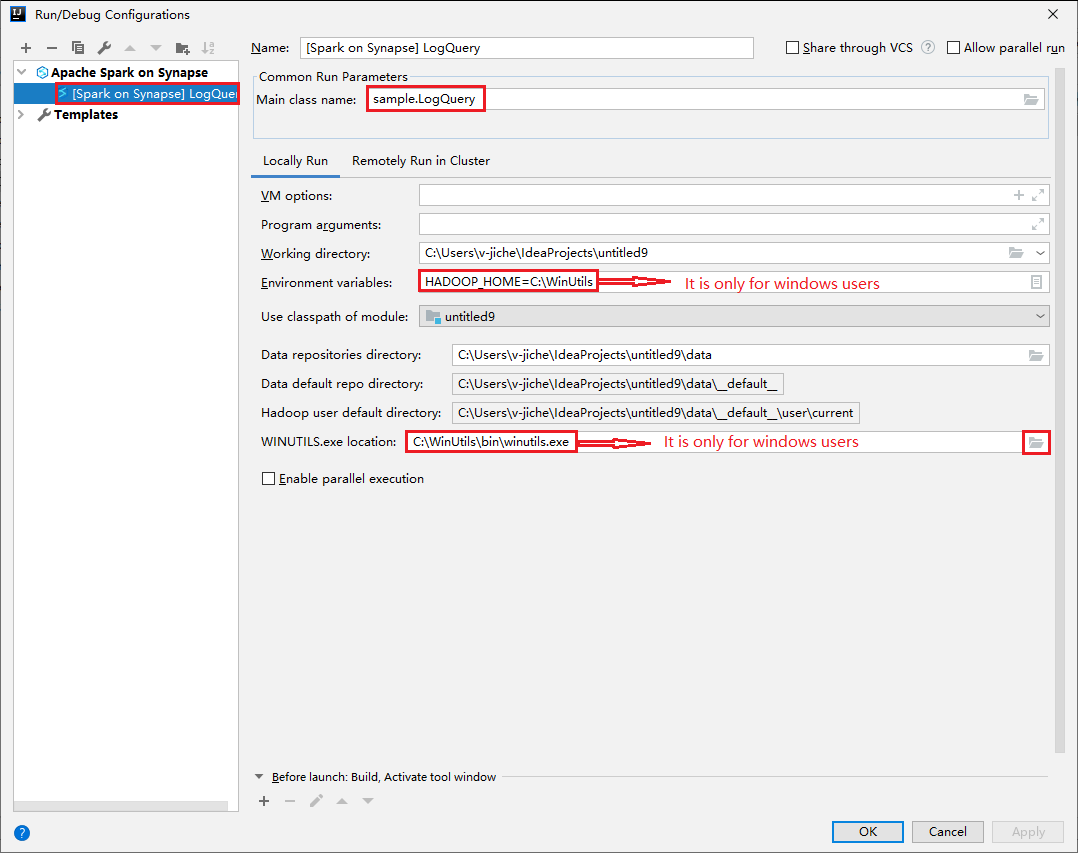
- Environment variables and WinUtils.exe Location are only for windows users.
- Environment variables: The system environment variable can be auto detected if you have set it before and no need to manually add.
- WinUtils.exe Location: You can specify the WinUtils location by selecting the folder icon on the right.
Then select the local play button.

Once local run completed, if script includes output, you can check the output file from data > default.

Scenario 2: Do local debugging
Open the LogQuery script, set breakpoints.
Select Local debug icon to do local debugging.

Access and manage Synapse Workspace
You can perform different operations in Azure Explorer within Azure Toolkit for IntelliJ. From the menu bar, navigate to View > Tool Windows > Azure Explorer.
Launch workspace
From Azure Explorer, navigate to Apache Spark on Synapse, then expand it.
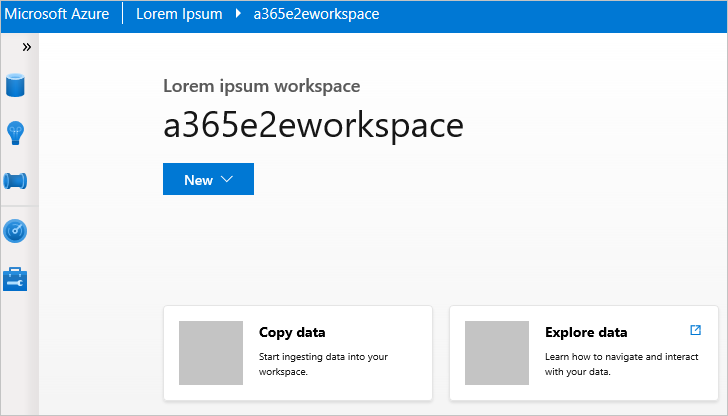
Right-click a workspace, then select Launch workspace, website will be opened.

Spark console
You can run Spark Local Console(Scala) or run Spark Livy Interactive Session Console(Scala).
Spark local console (Scala)
Ensure you've satisfied the WINUTILS.EXE prerequisite.
From the menu bar, navigate to Run > Edit Configurations....
From the Run/Debug Configurations window, in the left pane, navigate to Apache Spark on Synapse > [Spark on Synapse] myApp.
From the main window, select the Locally Run tab.
Provide the following values, and then select OK:
Property Value Environment variables Ensure the value for HADOOP_HOME is correct. WINUTILS.exe location Ensure the path is correct. 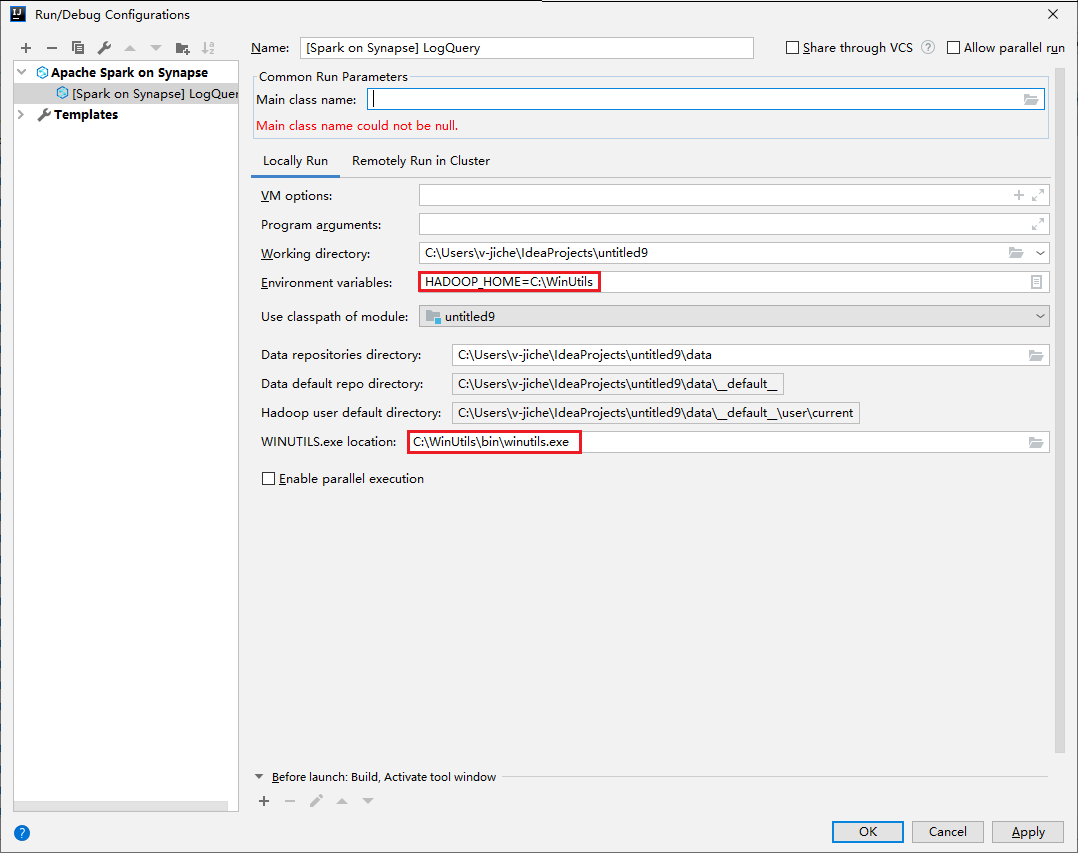
From Project, navigate to myApp > src > main > scala > myApp.
From the menu bar, navigate to Tools > Spark console > Run Spark Local Console(Scala).
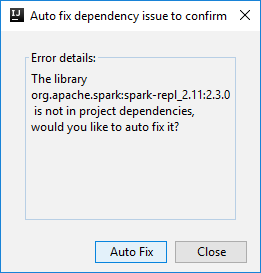
Then two dialogs may be displayed to ask you if you want to auto fix dependencies. If so, select Auto Fix.

The console should look similar to the picture below. In the console window type
sc.appName, and then press ctrl+Enter. The result will be shown. You can stop the local console by selecting red button.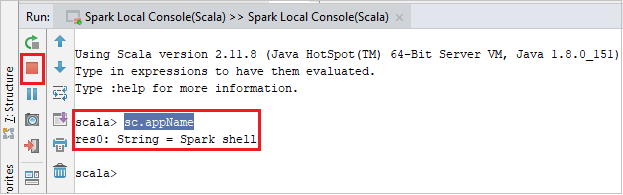
Spark Livy interactive session console (Scala)
It's only supported on IntelliJ 2018.2 and 2018.3.
From the menu bar, navigate to Run > Edit Configurations....
From the Run/Debug Configurations window, in the left pane, navigate to Apache Spark on synapse > [Spark on synapse] myApp.
From the main window, select the Remotely Run in Cluster tab.
Provide the following values, and then select OK:
Property Value Main class name Select the Main class name. Spark pools Select the Spark pools on which you want to run your application. 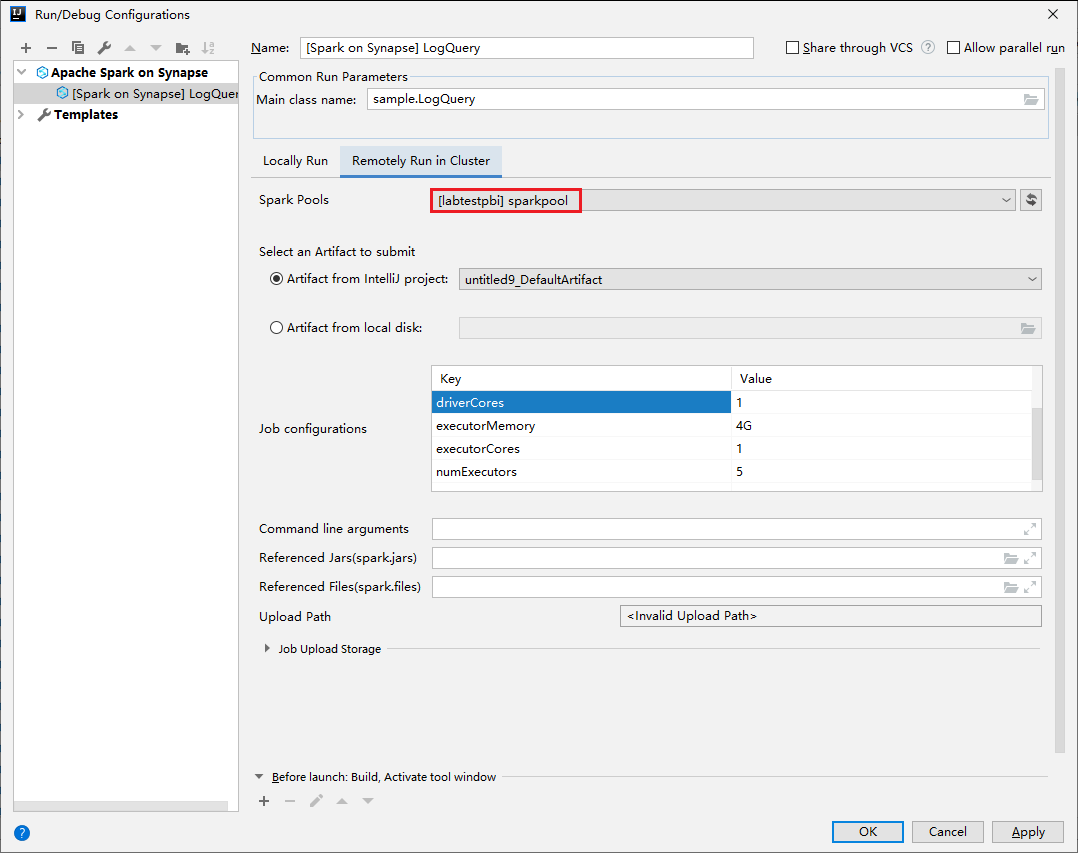
From Project, navigate to myApp > src > main > scala > myApp.
From the menu bar, navigate to Tools > Spark console > Run Spark Livy Interactive Session Console(Scala).
The console should look similar to the picture below. In the console window type
sc.appName, and then press ctrl+Enter. The result will be shown. You can stop the local console by selecting red button.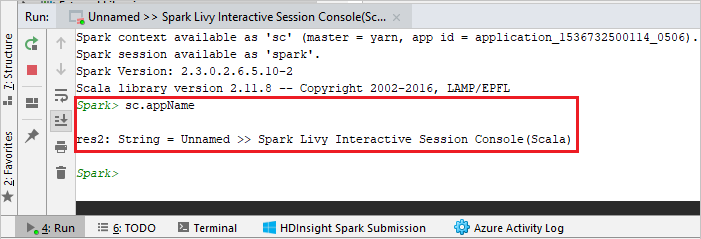
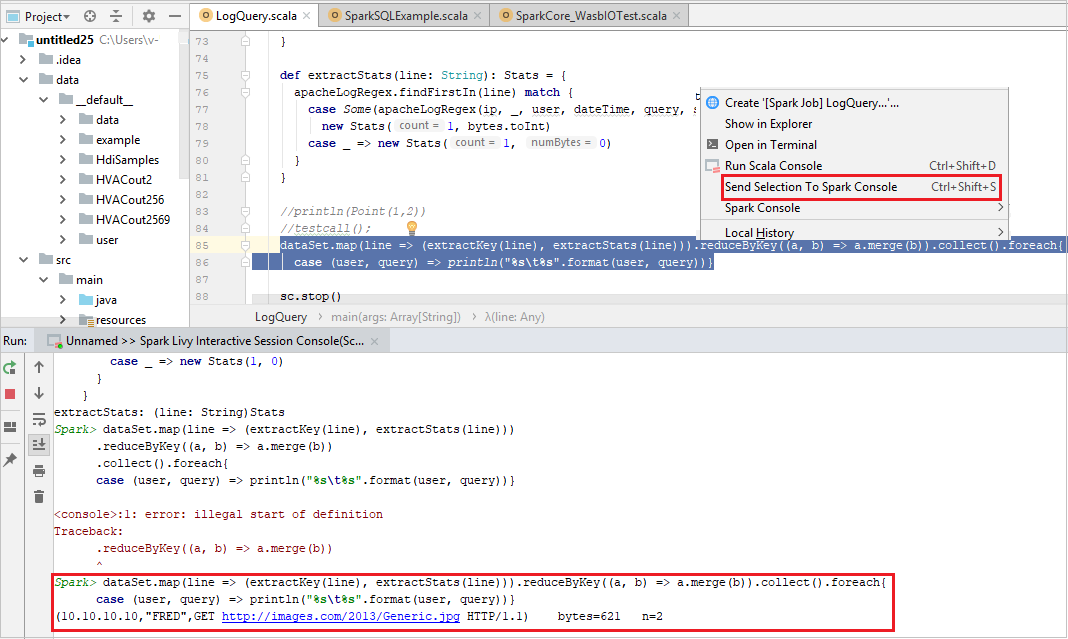
Send selection to Spark console
You may want to see the script result by sending some code to the local console or Livy Interactive Session Console(Scala). To do so, you can highlight some code in the Scala file, then right-click Send Selection To Spark console. The selected code will be sent to the console and be done. The result will be displayed after the code in the console. The console will check the existing errors.
Next steps
Feedback
Coming soon: Throughout 2024 we will be phasing out GitHub Issues as the feedback mechanism for content and replacing it with a new feedback system. For more information see: https://aka.ms/ContentUserFeedback.
Submit and view feedback for