Tutorial: Install a LAMP stack on an Azure Linux VM
Applies to: ✔️ Linux VMs
This article walks you through how to deploy an Apache web server, MySQL, and PHP (the LAMP stack) on an Ubuntu VM in Azure. To see the LAMP server in action, you can optionally install and configure a WordPress site. In this tutorial you learn how to:
- Create an Ubuntu VM
- Open port 80 for web traffic
- Install Apache, MySQL, and PHP
- Verify installation and configuration
- Install WordPress
This setup is for quick tests or proof of concept. For more on the LAMP stack, including recommendations for a production environment, see the Ubuntu documentation.
This tutorial uses the CLI within the Azure Cloud Shell, which is constantly updated to the latest version. To open the Cloud Shell, select Try it from the top of any code block.
If you choose to install and use the CLI locally, this tutorial requires that you're running the Azure CLI version 2.0.30 or later. Run az --version to find the version. If you need to install or upgrade, see Install Azure CLI.
Create a resource group
Create a resource group with the az group create command. An Azure resource group is a logical container into which Azure resources are deployed and managed.
The following example creates a resource group named myResourceGroup in the eastus location.
az group create --name myResourceGroup --location eastus
Create a virtual machine
Create a VM with the az vm create command.
The following example creates a VM named myVM and creates SSH keys if they don't already exist in a default key location. To use a specific set of keys, use the --ssh-key-value option. The command also sets azureuser as an administrator user name. You use this name later to connect to the VM.
az vm create \
    --resource-group myResourceGroup \
    --name myVM \
    --image Ubuntu2204 \
    --admin-username azureuser \
    --generate-ssh-keys
When the VM has been created, the Azure CLI shows information similar to the following example. Take note of the publicIpAddress. This address is used to access the VM in later steps.
{
  "fqdns": "",
  "id": "/subscriptions/<subscription ID>/resourceGroups/myResourceGroup/providers/Microsoft.Compute/virtualMachines/myVM",
  "location": "eastus",
  "macAddress": "00-0D-3A-23-9A-49",
  "powerState": "VM running",
  "privateIpAddress": "10.0.0.4",
  "publicIpAddress": "40.68.254.142",
  "resourceGroup": "myResourceGroup"
}
Open port 80 for web traffic
By default, only SSH connections are allowed into Linux VMs deployed in Azure. Because this VM is going to be a web server, you need to open port 80 from the internet. Use the az vm open-port command to open the desired port.
az vm open-port --port 80 --resource-group myResourceGroup --name myVM
For more information about opening ports to your VM, see Open ports.
SSH into your VM
If you don't already know the public IP address of your VM, run the az network public-ip list command. You need this IP address for several later steps.
az network public-ip list --resource-group myResourceGroup --query [].ipAddress
Use the following command to create an SSH session with the virtual machine. Substitute the correct public IP address of your virtual machine. In this example, the IP address is 40.68.254.142. azureuser is the administrator user name set when you created the VM.
ssh azureuser@40.68.254.142
Install Apache, MySQL, and PHP
Run the following command to update Ubuntu package sources and install Apache, MySQL, and PHP. Note the caret (^) at the end of the command, which is part of the lamp-server^ package name.
sudo apt update && sudo apt install lamp-server^
You're prompted to install the packages and other dependencies. This process installs the minimum required PHP extensions needed to use PHP with MySQL.
Verify Apache
Check the version of Apache with the following command:
apache2 -v
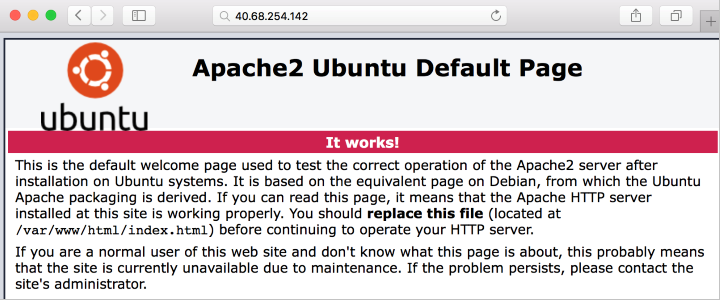
With Apache installed, and port 80 open to your VM, the web server can now be accessed from the internet. To view the Apache2 Ubuntu Default Page, open a web browser, and enter the public IP address of the VM. Use the public IP address you used to SSH to the VM:
Verify and secure MySQL
Check the version of MySQL with the following command (note the capital V parameter):
mysql -V
To help secure the installation of MySQL, including setting a root password, run the mysql_secure_installation script.
sudo mysql_secure_installation
You can optionally set up the Validate Password Plugin (recommended). Then, set a password for the MySQL root user, and configure the remaining security settings for your environment. We recommend that you answer "Y" (yes) to all questions.
If you want to try MySQL features (create a MySQL database, add users, or change configuration settings), login to MySQL. This step isn't required to complete this tutorial.
sudo mysql -u root -p
When done, exit the mysql prompt by typing \q.
Verify PHP
Check the version of PHP with the following command:
php -v
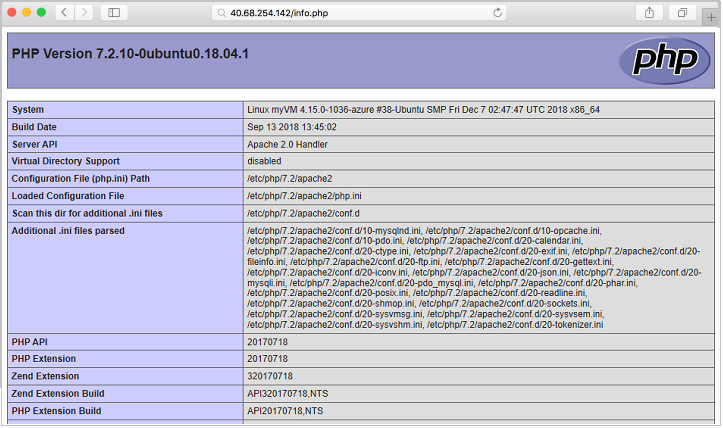
If you want to test further, create a quick PHP info page to view in a browser. The following command creates the PHP info page:
sudo sh -c 'echo "<?php phpinfo(); ?>" > /var/www/html/info.php'
Now you can check the PHP info page you created. Open a browser and go to http://yourPublicIPAddress/info.php. Substitute the public IP address of your VM. It should look similar to this image.
Install WordPress
If you want to try your stack, install a sample app. As an example, the following steps install the open source WordPress platform to create websites and blogs. Other workloads to try include Drupal and Moodle.
This WordPress setup is only for proof of concept. To install the latest WordPress in production with recommended security settings, see the WordPress documentation.
Install the WordPress package
Run the following command:
sudo apt install wordpress
Configure WordPress
Configure WordPress to use MySQL and PHP.
In a working directory, create a text file wordpress.sql to configure the MySQL database for WordPress:
sudo sensible-editor wordpress.sql
Add the following commands, substituting a database password of your choice for yourPassword (leave other values unchanged). If you previously set up a MySQL security policy to validate password strength, make sure the password meets the strength requirements. Save the file.
CREATE DATABASE wordpress;
GRANT SELECT,INSERT,UPDATE,DELETE,CREATE,DROP,ALTER
ON wordpress.*
TO wordpress@localhost
IDENTIFIED BY 'yourPassword';
Run the following command to create the database:
cat wordpress.sql | sudo mysql --defaults-extra-file=/etc/mysql/debian.cnf
Because the file wordpress.sql contains database credentials, delete it after use:
sudo rm wordpress.sql
To configure PHP, run the following command to open a text editor of your choice and create the file /etc/wordpress/config-localhost.php:
sudo sensible-editor /etc/wordpress/config-localhost.php
Copy the following lines to the file, substituting your WordPress database password for yourPassword (leave other values unchanged). Then save the file.
<?php
define('DB_NAME', 'wordpress');
define('DB_USER', 'wordpress');
define('DB_PASSWORD', 'yourPassword');
define('DB_HOST', 'localhost');
define('WP_CONTENT_DIR', '/usr/share/wordpress/wp-content');
?>
Move the WordPress installation to the web server document root:
sudo ln -s /usr/share/wordpress /var/www/html/wordpress

sudo mv /etc/wordpress/config-localhost.php /etc/wordpress/config-default.php
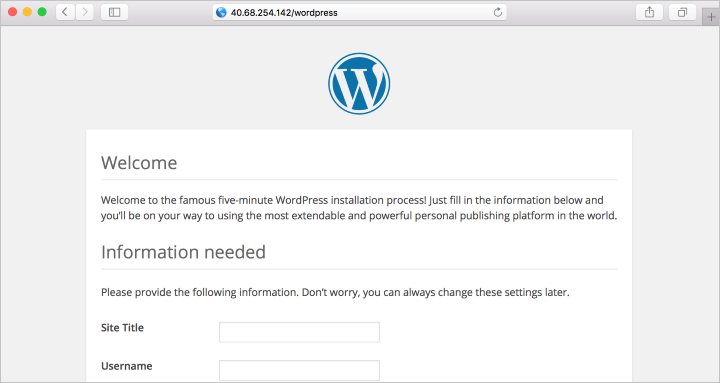
Now you can complete the WordPress setup and publish on the platform. Open a browser and go to http://yourPublicIPAddress/wordpress. Substitute the public IP address of your VM. It should look similar to this image.
Next steps
In this tutorial, you deployed a LAMP server in Azure. You learned how to:
- Create an Ubuntu VM
- Open port 80 for web traffic
- Install Apache, MySQL, and PHP
- Verify installation and configuration
- Install WordPress on the LAMP server
Advance to the next tutorial to learn how to secure web servers with TLS/SSL certificates.
Feedback
Coming soon: Throughout 2024 we will be phasing out GitHub Issues as the feedback mechanism for content and replacing it with a new feedback system. For more information see: https://aka.ms/ContentUserFeedback.
Submit and view feedback for