Define matching rules for data unification
This step in unification defines the match order and rules for cross-table matching. This step requires at least two tables. When records are matched, they're concatenated into a single record with all the fields from each table. Alternate rows (nonwinner rows from the Deduplication step) are considered when matching. But, if a row matches an alternate row in a table, the record is matched to the winner row.
Note
Once you create your match conditions and select Next, you cannot remove a selected table or column. If needed, select Back to review the selected tables and columns before continuing.
The following steps and images reflect the first time you go through the unification process. To edit existing unification settings, see Update the unification settings.
Include enriched tables (preview)
If you enriched tables on the data source level to help improve your unification results, select them. For more information, see Enrichment for data sources. If you selected enriched tables on the Deduplication rules page, you don't need to select them again.
On the Matching rules page, select Use enriched tables at the top of the page.
From the Use enriched tables pane, choose one or more enriched tables.
Select Done.
Specify the match order
Each match unifies two or more tables into a single, consolidated table. At the same time, it keeps the unique customer records. The match order indicates the order in which the system tries to match the records.
Important
The first table is called the primary table, which serves as the basis for your unified profiles. Additional tables that are selected will be added to this table.
Important considerations:
- Choose the table with the most complete and reliable profile data about your customers as the primary table.
- Choose the table that has several columns in common with other tables (for example, name, phone number, or email address) as the primary table.
- Tables can only match against other tables that are higher in priority. So Table2 can only match against Table1, and Table3 can match against Table2 or Table1.
On the Matching rules page, use the move up and down arrows to move the tables in the order you want, or drag and drop them. For example, select eCommerceContacts as the primary table and loyCustomer as the second table.
To have every record in the table as a unique customer regardless if a match is found, select Include all records. Any records in this table that don't match to records in any other table are included in the unified profile. Records that don't have a match are called singletons.
The primary table eCommerceContacts is matched with the next table loyCustomer. The dataset that results from the first match step is matched with the following table if you have more than two tables. If duplicates still exist in eCommerceContacts, when loyCustomer is matched against eCommerceContacts, eCommerceContacts duplicate rows aren't reduced to a single customer record. However, if duplicate rows in loyCustomer match a row in eCommerceContacts, they're reduced into a single customer record.

Define rules for match pairs
Match rules specify the logic by which a specific pair of tables will be matched. A rule consists of one or more conditions.
The warning next to a table name means that no match rule is defined for a match pair.
Select Add rule for a table pair to define match rules.
In the Add rule pane, configure the conditions for the rule.

Select Table/Field (first row): Choose a table and a column that is likely unique to a customer. For example, a phone number or email address. Avoid matching by activity-type columns. For example, a purchase ID will likely find no match in other record types.
Select Table/Field (second row): Choose a column that relates to the column of the table specified in the first row.
Normalize: Select from following normalization options for the selected columns.
- Numerals: Converts other numeral systems, such as Roman numerals, to Arabic numerals. VIII becomes 8.
- Symbols: Removes all symbols and special characters. Head&Shoulder becomes HeadShoulder.
- Text to lower case: Converts all character to lower case. ALL CAPS and Title Case becomes all caps and title case.
- Type (Phone, Name, Address, Organization): Standardizes names, titles, phone numbers, addresses, and organizations.
- Unicode to ASCII: Converts unicode notation to ASCII characters. /u00B2 becomes 2.
- Whitespace: Removes all spaces. Hello World becomes HelloWorld.
Precision: Set the level of precision to apply for this condition. Precision is used with fuzzy matching, and determines how close two strings need to be in order to be considered a match.
- Basic: Choose from Low (30%), Medium (60%), High (80%), and Exact (100%). Select Exact to only match records that match 100 percent.
- Custom: Set a percentage that records need to match. The system will only match records passing this threshold.
Name: Name for the rule.
To match tables only if columns meet multiple conditions, select Add > Add condition to add more conditions to a match rule. Conditions are connected with a logical AND operator and thus only executed if all conditions are met.
Optionally, consider advanced options such as exceptions or custom match conditions.
Select Done to finalize the rule.
Optionally, add more rules.
Select Next.
Add rules to a match pair
Match rules represent sets of conditions. To match tables by conditions based on multiple columns, add more rules.
Select Add rule on the table you want to add rules to.
Follow the steps in Define rules for match pairs.
Note
The order of rules matters. The matching algorithm tries to match a given customer record on the basis of your first rule and continues to the second rule only if no matches were identified with the first rule.
Advanced options
Add exceptions to a rule
In most cases, the table matching leads to unique customer profiles with consolidated data. To address rare cases of false positives and false negatives, define exceptions for a match rule. Exceptions are applied after processing the match rules and avoid matching of all records, which fulfill the exception criteria.
For example, if your match rule combines last name, city, and date of birth, the system would identify twins with the same last name who live in the same town as the same profile. You can specify an exception that doesn't match the profiles if the first name in the tables you combine aren’t the same.
In the Edit rule pane, select Add > Add exception.
Specify the exception criteria.
Select Done to save the rule.
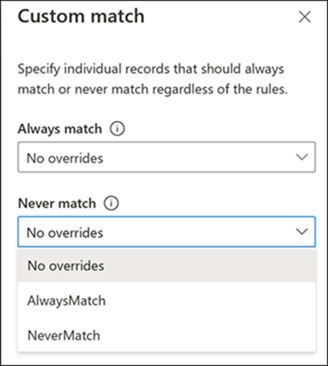
Specify custom match conditions
Specify conditions that override the default match logic. There are four options available:
| Option | Description | Example |
|---|---|---|
| Always match | Defines values for the primary keys that are always matched. | Always match the row with primary key 12345 to the row with primary key 54321. |
| Never match | Defines values for the primary keys that never match. | Never match the row with primary key 12345 to the row with primary key 54321. |
| Bypass | Defines values that the system should always ignore in the match phase. | Ignore the values 11111 and Unknown during match. |
| Alias mapping | Defines values that the system should consider as the same value. | Consider Joe to be equal to Joseph. |
Select Custom.

Choose the Custom type and select Download template. Rename the template without using spaces. Use a separate template for each match option.
Open the downloaded template file and fill in the details. The template contains fields to specify the table and the table primary key values to be used in the custom match. Table names are case sensitive. For example, if you want primary key 12345 from Sales table to always match with primary key 34567 from Contact table, fill in the template:
- Table1: Sales
- Table1Key: 12345
- Table2: Contact
- Table2Key: 34567
The same template file can specify custom match records from multiple tables.
If you want to specify custom matching for deduplication on a table, provide the same table as both Table1 and Table2 and set the different primary key values. You must define at least one deduplication rule to the table to use custom matching.
After adding all the overrides, save the template file.
Go to Data > Data sources and ingest the template files as new tables.
After uploading the files, select the Custom option again. Select the required tables from the dropdown menu and select Done.
Applying the custom match depends on the match option you want to use.
- For Always match or Never match, proceed to the next step.
- For Bypass or Alias mapping, select Edit on an existing match rule or create a new rule. In the Normalizations dropdown, choose the Custom bypass or Alias mapping option and select Done.
Select Done on the Custom pane to apply the custom match configuration.
Each template file ingested is its own data source. If records are discovered that need special matching treatment, update the appropriate data source. The update will be used during the next unification process. For example, you identify twins with nearly the same name living at the same address that had been merged as one person. Update the data source to identify the twins as separate, unique records.