Configure the sales accelerator
Enable and configure the sales accelerator to create sequences and connect records, and view daily work list items.
Tip
If you’d like to try Dynamics 365 Sales for free, you can sign up for a 30-day trial.
License and role requirements
| Requirement type | You must have |
|---|---|
| License | Dynamics 365 Sales Premium or Dynamics 365 Sales Enterprise More information: Dynamics 365 Sales pricing |
| Security roles | System Administrator More information: Predefined security roles for Sales |
How does the sales accelerator help a sales team?
The sales accelerator is an engagement platform that helps a sales team understand customers' needs and respond in the following ways:
- Engage with customers by using multiple channels within one workspace.
- Minimize the time spent on searching for the next best customer to reach out to.
- Gather information from multiple sources and let sellers focus on how to best approach their customers.
- Sell smartly by building a strong and prioritized pipeline, offering context, and surfacing automated recommendations throughout a sales sequence that helps to expedite the sales process.
Note
You can also set up the sales accelerator through quick setup (with the Dynamics 365 Sales Enterprise license). In this case, you'll get 1,500 sequence-connected records per month. To set up sales accelerator through quick setup, go to the Sales settings page under App Settings. More information: Set up sales accelerator
Recommendations
For the best experience of the sales accelerator, enable and configure predictive lead scoring and predictive opportunity scoring to display predictive scores for each record in the work list. Displaying the score helps your sellers to prioritize leads and opportunities based on how likely they're to be converted.
First-run setup
Enable the sales accelerator by quickly providing access to security roles and selecting the record types to be shown in the work list.
Note
By default, sales accelerator is available in the Sales Hub app with limited functionalities. Your Sales teams can view the work list items created through timeline for contact, opportunity, lead, and account records. To experience the full capabilities of sales accelerator, purchase the Sales Premium license and configure the features such as sequences and segments.
Sign in to your sales app, and in the lower-left corner of the page, go to Change area > Sales Insights settings.
Under Sales accelerator, select Workspace.
The sales accelerator workspace setup page opens.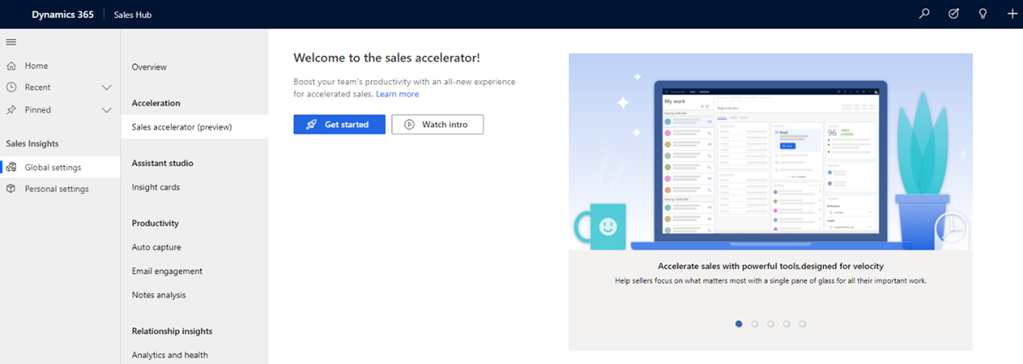
Select Quick setup.
The Sales accelerator quick setup pane opens.

In the Enable for section, select roles to grant permissions to use sales accelerator features. Choose one of the following options to grant permissions.
Security roles Description All security roles Select this option to give access to view sales accelerator features to all the security roles in your organization. Specific security roles Select this option to specify security roles to give access to view the sales accelerator to just a few users. Use the lookup box to add the security roles. Note
To provide permissions for other user roles to create, edit, delete, connect, and disconnect sequences, see Permission requirements to manage sequences
(Optional) Select Add sample data to explore the sales accelerator feature with the provided sample data.
Installing the sample data is relevant only for your sandbox or trial environments. Adding the sample data might take a few minutes. More information: Manage sample data
Important
To prevent unwanted results, sample data is available only for non-production environments.

In the Record type and form section, select the record types and their corresponding related forms to view in the work list, as required by your organization. By default, leads, opportunities, accounts, and contacts are selected.
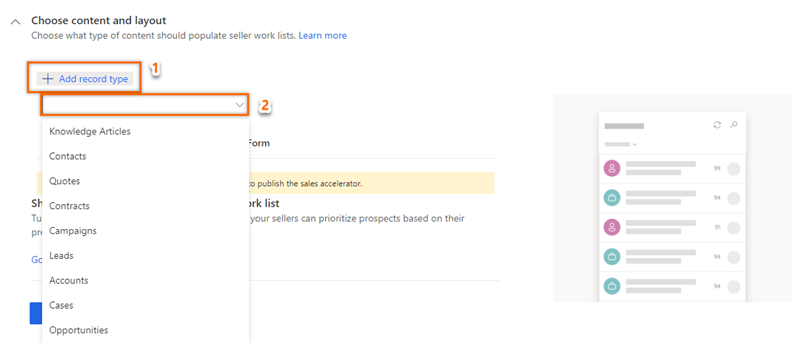
To add a record type, select Add record type, and then select the dropdown list to choose the records that you want to add.
From the dropdown list, choose a form to which you want to add the Sequence (up next) widget. Sales managers use the record types to configure the sequence that will be assigned to records to be displayed in the app.
Note
- To view the custom records types in the list, go to Settings > Customizations > Customize the System > Components > Entities. Under Communication & Collaboration, enable the options Activities, Connections, and Sending email (If an email field does not exist, one will be created).
- To add the Up next widget to your custom entity form, see Add the Up next widget to an entity form.
Repeat steps a and b to add more record types.
Note
- You can remove the record types that you no longer need to associate automated activities with. Select the X icon corresponding to the record type to remove it from the list. However, note that if the records in the deleted record type are associated with a sequence, these records will continue to be associated with the sequence.
- To know how records are populated in the work list, go to View my records by using the work list.
Select Update.
The sales accelerator workspace is enabled and ready to use in your organization. Now, you can customize the workspace by configuring filters, sort, and work item appearances. More information: Customize the workspace
Disable sales accelerator
You can disable the sales accelerator workspace, if it's no longer required in your organization.
On the Sales accelerator workspace page, select Disable.

On the confirmation message, select Disable Sales accelerator.

The sales accelerator workspace is disabled in your organization. Also, sellers can't see the Sales accelerator sitemap entry under My Work.
To configure the sales accelerator, go to First-run setup.
Customizations
By default, the Up next widget is displayed on the Default Main and Sales Insight forms. To add the Up next widget to other forms, follow the process specified in How do I add the Up next widget to an entity form?
Learn more about how to add sales accelerator to the site map in your custom app.
Add sales accelerator site map entry to custom app
Note
Enable sales insights in your organization before you add the site map to your custom app.
When you create a custom model-driven app and choose a default solution to create a sitemap for the app. However, the list contains solutions that are based on entity forms only. The sales accelerator option is based on URL custom control forms and do not appear in the solution list. You must manually add the option to the sitemap. After you add these options, users in your organization can see them on the app’s sitemap.
Use the following URLs to add the sale accelerator site map to your custom app and perform the steps in add site map entry to custom app:
| Feature name | URL |
|---|---|
| Sales accelerator | /main.aspx?pagetype=control&controlName=MscrmControls.AcceleratedSales.AnchorShellControl |
Can't find the options in your app?
There are three possibilities:
- You don't have the necessary license or role.
- Your administrator hasn't turned on the feature.
- Your organization is using a custom app. Check with your administrator for exact steps. The steps described in this article are specific to the out-of-the-box Sales Hub and Sales Professional apps.
See also
What is the sales accelerator?
Create and manage sequences
Configure sales accelerator settings for sellers to personalize
Manage access and record type
Customize the workspace
Feedback
Coming soon: Throughout 2024 we will be phasing out GitHub Issues as the feedback mechanism for content and replacing it with a new feedback system. For more information see: https://aka.ms/ContentUserFeedback.
Submit and view feedback for