Manage your SharePoint documents and document locations from Dynamics 365 Customer Engagement (on-premises).
This article applies to Dynamics 365 Customer Engagement (on-premises) version 9.1 using the legacy web client. If you’re using Unified Interface, your apps work the same as Unified Interface for model-driven Power Apps. For the Power Apps version of this article, see: Collaborate using SharePoint
With Dynamics 365 Customer Engagement (on-premises), you can store your documents on SharePoint and manage them from within your app.
The documents that you create in Customer Engagement are stored on SharePoint, and are automatically synced to your desktop and mobile devices.
Note
Before you can use SharePoint to store the documents, it must be enabled by your system administrator.
Important
This feature requires that you have an Office 365 subscription or a subscription to an online service such as SharePoint.
What record types support document management?
By default, SharePoint is enabled for the following entities:
Account
Article
Category
Knowledge Article
Lead
Opportunity
Quote
Product
Sales Literature
Where do you access the documents from?
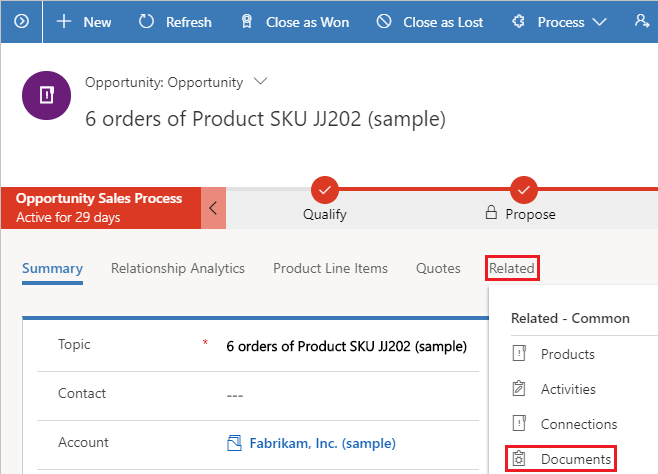
For record types that support document management, open the record, select the Related tab, and then select Documents.
What happens when you navigate to the Documents tab first time?
When SharePoint is enabled, for record types that support document management, a default document location (folder) is automatically created on SharePoint the first time you go to the Documents tab. The name of the document location is in the following format: <record_name>_<record_id>.
By default, the location is set to Documents on Default Site 1.
View existing SharePoint documents
Open the Document Associated grid in a web app
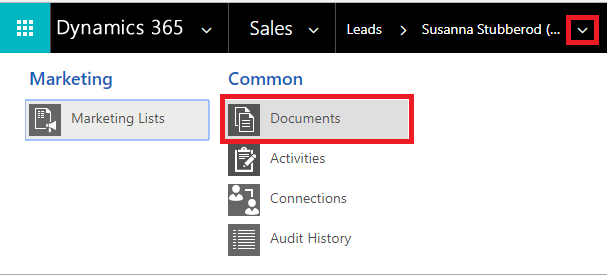
Go to the record for which you want to view the associated documents. For example, select Sales > Leads.
In the web app, on the command bar, select the arrow besides the record name, and select Documents.
Open the Document Associated grid in a mobile-optimized app
Select the site map
 , and then select Opportunities
Select the Related tab, and then select Documents.

Customer Engagement organizes documents in a consolidated view.
Select Document Location to filter the document list. Select from the available document locations.
Create a new document
To create a new SharePoint document in Customer Engagement:
Go to the record you want to create the document for, and select the Documents tab.
Navigate to the document location and folder where you want to create this new document.
Select New, and then choose a document type such as Microsoft Word, Microsoft Excel, Microsoft PowerPoint, or OneNote.
You can also create a folder from here.
In the Create a New Document dialog box, enter a document or folder name.
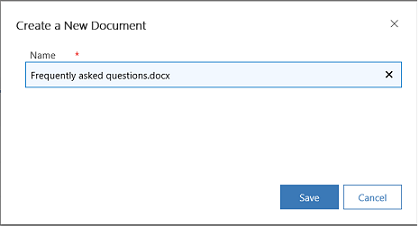
Select Save.
The document is created in the folder of the current document location you're in.
If you create a folder, you'll be able to see a folder hierarchy at the top of Documents list.
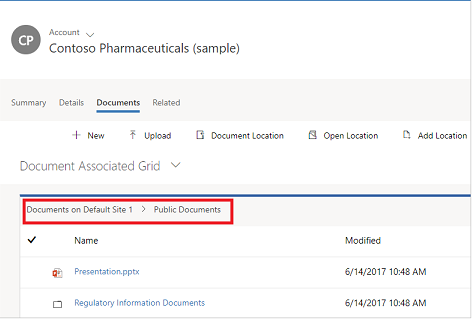
Select on the folder name to navigate between the folders.
Upload a document
To upload existing document to SharePoint from Microsoft Dynamics 365 for Sales:
Go to the record you want to create the document for, and select the Documents tab.
Select Upload.
Choose the file you want to upload. You can choose only one file at a time.
The document is created in the folder of the current document location you're in.
Note
You can upload a file of up to 50 MB. If your internet connection is slow, you might get an error while uploading large files.
If files with the same name exist in SharePoint, select whether you want to overwrite the files.
Select OK.
Manage SharePoint locations
You can create new or edit existing SharePoint locations from Microsoft Dynamics 365 for Sales.
In the Documents list
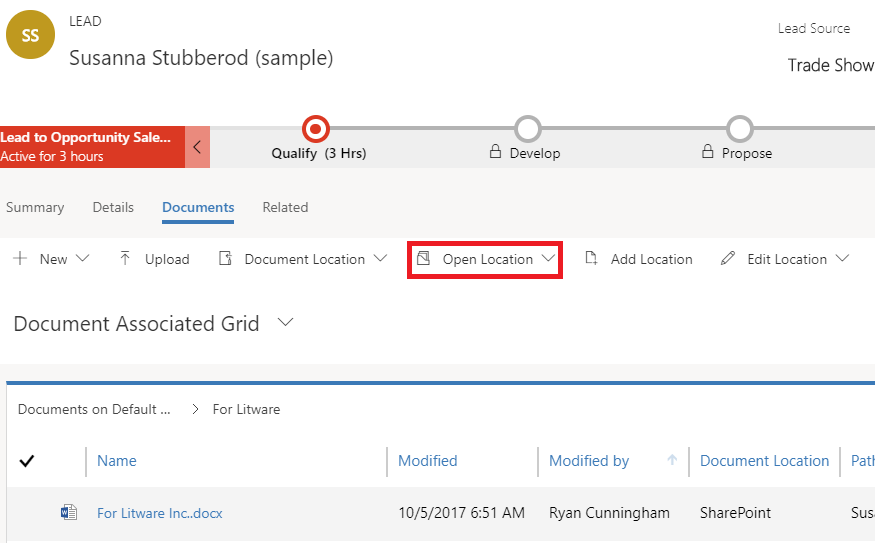
To open the location, on the command bar, select Open Location, and then select the location.
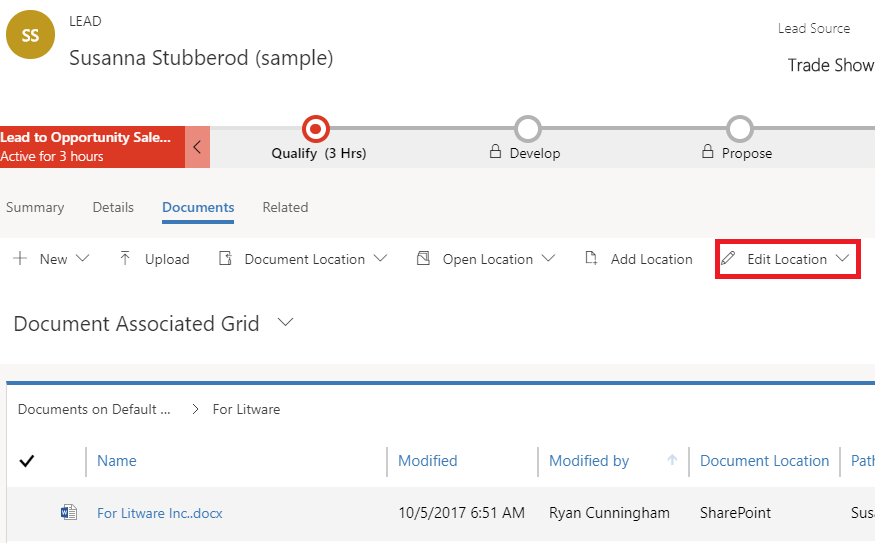
To edit the location, on the command bar, select Edit Location > <location name>.
The Edit Location dialog box appears.
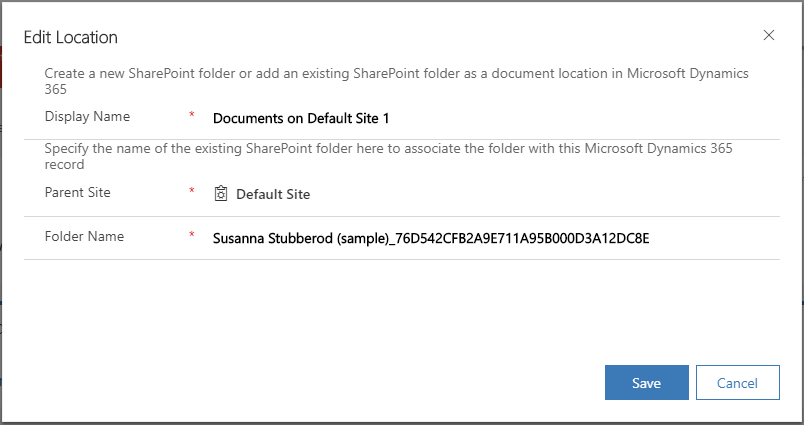
The display name, parent site, and folder name are automatically populated. Enter details about the new location, and then select Save.
To add a location, on the command bar, select Add Location.
The Add Location dialog box appears.
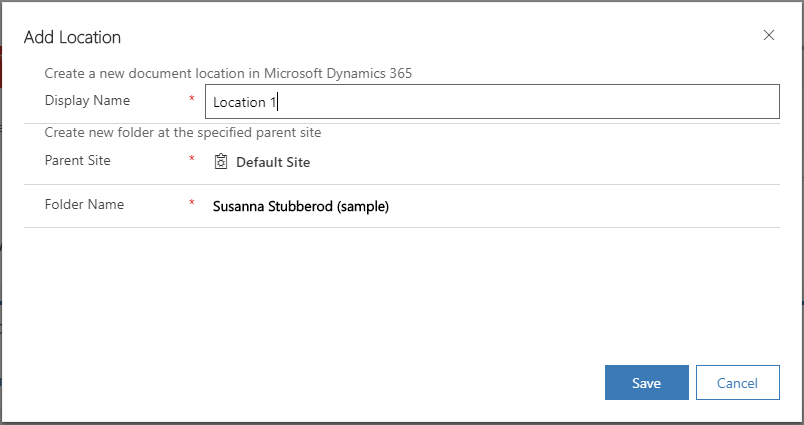
The display name, parent site, and folder name are automatically populated. Change the details if required, and then select Save.
Actions on documents
When you select one or more documents in the Documents list, you can take the following other common SharePoint actions on the documents:
Edit
Delete
Check in
Check out
Discard check out
Edit properties
This topic applies to Dynamics 365 Customer Engagement (on-premises). For the Power Apps version of this topic, see: Collaborate using SharePoint
With Dynamics 365 Customer Engagement (on-premises), you can store your documents on SharePoint and manage them from within your app.
The documents that you create in Customer Engagement are stored on SharePoint, and are automatically synced to your desktop and mobile devices.
Note
Before you can use SharePoint to store the documents, it must be enabled by your system administrator.
Important
This feature requires that you have an Office 365 subscription or a subscription to an online service such as SharePoint.
What record types support document management?
By default, SharePoint is enabled for the following entities:
Account
Article
Category
Knowledge Article
Lead
Opportunity
Quote
Product
Sales Literature
Where do you access the documents from?
For record types that support document management, open the record, select the Related tab, and then select Documents.

What happens when you navigate to the Documents tab first time?
When SharePoint is enabled, for record types that support document management, a default document location (folder) is automatically created on SharePoint the first time you go to the Documents tab. The name of the document location is in the following format: <record_name>_<record_id>.
By default, the location is set to Documents on Default Site 1.
View existing SharePoint documents
Open the Document Associated grid in a web app
Go to the record for which you want to view the associated documents. For example, select Sales > Leads.
In the web app, on the command bar, select the arrow besides the record name, and select Documents.

Open the Document Associated grid in a mobile-optimized app
Select the site map
 , and then select Opportunities
Select the Related tab, and then select Documents.

Customer Engagement organizes documents in a consolidated view.
Select Document Location to filter the document list. Select from the available document locations.
Create a new document
To create a new SharePoint document in Customer Engagement:
Go to the record you want to create the document for, and select the Documents tab.
Navigate to the document location and folder where you want to create this new document.
Select New, and then choose a document type such as Microsoft Word, Microsoft Excel, Microsoft PowerPoint, or OneNote.
You can also create a folder from here.
In the Create a New Document dialog box, enter a document or folder name.

Select Save.
The document is created in the folder of the current document location you're in.
If you create a folder, you'll be able to see a folder hierarchy at the top of Documents list.

Select on the folder name to navigate between the folders.
Upload a document
To upload existing document to SharePoint from Microsoft Dynamics 365 for Sales:
Go to the record you want to create the document for, and select the Documents tab.
Select Upload.
Choose the file you want to upload. You can choose only one file at a time.
The document is created in the folder of the current document location you're in.
Note
You can upload a file of up to 50 MB. If your internet connection is slow, you might get an error while uploading large files.
If files with the same name exist in SharePoint, select whether you want to overwrite the files.
Select OK.
Manage SharePoint locations
You can create new or edit existing SharePoint locations from Microsoft Dynamics 365 for Sales.
In the Documents list
To open the location, on the command bar, select Open Location, and then select the location.

To edit the location, on the command bar, select Edit Location > <location name>.

The Edit Location dialog box appears.

The display name, parent site, and folder name are automatically populated. Enter details about the new location, and then select Save.
To add a location, on the command bar, select Add Location.
The Add Location dialog box appears.

The display name, parent site, and folder name are automatically populated. Change the details if required, and then select Save.
Actions on documents
When you select one or more documents in the Documents list, you can take the following other common SharePoint actions on the documents:
Edit
Delete
Check in
Check out
Discard check out
Edit properties
Feedback
Coming soon: Throughout 2024 we will be phasing out GitHub Issues as the feedback mechanism for content and replacing it with a new feedback system. For more information see: https://aka.ms/ContentUserFeedback.
Submit and view feedback for