Schedule optimization
Publishing schedules
Optimization status code
Unpublished: Default status when a schedule is created or after a reset.
Publishing: The system is trying to publish schedules.
Published: The system published a schedule and it's good to run.
Out of Sync: Changes made against the schedule require it to be published again.
Under Maintenance: Indicates someone is upgrading the Resource Scheduling Optimization to a newer version.
Failed: System failed to publish schedules for various reasons.
The user is able to see the error details on the form of the schedule.
A typical error would be that the SAS Key has not been configured, meaning Resource Scheduling Optimization Azure resources are not set up correctly.

Buttons and functions for optimization schedules
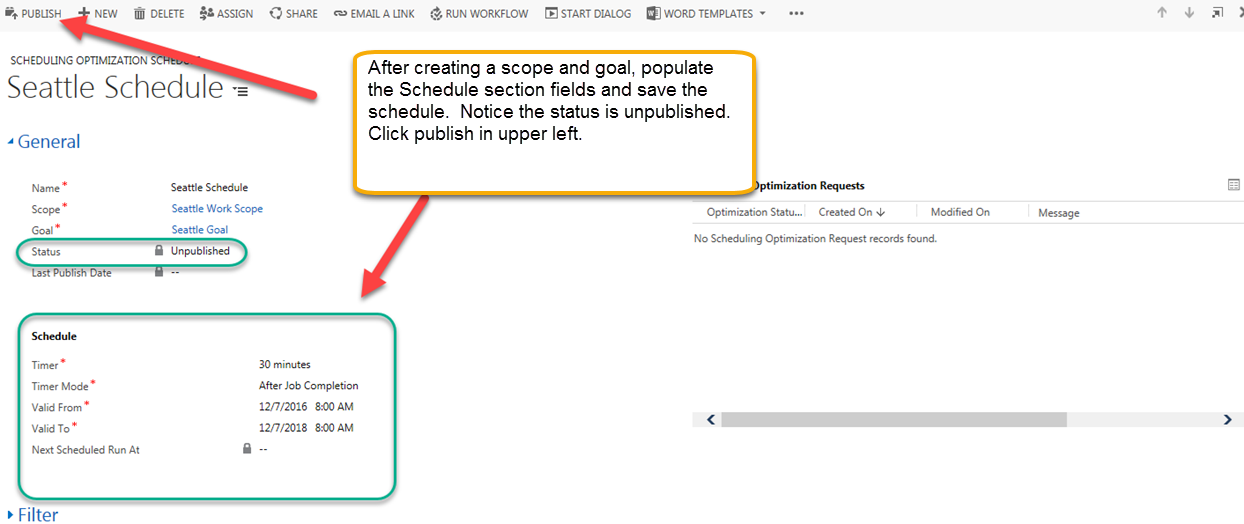
PUBLISH: After creating and saving the schedules, you need to publish them. Notice the Status in this screenshot is Unpublished. To publish, select Publish in the upper left.
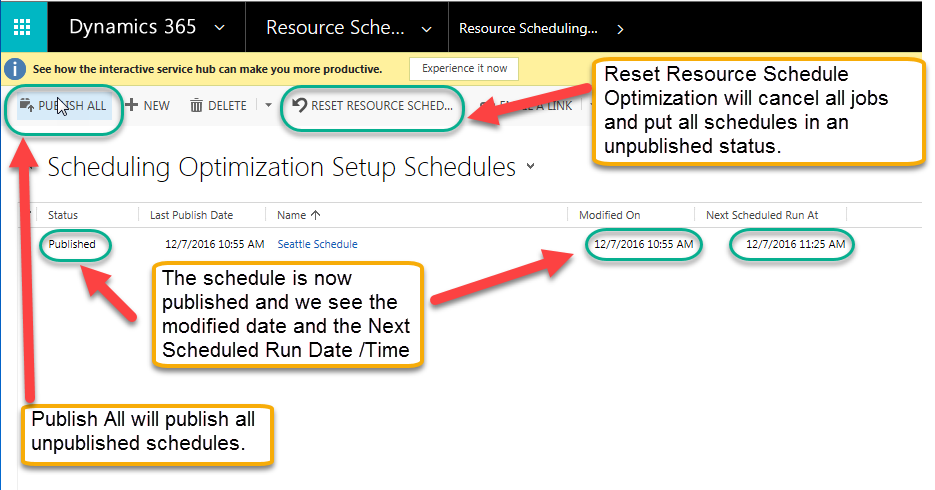
PUBLISH ALL: Publishes all schedules.
RESET RESOURCE SCHEDULING OPTIMIZATION: Cancels all pending Resource Scheduling Optimization jobs and unpublishes all schedules.
The next screenshot shows the publish status of the schedule, the date it was last modified, and the next scheduled run date and time.
RUN NOW: Run Resource Scheduling Optimization on demand, regardless of the timer setting.
Note
RUN NOW is also a function that can trigger a new job. The user can use this button to run Resource Scheduling Optimization per their business needs. For example, whenever there is a P1 work order requirement, you can re-run Resource Scheduling Optimization right away.

Monitoring optimization requests
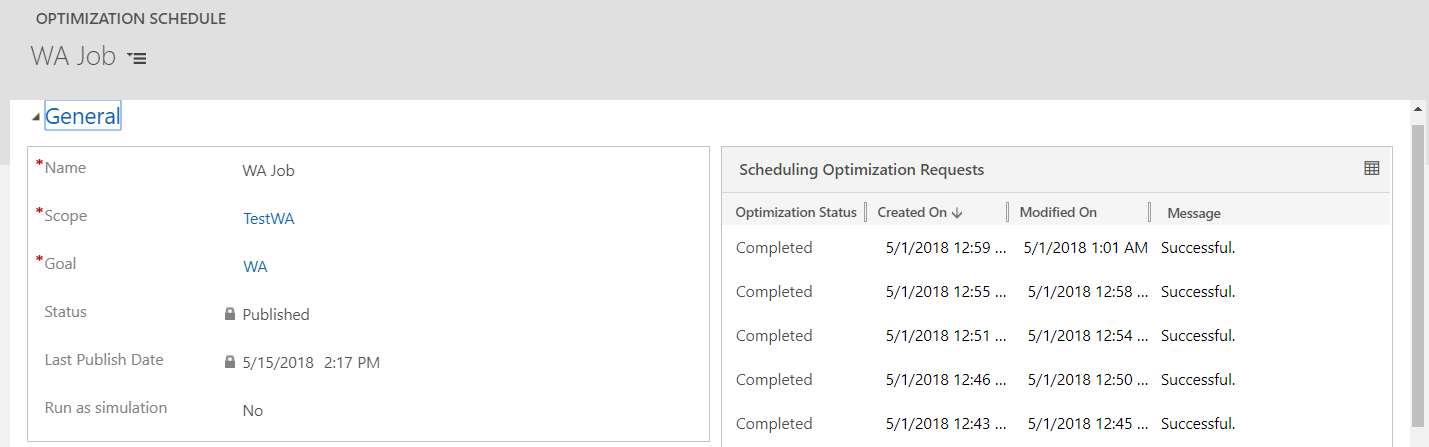
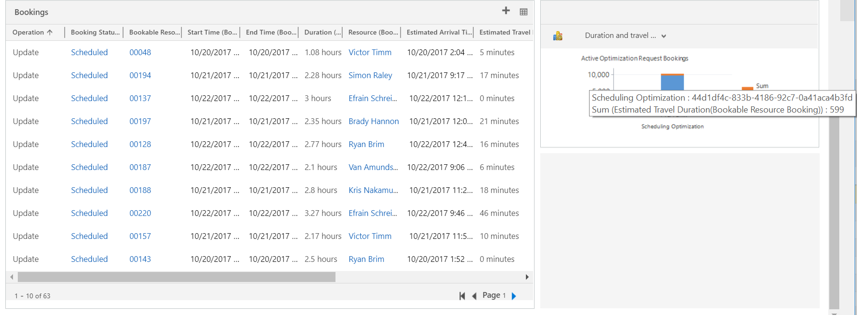
Once a schedule has been published, you can open it and monitor the scheduling optimization requests (Resource Scheduling Optimization jobs). You can drill into each of these to see the bookings associated with that Resource Scheduling Optimization job run.
You can see which resources are being optimized, and which are not (and for what reason).

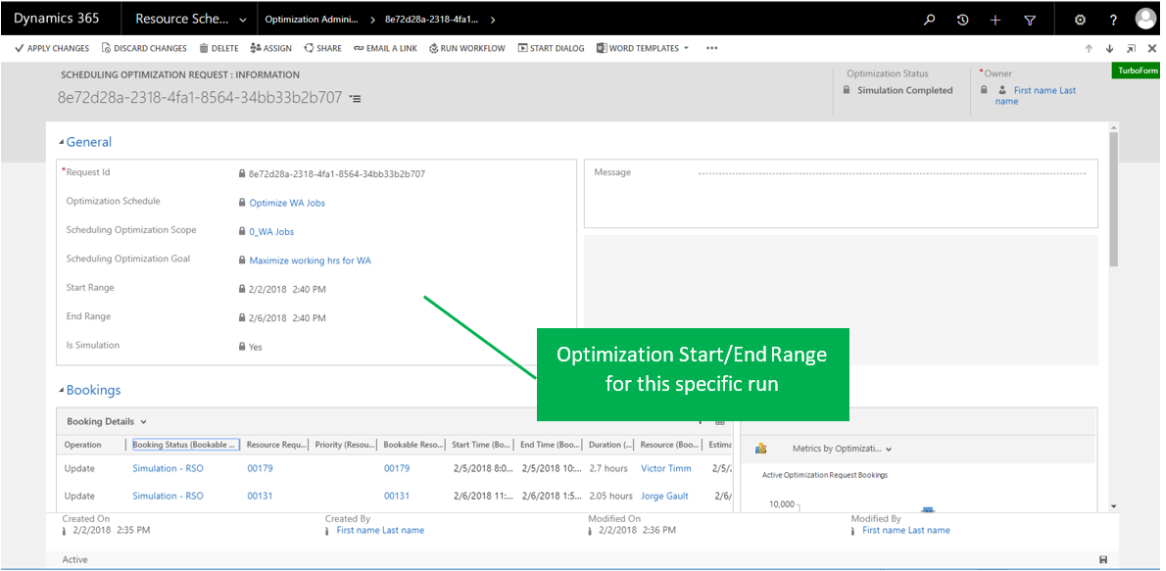
You can view booking details as well as analytic charts showing how many hours of travel time versus how many work hours are scheduled for this run.
Tip
If your schedule has been running for a long time and seems stuck, select Reset Resource Scheduling Optimization. This option clears the blocked job and resets the schedules into a good state. When resetting a single optimization schedule doesn't work or gets blocked too, reset all schedules and republish them.
Leveraging the schedule board to review optimization results
With schedule board integration, you can:
- Better understand the optimization scope.
- View optimization results in a visualized way.
- More easily analyze failed optimization requests.
- Create a new schedule on the fly.
How to get there: Navigate to your Optimization Schedules, select your schedule, and select SCHEDULE BOARD on the grid view, or open the Optimization Schedules record form and select SCHEDULE BOARD on the form.


Feature Details: After clicking SCHEDULE BOARD, you will see the following:
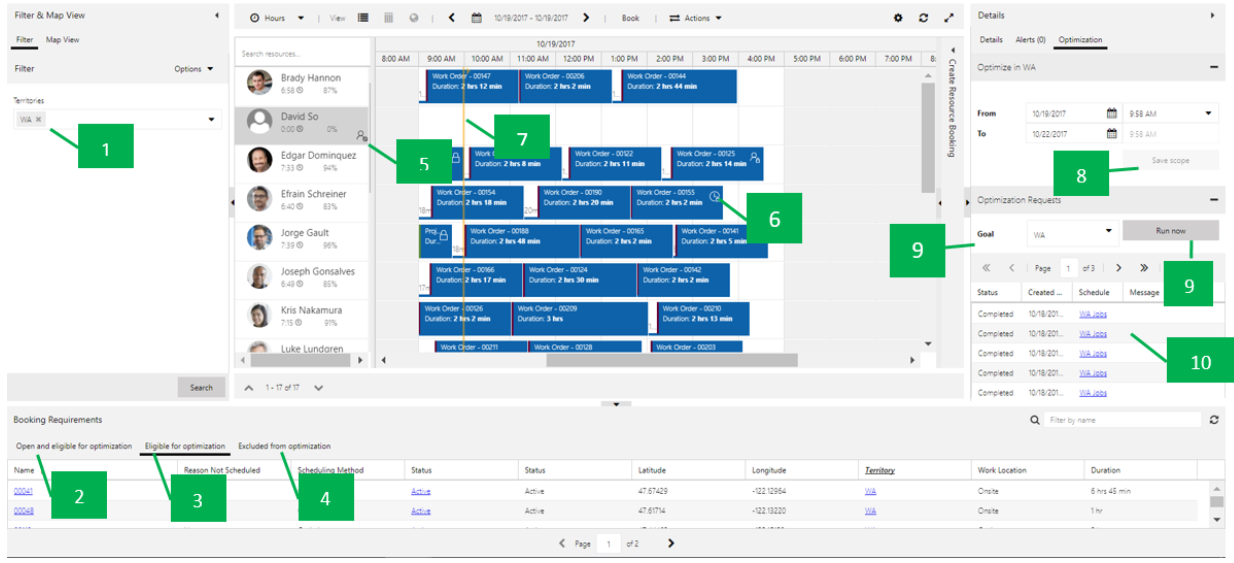
In the Filter section, the system prepopulated filters match Scope > Resource view.
The Open and eligible for optimization tab shows all eligible unscheduled requirements that match scope definition, requirement range, and requirement state setting.
The Eligible for optimization tab shows all eligible unscheduled requirements as well as any eligible bookings to be reoptimized that match scope definition, requirement range, and requirement state setting.
The Excluded from optimization tab shows any eligible requirements or bookings that fail to be optimized for certain reasons (such as invalid longitude/latitude).
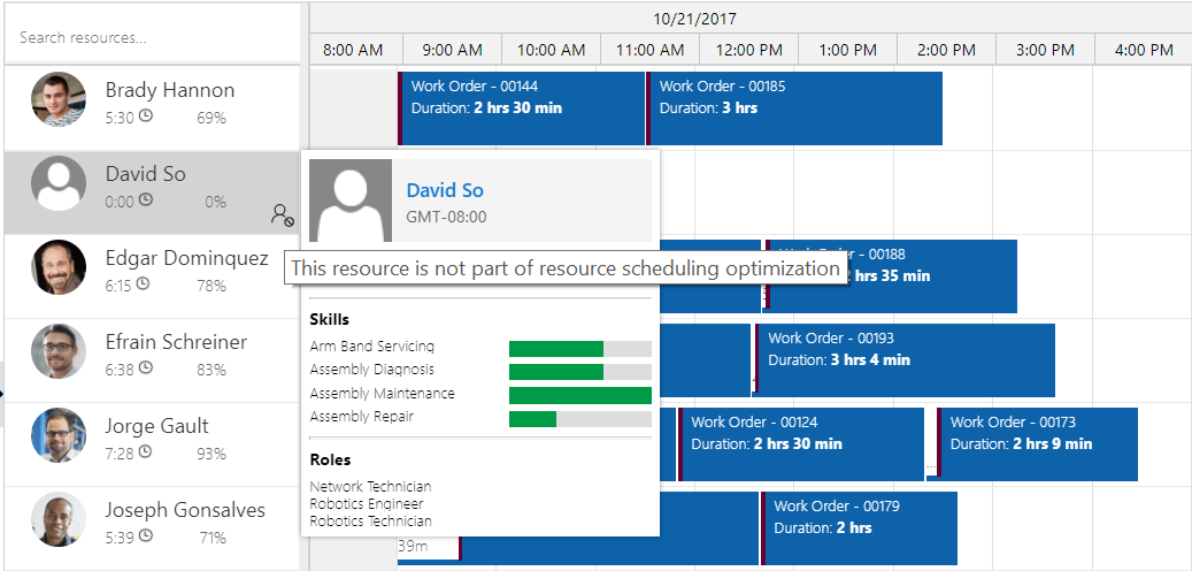
The icon and tooltip indicate resources not in the optimization scope.
The lock icon and tooltip indicate that the booking has been locked.

Yellow lines indicate the start and end time for the optimization range.

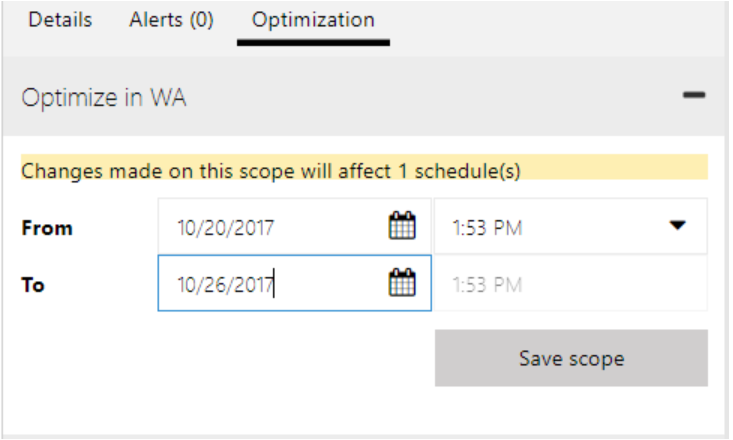
From / To date and time match the time range defined in the optimization scope. You can continue to modify and save the changes back to the original scope. If the same scope is being referenced by multiple optimization schedules, the change will apply to all of these schedules with the same scope.
Select a goal and select Run Now to trigger an on-demand optimization request.
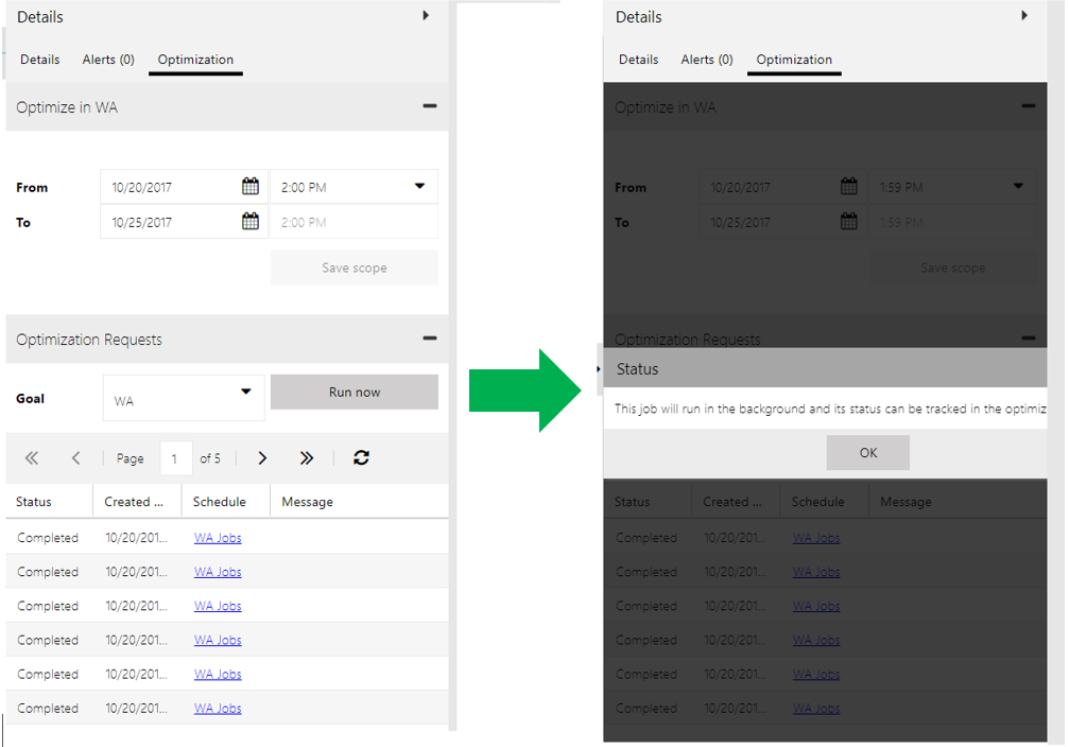
The optimization request will show the status and details. If an exception occurs, select a specific optimization request to open it. You can view booking details as well as analytic charts showing how many hours of travel time versus how many work hours are scheduled for this run.
Feedback
Coming soon: Throughout 2024 we will be phasing out GitHub Issues as the feedback mechanism for content and replacing it with a new feedback system. For more information see: https://aka.ms/ContentUserFeedback.
Submit and view feedback for