Set up an event
The event planning process in Dynamics 365 Customer Insights - Journeys starts with creating an event record. The event record guides you through each step of event planning. The record collects all of your planning details, gives links to related records, and provides a business-process timeline. After you create the event record, you can set up your event team, manage speakers and sessions, set up event passes, and set up a venue.
Create the root event record
Creating an event record is the first step when setting up your event in Customer Insights - Journeys. Everything related to a given event will be stored either directly in the event record or in other records that are linked to that event.
Though Customer Insights - Journeys offers many views into other record types, you'll probably do most of your work directly in the relevant event record. When working in the event record, you'll be able to view and create most types of related records and everything that you do will automatically be related to that event.
You can see a list of all your event records by opening the Events work area and going to Events > Event > Events. From here you can use the standard list-view controls to search, sort, and filter the list to find and open an existing event, or to create a new event record.
As with other forms in Dynamics 365, the event form provides a summary of its most important settings at the top, where you'll also find the business workflow timeline, which helps organize your work at each stage of the event-management process. A standard business workflow for events is provided out of the box, but you can customize it to match the process in place at your organization.
The first time you create a new event, you must specify values for each of the required fields (marked with a red asterisk). We recommend that you fill out the business-critical fields as well (select each business workflow item, then fill out the items marked with a blue plus sign). All required and business-critical fields are available at the top of the page in the business workflow, where you can fill them out quickly and easily. All settings that you enter in the business workflow will also be visible among the other event details further down the page. You can still view and edit these settings even after you move forward to the next stage in the workflow.
After you enter values for all the required fields, you can save the record. You'll probably return to the event record many times over several days while you plan your event. Use the workflow as a to-do list and to track your progress during each stage.
The main body of the page repeats all the important information requested by, and shown in, the workflow, plus much more. The main body is organized into tabs, which you can navigate by using the links near the top of the page body. You can enter your planning details in the main body of the page whenever you want to—you don't have to wait until you get to a specific part of the workflow. The following subsections give a summary of how to use each available tab.
The General tab
Here you can see and edit your basic event information, including:
- Key information: Includes the name of your event and other basic details. The following settings are provided:
- Event name: Enter a name for the event.
- Event type: Choose the type of event. The event type is for information only and won't affect any features. Use it to make your event easier to find and identify.
- Registration count: Shows the number of people who registered for the event. The maximum value that can be shown here is 50,000, but you can still store more registrations in the system.
- Check-in count: Shows the number of attendees that checked in during the event. The maximum value that can be shown here is 50,000, but you can still store more check-ins in the system.
- Event URL: Shows the address of your event website. If you're using the default location on your Power Apps portals solution, the event URL value is read-only and provided automatically. If you are hosting your website at a custom location, then select the Custom event URL check box and edit the value here. Select the globe button next the event URL field to open the site.
- Schedule: Provides settings for specifying the time zone, start, and end dates for your event. The schedule section also provides a countdown of the days until your event. You can also set up a recurring event here. If you change the start date for an event that's already been saved, you'll be asked whether you want to change the end date and the session schedule to match it.
- Timeline: As with most types of entities in Dynamics 365, you can use this section to build a record of the activities (such as calls, emails, and appointments) that you and others do in relation to the current record. You can also share notes here. Use the links, buttons, and menus at the top of this area to create new items and to search and sort the list.
- Stream this event online: Set up your event as a Microsoft Teams webinar,a Teams Live Event, a Teams Meeting, or on-site only.
- Location: Specify the location where your event will take place. The location is hierarchical, and you can specify only as much detail as you need. For example, you can specify just a building. But to specify a room, you must first choose the building that contains that room. You can assign a separate location to each session if applicable. You can create location records from here, or choose from among existing venue records. Each location record can contain useful information such as address, facilities, capacity, and more.
- Venue constraints: The venue constraints section only appears for on-site events. Each time you set a new Location, the Maximum event capacity value shown here updates to match the capacity configured for your last selected building, room, or layout (if available). You can then edit the value manually to override the capacity figure if needed. You can also enable the waitlist here to handle registrations that arrive after the event is full.
- Webinar setup: The webinar setup section only appears for webinar and hybrid events. Use the settings here to set up your webinar configuration and find the URLs for viewing and presenting the webinar.
The Agenda tab
The Agenda tab includes details about the schedule of sessions happening during your event. Here you can find, create, and edit each of the following options for the current event:
- Allow registrants to create their own agenda: This setting is only available for events that don't have any passes set up. It's shown above the calendar when no passes are defined, but is hidden when passes are defined.
- Sessions calendar: Shows a calendar of sessions defined for your event. You can create and edit sessions using the calendar. More information: Work with marketing calendars.
- Sessions list: Each session is typically a single presentation, class, discussion, or webinar. This table repeats the information also shown in the calendar. You can also create or edit sessions here.
- Session tracks: Each (external) track is a collection of related, non-conflicting sessions that likely would be of interest to the same audience. Attendees might sign up for a specific track, which you can manage by using passes. You can also set up internal tracks, which are not exposed to attendees but can help you with your planning.
- Speaker engagements: Each speaker engagement maps a speaker to a session occurring at your event.
- Sponsors: Companies who are sponsoring the event.
The Website and form tab
Note
The event portal landing page (event website) isn't currently available in real-time journeys. However, marketing forms for registration can serve as a viable alternative to showcase event details and facilitate the registration process.
The Website and form tab provides options to set registration parameters. First, you can decide where do you want attendees to register for your event:
- On a standalone registration page:
- Use this option if you want to create a registration page using Customer Insights - Journeys registration forms and use Customer Insights - Journeys to host the page.

- Use this option if you want to create a registration page using Customer Insights - Journeys registration forms and use Customer Insights - Journeys to host the page.
- On your own website:
- Use this option if you want to use your own website to collect registrations. In this case, you need to provide the event URL, and decide if you want to use Customer Insights - Journeys registration forms. In this case, you can copy Java scrip code of the form to embed it on your website.

- Use this option if you want to use your own website to collect registrations. In this case, you need to provide the event URL, and decide if you want to use Customer Insights - Journeys registration forms. In this case, you can copy Java scrip code of the form to embed it on your website.
- This event does not have a website:
- Use this option if you want to collect registrations elsewhere or not collect them at all.
The Registration and attendance tab
Use the Registration and attendance tab to see who registered for the event and who attended. You can also create registrations and check-ins here. The following sections are available:
- Event registration: This table provides a list of people who registered for your event. You can also register people manually here. If you are using custom registration fields, then you can also view the values submitted by each attendee here.
- Event check-ins: Here you can see who attended the event and enter attendance records.
The Additional information tab
Use the Additional information tab to set up your event team and record general information, goals, and financial details. The following sections are provided here:
- Additional information: Enter a basic description and outline your goals.
- Financials: View and record financial details for your event. These values appear in dashboard charts and analytics, but are intended for information only, not for formal accounting or bookkeeping.
- Event team members: Set up your event team by adding links to coworkers and external contacts who are helping you organize the event. The table shows each team member's name and role, so you can easily see who to call and find their contact info when needed.
The Room reservations tab
The Room reservations tab provides a calendar that shows the rooms assigned to the currently displayed event and its sessions. Unreserved rooms aren't shown, nor are events or sessions without assigned rooms. This calendar is read-only, so you can't create sessions or reservations here. More information: Work with marketing calendars.
The Recovery items tab
The Recovery items tab allows system administrators to track customization errors, improving the event workflow creation process. This tab contains a grid with customization errors and gives administrators options to handle them. For events, typical errors occur during registration on event websites.
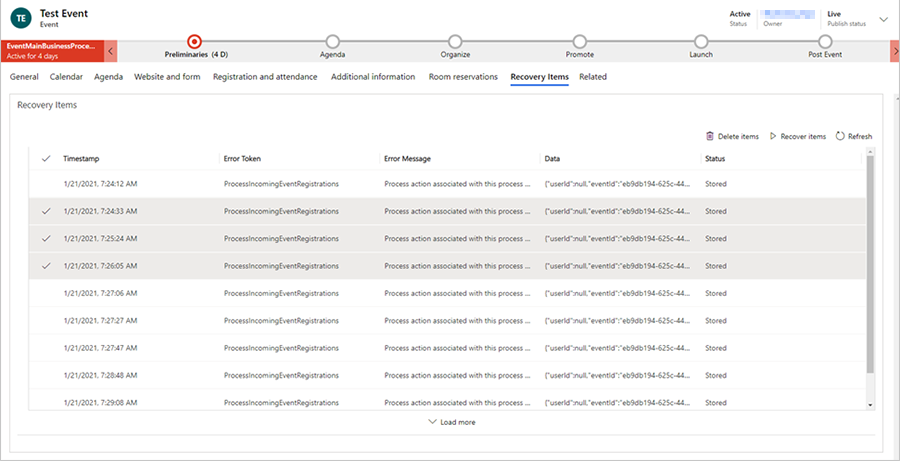
After selecting rows in the Recovery items tab, you can delete the items (which will delete them from blob storage), or you can fix the issue and "recover" any item, which will replay the previously failed functionality.
Note
If there are items in the Recovery items tab, non-system admin users will receive a notification that says, "There seems to be some issues with this event. Ask your system admin for assistance."
The Related menu
The Related menu provides links to event-related topics ranging from activities to speakers. If you select a topic in the related menu, a new temporary tab for that topic appears to the left of the related menu.
Although you can edit and save items related to the selected topic in the temporary tab, the temporary tab will not remain next to the Related menu after the event is saved and closed.
Set up your event team
Your event team includes coworkers and external contacts who are helping you organize the event. Each event record lists each team member's name and role, plus links for more information, so you can easily see who to call and find their contact info when needed.
- You can view and edit the list of all team members who worked, are working, or will work on all your events by going to Events > Event > Event Team Members. Use this area to set up a database of people who are available to help with your various events.
- You can view and edit the list of team members associated with a specific event by going to Events > Event > Events, opening the appropriate event, and looking at the Event Team Members section of the Additional information tab. The list on the Events page works the same as the list on the Event Team Members page, except that it only shows and adds team members who are assigned to the current event.
Each team member record can be associated with a contact or user record.
- Users are people who work for your organization and have a Dynamics 365 license.
- Contacts come from your contact database, which will include customers, potential customers, vendors, partners, and other external people (or internal people who don't use Dynamics 365).
When you create a new team member record, you'll be able to choose whether to associate it either with a user or a contact. If you choose to associate the record with a contact, the team-member record will display relevant information from that contact record. User records don't include any contact information, so if you associate the record with a user, the association will be shown but no additional information will be loaded. The team-member record also provides information about the member's role and which events the team member has worked on. You can create team members from either the Event Team Members list page or directly from a specific Event record.
When you're looking at a list view of team members, the list includes both a User and a Contacts column, but only one of the columns will show a value. From the list, you can go to the user or contact record by selecting the name in the list, or you can open the team-member record itself by double-clicking on a row anywhere away from the person's name.
Manage event sessions and speakers
The core attractions of your event offering will typically be its sessions and speakers. A simple event might have just one session, whereas a conference will typically have several sessions spread over several days.
Set up event sessions and tracks
A session represents a subdivision of things that are happening at your event. Each session is usually a something like a seminar or keynote, but the concept is flexible so you can adapt it as needed. For example, if your event is a trade show rather than a conference, you can use sessions to represent booths.
A large conference might have several sessions running concurrently, and might even feature several session tracks, which organize multiple related and non-conflicting sessions by audience so attendees can easily choose the best track for themselves without having to study the entire offering. Later, you'll be able to set up event and session passes to manage ticketing.
There are two types of tracks: internal and external. Use internal tracks during the planning phase to group sessions along organization lines, such as according to team resources or required equipment. Use external tracks to group sessions by content or audience. External tracks are published on customer-facing platforms such as event websites and mobile apps. As needed, you can set up a pass type for each relevant external track, but you wouldn't set up passes for internal tracks. Use the Track Type setting, at the top of the form to set the track to internal or external.
Use the Agenda tab of an event record to view and set up sessions and sessions tracks for that event.
- Each session is associated with a specific event and speaker, and includes scheduling details. You can view, create, and edit sessions using either the calendar display or the table.
- For each track, you can assign an audience and a few other descriptive details and then add member sessions, one at a time. All sessions in a track must be from the same event.
Set up and assign session speakers
Use the following pages to manage your speakers and speaker engagements:
- Events > Participants > Speakers: Lists all speakers who are available for previous, current, or future events, and lets you set up new speakers.
- Events > Event > Events: Work on the Agenda tab of the appropriate event record to set up speaker engagements for that event. You can also create new speaker records here if needed while setting up speaker engagements.
When setting up a speaker engagement, you map a speaker to a specific session for the event record you are working with. To set up a speaker engagement:
- A speaker record must exist.
- If you're assigning a session, a session record must exist. (For single-session events, you might not have a session record and instead will treat the event itself as a session.)
Set up event passes
Event passes are not supported in Customer Insights - Journeys Event Management.
Set up the event venue
A venue is any physical location where you hold an event or session. It might be a single building with just one room, or one of several rooms in a building. For each venue, you can register many types of important details, including name, location, facilities, capacity, layout, events that will or have occurred there, and more. After you've set up a venue, you can assign events and sessions to it as needed.
Use the various types of venue entities in the Events > Venue Management area to construct a hierarchical model of your event location. Later, you'll be able to assign events and sessions to each venue space from your model. You only need to include as much detail as you need, so a simple building with just one room doesn't need to have any rooms defined for it, and a simple room with just one layout doesn't need to have any layouts defined for it. But you can't set up a room without a building or a layout without a room.
Use the following entities to model your venues:
- Events > Venue Management > Buildings: Buildings represent free-standing structures that might or might not be divided into rooms.
- Events > Venue Management > Rooms: Rooms represent subdivisions of buildings, and each must be assigned to a building record also stored in the system.
- Events > Venue Management > Layouts: During an event, you might use a single room to host several types of sessions, each of which might require a different arrangement of chairs and other facilities. The room layout might have practical consequences that affect, for example, seating capacity. Each layout must be associated with a particular room, but you can set up any number of layouts for each room.