Enable push notifications
In the Dynamics 365 Field Service mobile app, push notifications send updates to technicians through their mobile phones or tablets. Push notifications use Microsoft Power Automate and support many scenarios. For example, to notify about a newly assigned booking or as a reminder to capture and enter important data.
There are two ways to enable push notifications for your organization.
Enable the push notification cloud flow included with Dynamics 365 Field Service. The included push notification notifies technicians when they have been assigned a booking.
Create a custom push notification based on custom triggers using the Send Push Notification V2 connector in Power Automate.
Prerequisites
- A license and permissions for Power Automate.
- Mobile app v13.20101.19+ for iOS or v3.20101.19+ Android devices. Check the version in the About section of the app.
- Enabled notifications in your device settings for the Field Service mobile app.
- Review and agree to the privacy notes for Field Service push notifications.
Turn on push notifications included with Field Service
Field Service includes a template to enable push notifications for new bookings. You can also create push notifications based on custom triggers.
Configure the following cloud flow to send frontline workers a push notification on their mobile device when they're booked for a work order.
Sign in to Power Apps and select the environment with your Field Service installation.
In the left pane, select Solutions. From the list of solutions, select the Default Solution.
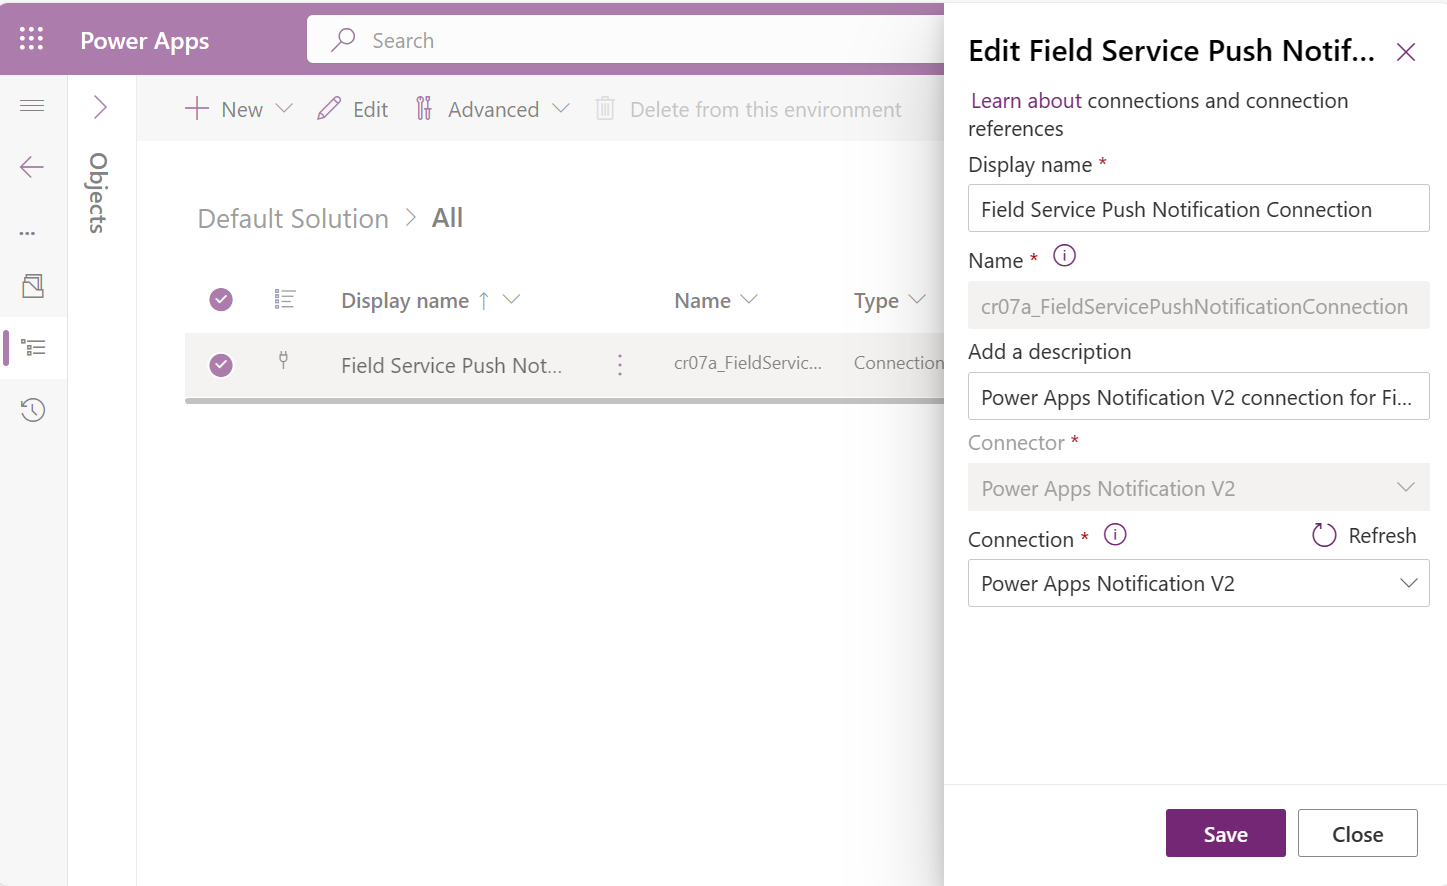
Create two new connection references:
- Field Service Push Notification Connection, using the Power Apps Notification V2 connector.
- Dataverse Connection Reference, using the Microsoft Dataverse connector.
For both connection references, add a new connection and make sure they're enabled.
In the Solutions area, edit the solution with the name
msdyn_FieldService_patch_update.Find the cloud flow called Field Service – Notify user about booking (UCI app) and select the Turn On option.
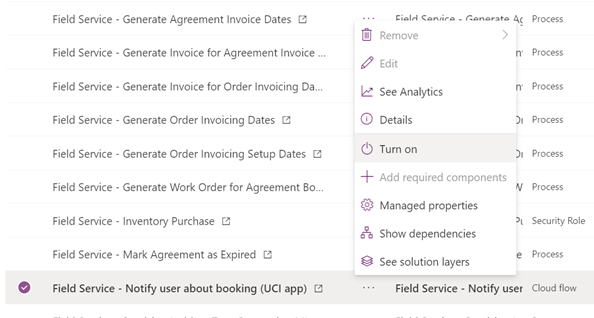
Open the details for the Field Service – Notify user about booking (UCI app) cloud flow. Make sure the Connection References section contains both connection references that you created in step 3.
Test push notifications
Schedule a work order to a frontline worker that has a user set up for the mobile app.
Within 60 seconds, you should receive a push notification from the Field Service mobile app.
Create a custom push notification
You can create push notification with custom triggers to match your business scenarios. The following steps outline an example flow that sends a push notification to users of the mobile application when they get a new booking assigned. The notification includes the work order associated to the booking.
Sign in to Power Automate and select Create. Power Automate supports hundreds of connectors that can be used to trigger and provide data to the push notifications. You can use any of these triggers to send targeted push notifications to the desired set of users.
Select Automated cloud flow, give your flow a Name and choose the Microsoft Dataverse connector. For this example, we use the Dataverse connector that triggers When a row is created, updated, or deleted.
Choose the trigger options. In this example, we choose Added, Bookable Resource Booking, and Organization.
Add another step and choose the Get row by ID option to get the associated resource value. Set the table name to Bookable Resource and the Row ID to Resource (Value).
Add a condition. For our example, we want to send notifications to users, rather than resources that represent equipment, pools, and contractors. Set the condition to Resource Type is equal to User (Type).
When the condition matches, we need the associated user values. Technicians sign into the mobile app with their Dynamics 365 user credentials. This step ensures that push notifications go to the appropriate users. In the If yes box, add a Get row by ID option and choose the User (Value) row from the Users table.
To include work order information in the push notification message, configure the flow to get work orders. Add another Get row by ID option and choose the Work Order (Value) row from the Work Orders table.

With all information available and the flow logic defined, it's time to add the Send push notification V2 action.
Enter the necessary information to the action:
- Mobile app: Field Service
- Your app: Field Service Mobile
To redirect the technician to the new booking and work order form:
- Open app: Yes
- Entity: Bookable Resource Booking
- Form: Form – Booking and Work Order
- Record ID: Bookable Resource Booking
To provide a custom message:
- Recipients Item: Primary email
- Message: The notification message.
The push notifications on the technician's mobile phone. They don't need to have the app open or use their device to receive push notifications.

Feedback
Coming soon: Throughout 2024 we will be phasing out GitHub Issues as the feedback mechanism for content and replacing it with a new feedback system. For more information see: https://aka.ms/ContentUserFeedback.
Submit and view feedback for